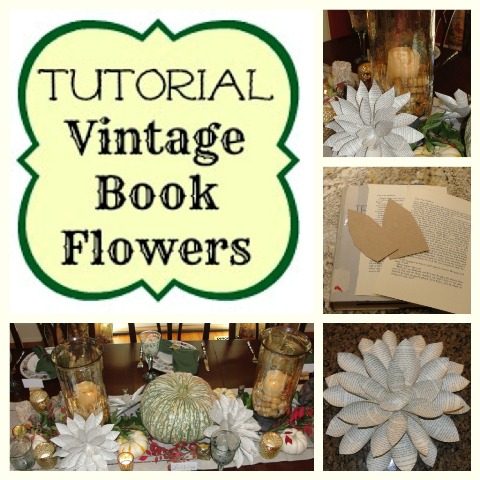
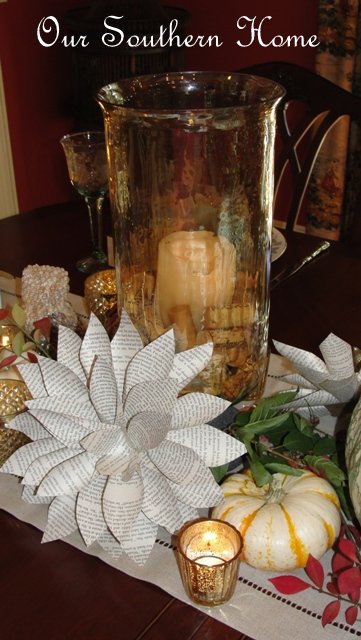
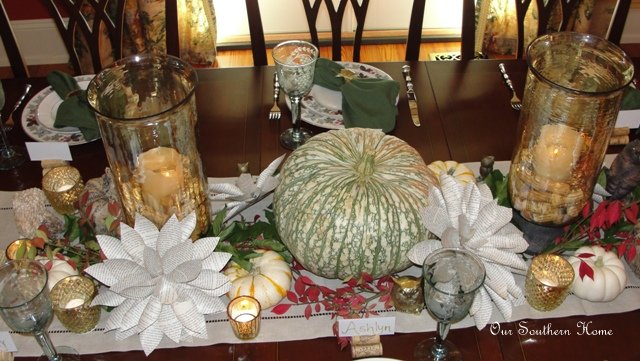
Vintage Book Flowers {tutorial}
Have you checked out my Fall Dining Room post yet? Please click the link and it will take you right there! More pictures are here.
This was a very inexpensive cheap project to complete. It was really fast as well especially after I started to change my methods after the first flower! My daughter even helped until she grew bored by tearing out the book pages. This is not a new project by any means, and I'd like to share the source of my original inspiration~ What Meegan Makes. Meegan has lots of beautiful projects…so check her out!

Materials Needed:
~book of choice
~hot glue gun
~scissors
~thin cardboard like from food/snack box
~pencil
~stapler (added after 2nd flower)
~waxed paper to protect surface
Ashlyn (13 years old) loves to be my assistant until she gets bored! This was a great project for us to do while sitting on the couch catching up on our favorite HGTV shows…..at least part of it. Ashlyn helped by tearing out the book pages. You can easily tear out a few at a time. If you try to tear too many at one time then your pages start to rip. Who wants to waste valuable pages from a $2 Goodwill book?
While Ashlyn got to be destructive with books, I made 2 freehand petal patterns with my cereal box cardboard…..1 large and 1 small. As you can see, it is not perfect! What petal is? The larger was approximately 5-1/2 inches long and 2 inches wide at its widest. The smaller was approximately 4-1/2 inches long and the same width. You will find that you can adjust the petal size by the way you attach it to the cardboard.
By the time I had my petal patterns drawn with pencil and cut out, Ashlyn had a nice stack of pages going. I cut out a good sized amount of large and small petals. You can stack several pages at a time and cut out several petals at once. No perfection here! I did use 1 page per flower.
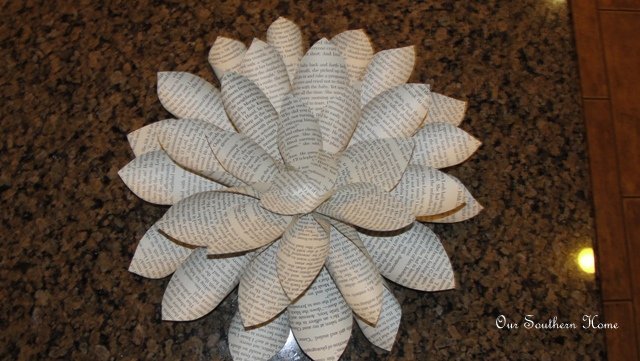
I have approximately 35 petals on the largest flower. There is no exact amount. You may find that you have to cut out more.

You will see that I cut out a rough cardboard square/rectangle (no measuring….just eyeball it). Mine is about 4×3 inches.
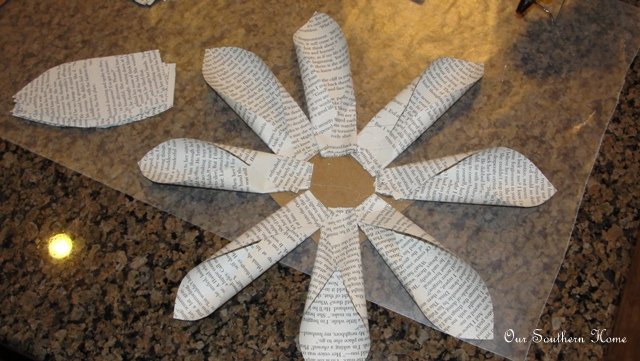
Also I cut out a 4 petal piece. I didn't draw it first, but you could. It will later go in the center.
While I did all of this, I had my glue gun heating on my piece of waxed paper. I love waxed paper to protect my surfaces.
Glue guns can be dangerous! No kid help here please!! Take one petal and place a dollop of glue in the bottom center. Then fold over one of the bottom edges onto the center glue. I used the eraser end of an old pencil to push it into the glue slightly. Repeat with the other side.
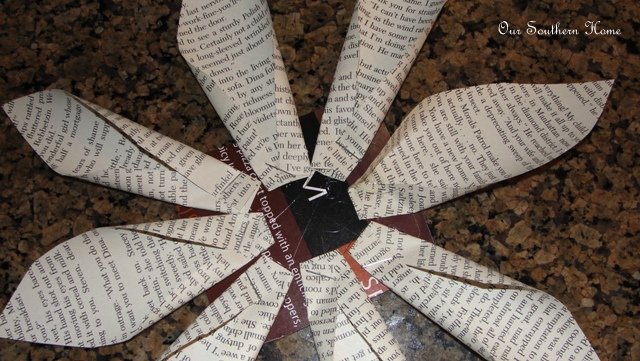
After you have glued quite a few of the larger petals, then begin to place them symmetrically on your cardboard and hot glue down. NOTE: Don't do like I did…make sure the print of the cardboard is facing up. That way when they are displayed on the table, you won't see the box writing on the back side. I found that out here without thinking first! No problem….I just cut out a piece of book print to cover it!
After you have completed the first layer, start filling in and making fuller with each layer. As you get to the final inner layer, use the smaller petals.
Notice the center. This is where you will be able to glue the 4 sided petal that you cut out. It will cover up where all the petals come together making it look pretty.
Now where does the stapler come in you ask?? I wanted things to go a bit quicker. I started to staple the petals instead of gluing! Fast and safer for me! Then I stapled as many as I could to the cardboard square. Eventually you will have to resort back to gluing, but the stapler makes it go much faster!!!
Notice that I have the print side up this side (correct way). I just love the way these turned out!!!!
Thanks so much for stopping by! Have a lovely fall!
Other Fall posts you may want to visit:


Love the book page flowers! They are adorable! I saw a book page wreath once that seemed like a lot of work, but I think you have inspired me!
Thanks, Amy! This was my first attempt, and I just love the way they turned out. Going to do some to hang on daughter’s new study area in her room. If you follow the stapler short-cut, it makes it much faster and easier. Thanks so much for stopping by!
What a fantastic project ( I’m a huge book lover so this is something I have to try! )
Your newest follower – would love you to come by when you have the time and follow back 🙂
Hugs,
Suzan
Thank you so much!!! I appreciate you stopping by and following me. I feel the love! I’ll check out your blog as well. 🙂
Christy I love this project! Thanx for sharing at THT.
Love your link party!!! Thanks!
What a super idea! Thanks for taking the time to put together a good tutorial. So glad I stopped in from Tuesdays Treasure!
Great, Jeanne! I hope you find time to try it out! Also, thanks for letting me know where you discovered my little blog. It is neat to see that! I hope I can continue to please you. 🙂
These flowers are darling. Great tutorial too…welcome to blogging!
Ann~ Thanks so much! I am loving blogging. I am so glad you enjoyed the tutorial. It really is a lovely project. I’ll be sure to check out your blog. I really appreciate the support!
Thanks so much for the support in following my “baby” blog! I am so happy you enjoyed this project. I must say I am in love with it….pretty and cheap! I’ll be sure to check out your blog as well!
This comment has been removed by the author.
This is adorable and I love it! You are so patient. Thanks for sharing.
Thanks so much, Debbie! So love your inspirational blog!
Your ‘Book Flowers’ are lovely and they look so pretty in the Fall vignettes you have created. I have become your newest follower and look forward to reading your future posts.
Thanks so much for the support in following my “baby” blog! I am so happy you enjoyed this project. I must say I am in love with it….pretty and cheap! I’ll be sure to check out your blog as well!