Upcycled Menu Board
It's hard to believe that my teens start school on August 18th!
This summer has just flown by….I find it kind of sad. I love everyone home in the summer….carefree, stress-free.
This year my oldest will be a senior in high school…..sigh, tears.
This will no doubt be a very busy fall with applying to colleges, homework, projects and tennis team for my daughter.
One thing that I really try to keep on a schedule is our weekly dinner menu once school starts.
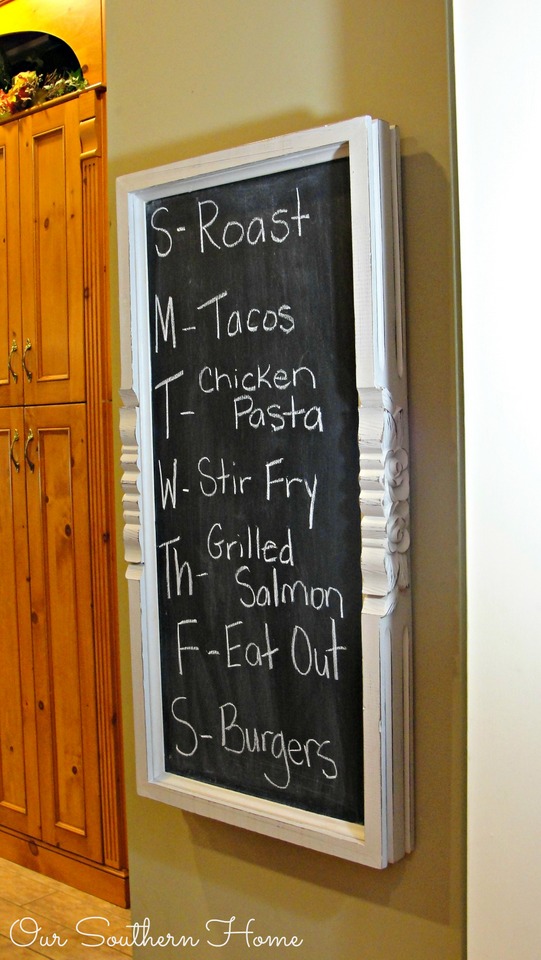
I always post the menu written on a piece of paper taped to the inside of a cabinet door. Fancy I know, but it works!
Everyone checks it.
I wanted to make it a bit nicer and out in the open. I've been wanting to make a chalkboard menu board for a while now.
While in the barn looking at my stash for July's themed furniture month (toy chest HERE), I came across this coffee table…sans top.
I've thought of using it for several things….a tray….a bar cart with new legs.
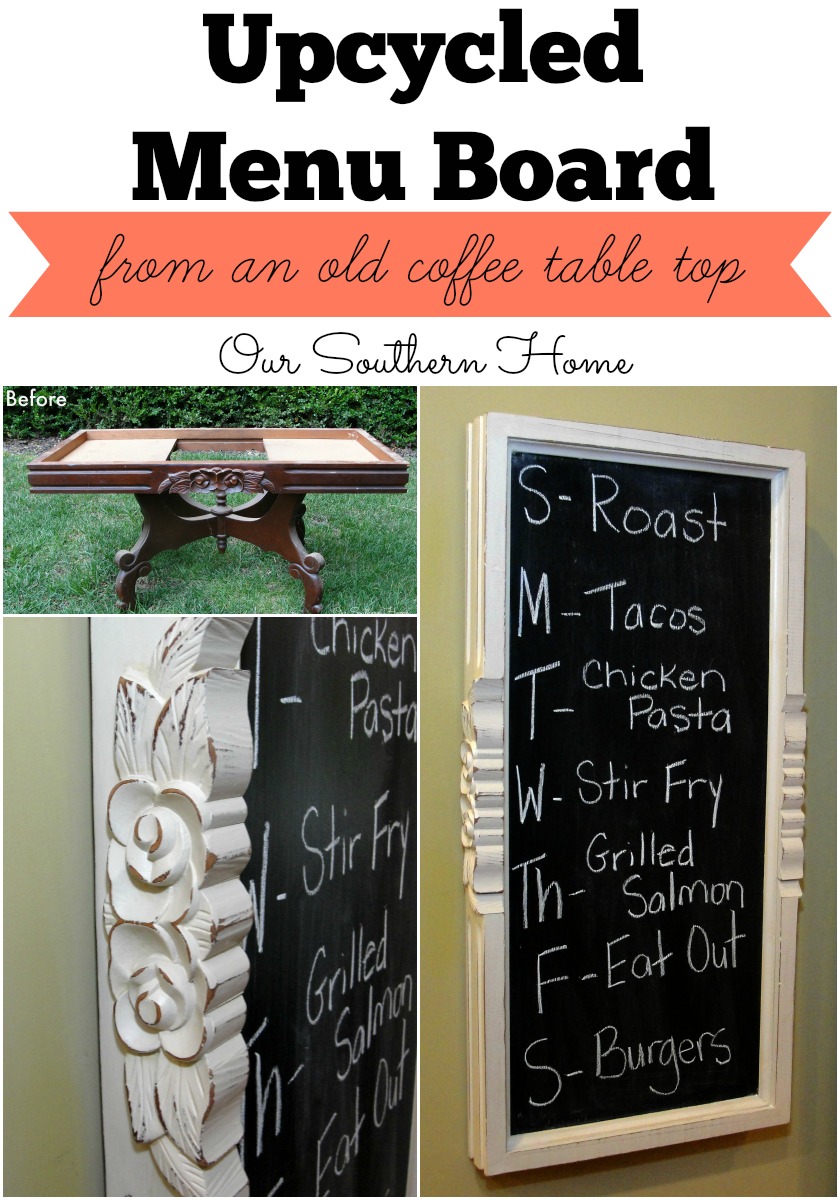
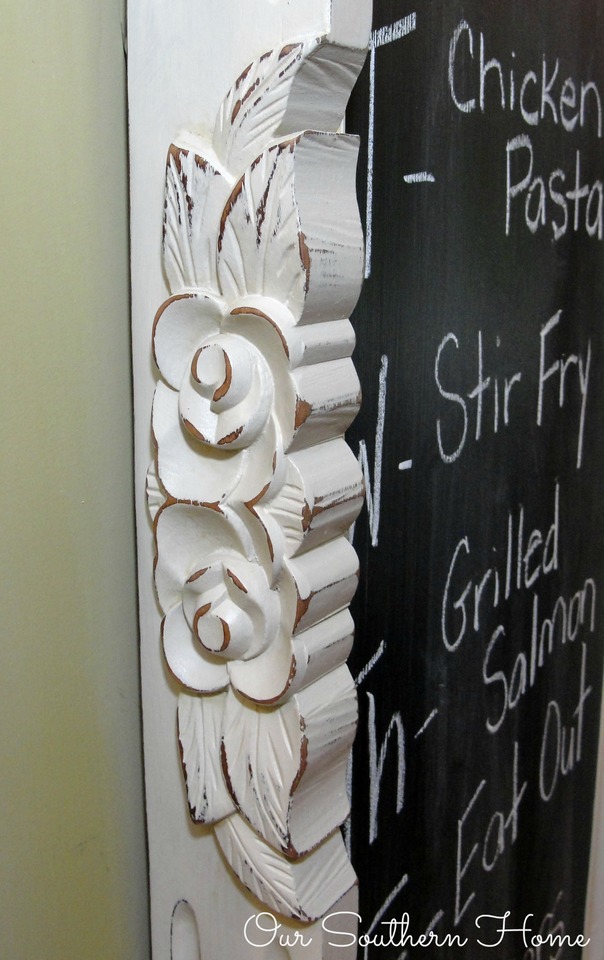
It has such pretty detail. I thought it would be so unique on the wall!!!! My daughter is actually the one who suggested the menu board. She has really been wanting this as she is always starving!
Perfect idea my dear! I now have my Back to School project idea with my southern blogging pals for August!
So…..My Upcycled Menu Board was born!
I'll have the links to my friend's projects at the end of this post.
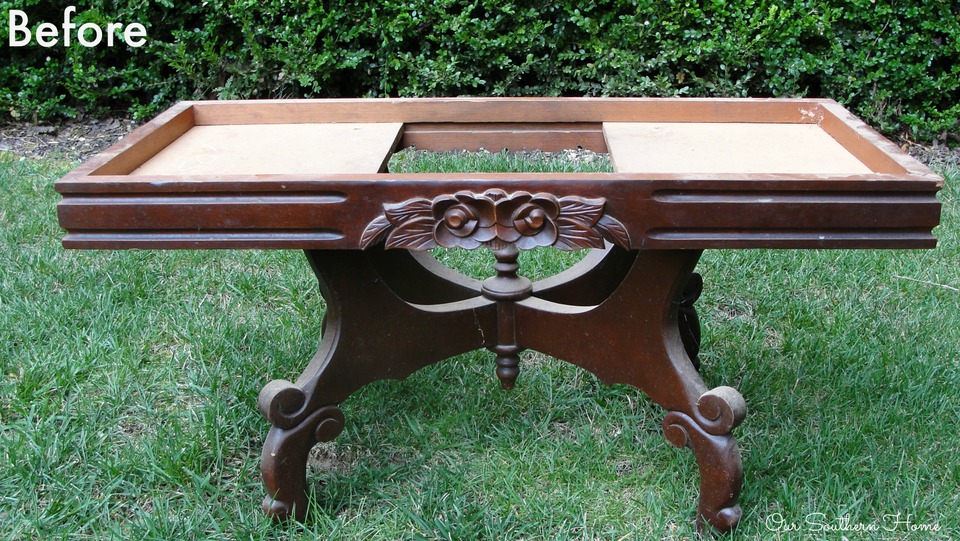
See what I'm talking about? The coffee table itself is a bit fancy for me, but taken apart and used in other ways is just perfect. Don't worry….I'm sure I'll come up with something cool for the legs. It was only $4!!!
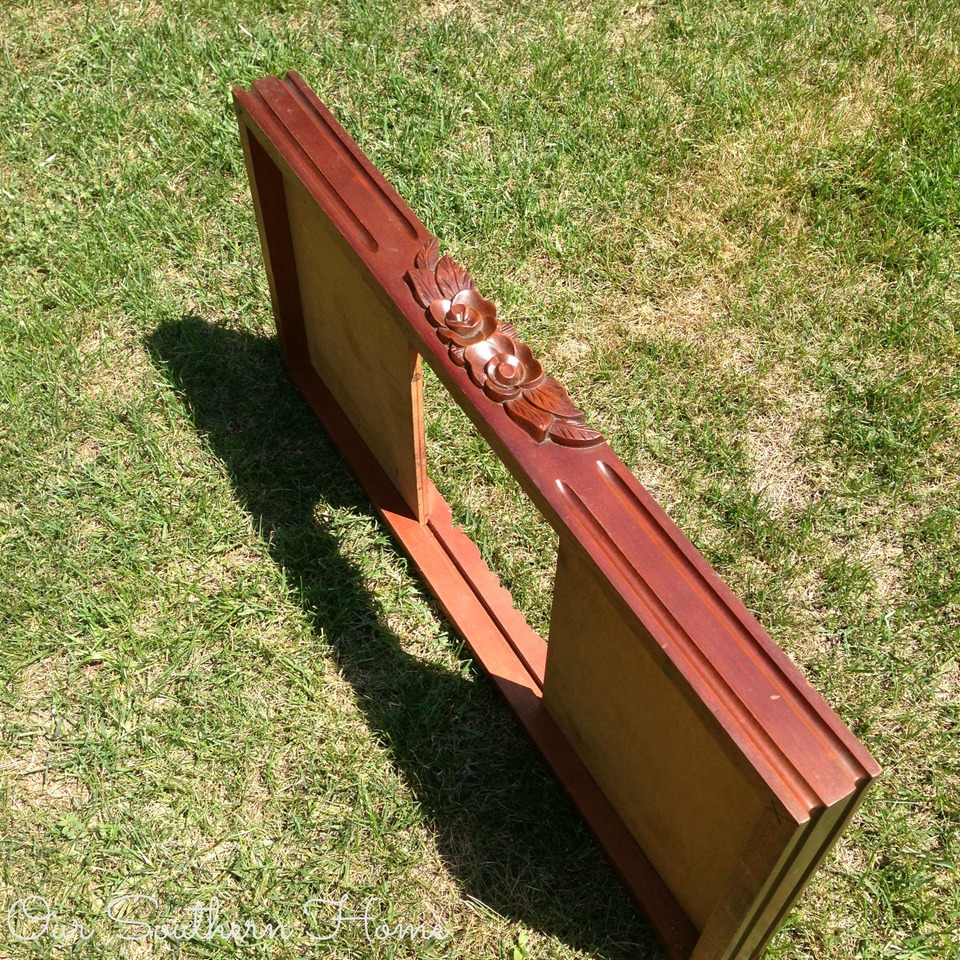
We took off the legs and cleaned her up. I picked up a piece of birch plywood at the home improvement center. I took my measurements, and they cut it to fit for me there.
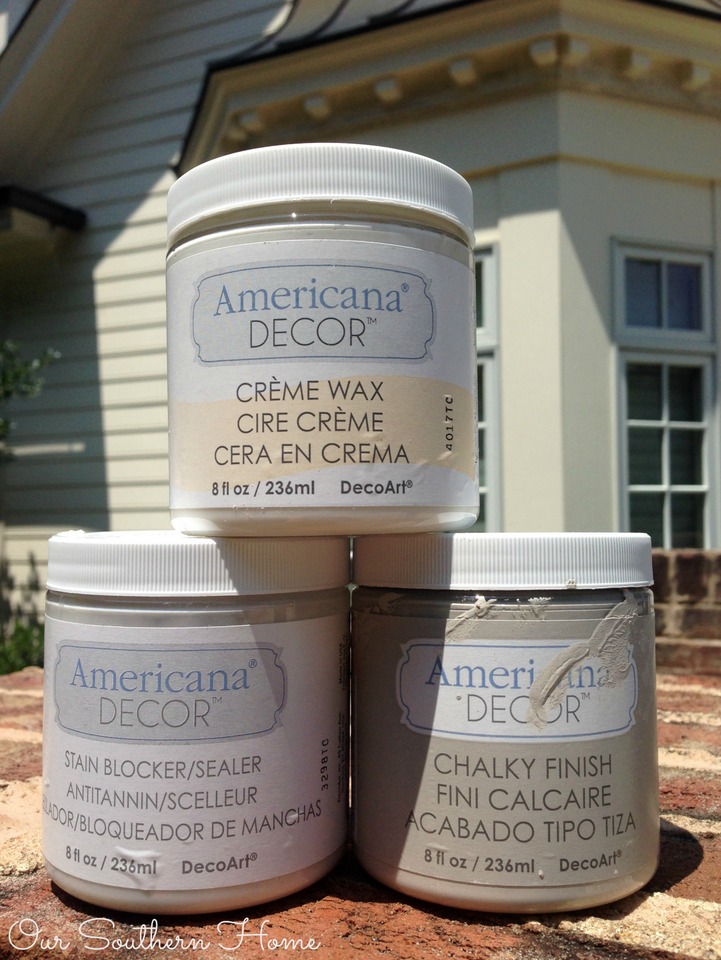
I used these products to finish the frame. They were also used on my vanity stool makeover. You can see all the details on using the finish there. I only used clear wax, not dark. The color is Primitive. This line can be found at your local Michaels and Home Depot. I painted 2 coats of Primitive. Let it dry thoroughly, lightly distress and apply wax. When dry, buff to desired sheen.
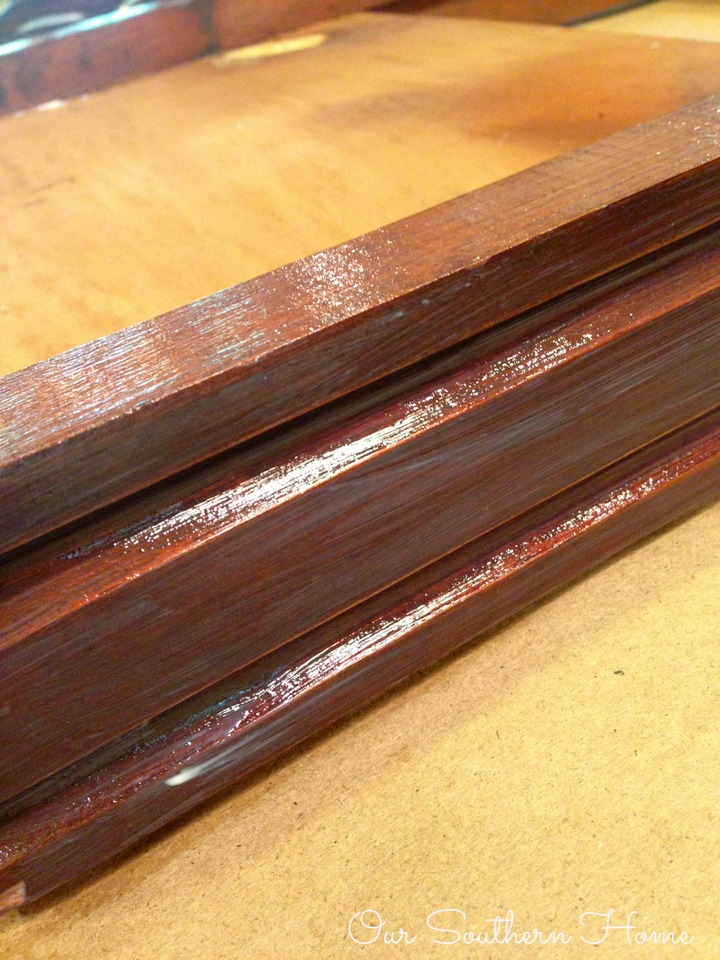
Since this is a very dark mahogany piece and I was painting with a lighter color, I applied one coat of the stain blocker to the top. This will seal out any bleed through from the dark stain. I found that it really filled in any slight imperfections and gave it a very smooth surface to paint. Let this cure according to directions.
I then primed the plywood with spray paint primer. Let that dry.
Then I coated the plywood with 2 coats of chalkboard paint.
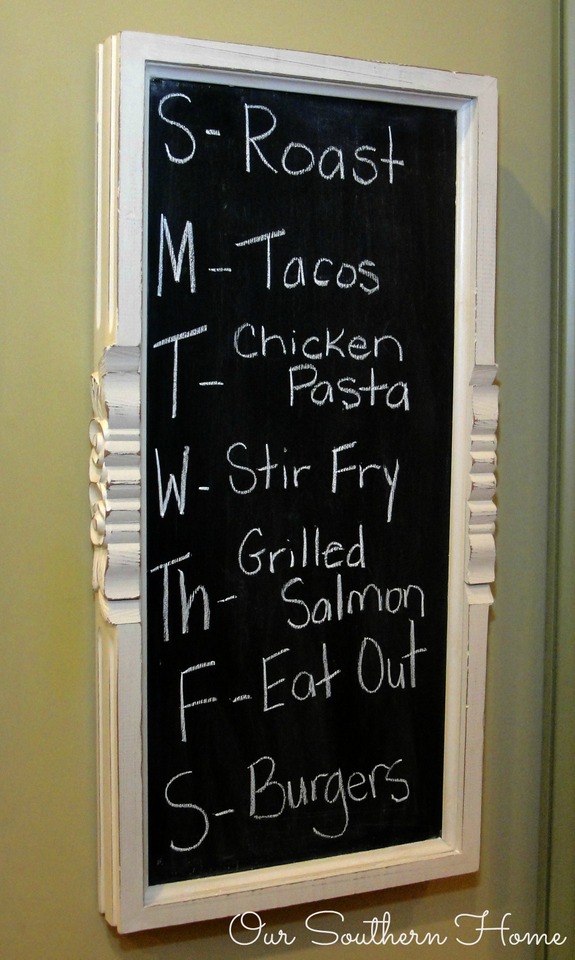
We screwed the chalkboard to the frame. The crews were ugly, but will really keep the board secure. To hide the screws and the edge against the frame, we nailed a small molding.
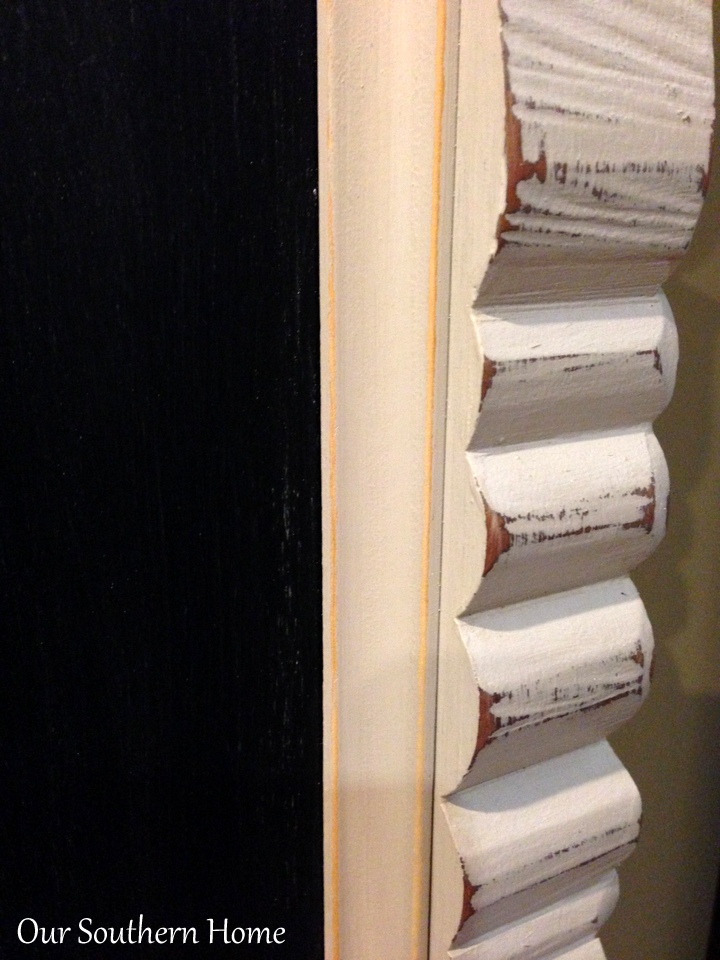
We bought a stick of cove molding and cut it with a plastic portable miter box set. I painted, distressed and waxed before applying it to the frame. When it was dry, it was nailed to the frame. Then the nail holes were filled in with wood filler and touched up with paint and wax.
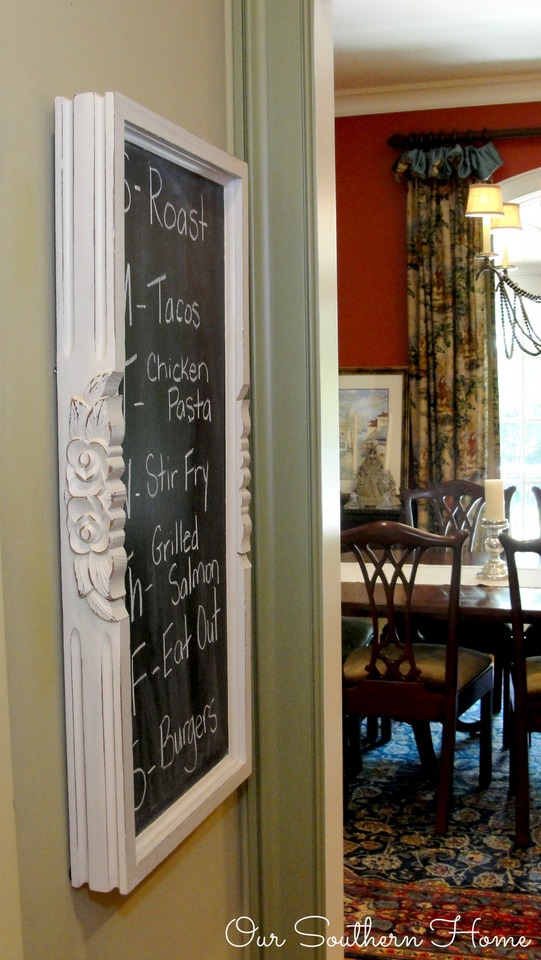
I love the side detail. I'm going to add letters above the board that says “MENU.” I'll be sure to share with you when I have those up. Trying to decide what I want them to look like.
This really makes it one of a kind!
Really look when thrift store shopping…you may just come across a pretty table top as well to use in a new way!
Be sure to check out my other projects using Americana Decor Chalky Finish Paints
Thrift Store Vanity Stool Makeover
Be sure to check out these other Back to School ideas from my southern friends!
Lots of behind the scenes are taking place on Instagram.
I can be found on Pinterest HERE.

Link Parties that OSH parties at on occasion! Sunday: DIY Show Off Monday: Between Naps on the Porch, Home Storis A to Z Tuesday: Not Just A Housewife, The Scoop at Cedar Hill Farmhouse and Inspire Me Party at A Stroll Thru Life, My Uncommon Slice of Suburbia Wednesday: Savvy Southern Style Thursday: My Repurposed Life, From My Front Porch to Yours, Imparting Grace Friday: French Country Cottage, Miss Mustard Seed Furniture Friday, Common Ground, The Charm of Home, Rooted in Thyme, Imparting Grace, Keep Calm and Link Up, My Romantic Home – Show and Tell Friday, Craftberry Bush – Inspiration Gallery Friday, SnapCreativity – Show and Tell, Tatertots and Jello
Buffer


Wow! You did an amazing job! I love reading post like these!
Just my style, Beautiful Job !
What a great project, Christy! I love that this pretty table got a whole new life! You have opened my eyes to look outside of the “frame” box!
I really love how it turned out — very pretty and functional to boot! Now, I’m gonna keep my eyes out for some pretty table tops that this could work on — I want my own. 🙂
Love this! I write mine out on paper and put on fridge, then if I make changes, it looks messy. This is much prettier.
This is a great use for this table top and I know your family loves knowing what’s for dinner. I am still in shock that it is back to school time!
Such a creative idea Christy! The carving is just gorgeous!
What a great idea Christy…I love the way it turned out!!
Christy this a fantastic project. Love the details on the sides and this idea. By the way, Love the curtains in the background!
Cindy
That turned out really well! What a great repurpose from your scrap stash!!
Love this! I just made a magnetic chalkboard for my herbs and spices and have so much paint left I would love to find more uses! That tabletop makes such a unique dimensional frame! Now I am itching to go thrifting! I promised myself I would work on some of the thrifted finds I already have before getting more, and now you went and posted this–you found the chink in my armor. 😉 Keep mulling over the table legs–they are definitely too cool to gather dust.
I love this, the molding detail around the edge is so pretty. What a great idea.
Three things that I want from you, the legs, the chalkboard and to come eat this week! This is one awesome menu board! Love it! Happy School Year!
Debbie
LOVE this! What a great up cycle! I am all fancy with the paper menu myself! {When I actually plan! Ha!} Thanks for sharing! Life to the full! Melissa
Love the details of the table and it makes a beautiful menu frame. A menu display is on my to do list! ~Sonya
it is such a pretty frame. perfect chalkboard. I will need to learn from you on the meals. I never know what we are eating until 1 hour before dinner.