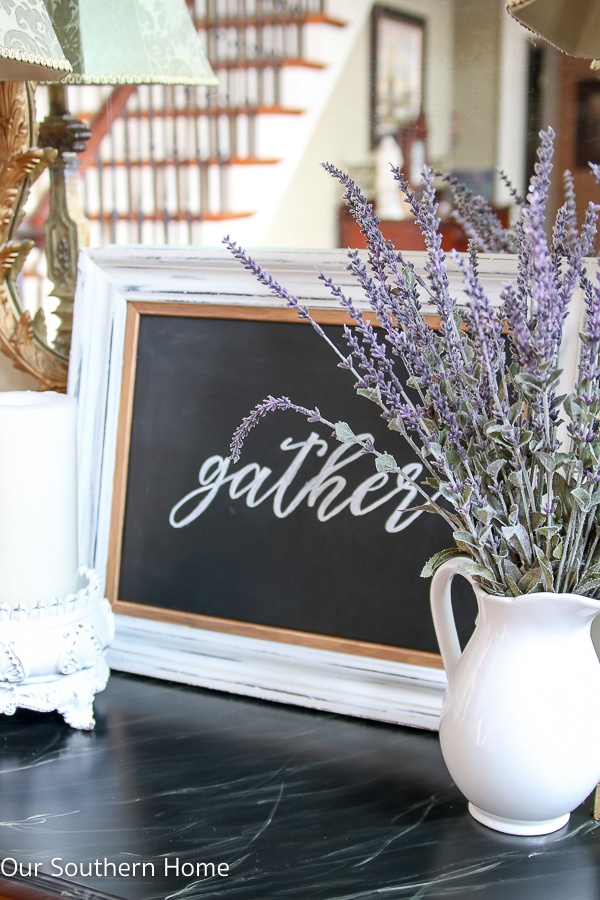
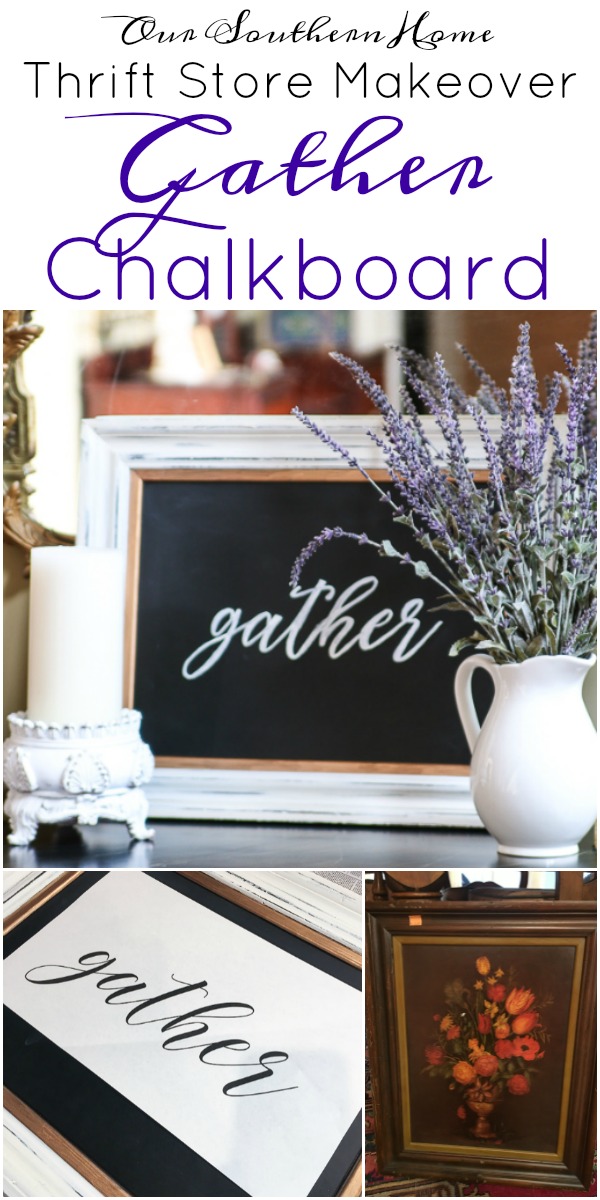
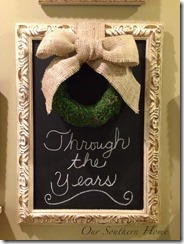
Chalkboard Wall Art
Woo hoo……it's that time of the month where we get to really be creative without breaking the bank.
If you have not pursued transforming thrift store treasure….you are missing out.
I get such gratification when decorating our home with pretties on the cheap!
Welcome to another addition of Thrift Store Decor Makeovers. Be sure to read until the end. You'll find links to 5 other fab ideas.
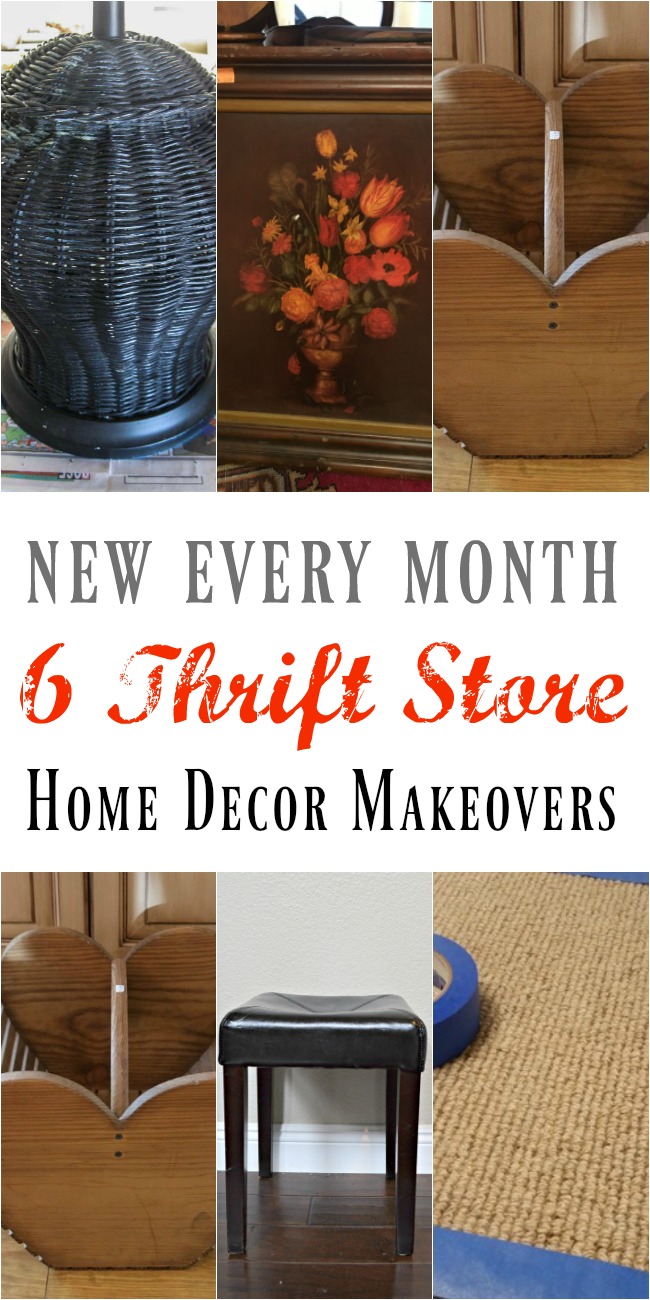
This month I went through my archives. That sounds a bit sweeter than my closet of junk as the hubby would call it.
This baby was found circa 2014 according the the price tag.
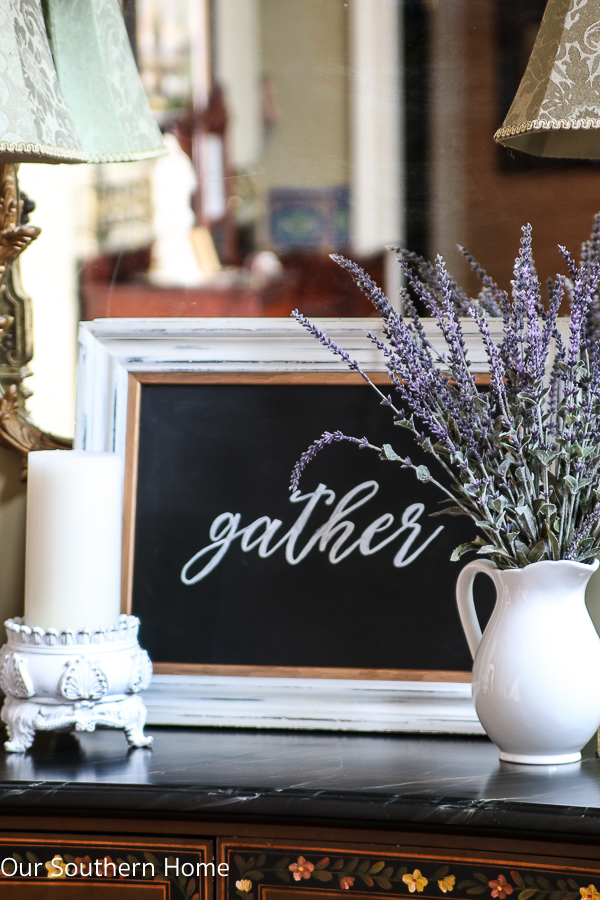
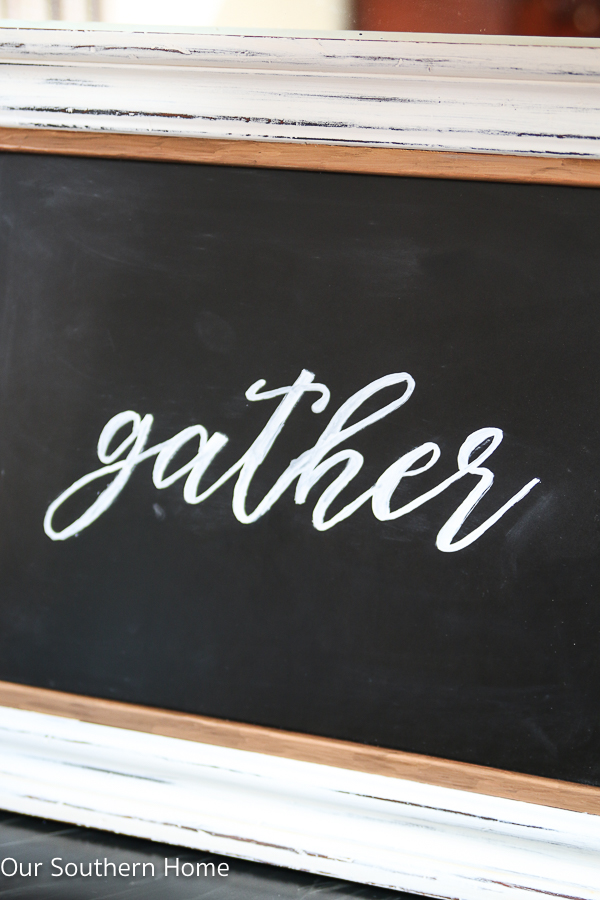
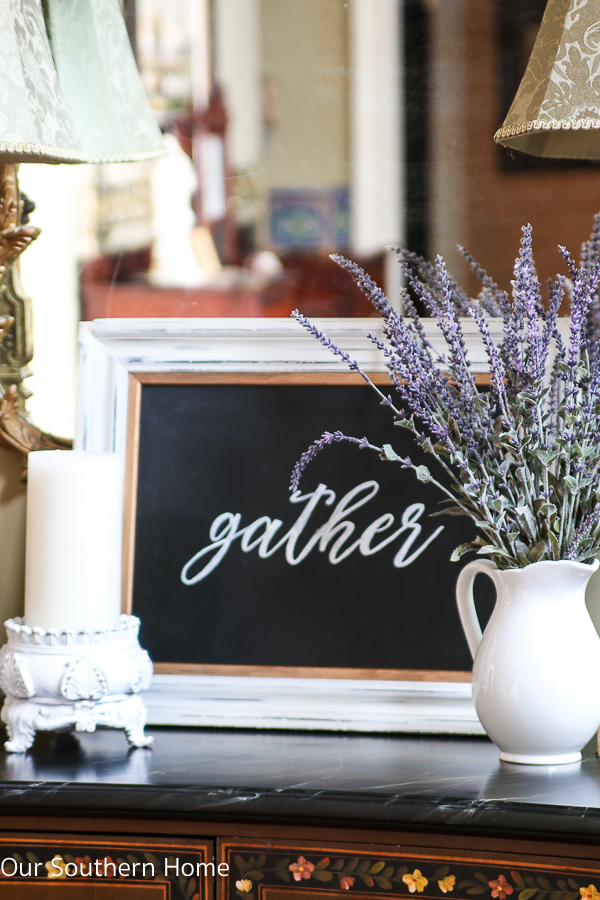
Gather Chalkboard Wall Art
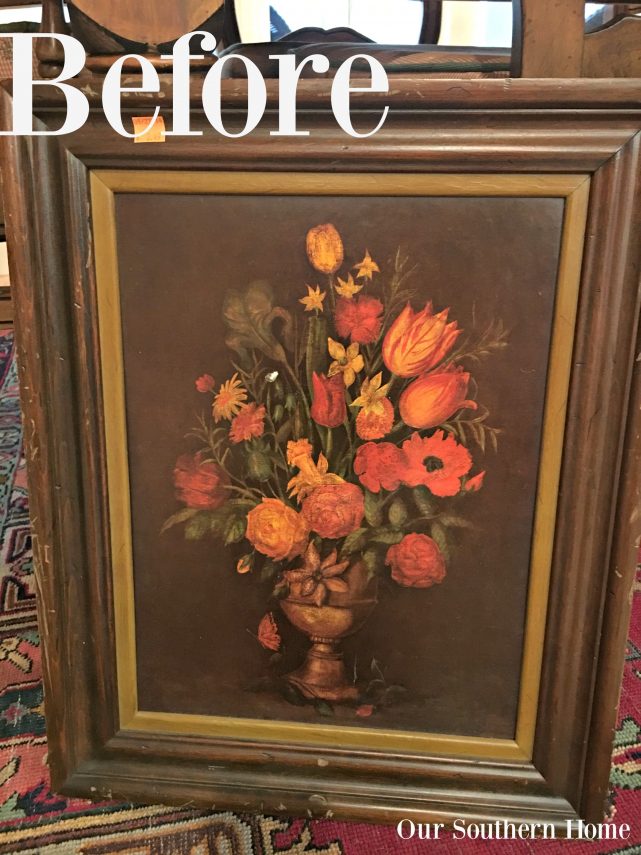
I really pondered this one. I found myself scrambling around to get ‘er done. I thought….wow this would be a fun project to keep the look but paint on top of the flowers with acrylic paint. You know….really create a masterpiece. Something to be cherished. The kids will fight over it one day when I'm gone.
Well, it was about 7pm last night. I didn't have any fancy paint supplies. I don't even know how to paint like that. Had to regroup, but I promise you that is really in the back of my mind.
This project goes to show you that great home decor need not take hours to create.
For this project, you will need: (contains affiliate links)
- fabulous thrift store frame backed with art (or not…we'll chat)
- Spray chalkboard paint in black

- painters tape
- white paint – I used chalk paint
- foam brush or regular brush
- sanding block
- gold leaf paint
- artist brush
- sealer
- gather print out
- chalk
- chalk marker or white paint pen


 or regular


 or
or 
Clean your frame and art thoroughly. I used cleaning wipes. I used a lot! This sucker was dirty. It was a very inexpensive piece to begin with. Believe me….no value. I paid I believe $3.49. Let it dry.
I sprayed the entire art area with 2 coats of the spray chalkboard paint. I didn't tape anything off at this point. It didn't matter if I got black on the actual frame.
I let it dry overnight.
If you just have a frame, you can still do this. Cut a piece of this wood or even a sturdy sheet of cardboard or foam core will work.
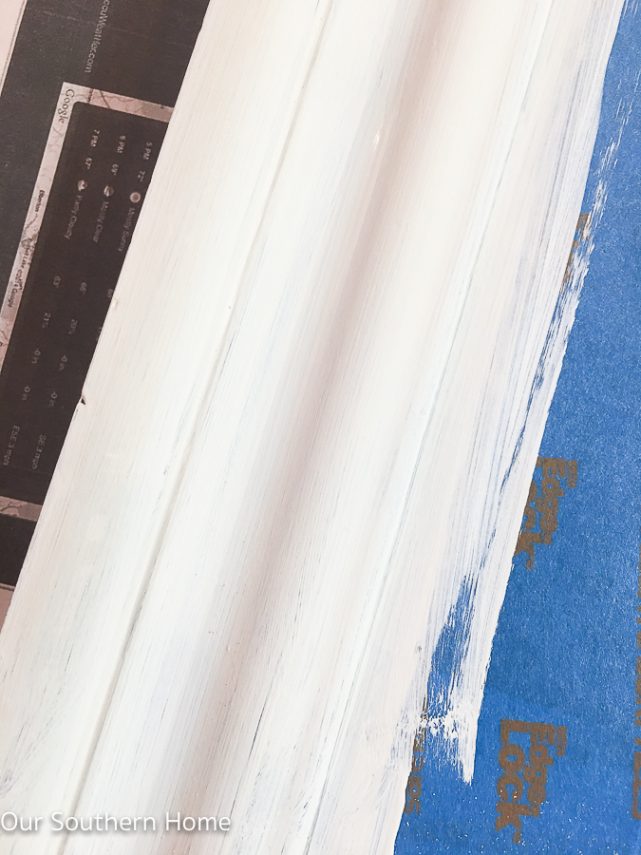
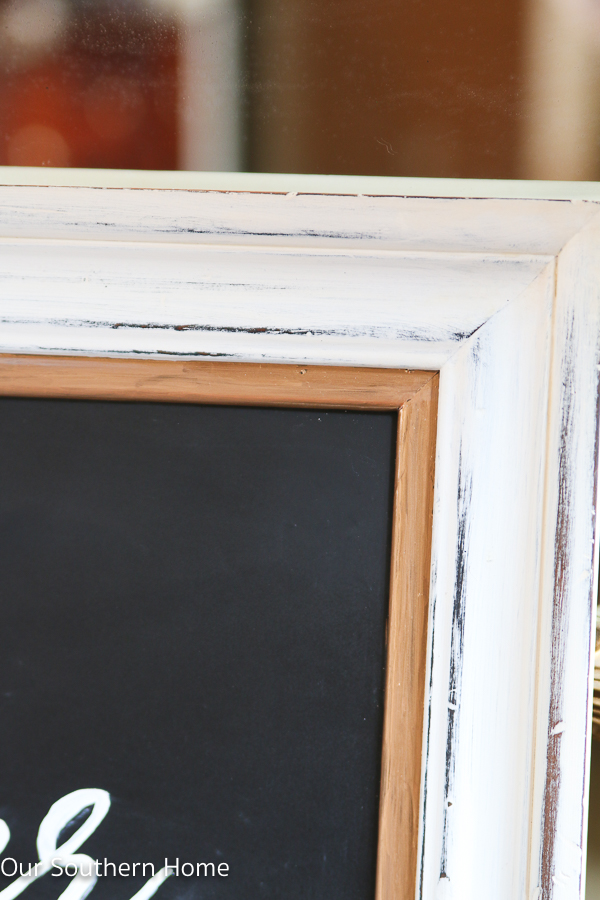
The next morning, I painted 2 coats of the white chalky finish paint on the frame. There is a little, narrow, inner edge that I didn't want white, so I taped it off with painter's tape.
Notice that it doesn't look completely covered. That didn't matter since I was distressing.
When the frame is dry, distress it to desired look with a fine sanding sponge/block.
Remove the tape.
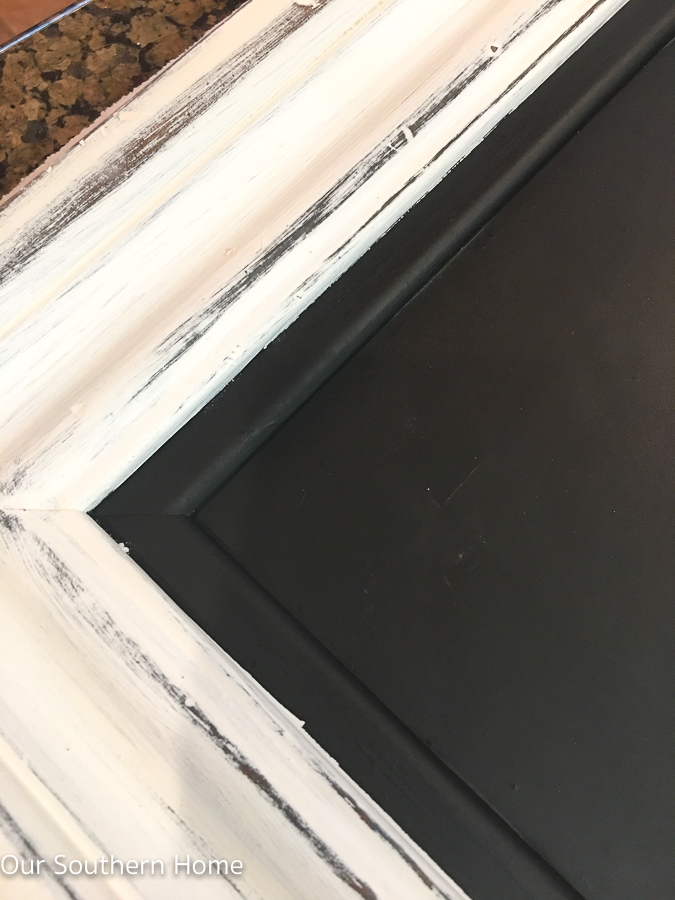
Paint the inner frame with the gold leaf paint with an artist brush.
Let this dry thoroughly.
Seal the frame with the above mentioned sealer and a brush.
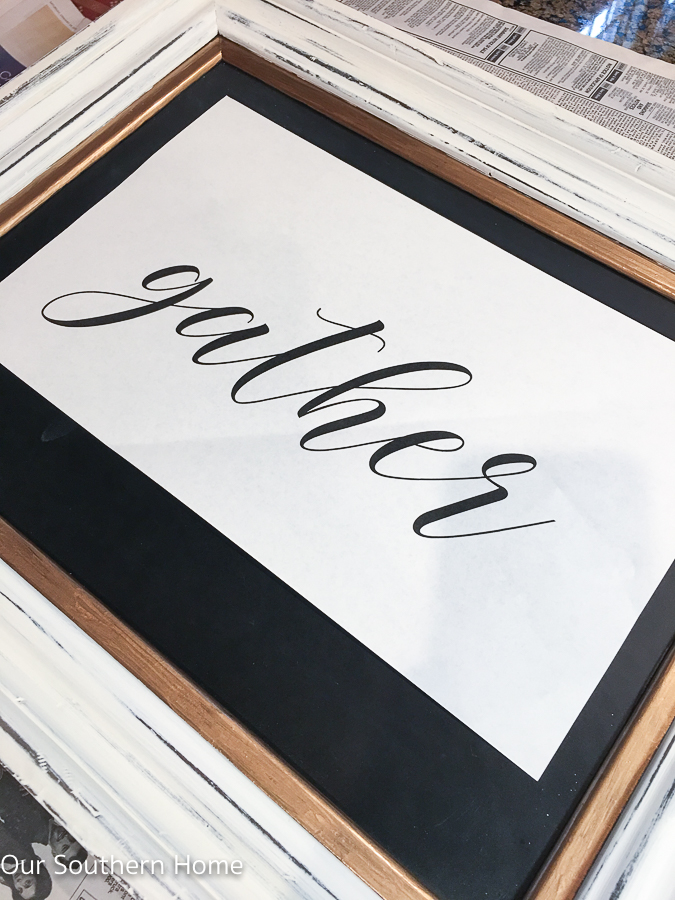
Print your GATHER sheet. This one is 8-1/2 by 14. It's the legal size paper.
>>>Click to print gather
Transfer the GATHER word
- print the word
- flip it over to the back
- with the long side of your chalk or how ever you can, color all over the back where the word is. HINT: use the same color chalk as the lettering will be.
- flip it back over and center it on the board. Tape it down.
- With a pencil, trace the word.
- Remove the paper and you'll be left with a chalk outline to color in!
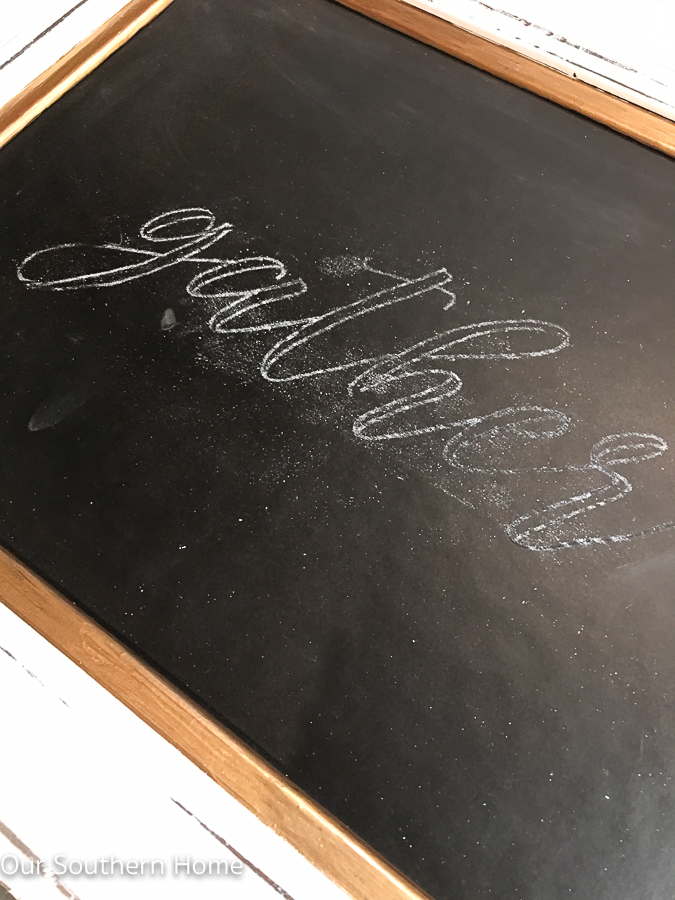
Color in with a chalk pen or paint pen. I do find that chalk pens are hard to remove without seeing the original outline. If you want to erase…..use regular chalk! You can also use a paint pen if you want it permanent.
Let it DRY!
Then dust off the residue.

My Repurposed Life – Easy Spray Paint Welcome Mat
My Uncommon Slice of Suburbia – Paint and Upholstered Stool Makeover
Domestically Speaking (Mine) – Rattan Lamp Makeover
Our Southern Home – Chalkboard Wall Art
Petticoat Junktion – Stenciled Wood Chest
Refresh Restyle – Repurposed Farmhouse Tote

Buffer
Woooow ! Great job Cristy!
I am so glad to visit your blog…..Love your blog so much !
Yes, regular chalk is better for erase.
Thanks a lot for sharing with us !
Thanks, Blake!
Love it! So pretty, I use the same method for writing!! 🙂
Love the make over! Sooo much better! Now I will have to look for a frame!
Thanks so much…seriously check your thrift store or maybe you have one that needs a makeover. I did the same thing upstairs to a piece of art that no longer worked with our decor. I painted over the glass!
Beautiful job on the chalkboard Christy! I love the white and gold together.
pinned!
gail
Thanks so much! I almost did a layered paint finish, but I liked the simple white as well.
This is so pretty, you would never know it started out as a painting! You sounds like me last minute painting 🙂
Thanks Kristin! Hope everyone is on the mend!
So cute!!! Love your little chalkboard.
Thanks!!!
That chalkboard is so cute Christy. It looks like an expensive piece. Good save!
Thanks so much! Something about bringing life back to those finds!