No-Sew Floral Spring Pillow
**The following review is part of the Jo-Ann Fabric and Craft Stores National Craft Month campaign. I received compensation for this review; however, this is my personal, honest opinion based on my experience.**
I am almost embarrassed to admit this, but this is my first pillow! I've sewn numerous window treatments, dresses for when my daughter was little and Halloween costumes, but sadly…never a pillow!
Oh how that is now changed!
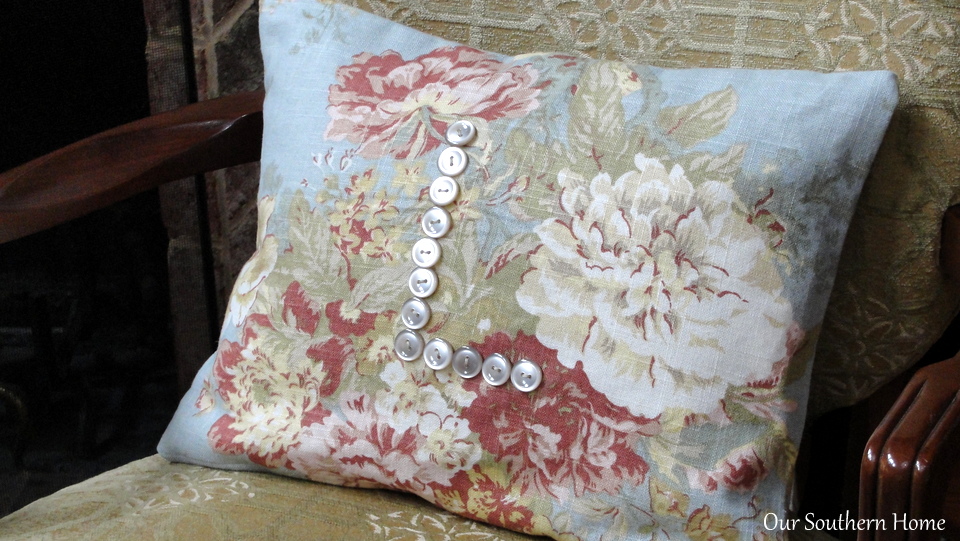
I am so happy with how my No-Sew Floral Spring Pillow turned out. No-sew is all the rage so I thought I'd give it a whirl. I leafed through the home sewing books that I own and various pillow patterns. From what I read from those, I went with a simple envelope pillow.
I headed out to my local Jo-Ann Fabric and Craft Store. Jo-Ann makes spring crafting easy during National Craft Month with a $5 off $25 or more purchase coupon and a spring crafting inspiration website.
Jo-Ann has a huge, impressive fabric selection! One of the huge trends for spring in crafts, fashion and home decor is floral. I am so a floral girl. I love romantic vintage, floral inspired fabrics.
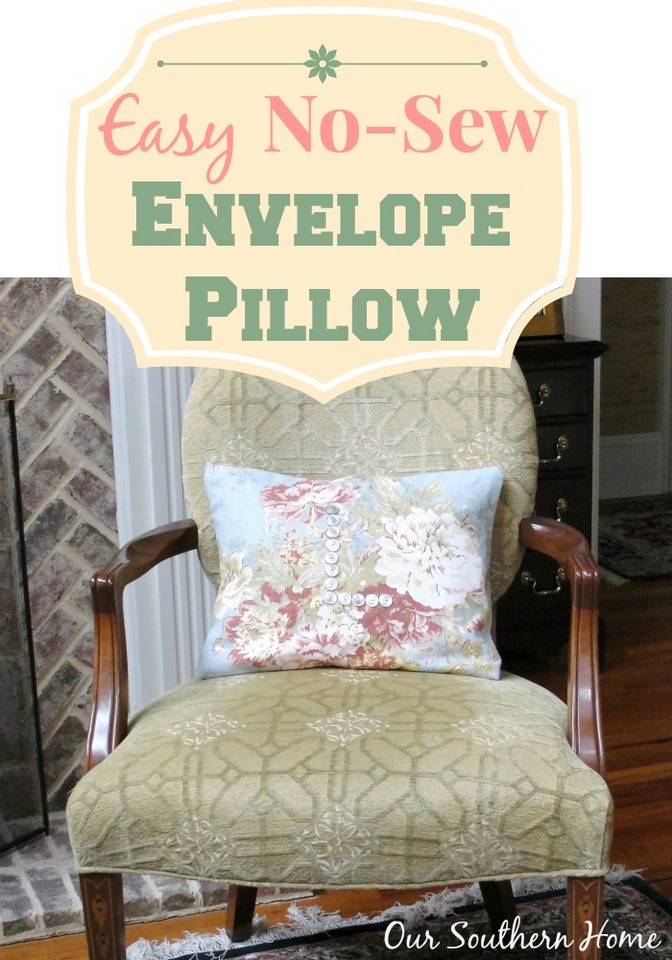
I wanted to make a small accent pillow to use in an occasional chair. I decided to go with this beautiful, vintage inspired soft floral fabric. Jo-Ann has a large pillow form selection as well.
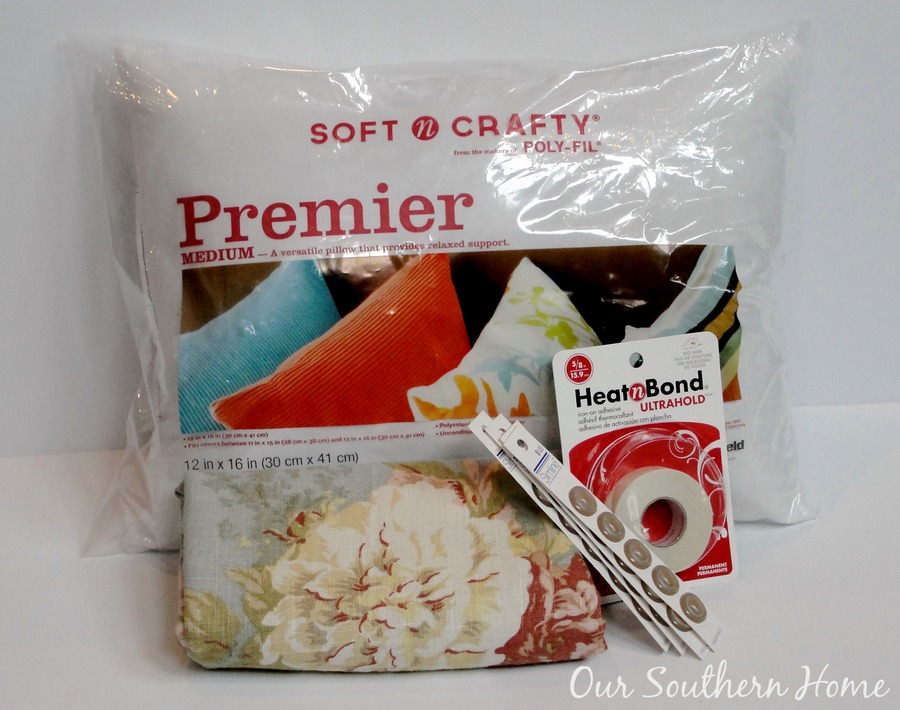
Materials I purchased from Jo-Ann:
12×16 inch pillow form
1/2 yard of floral decorator fabric
buttons for my monogram
Heat N Bond Ultrahold tape in 5/8″
Everything else I had on hand: scissors, self-healing cutting mat, cutting board, rotary cutter, ruler, iron, ironing board, fabric chalk, needle and thread
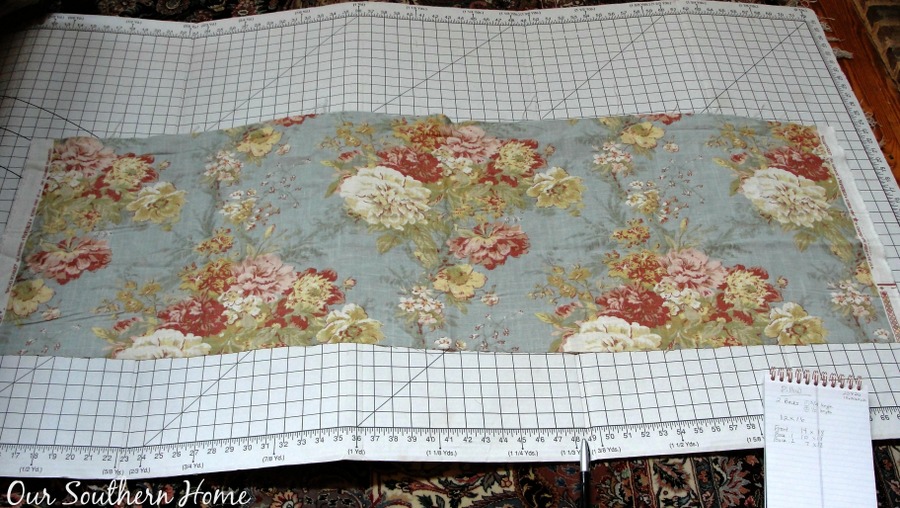
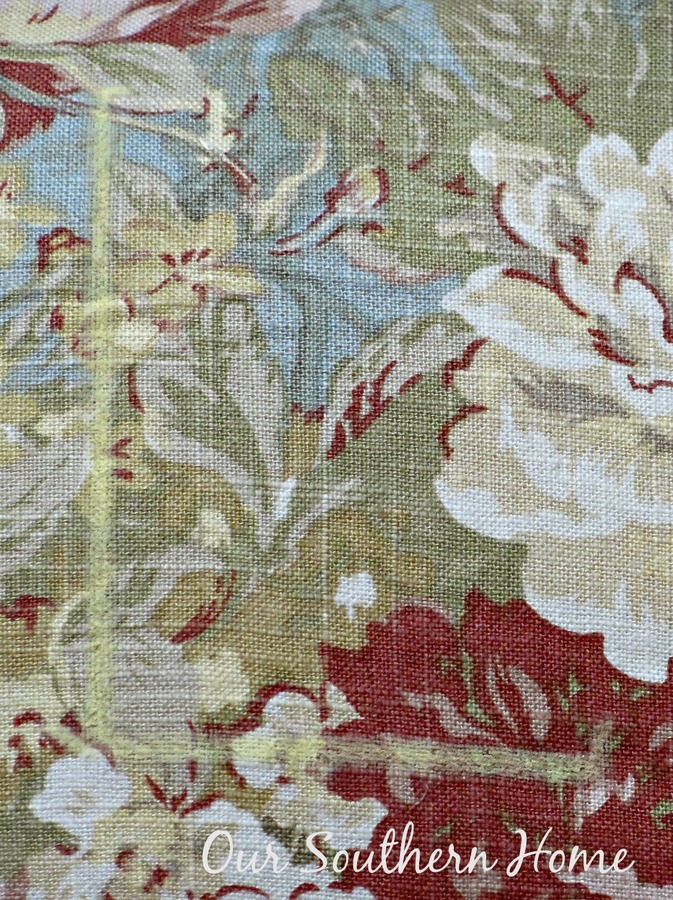
Isn't this fabric beautiful!
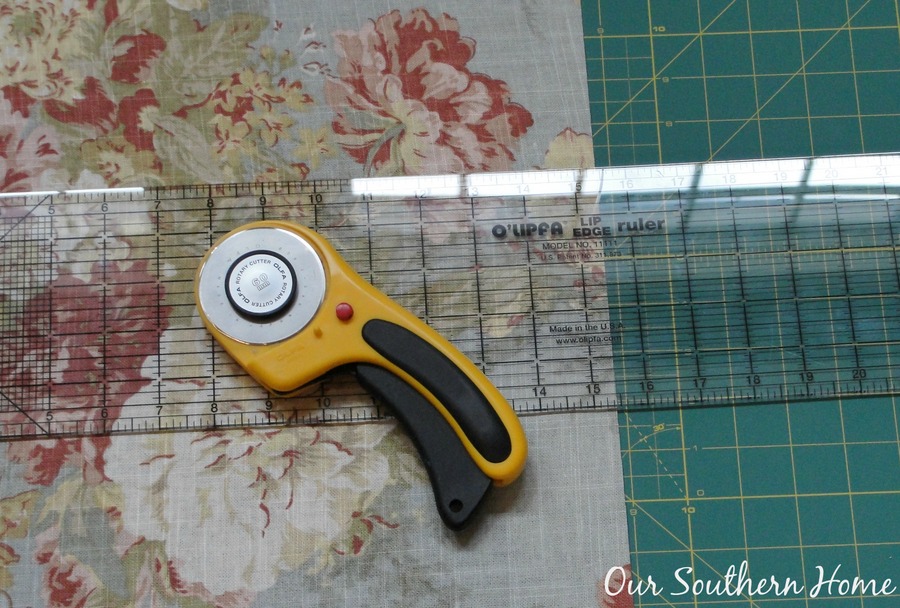
I used my ruler that has an edge to hook onto the cutting mat. This allows for very straight cuts when used with the guide lines and rotary cutter. I cut 3 pieces in the following sizes to fit my 12×16″ pillow form.
Front Piece: 14×18″
2 pieces for back for envelope:
11×18″
8×18″
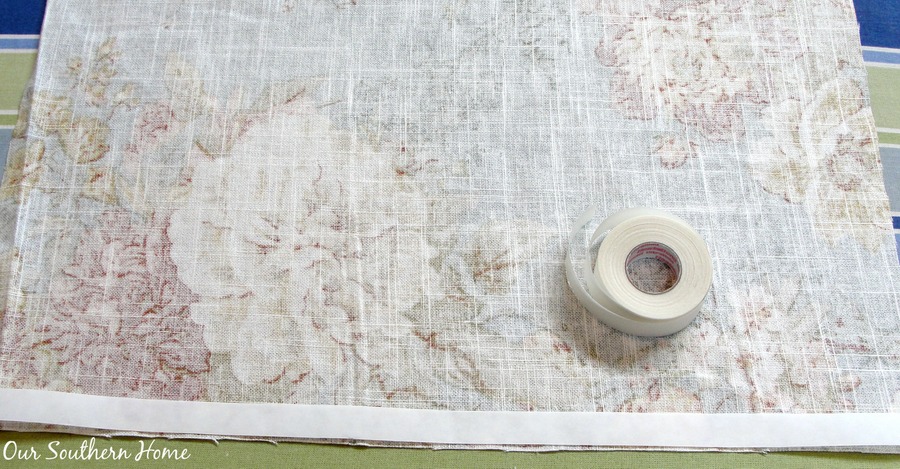
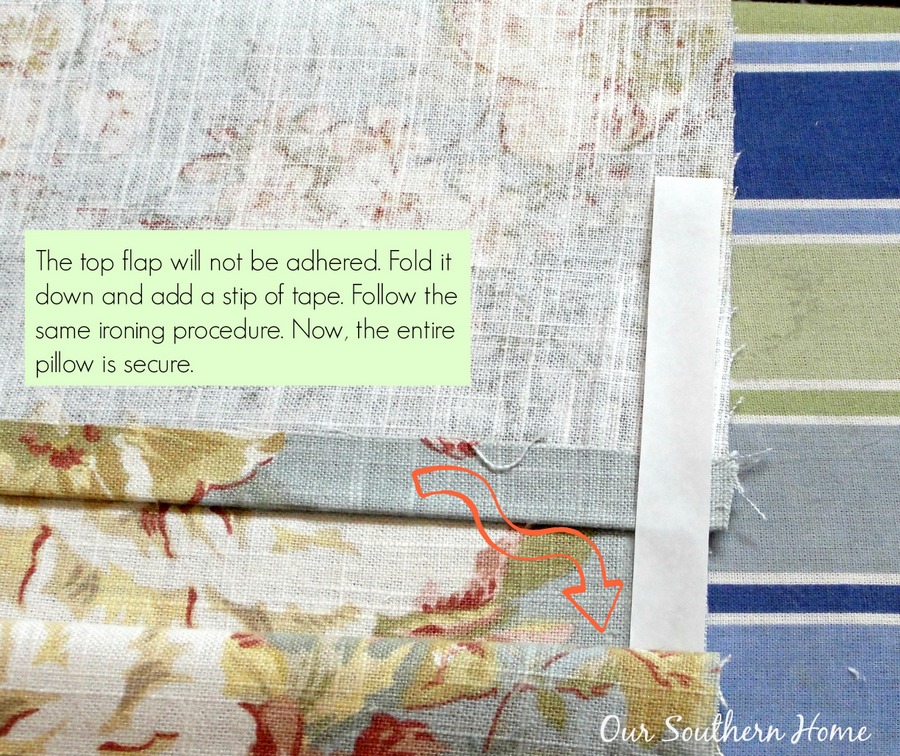
On 1 long end of the 2 back sections (wrong sides of fabric), cut a piece of tape to fit the length. Iron it on following the directions on the tape box. It will be hot!!! Let it cool completely before peeling off the paper backing. This will also ensure that it has set up.
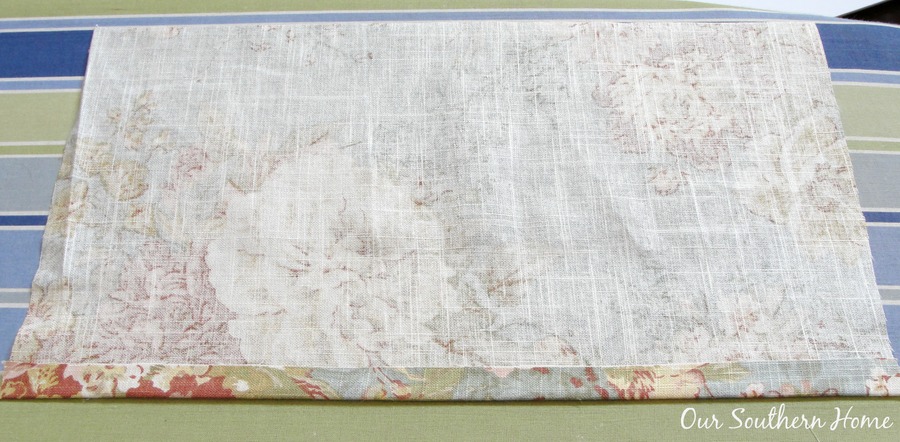
Peel the paper backing off the tape. Fold over and iron to hem. Do this for both back pieces. This gives a finished hem for the envelope back.
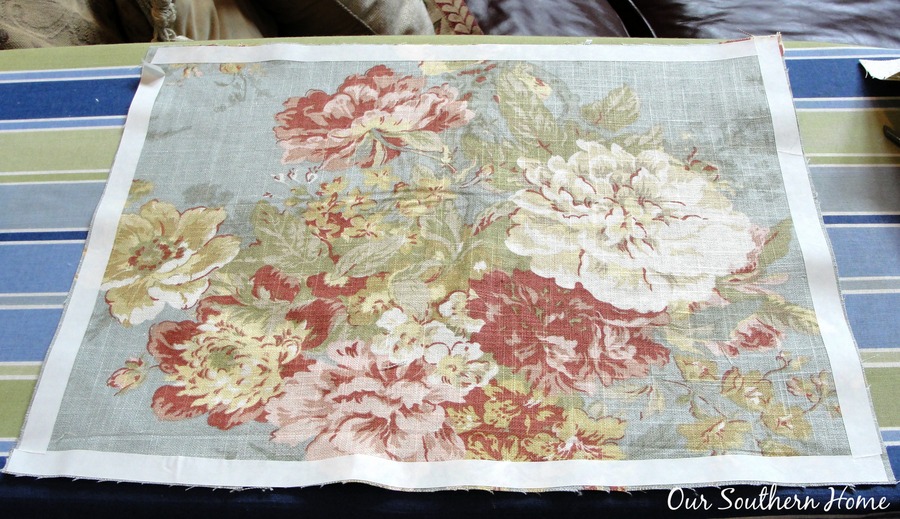
On the front piece, iron the tape around all four sides of the front piece (pretty side). Once cooled, remove the paper tape backing. Leave the piece just like it is. Place the two back pieces on top with pretty sides facing each other.
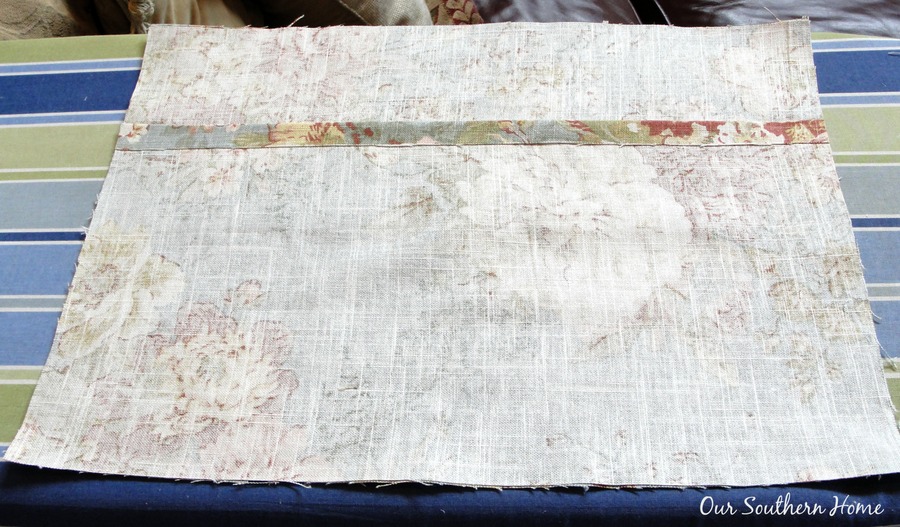
It will look like this. Iron the 3 pieces together. Really follow tape directions. I use a hot, no steam setting and apply a bit of pressure to really marry the pieces together. The back forms an envelope back to insert the pillow form. This way you could easily change out the pillow with the seasons.
I didn't take a picture of this, but slightly clip the corners so you can get a sharper corner. Let it cool and set up for about 10 minutes. Turn it inside out.
I drew an “L” on the front with yellow chalk. You could glue the buttons on with a heavy-duty fabric glue. I decided to just sew on the buttons for added durability. Great excuse to sit and watch a TV show! Insert the pillow and voila! You are done. The pillow portion was completed in an hour.
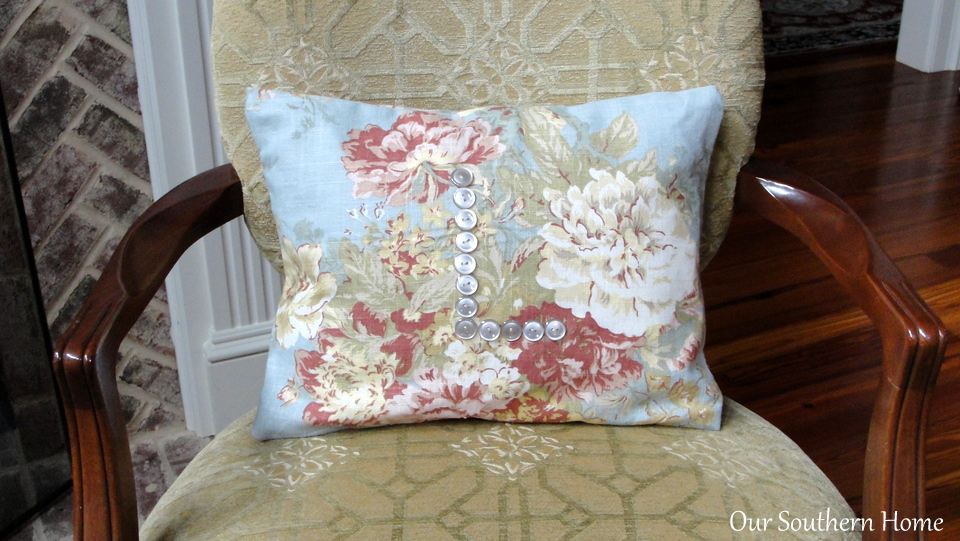
Of course, you could leave off the button monogram, but I love the extra decorative touch!
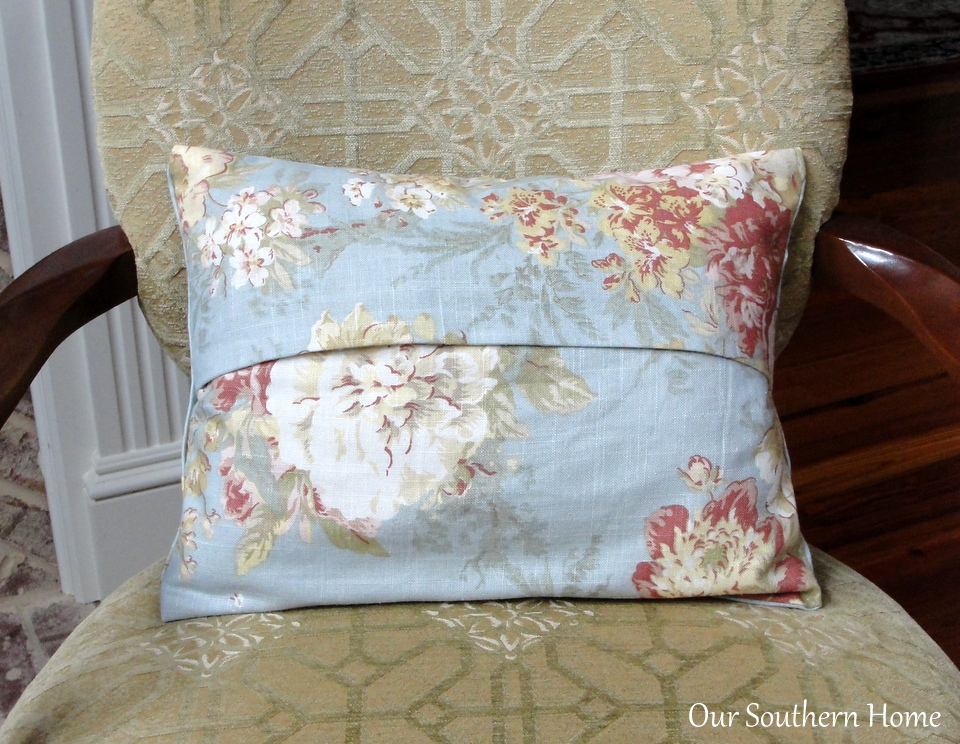
This is the back of the pillow. You can easily slip the cover off to change-up your look.
Be sure to check out Jo-Ann for all of your spring crafting needs. You can visit the online site HERE.
Coupon can be found HERE!
Happy first day of spring!!!

Link Parties that OSH parties at on occasion! Sunday: DIY Show Off Monday: Between Naps on the Porch, Home Storis A to Z Tuesday: Not Just A Housewife, The Scoop at Cedar Hill Farmhouse and Inspire Me Party at A Stroll Thru Life, Setting for Four – Project Inspire{d}, My Uncommon Slice of Suburbia Wednesday: Savvy Southern Style Thursday: My Repurposed Life, From My Front Porch to Yours, Home and Garden Thursday at A Delightsome Life ,No Minimalist Here , Imparting Grace Friday: French Country Cottage, Miss Mustard Seed Furniture Friday, Common Ground, The Charm of Home, Rooted in Thyme, Imparting Grace, Keep Calm and Link Up, My Romantic Home – Show and Tell Friday, Craftberry Bush – Inspiration Gallery Friday, SnapCreativity – Show and Tell, Tatertots and Jello
Buffer

I loved it and thank you for the inspiration! I’ve been grumbling to myself over tired pillows every time I walk past the living room. This is a wonderful idea to repurpose without have to store the old pillows.
Thanks so much, Diane! I am so inspired by my first pillow. I have old pillows in thee attic that I’m going to drag out! Going to use in a higher use area so I may try sewing those! The no-sew really took the fear away! Happy crafting! XXOO Christy
Love the fabric. Off to JoAnn’s tomorrow. This fabric is pretty enough to frame also. I too love florals and this one is really pretty!
Thanks so much! I am smitten with that fabric! I’ve got to go get more!!! XXOO Christy
Very pretty…love that fabric!
Cute pillow, Christy! I love a “no-sew” project! Happy Spring!