Christmas | Crafts | DIY | Interior Decorating | My Projects
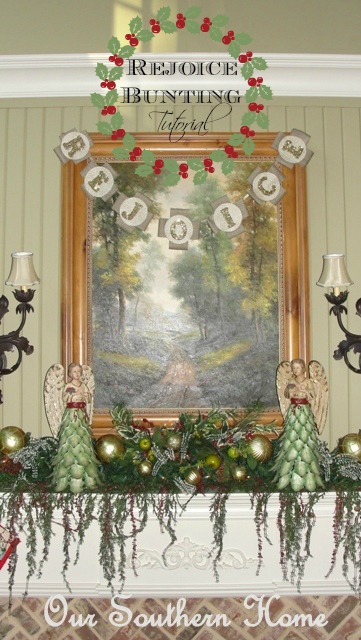
Rejoice Bunting {Tutorial}
Buntings are a great way to add texture and interest to a space. They are really inexpensive to make and creativity is endless. Here is my tutorial for my Rejoice Bunting in our family room.
I am so happy jealous for all of you fortunate Silhouette owners!! One day I hope to be playing and creating with my very own! Until then….a girl has to do what a girl has to do! I had in mind what I wanted to do, but it turned out to be one of those create as you go projects. Have you ever had one of those?
For the final product you will need:
- wooden letters to spell out your word of choice ( I went with the smallest at AC Moore)
- craft glue
- small paint brush
- glitter of your choice
- wide ribbon
- scrapbook papers
- scrap paper or cereal box
- ribbon
- scissors
- glue gun
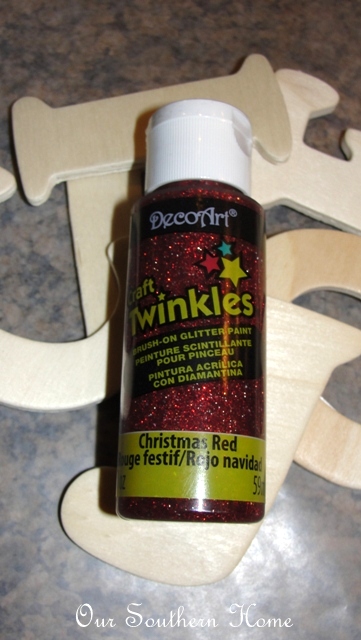
This was the craft fail part! UGH!!! My 13-year-old daughter wanted to help, and she really is great at it! She painted all of the letters 2 times, but this product was too translucent to be seen above the mantel. It's a shame because it is pretty. Another project, perhaps~
The next part I failed to take pictures. Frustration took over! Each letter was painted with craft glue on the front and sides. Then they were heavily glittered with gold glitter. They turned out beautifully! Now I was smiling!! We let them dry overnight and I completed the rest of the banner during a DVR episode of Grey's Anatomy- 1 hour the next day!
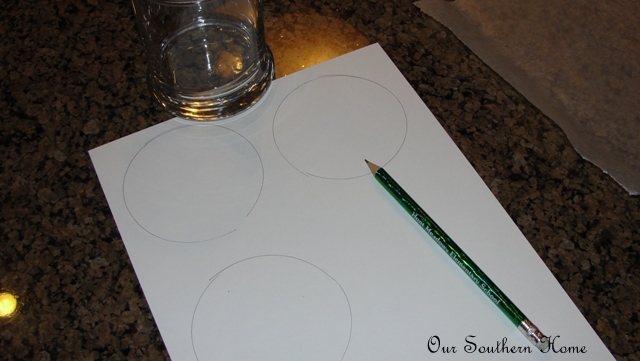
I knew that I needed some sort of base to attach it all. This is where you can use card stock which I always have on hand or cereal box. This will not be seen. Pick out some sort of round object that you can trace a circle. I used my dollar tree candle hurricane. Trace and cut out one circle for each letter.
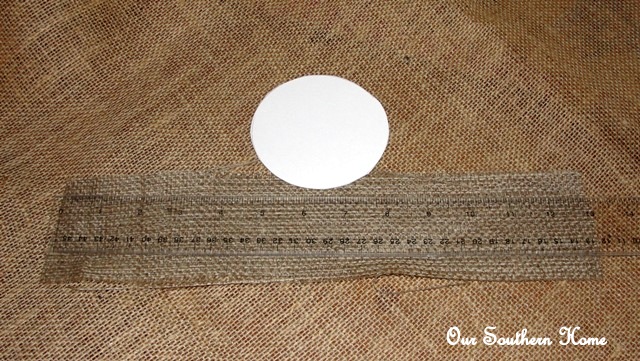
I have a very large spool of burlap ribbon (no wire). You could even cut strips of burlap fabric. I cut two 13″ lengths of the ribbon for each circle.
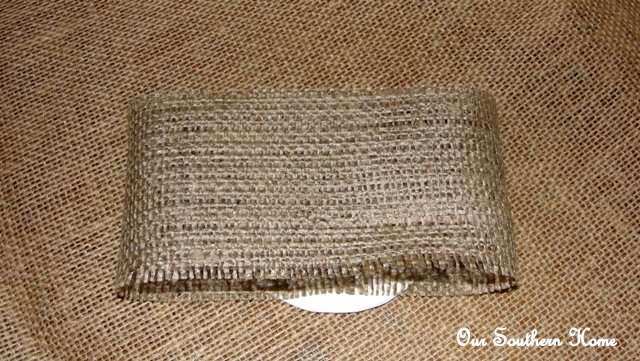
Loop the piece of ribbon so that the edges are just touching each other and secure with hot glue on top of the scrap circle. See how it is not seen once you glue the ribbon.
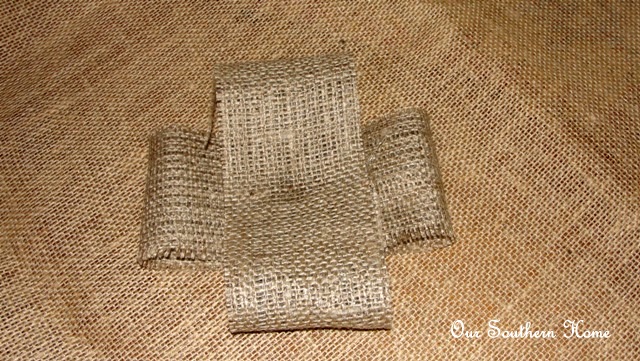
Do the same with the second strip of ribbon. Put a dab of hot glue in the center and push it down. I used the eraser of a pencil for this to protect your fingers from the hot glue. Now you have a cross shape.
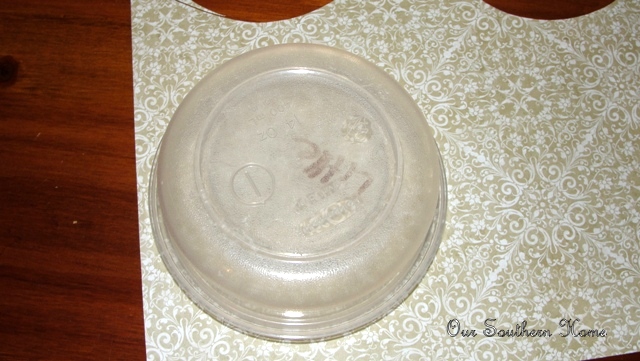
You want to find a round object to trace that is slightly larger than your letter. Trace and cut out one circle for each letter and glue to the center of the ribbon cross.
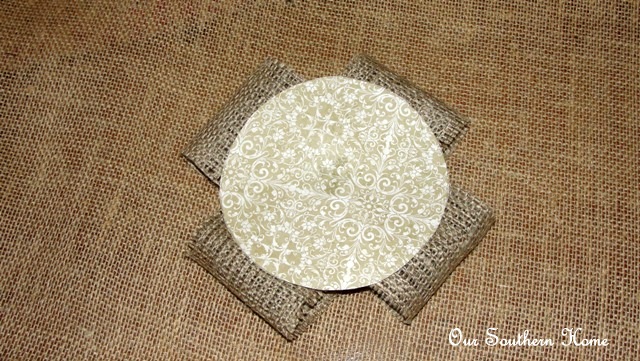
I decided to go fairly neutral with mine since it was going to be displayed over a landscape oil painting. That's the beauty with all of the scrap papers out there! You have so many color choices.
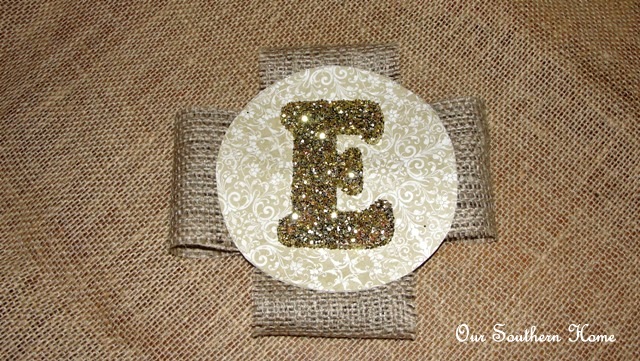
I love how the glittered letters turned out!!! I need to find something else to glitter!!! Hot glue the letter to the center of the circle.
I laid out the letters on my counter evenly spacing them. I placed a thin cream ribbon behind the letters gluing the ribbon in the proper spot and placing the top edge of the bottom circle in the glued area. You could loop the ribbon through the top ribbon, but it won't stay secure without glue and I didn't want to destroy the burlap since it is naturally a loose texture.
Be sure to leave a nice long tail on each end for hanging.
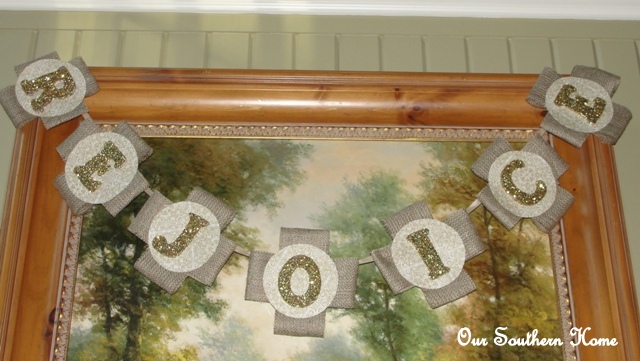
I used poster command strips to hang the banner on the backside of the painting. I really like how the banner is neutral over the painting. I am really pleased with how it turned out! I plan to make others. Maybe I'll use pink and red glitter for Valentine's Day. I guess until I have that glorious machine, glitter and wooden letters will be my friend!
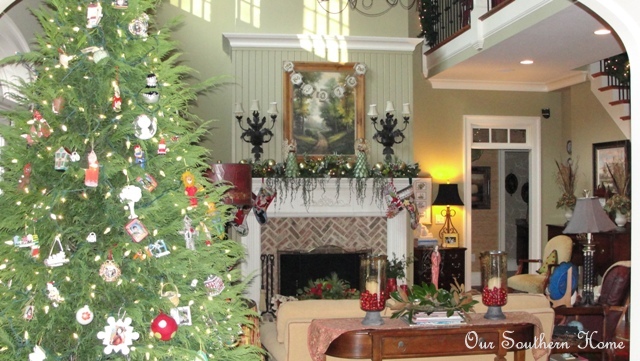
To see further detail of the bunting and mantle you can visit this post on my Angels Rejoice Mantle!
Let me know if any of you make this banner! I'd love to see pictures!!
Merry Christmas!


I am in Aiken, SC and love your site. Where did you get the angels on the mantel? Thank you and have a wonderful new year.
Thanks so much!!!! I got the angels at an after Christmas sale at Belk over 10 years ago. They were a steal and still a favorite of mine today. Happy New Year!
Turned out great! Yeah, I don’t have a silhouette either! But someday I will have! 🙂
Thanks so very much for being my 500th GFC follower!! I was so hoping I’d hit that before Christmas! I would love to send you a little thank you in the mail…could you email me your address? jwheel75(at)gmail(dot)com. Thanks again and whoohoo Merry Christmas! 🙂
Jennifer, you are such a sweetie! I found you through Instagram. Loving your blog as well. I just emailed you from my phone….my computer is not feeling well!
Very nice! And your family room is lovely, too.
Thanks so much, Melanie! I appreciate you stopping by! Have a great evening!!!
Very pretty! I would love for you to share this or any of your great ideas at the link party going on now (and every Saturday – Tuesday) at ‘Or so she says …’ Hope to see you there! http://www.oneshetwoshe.com
Thanks, Mariel! I will check out the party! Love ways to get new ideas and share mine! I appreciate you stopping by!