Have you ever wanted to paint dark wood furniture, but didn't know where to start?
How to Paint Dark Wood Furniture
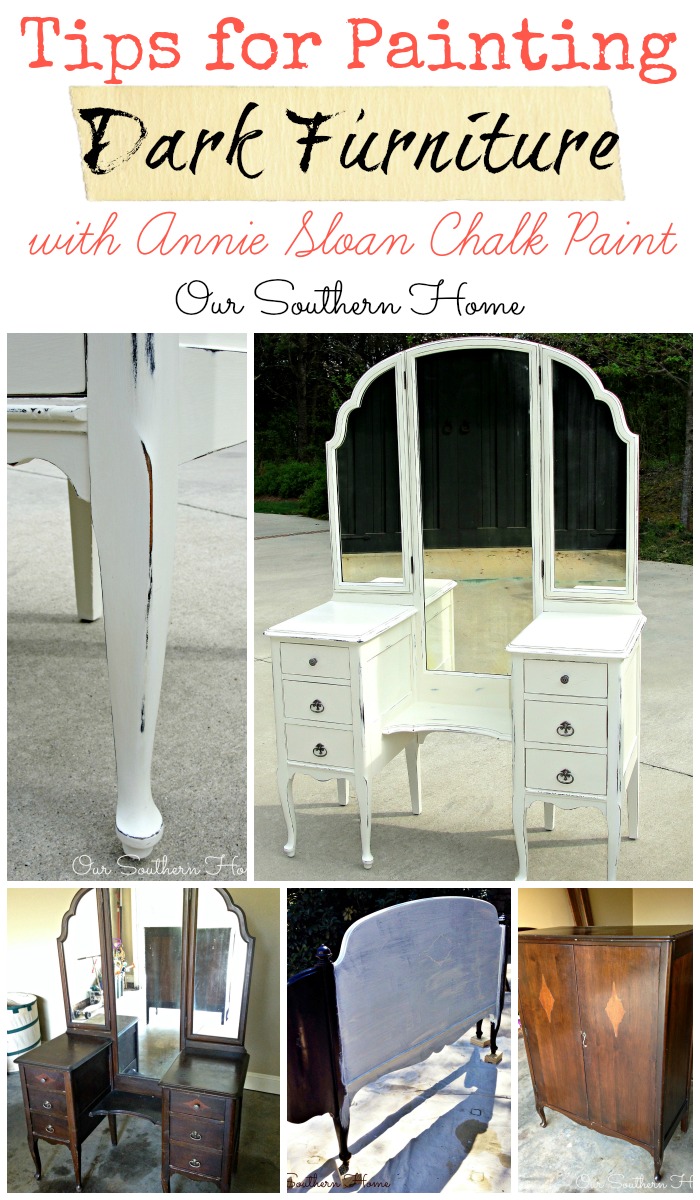
Tips for painting dark wood furniture a lighter color
DEWALT D26451 3-Amp 5-Inch Random-Orbit Sander with Cloth Dust Bag
It's no secret, I love to paint accessories and furniture……walls not quite as much.
This client project was perhaps my most challenging to date with the exception of my son's antique desk.
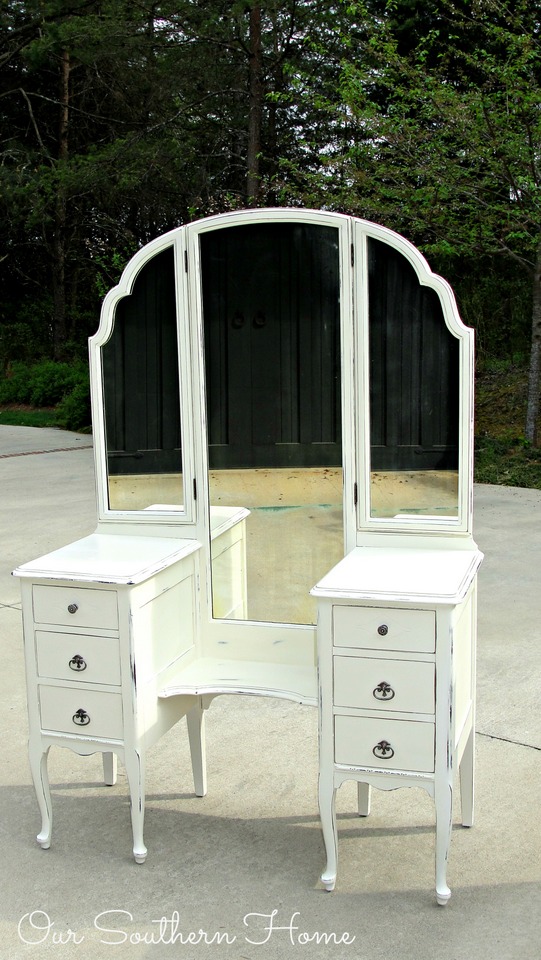
My client was given an antique bedroom suit from a family member. Her hope was to use it in her little girl's room. She wanted antique white so we decided on Old White from Annie Sloan Chalk Paint.
Generally, you really have no to minimal prep work when using Annie Sloan….which I love. From past experience in working with dark furniture AND painting it a light color…..I knew bleed through would be a possibility…..and it was.
Step 1
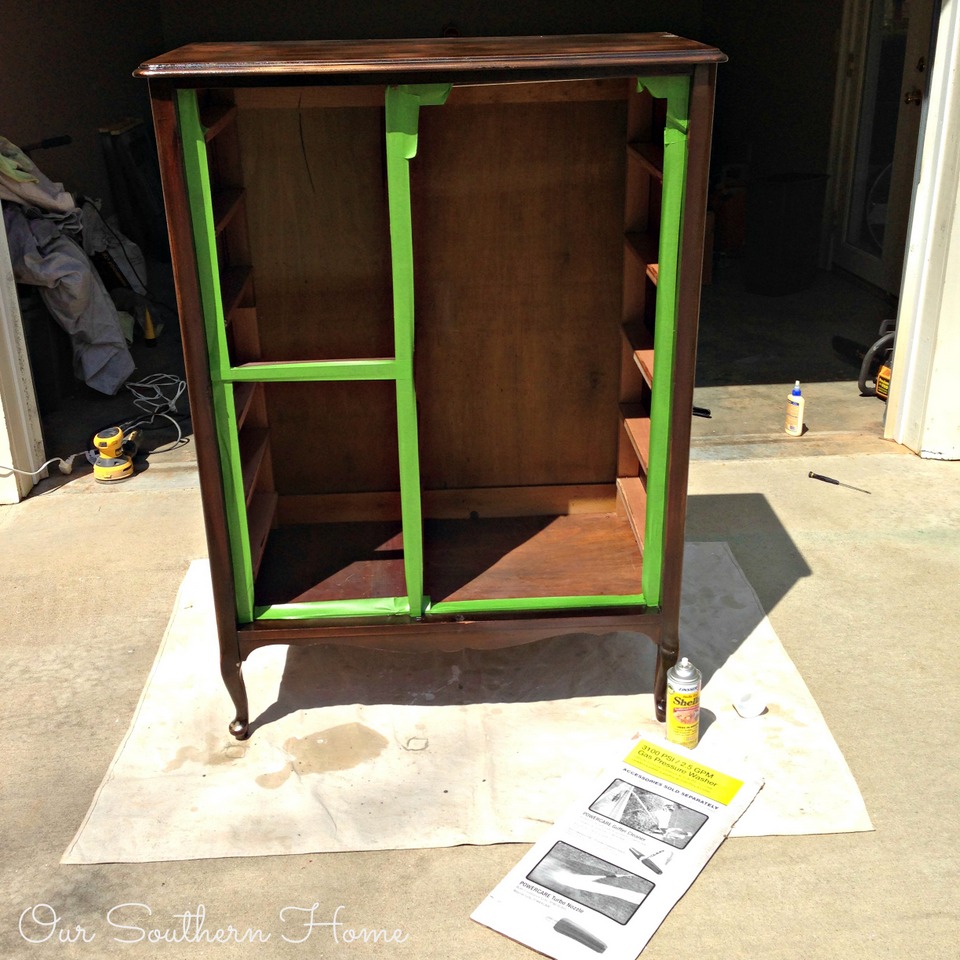
The first thing that I did was clean it really well and wipe it down with mineral spirits. It had been in storage and needed it. There are cleaning products for this purpose in the painting section. I had mineral spirits on hand so went with it.

On several pieces, you could visibly see the texture in the varnish. I knew that in order to get a nice smooth finish, I would need to sand, sand, sand. I used my Christmas gift from my hubby, my Dewalt Orbital Sander.
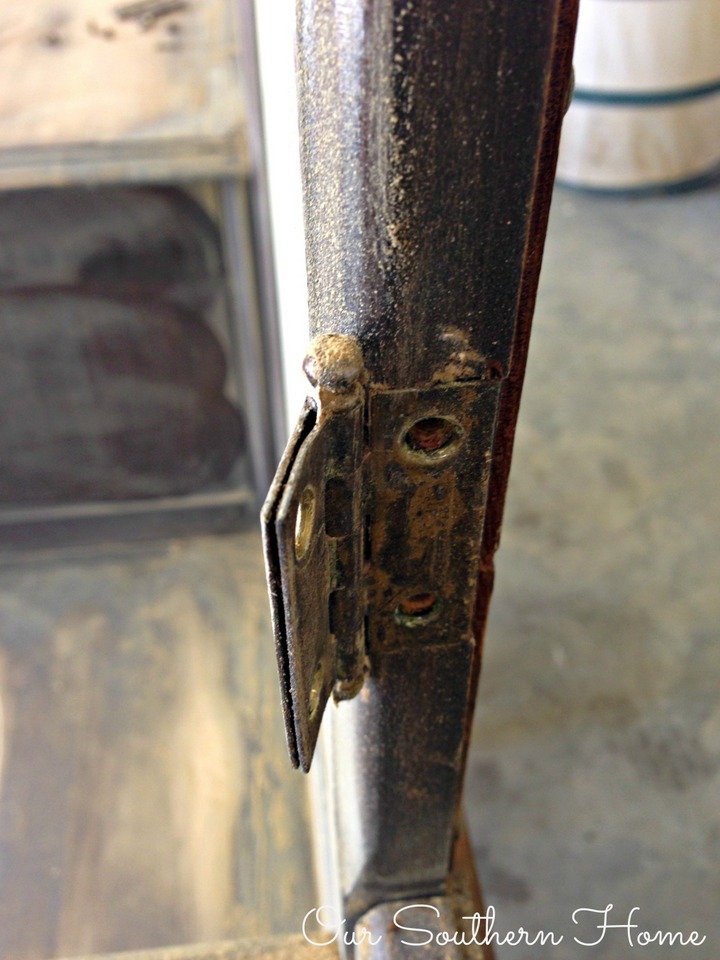
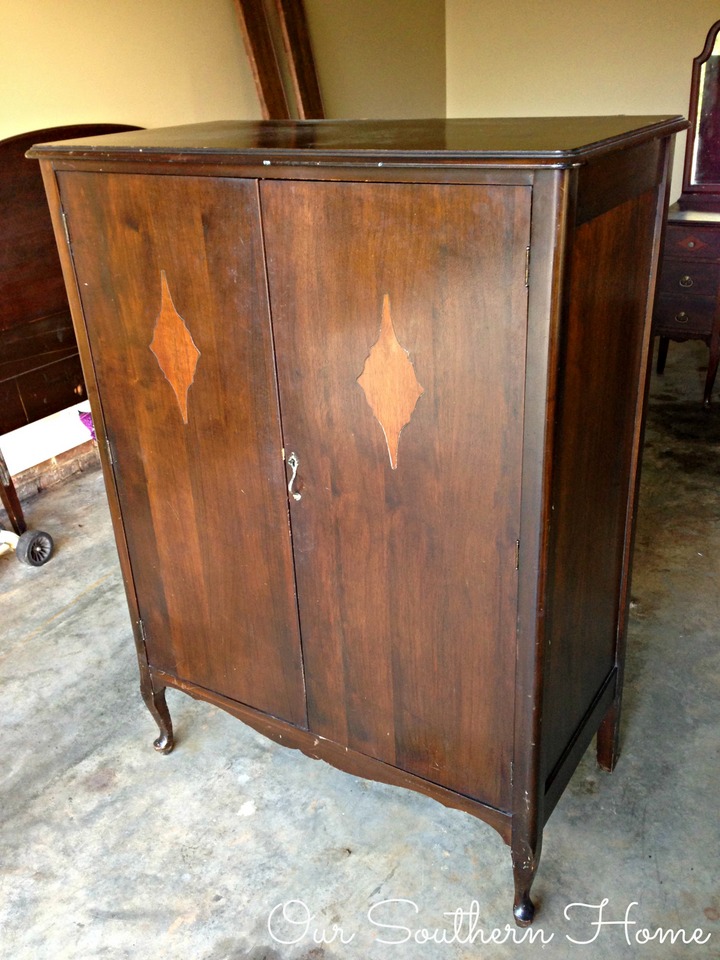
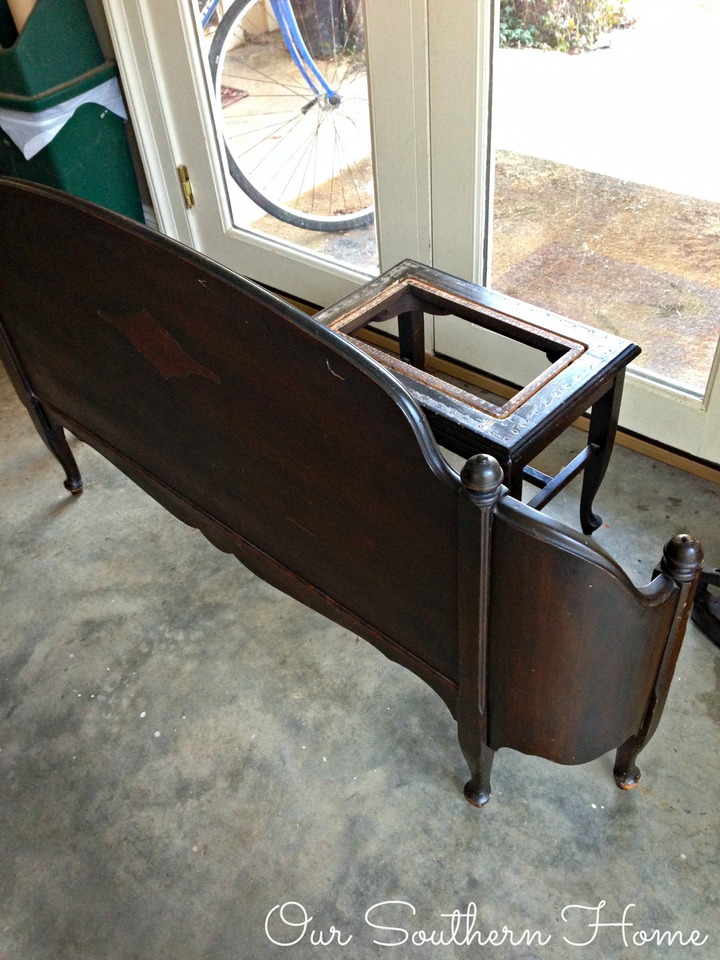
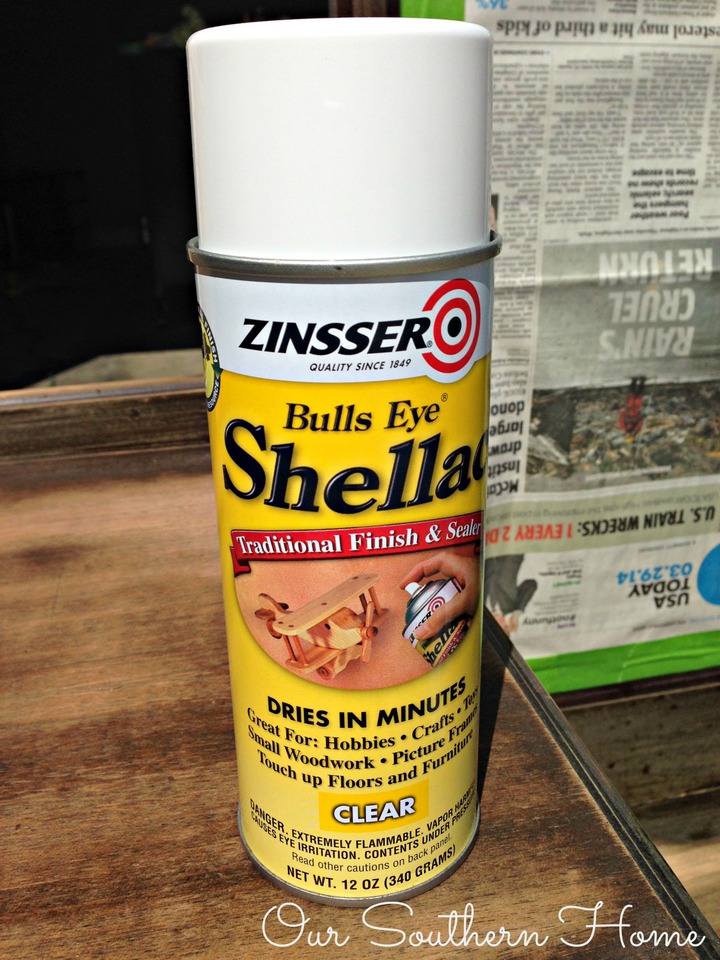
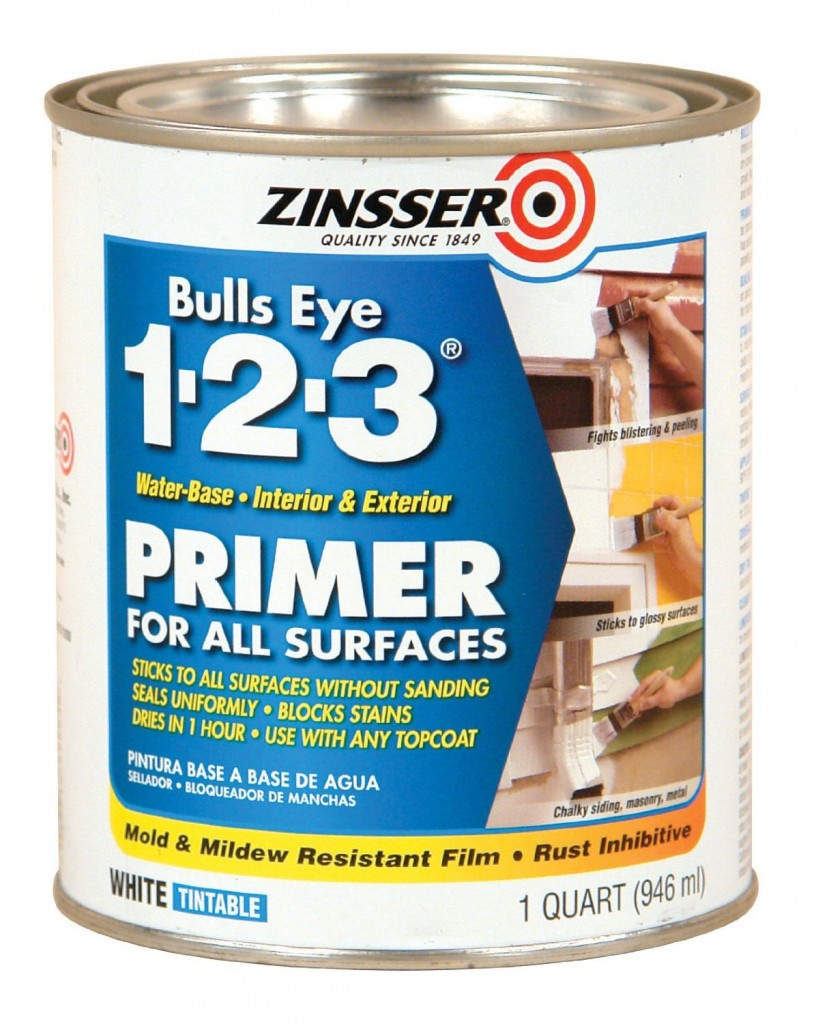
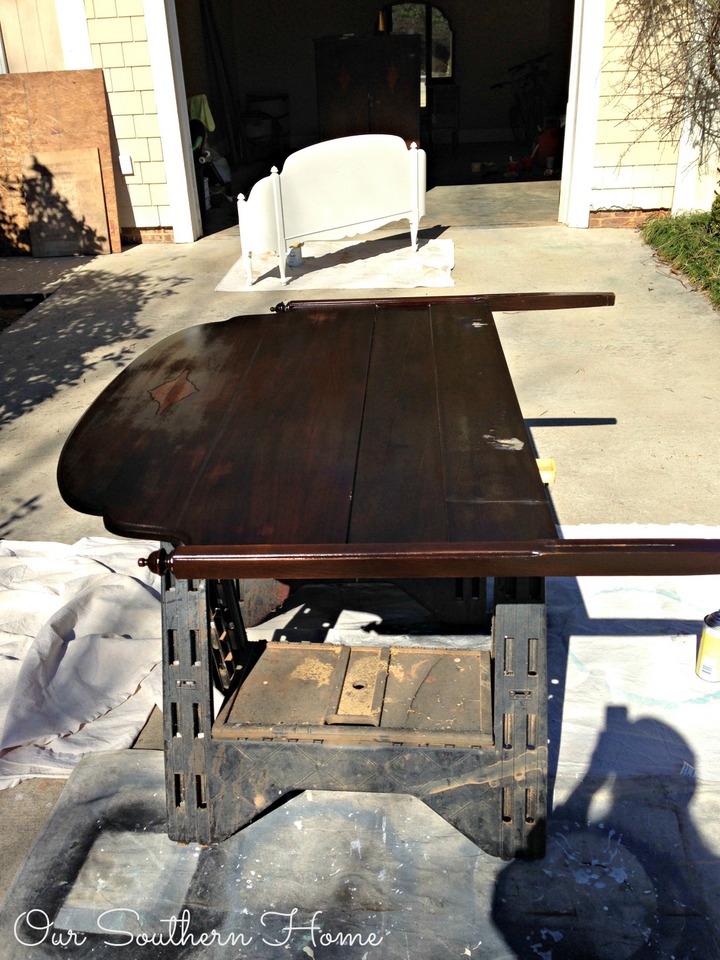
Even with this sander, it was a bit of work. Here are the before photos of the bed, dressing table, stool and armoire. These are working photos. I didn't have my light kits or tripod out.dressing tablearmoirefoot board and stool After I sanded and filled in bad places with wood filler, I was ready to seal with Shellac.You can see where this piece was sanded. This product seals the furniture preventing stain from showing through. This furniture was different in that some of the pieces were easier than others. The headboard was a LOT of work. I had the most issue with bleed through even after spraying with Shellac. I sprayed 2 coats on each piece of furniture. It must be done outdoors….it is smelly! It dries very fast. I used 3 cans.After a test, I was still having spotty bleed through so I applied 1 coat of primer. This is what I like to use. It is water based and dries fast. Very easy to work with! It takes no time to apply this.

Rust-Oleum 2004 Zinsser Bulls Eye 1-2-3 White Water-Based Interior/Exterior Primer Sealer, 1-Quart
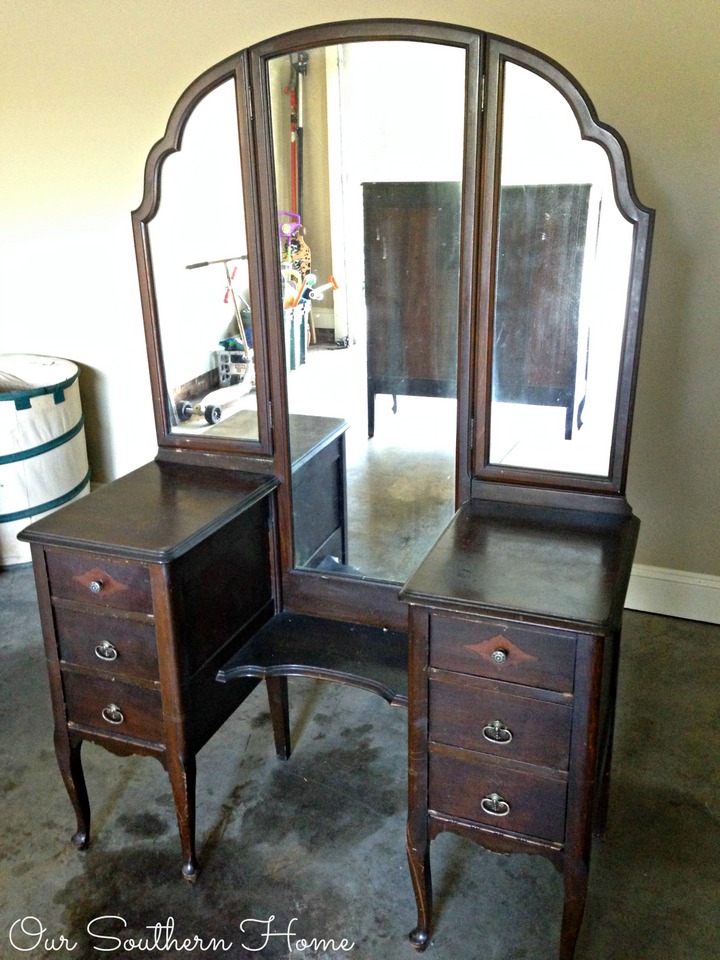
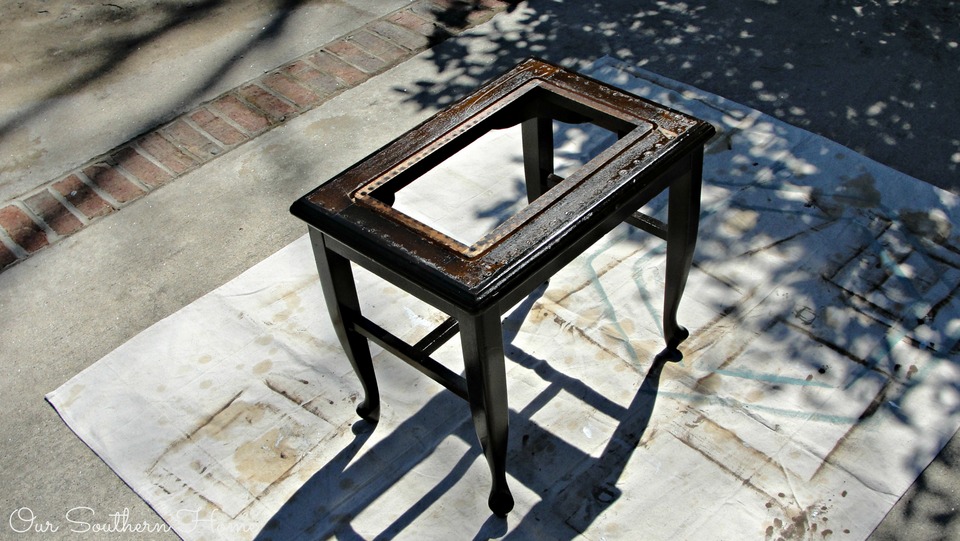
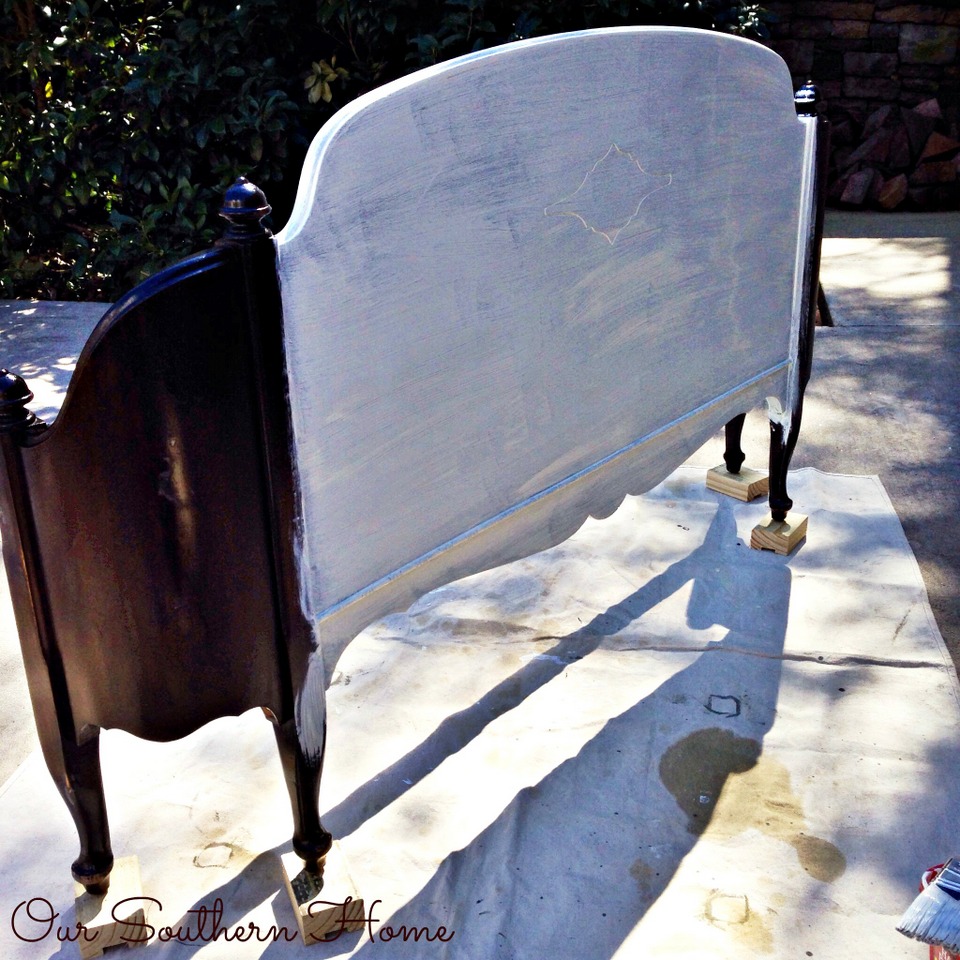
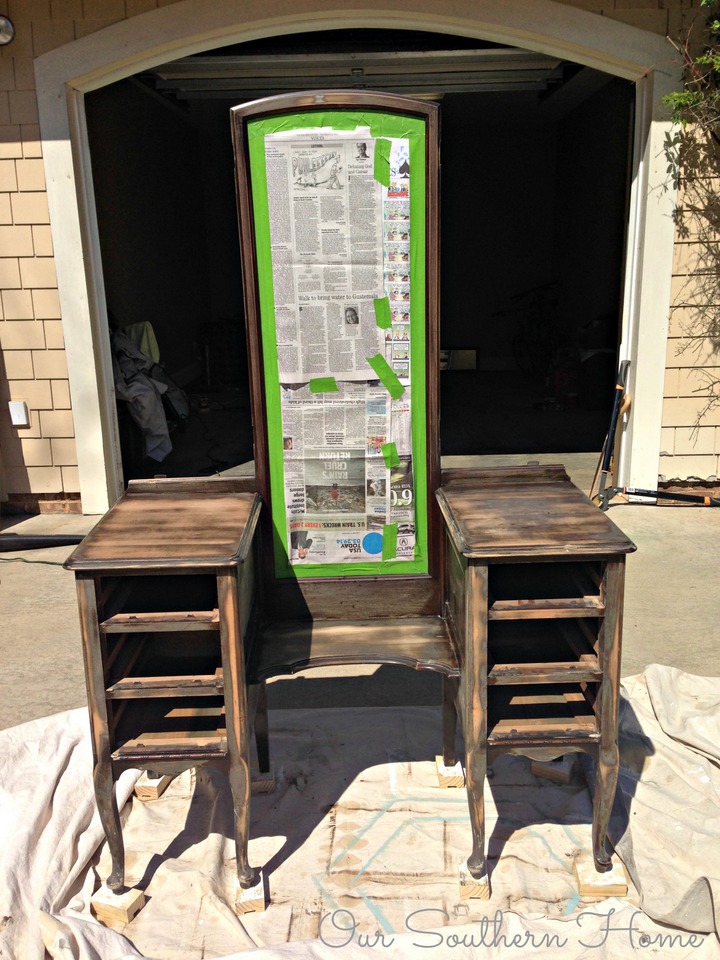
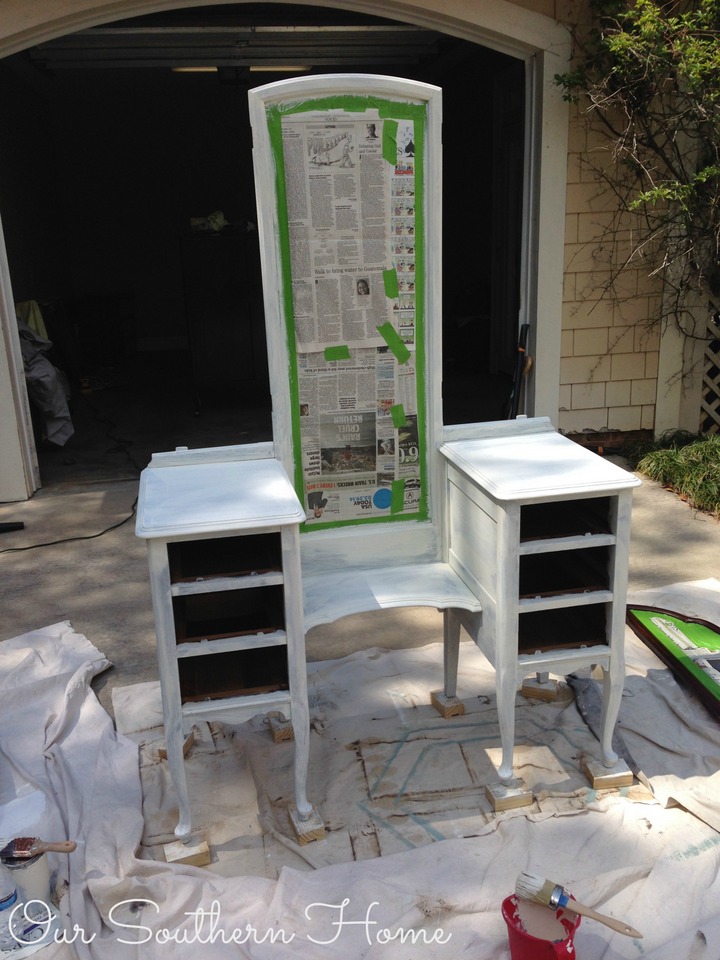
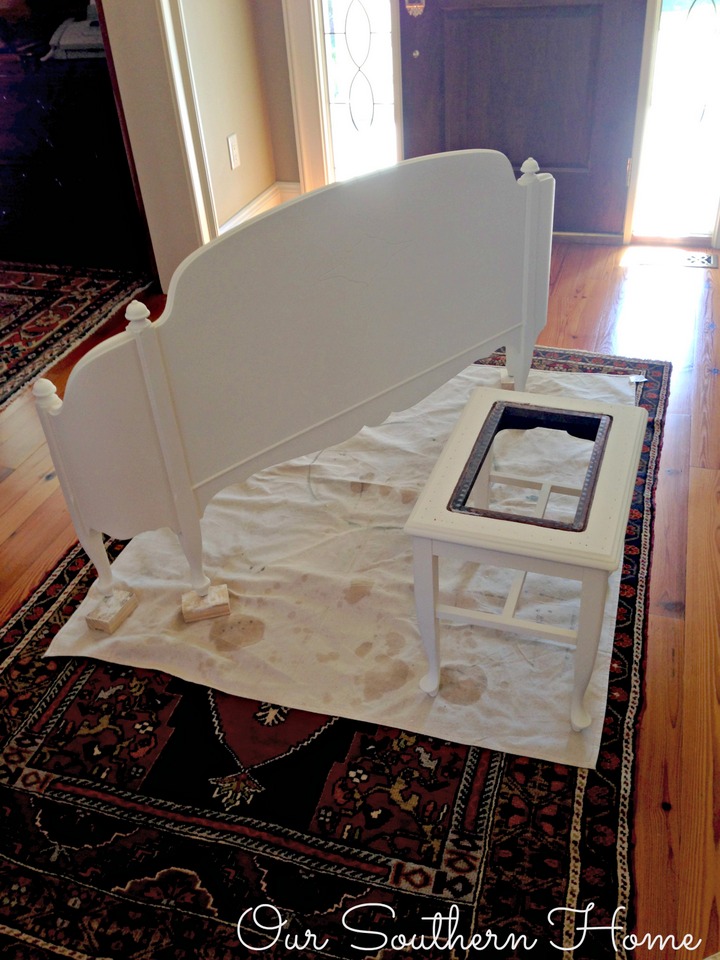
 foot boardThe foot board was a breeze. 2 coats of Shellac and 1 coat of primer. The headboard was a different story. I followed my same procedure. Except when I painted my first coat of old white, I noticed bleed through. So…I applied another coat of primer on top of the old white. No way I was going to continue applying layers of expensive chalk paint to have this happen. This photo shows the Shellac drying. It will be shiny.I could tell that after sanding, I wasn't going to have issues like I did with the headboard. I applied 2 coats of Shellac, 1 coat of primer and started to paint. You could apply several coats of the white primer by hand, but it was much faster to apply the spray Shellac and 1 coat of can primer. Plus, I was using what I had to get started without having drive into town at that moment.I was able to remove the 2 side panel mirrors, but not the center.I removed the doors and taped off the areas that were not going to be painted old white. My client wanted to leave the interior as is. It is full of drawers.I apologize for these poor photos lacking in detail. At the time I wasn't thinking of sharing a blog post…just getting the job completed. The center of the stool has upholstery.
 Headboard detail. I lost count as to how many coats of paint this baby received! The headboard had layers of old varnish with a gritty texture. That's why it was such a bear!I removed all of the original hardware and cleaned it up. It's not perfect, but using the original hardware helps maintain that vintage look we were after.
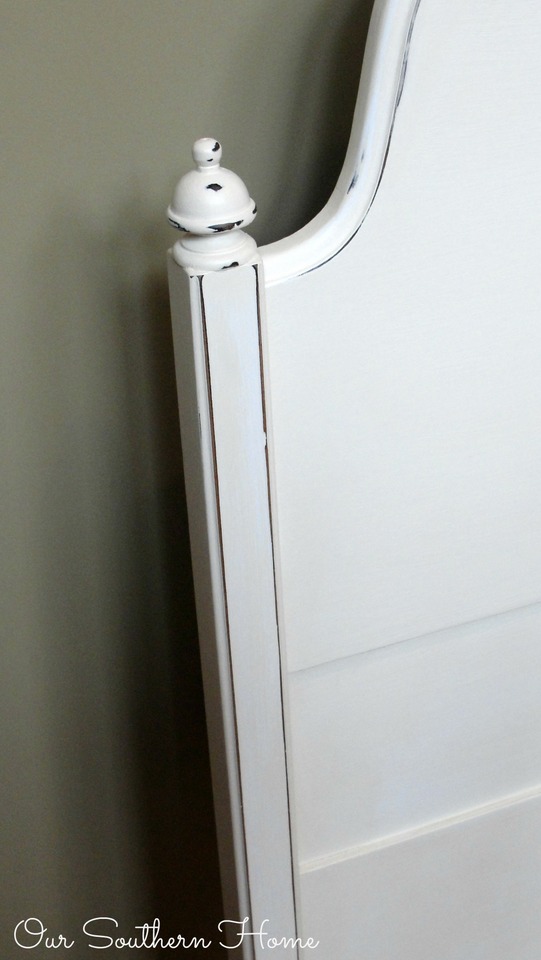
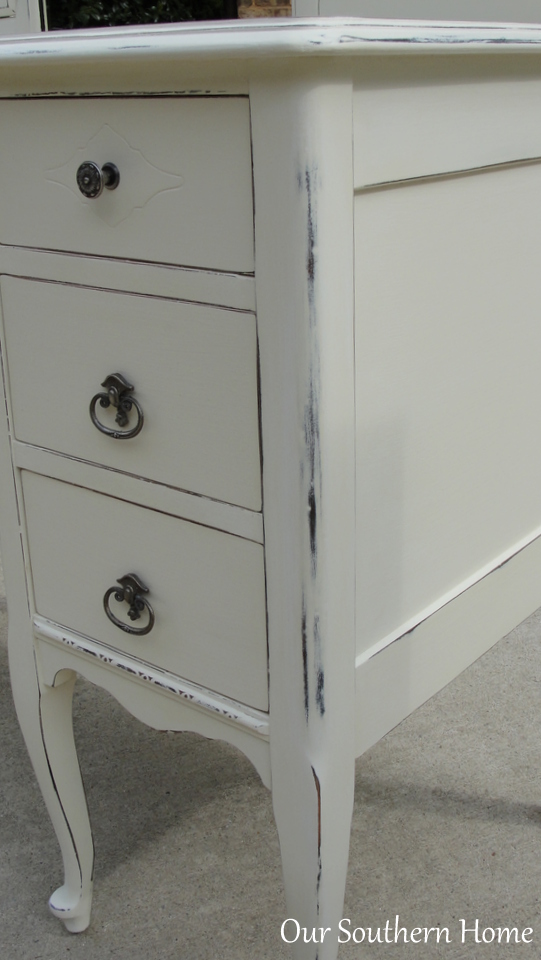
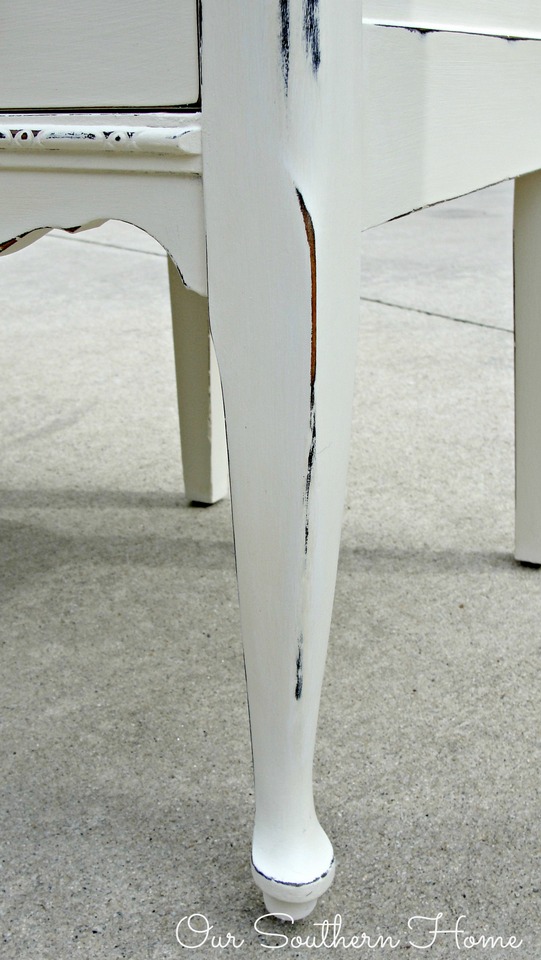
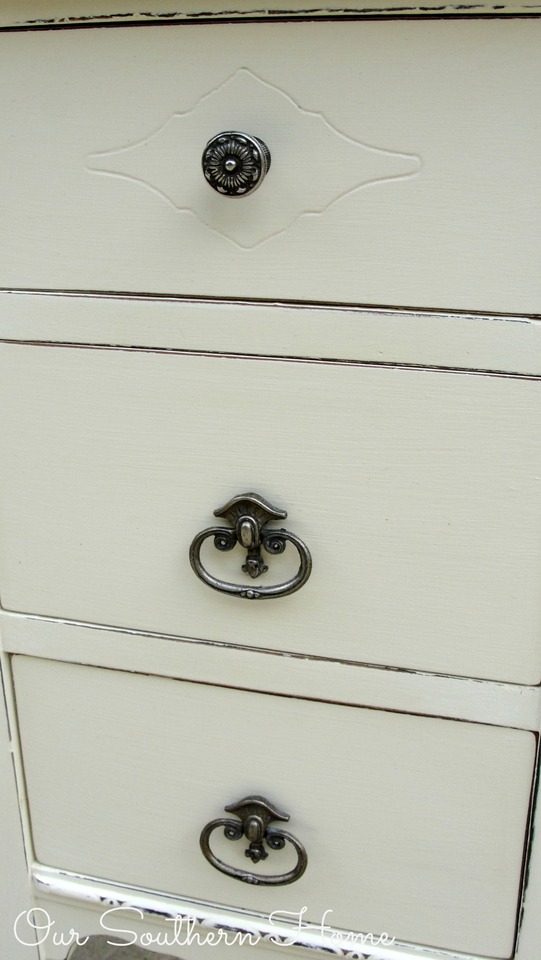
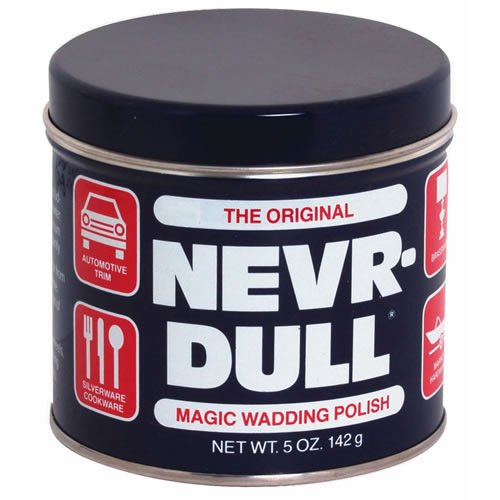
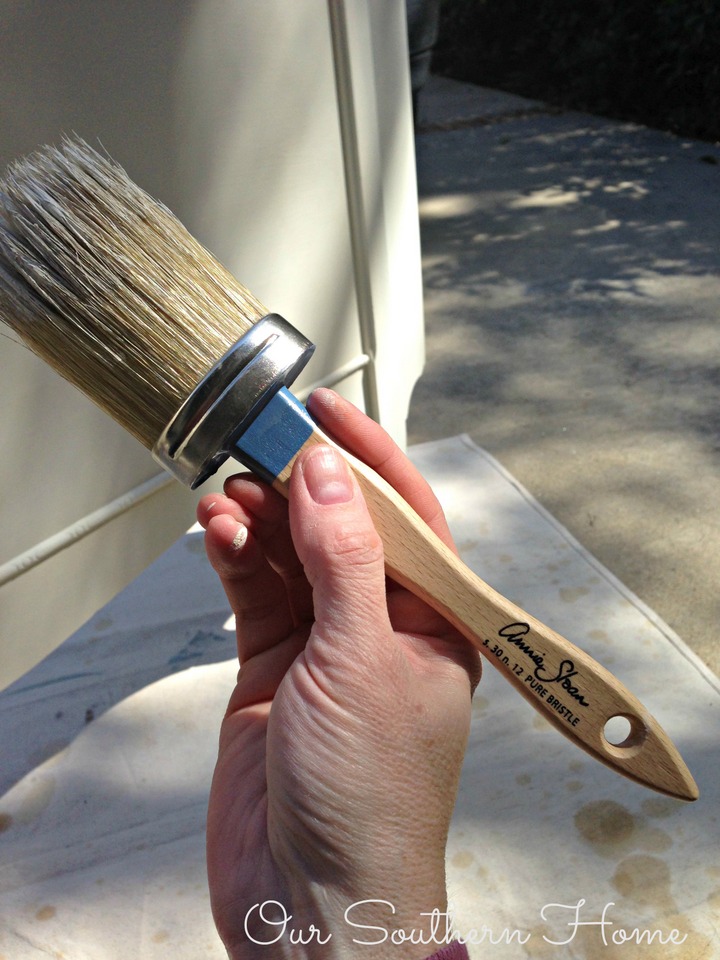
George Basch N/D “Never-Dull” Magic Wadding Polish 5 OzI finally broke down and invested in the medium-sized brush from Annie Sloan. Yes I cringed, but let me tell you…….it was worth every penny!!!Normally, with any piece that I paint there is no prep! I just clean the furniture, fill in any imperfections and paint!Older, antique dark stained furniture like this is where you may have extra work if using a light color. You need to do a test first if in doubt. My son's desk that I mentioned earlier was so bad that the first coat of white primer looked like I had painted it pink! I distressed lightly on the edges and areas of natural wear. I applied 2 coats of clear wax on the body. I applied 3 coats of clear wax on tops for extra protection. I buffed to a shine.In conclusion with this bedroom suit:cleansandwipe dust away2 coats of Shellac1 coat of white primer (more on the headboard)2 coats of chalk paintdistresswaxbuffLove! **This post contains Amazon affiliate links**Happy Painting!
Buffer


ohhh Christy! What a lot of work, but the end result is beautiful!! Lots of great tips for us.
Pinning!
gail
Thanks, Gail! It was a lot of work, but turned out beautifully!
WOW! Wish I had read this BEFORE I pulled out my hair refinishing an antique loveseat! After first white coat dried pink & gray, I painted 2 coats of 1-2-3 and still had bleed thru. 2 coats schillac then 2 coats AS paint! I have a matching chair to paint and now I know what NOT to do!!
That is such a pain when that happens! So glad the shellac worked for you!
Christy,
Today, before reading this post which I have pinned, I started to redo an antique nightstand and I am having terrible bleed through, the pink kind you mention. I even sanded most of the varnish and color off like you suggested. I have now painted two coats of white. Can I spray the shellac right over the chalk paint or do I need to sand again?
Thanks,
April
So sorry to just be seeing this. I hope you figured out your problem, but yes you can spray shellac anytime during the paint process and keep painting. If you have stubborn areas you may need to use a stain blocking primer as well!
I have this old dark drawer furniture and I’m planning to re-paint it. I’m glad that I found your great tips and ideas while searching for some inspirations in pinterest. Thanks Christy.
Thanks so much!!! I hope you have great success with your project!
do you have a picture of the stool with the upholstery?
I bought that same stool for $1 at an antique store but had no Idea how I should go about covering the hole in the center lol
I’m sorry, but I do not. When she delivered the furniture to my house for the job, I had asked her to already have it removed ahead of time. I didn’t want to be responsible for removing the nail head trim. The center was a thinner plywood base with foam and fabric. There is a recessed area for it to rest. You could have this cut at Lowes. The fabric was stapled underneath and then attached to the top with nail head trim all around.
Everything came out great! I didn’t see what you used the “Never Dull” for…was it distressing?
Thanks! Never DUll was to clean the brass hardware.
Love these projects…I have a dresser almost identical to that one and it is covered in dark mahogany type paint plus a heavy layer of poly(?)…How do you get the black look on the edges? do you paint black underneath first or what? Thanks, Marilyn
Thanks!!! No I didn’t paint black. It’s the dark stain coming through when I distress the white. If you have a heavy coat of poly, I’d definitely give it a light sanding to give the paint something to cling to!
I am using ASCP to paint my bathroom cabinets. They current have white oil base paint. I want to distress them to look like they once were stained. After you did all of the sanding and priming, how did you make your distressed places dark? Beautiful work!
Thanks so much!!! I got the dark look from the originally stained wood. If you want a color to come through with your sanding, you can painted a darker black or brown under your white. When you sand the edges, it will show.
WOW! I had an identical set but sold all of it in original condition which was very good. Now I want to paint my Queen Anne set. Thanks for sharing this information. ..very helpful!
Amazing transformation!! Ugh, I ran into that same “bleeding” issue before … learned my lesson, fo’ sho’ !! I know your client must be thrilled with her “new” pieces!! Outstanding!!
Wow, a lot of work, but it turned out beautifully. Do you have any suggestions for painting over veneer? I would not be worried, except that I have four inside kitty kats and three pups, that have and might again get on the furniture. I only have cheap stuff, but if I paint it, I so want it to last at least a decent while. lol
This set turned out beautifully, Christy! I have had bleed through on anything mahogany. I shellac those pieces too with a foam brush and the can of shellac and it dries super fast and lets me get on with my project. I didn’t realize they made it in a spray. I’m sure the little girl is thrilled to have this in her room! Very nicely done!
Thank you for sharing your process. But can you share or advise about paint sprayers? I have been looking and researching and am more confused. I have a issue with strength in my hands so would like a lightweight sprayer. But a good one. And cost is all over . I’m looking in the $100. -$150 range. I paint small items and furniture. I appreciate you input.
Thank You Barbara Ann
http://Www.etsy.com/shop/barbaraannscreations
I am so glad to read your tips, Christy! I’ve had problems with bleed through when painting with AS white, even when I used primer. Now I know to use shellac! I did a dresser for a friend’s teen daughter this summer and had that problem on one of the legs. Luckily it was in a place that wouldn’t be seen.
I’m sure your client was pleased with the end result of your paint job on her set of furniture. It’s perfect for a bedroom!
Lovely bedroom set, you did a fabulous job! I am going to try “never dull” wax, first time I hear about it.
Thanks! Just wanting to make sure you know the Never Dull is for the hardware and not the paint. Have fun with your project! ~Christy
I love the dresser…what a transformation!
It turned out to be exquisite. Gorgeous. You do great work.
Whew!! Lots of work! It does look great! To think of all the great “old” pieces of furniture I’ve gotten rid of over the years makes me cringe! I had an antique dining room set that I wish I had now. What we’ve got is a Early American looking oak. And as far as the Anne Sloan brush? The right tools makes jobs so much easier.
Christy the pieces turned out beautiful!!
It all turned out beautiful Christy! Many people really have no idea how much work can go into painting furniture, especially all of the unforeseen things! Happy Friday ~Sonya