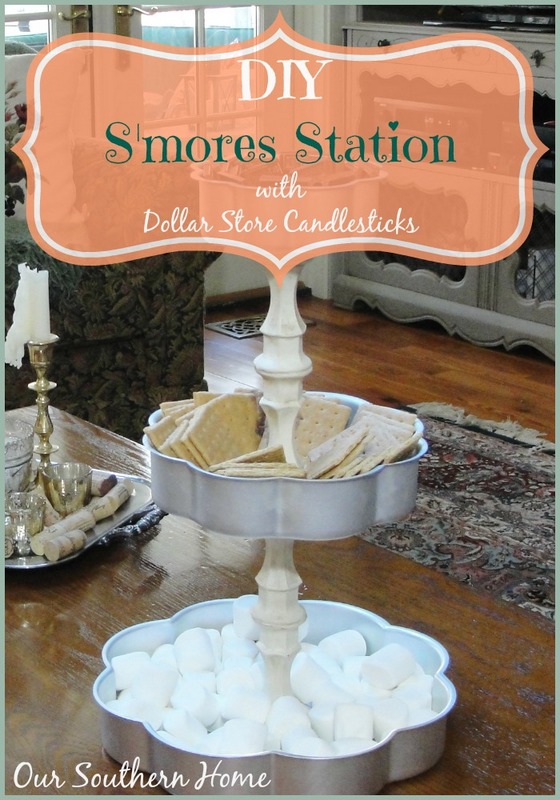
Dollar Store Challenge {S’mores Station}
Do you love a great challenge? Especially one that is easy on the budget!!!
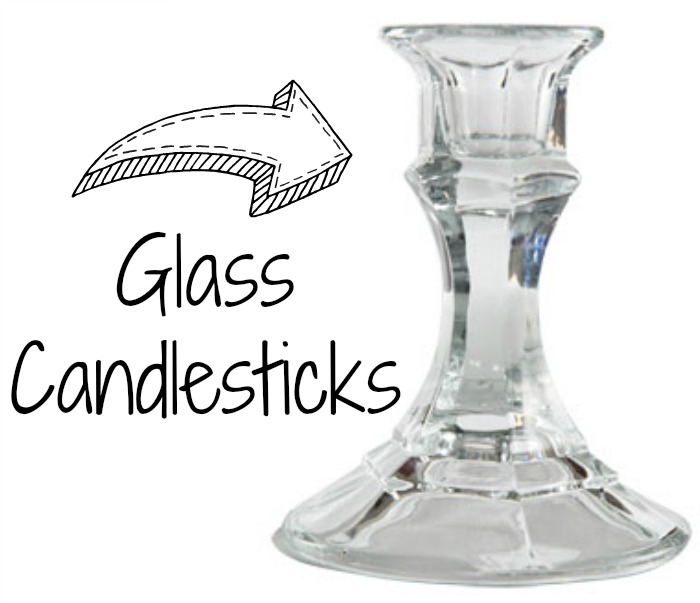
I sure do! My friend, Barb, over at The Everyday Home had yet another amazing idea! She has created The Great Dollar Store Challenge. This will be a monthly event where 1 dollar store item is selected and each and everyone is invited to create an item using the monthly selection. This month is…the glass candlestick! Bloggers, please link up your project below. You didn't create a project…no problem…click on the links below that interest you and get some new ideas! Be sure to check back in regularly as new links will be added! You do not have to be a blogger to click on the links below!
I am co-hosting the very first party with the other ladies listed below! Be sure to check out their creative blogs!
Here is my project! I created a Tiered Stand that I am using as a S'mores Station using 4 dollar store glass candlesticks.
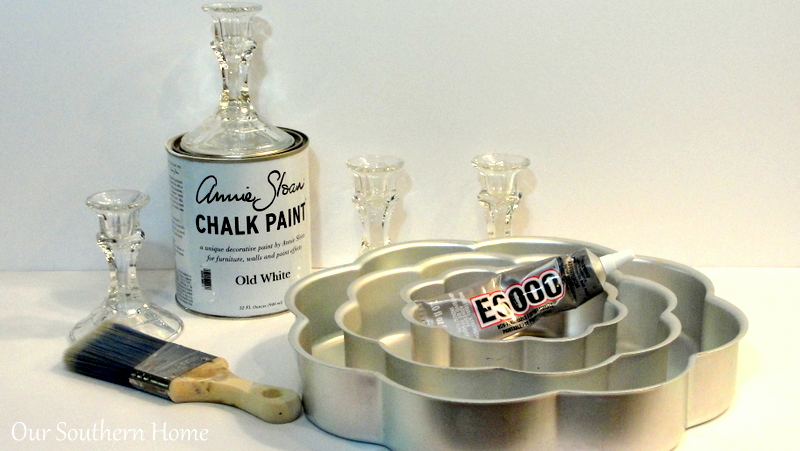
You will need:
4- glass candlesticks ($1 each)
3 cake pans (I had on hand)
E6000 adhesive (on hand found in craft stores)
Annie Sloan Old White Chalk Paint
Annie Sloan clear and dark wax
1) I washed the candleholders and cake pans. Let them thoroughly dry.
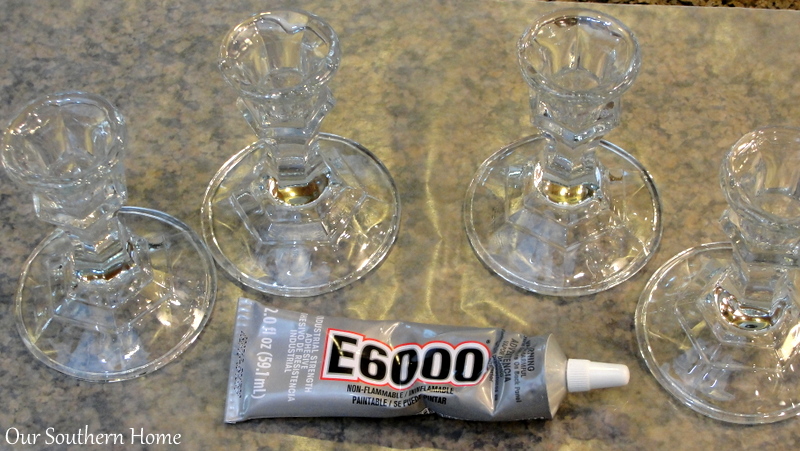
2) Apply the E6000 clear adhesive around the top edge of each candleholder. Let sit for 2 minutes. Then flip one over and match the part where you place the candle…..the smaller part. Marry the two ends together. Do the same with the other 2. Now you have your 2 columns that the pans will rest on. If any adhesive drips, immediately wipe with a wet paper towel. I let mine dry and harden overnight.
3) I applied 3 coats of the Annie Sloan Chalk Paint in Old White. I started with a regular brush, but switched to a foam brush. I liked it better on the glass.
4) After the paint was dry, I applied a coat of clear wax and then dark wax. Buff out the dark wax.
5) Attach the 2 columns to the pans and adhere with E6000. Let dry!
I used to decorate cakes for my kid's birthdays when they were younger….colored icing and various tips! Self taught with a little help from my mom. She took many courses on it when we were younger. This flower petal cake pan set actually has one more larger pan with it. I haven't used them in probably 5+ years. I love the way they look with the candlesticks, but I'm going to honest here…..I didn't glue them with the adhesive….at least not yet! The set of 4 pans was pricey. I'm not quite ready to adhere them permanently. I so love the look. My goal is to scour thrift and antique stores until I can find some old vintage pans to use instead. I looked in various stores, but couldn't find the look I wanted. I encourage you to do the same when looking for the cake pan part. You could also do this with melamine plates, glass or regular dinnerware, and how about a graduated set of tight weave baskets! The E6000 is strong! I love this stuff!! When carrying, I'd still support from the bottom pan or plate.
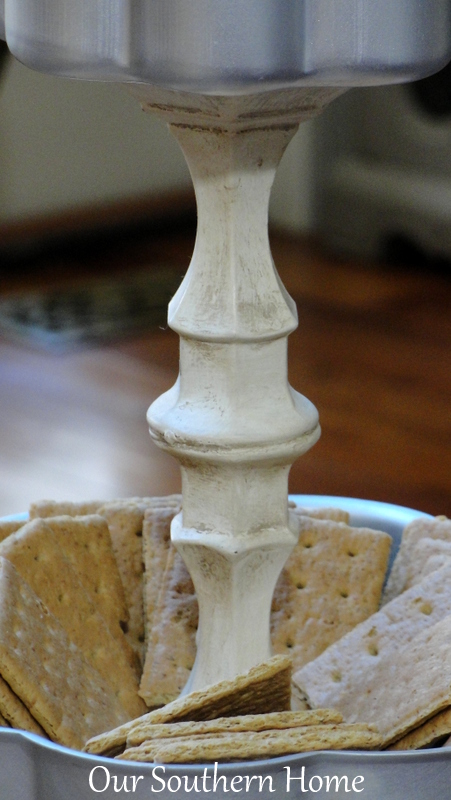
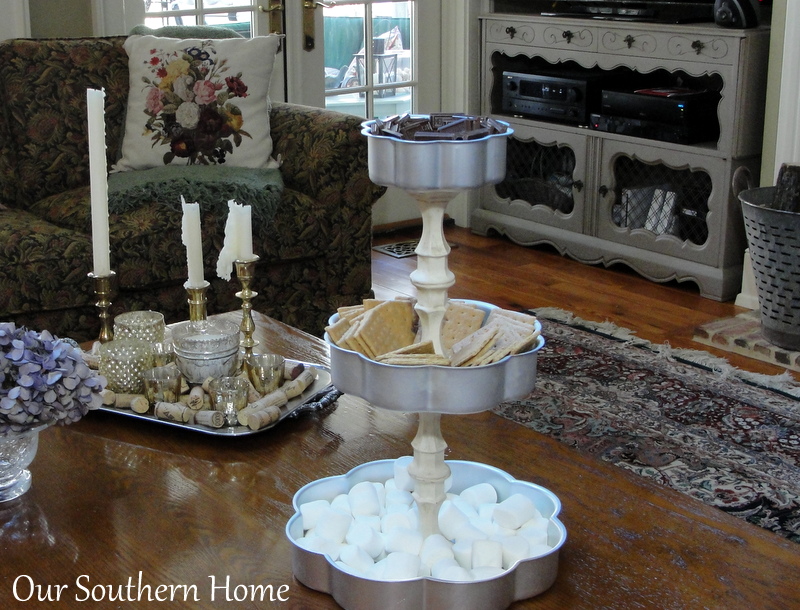
Old White with the clear and dark wax really gives the tiered stand a vintage feel.
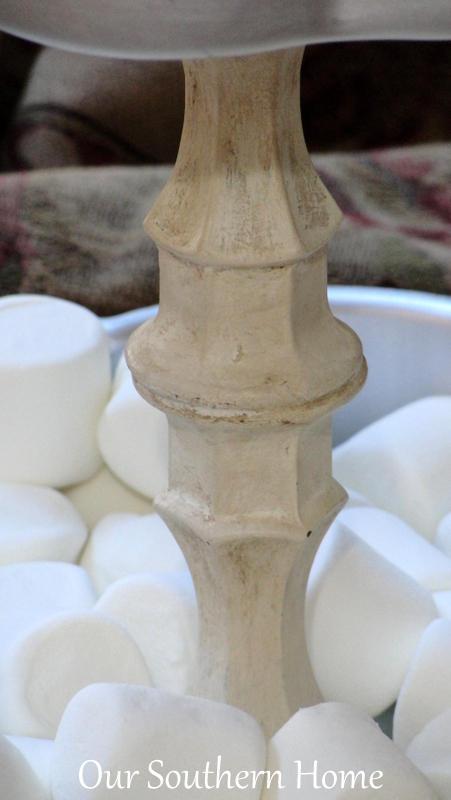
Hard to believe they were glass candleholders!
Ashlyn's 15th birthday is on the 30th so I need to find something quickly. She has her group of friends spending the night for a home-made spaghetti dinner, movie night complete with popcorn, roaring fire and S'mores! I'll be sure to update to let you know what I decide. I may just use these. They haven't been used in so long that I may as well put them to good use! I see many uses ahead for it from serving food for get-togethers, a coffee bar station, storing craft or office supplies! Decisions, decisions!
One thing that you will want to do when serving food from this, is to place some clear plastic wrap just around the base of each candleholder. It won't be seen, but will protect the food from the small bit of the painted surface. The cake pan of course is food safe!
I'd love to give a shout out to my sweet and helpful local Dollar Tree cashier, Dawn. Thanks for the warm smile and kind words!!!
Time for you to link up your candleholder project or find something to inspire you below!
You can also follow the Dollar Store Challenge pin board HERE on Pinterest!


Welcome to the very first
Great Dollar Store Challenge.
Each month, a new Dollar Store item will be chosen, and then I will
issue a challenge to all Bloggers to create something one-of-a-kind
with their own unique spin.
This month's Co-Hosts for this event are:
Tammy with Deja Vue Designs

Jane and Leo with Cottage at the Crossroads
Christy with Our Southern Home

and Sheila with Plum Doodles

Please make sure you stop by these lovely blogs and say hello.
Link Parties that OSH parties at on occasion!
Monday: Between Naps on the Porch
Tuesday: The Scoop at Cedar Hill Farmhouse and Inspire Me Party at A Stroll Thru Life, Setting for Four – Project Inspire{d}
Wednesday: Savvy Southern Style
Thursday: From My Front Porch to Yours, 52 Mantels, Stone Gable, Home and Garden Thursday at A Delightsome Life, The Shabby Creek Cottage ,No Minimalist Here
Friday: French Country Cottage, My Repurposed Life, Miss Mustard Seed Furniture Friday, Common Ground, The Charm of Home, Rooted in Thyme,Imparting Grace, Keep Calm and Link Up, at the picket fence – Inspiration Fridays, My Romantic Home – Show and Tell Friday, Craftberry Bush – Inspiration Gallery Friday, SnapCreativity – Show and Tell

This month's item:
Now, let's get on with the Challenge.
We can't wait to see what you have created…

Use hot glue to stick the candlesticks to the pans. You can just pop them apart and peel the glue off when you want to use them as pans. I’ve done this with glass plates when making a cupcake stand.
Great idea!! Thanks!!
I have some vintage finds that I wanted to make a tiered server from without using permanent glue – that way they can be taken apart for storage and I can reuse the pieces later – try Museum Putty or Quake Hold. Amazon or Home Depot sell it!
Yes, the Quake Hold is a fabulous product. With kids using this, I wanted to make this more permanent. I think using the Quake Hold for vintage serving pieces on a buffet table for temporary use is a great idea! Don’t want to harm those. I did find some inexpensive cake pans on EBay that I ended up using! Let me know how your project turns out! Enjoy the summer! ~Christy
I love this idea, how fun. Thanks tons for linking to Inspire Me. Hugs, Marty
Thanks bunches, Marty! Always a great party! XXOO ~Christy
WHAT A GREAT IDEA!
And what a fun party!
🙂 <3
Thanks friend! Ashlyn had a wonderful birthday…15!!! Big hug~Christy
Christy, OMGosh..a smore station? How could this not be completely awesome. I love it. Way to go.
tammy
Thanks so much Tammy! Guess what? I found some replacement vintage pans on EBay!!! Have a great week!! XXOO Christy
When using the annie sloane paint do you still need a primer?How do you apply the wax and how long do you leave it on for? I think this is a great idea and very versatile for many things. I saw a woman at a stamp store had made this exact thing and stored all kinds of stamps and crafts in it at the store. It was so cute and shabby chic looking.Susie
Susie, thanks so much!!!! You have no prep work or sanding with ASCP unless you need to repair damaged wood! It’s a great product!!! If a big project, I like to use a wax or chip brush. In most cases I use old t-shirts. For this, I applied thin coat of clear and really worked it it. Then I immediately applied the dark and worked it in the same way so that it just shows sparingly. If it is too dark you can “erase” with clear. I’ll be sharing an antique buffet that I’m almost finished with in detail. It’s our new TV cabinet!You can actually see it in the photos! Be sure to follow by email so you will get that post! So happy you stopped by!!! ~Christy
wow,Awesome!
Thanks so much!!! ~Christy
I love this Christy!! What a fabulous and creative idea you came up with here! 🙂
Nancy
Thanks so much, Nancy!!!! I found some replacement pans on EBay this morning!!! ~Christy
You throw my kind of party, Christy. I love your s’mores station, and like you I think it has such a perfect vintage vibe with the antiqued old white paint and the aluminum pans.
So far, this is my favorite project in the Dollar Store Challenge!
Oh, wow Amy!! Thanks so much! You’ve just made my day! XXOO ~ Christy
Not sure what the problem is Christy, but in the last several posts, I’ve not been able to view the pics you post, only the text. Any ideas about what is wrong? It’s probably on my end, but I miss seeing the pics.
That is strange, Linda!!! So sorry for your problems. I appreciate you letting me know. What browser are you using? I sometimes have that issue when visiting sites and it means my cache is full. Have you tried clearing/deleting cache/history? let me know!!! That usually works for me. I’m not seeing any blog problems. ~Christy
Christy, I LOVE how this came together. It is perfect and so simple. I pinned this for an idea for the new house. Hope your daughter and friends have fun and enjoy the movie and popcorn and how could I forget the Smore’s!!
Cynthia
Thanks so much, sweet friend! Have a fabulous weekend!! XXOO ~Christy
I must admit, I breathed a sigh of relief when you said you had not glued the cake pans. My first thought was I would have to spend a fortune to get those beautiful cake pans. I too just love ‘my’ Dollar Tree Store. And it is about the only really good store close to me (only a mile away) and I thank them every time I go there. I would just use some Dollar Tree plates and maybe a matching bowl for the very top. You know? Keep those gorgeous pans for what they are intended for.
I recommend making a Red Velvet (from scratch, it’s easy too) Cake for Valentines Day with those pans, then a Green Velvet Cake for St. Patty’s Day……. yes I do it. And why not use them to bake a gorgeous birthday cake for your daughter, her friends and enough for the whole family. Please, please, please keep them for cakes?
Thanks so much!!! Red Velvet is my favorite. I plan to make Ash’s cake with the pans this year. Guess what I found on EBay this morning?? A set of tiered pans to use for it for $13. Mine are selling for $50-60 there! Have a great weekend! ~Christy
You are so clever! From the picture, I never would have guessed that you used dollar store candlesticks to make this. I’ll bet you won’t have any trouble finding thrift store pans to use to make this permanent. I am looking forward to seeing everyone else’s projects.
Thanks so much, Paula! It was really quick and simple to do. Going to really be hunting for some pans!!! ~Christy
i love what everyone has come up with. It looks like alot of people had pedestals on the mind.
Thanks, Laura! I agree…pedestals were popular, but so fun looking at the original spins on it! Looking forward to next month! Have a great day! ~Christy
Christy, this is such a clever use of the candleholders, and I love the finish that you gave them. If I ever run across a set of inexpensive pans, I’ll let you know. I’ll get a set for myself too because I love your idea!
Awww, thanks Jane! I’ve got to find some pans this week for Ash’s sleepover next Saturday! Fun partying with you! ~Christy
Super super cute Christy! You are so creative. I love the wavy pans! What a great idea to stack them! ~Tammy
Thanks so much, Tammy!!! Those are really fun pans! Fun partying with you! ~Christy
I love this party!! Something new to look forward too!
Thanks so much!!! I think it will be a great way to get affordable decorating ideas!! ~Christy
Christy that turned out AWESOME!! Love it!
Thanks so much Martina!! It was a fun project!!! -Christy
LOVE it Christy! Funny thing is I have the exact candles sticks! I should have joined this challenge, maybe next time! ~Sonya
It was a fun, inexpensive craft! Thanks!!! ~ Christy
Love this idea! But I was kinda glad to hear that you didn’t actually glue the pans!! As a {former} cake decorator afficianado, I know those cake pans aren’t cheap! Keep thrifting… you’ll find just the right thing!
Thanks so much!!! Glad you agree on the cake plates! Don’t have to twist my arm to thrift! Lol!! ~Christy
This is great Christy! Could be used for so many more things too!
Thanks, Christine!! It was fun!! ~Christy
Christy, That is the cutest darn idea! I would have never thought of that. I love it.
Thanks, Kathy!!!