DIY Beverage Station Tutorial and Virtual Home Depot Party
*This post was sponsored by The Home Depot. I was provided compensation for my time. All opinions are mine! More Below!**
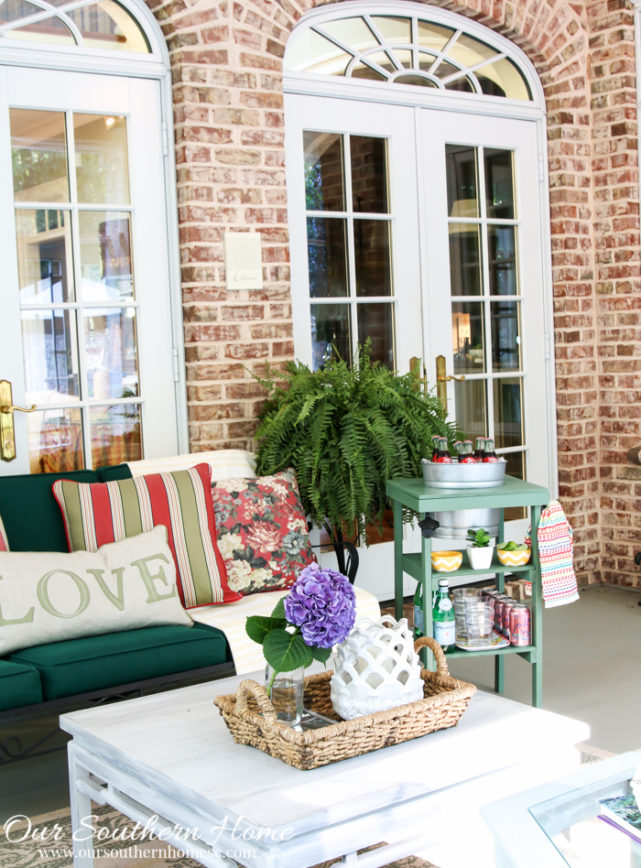
This time of year, I am all about bringing the indoors out and enjoying our outdoor living spaces. I am sure you know by now that our screened porch is our go-to summer spot.
Anything to add a bit of vintage farmhouse charm and functionality to our porch has me ready to conquer the next project. Today's project had me ready to break out the power tools.
This DIY Beverage Station is a fun new project from the DIH Workshops at your local Home Depot. This month's project is June 16th from 6:30-8:00pm.
It's perfect for a girls' night out with friends, family, church groups, co-workers and more! It's the perfect way to expose yourself to the use of power tools guided by a Home Depot professional to build your own Beverage Station.
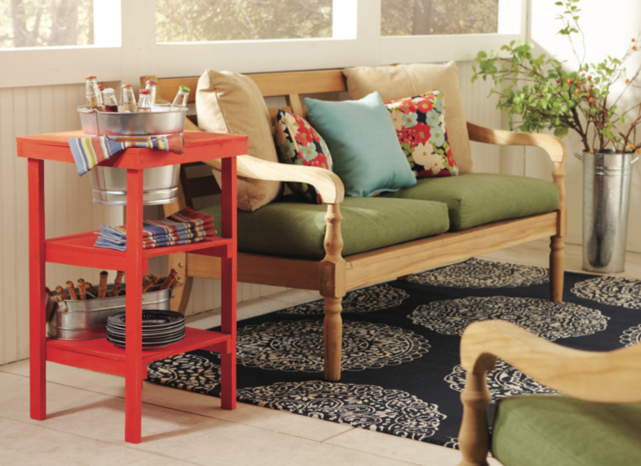
Here is The Home Depot's project example. I love the bold use of orange. It really ties in the space with the floral pillows.
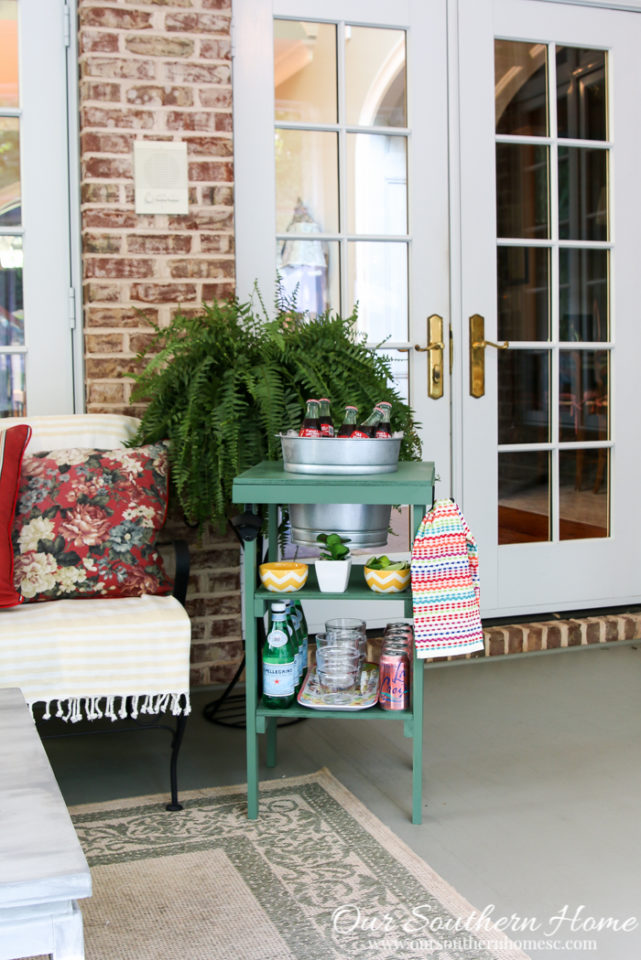
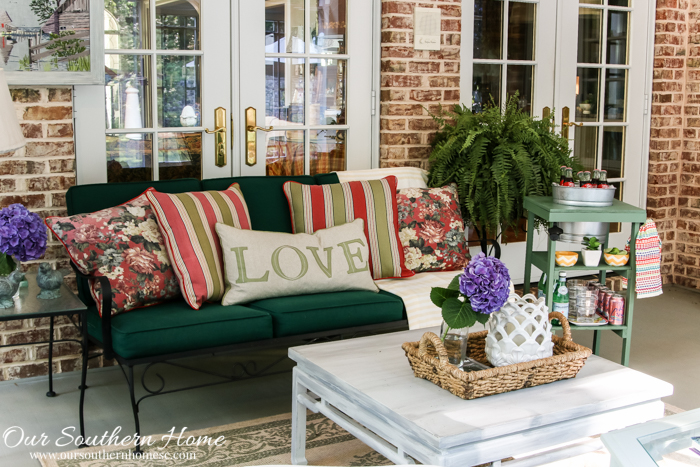
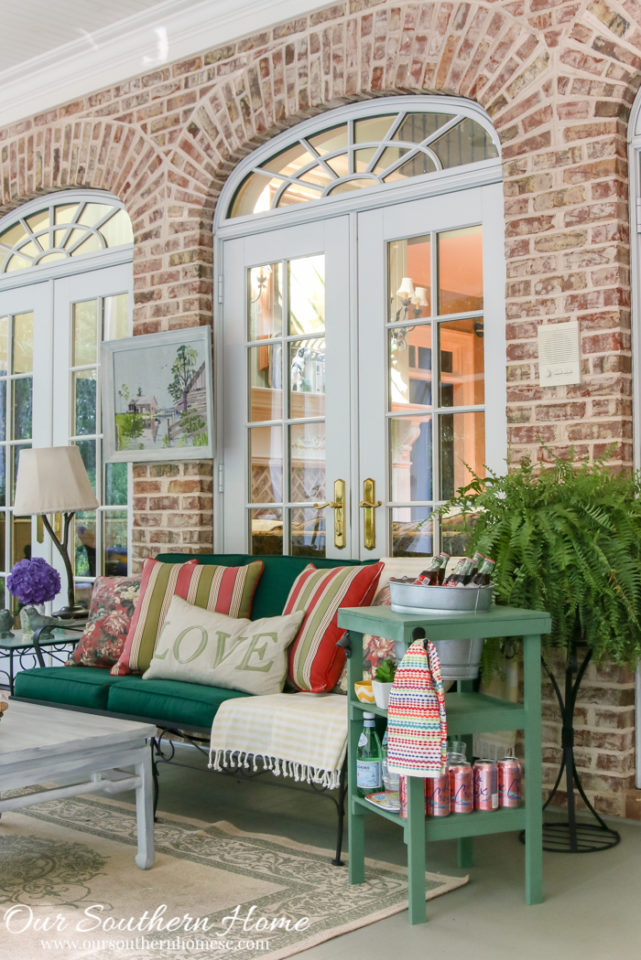
Here is my version. I love that it has that vintage look that I like and is so functional and easily portable wherever the fun takes you!
You will need the following supplies to make your own:
- 1 – 1⁄2˝ x 2´ x 4´ Sanded Plywood Board
- 3 – 1˝ x 2˝ x 8´ Common Board
- 1 Box – 1 1⁄4˝ x 18 Gauge Brad Nails
- 1 – Twine / String
- 1 – Paint or Stain
- 1 – 10 Quart Galvanized Pail
To Personalize like mine, you will need:
- Rust-Oleum 2X Ultra Coverage spray paint in Satin Moss Green (3-4 cans)
- 1 hook of your choice for towel
- 1 bottle opener of your choice
- paintable/stainable wood filler
Tools Needed:
- Circular Saw
- 18-Gauge Cordless Brad Nailer
- Drill
- Drill Bits
- Measuring Tape or Carpenter’s Square
- Pencil
- Safety Goggles
- Sanding Block
- Reciprocating Saw (Jigsaw)
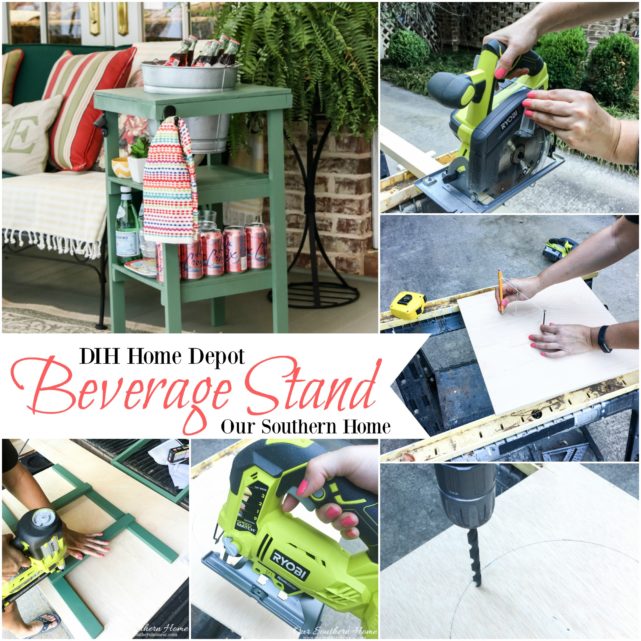
The first step is making your cuts with the circular saw. When you are finished, you should have:
From the 1˝x 2˝ x 8´ Boards
(4) 1˝x 2˝ x 28 1⁄2˝ Legs
(2) 1˝x 2˝ x 16˝ Long Frame
(2) 1˝x 2˝ x 14 1⁄2˝ Short Frame
(4) 1˝x 2˝ x 14 1⁄2˝ Shelf Brace
From the 2´ x 4´ Plywood Board
(1) 16˝ x 16˝ Top Shelf
(1) 141⁄2˝ x 13˝ Middle Shelf
(1) 14 1⁄2˝ x 13˝ Bottom Shelf
I then sanded raw edges and spray painted the pieces with the exception of the top of my board.
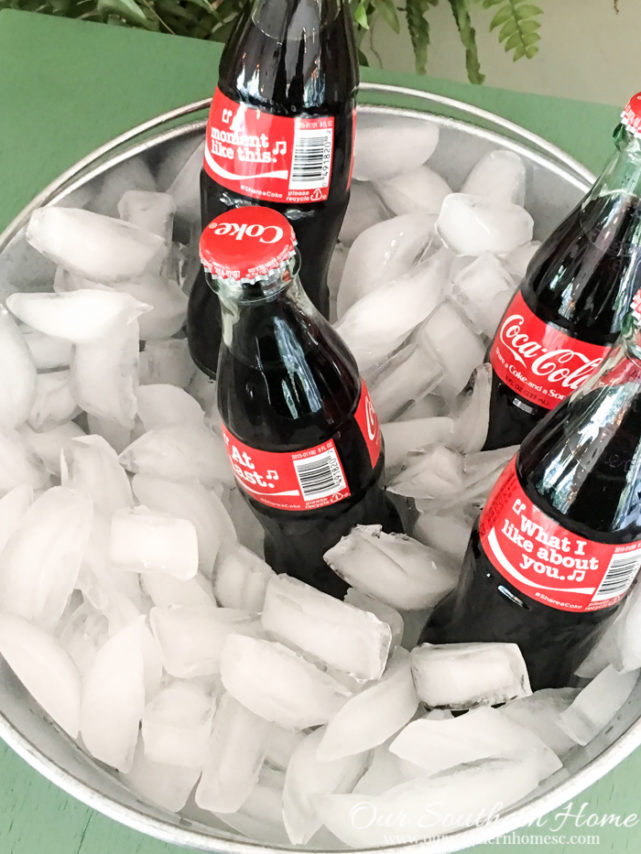
Create your circle for the bucket to rest:
- Mark the center of the 16˝ x 16˝piece of plywood.
- Nail a nail into the center mark and tie a string around the nail head on one end and to a pencil on the other end.
- Make sure that the string when stretched from nail to pencil is 5˝. This is very important. Too big and your bucket may slide through.
- Draw a circle, keeping string tight. You should have drawn a 10˝ diameter circle.
- Next, using a 1⁄2˝ drill bit, drill one hole inside the edge of the circle. This is where you will insert saw blade.
- Using the reciprocator saw (Jigsaw), cut the circle out around the edge.
Assemble your parts:
Top Shelf Frame
- Stand the (2) 16˝ long frame boards on end and parallel to each other.
- Sandwich the (2) 14 1⁄2˝ short frame boards between the long boards to create a 16˝ x 16˝ square frame and secure with brad nailer.
Leg Frame
- Lay (2) legs flat 14 1⁄2˝ apart.
- Using brad nailer, attach (2) 14 1⁄2˝ shelf braces to legs with the first attached at 7 1⁄2˝ up from the bottom of the legs (for bottom shelf) and the
second attached at 171⁄2˝ up from the bottom of the legs (for middle shelf). - Repeat with the other (2) legs and shelf braces.
Assemble the Station
- Place top shelf frame on flat surface and insert leg frames upside down into frame with shelf braces facing inward, keeping legs flush with the corners and top of frame. Secure with brad nailer.
- Ensuring legs are secure, turn station over and lay (1) 14 1⁄2˝ x 13˝ section on top of the bottom shelf braces and secure with brad nailer.
Repeat with 14 1⁄2˝ x 13˝ piece for middle shelf. TIP: Attach bottom shelf first, then middle shelf. - Finally, place the 16˝x 16˝ piece on top of shelf frame and secure with brad nailer.
- Spray paint the top of the beverage stand and touch up any other areas.
- With a drill and appropriate drill bits per instructions, install the towel hook and bottle opener.
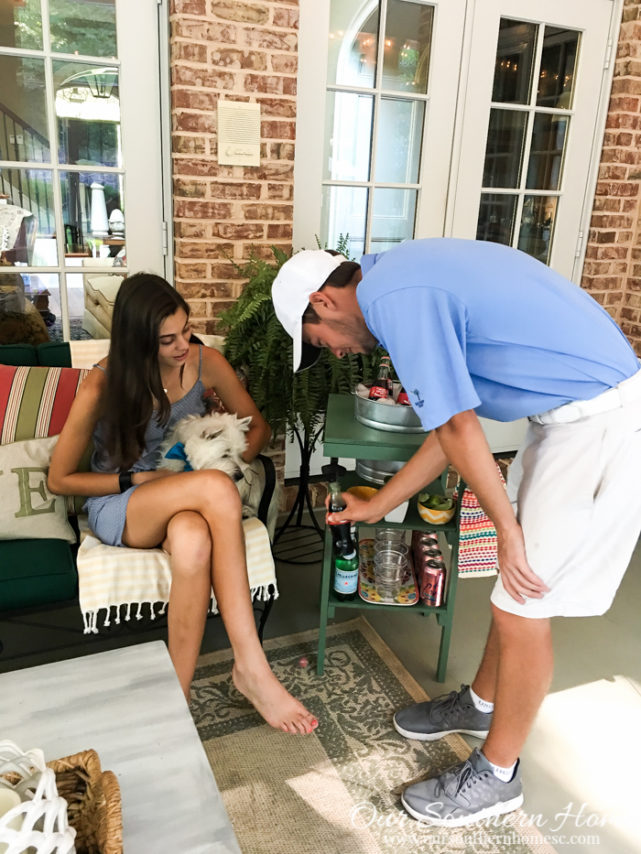
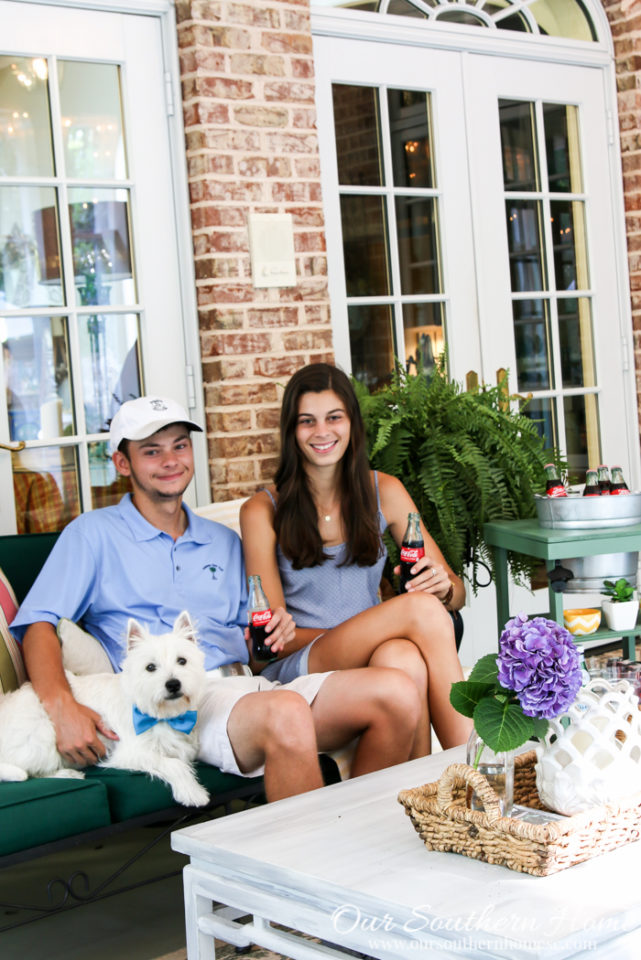
It's perfect for a family evening at home.
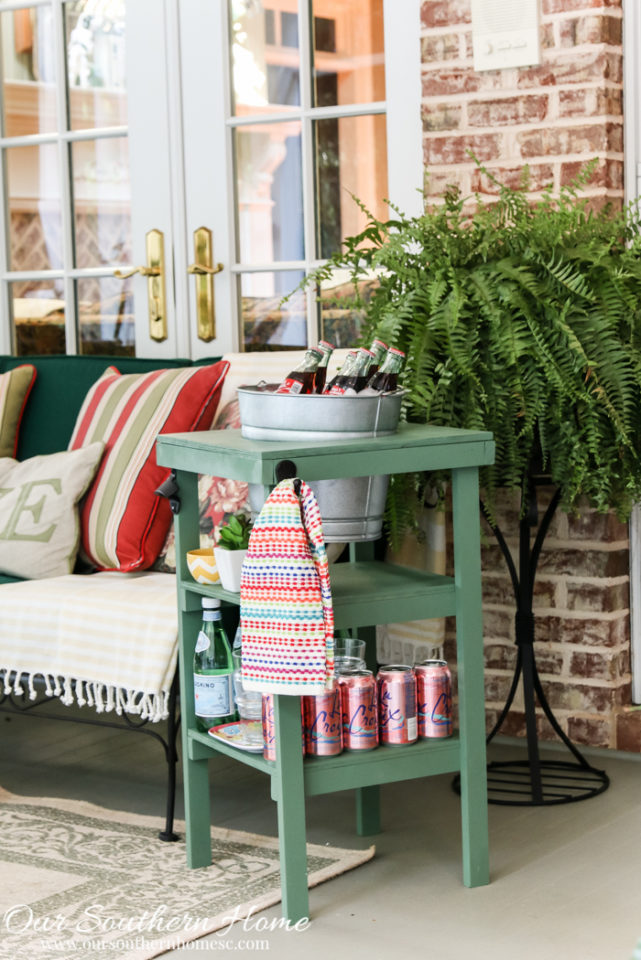
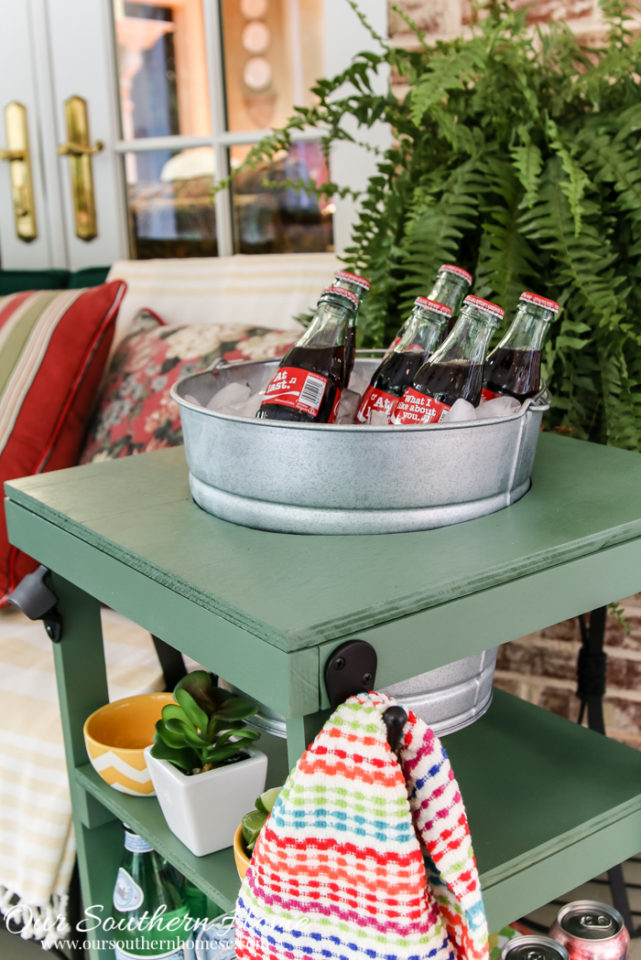
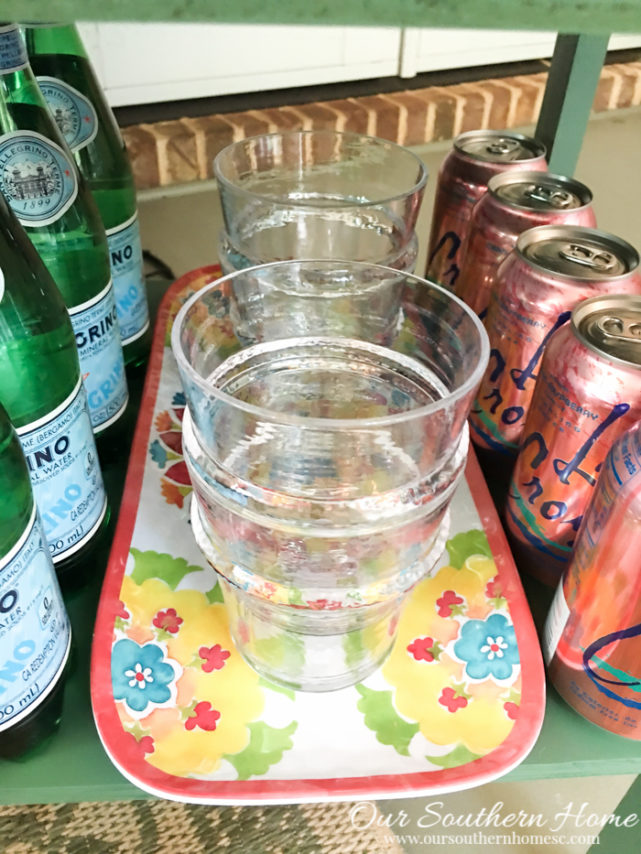
The shelves hold surplus drinks to add to the bucket or to pour over ice.
Green is my favorite color, so I love this softer shade against the hunter green couch cushions.

It's compact and portable enough to move around your home or carry in the car to your favorite picnic spot.
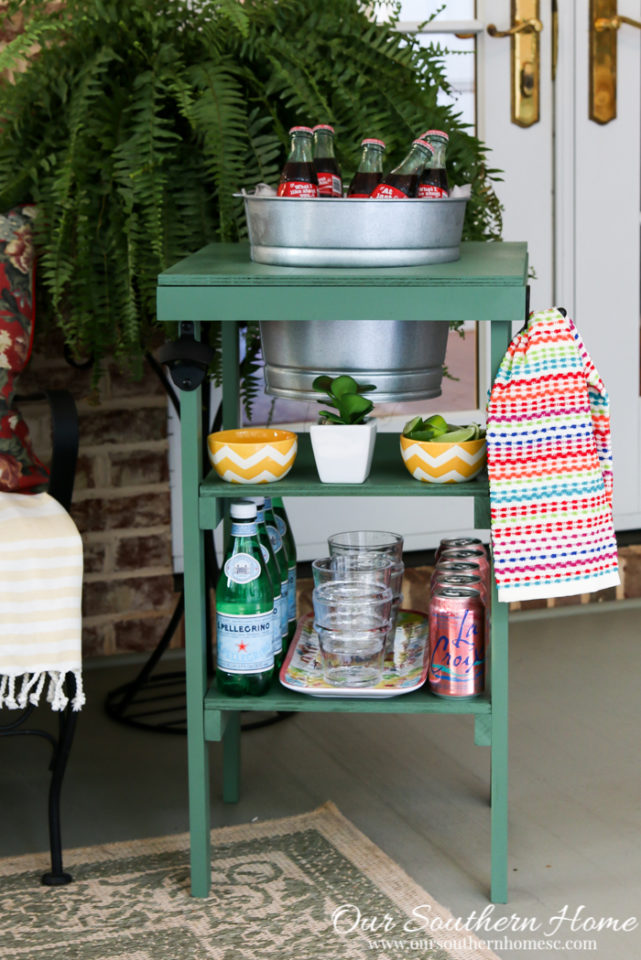
The Home Depot has the hooks and bottle opener in a couple of different finishes.
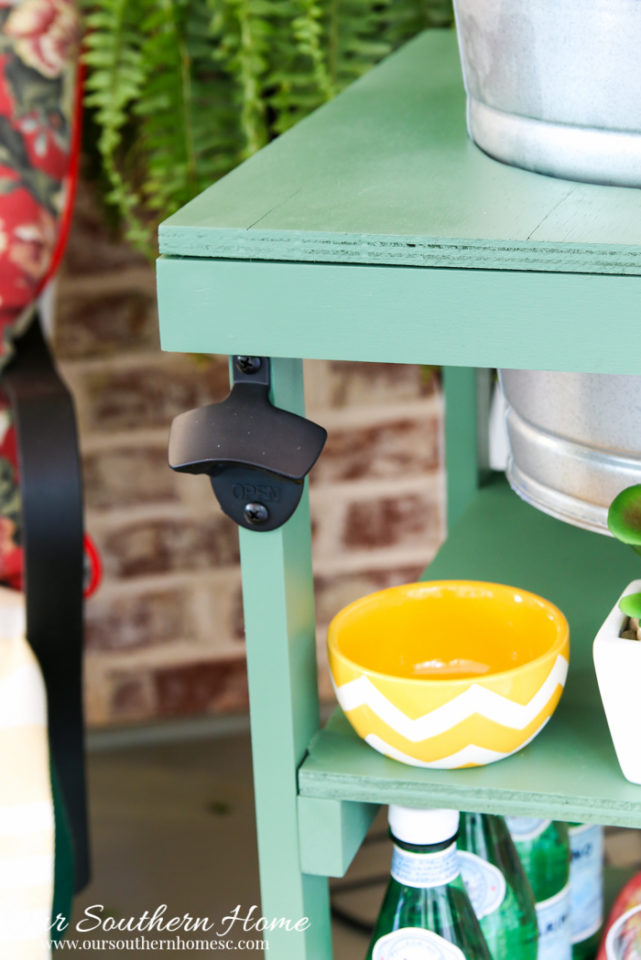
Attend the workshop and have a wonderful gift to present to that special guy for Father's Day. Place an empty bowl near the bottle opener to place caps.
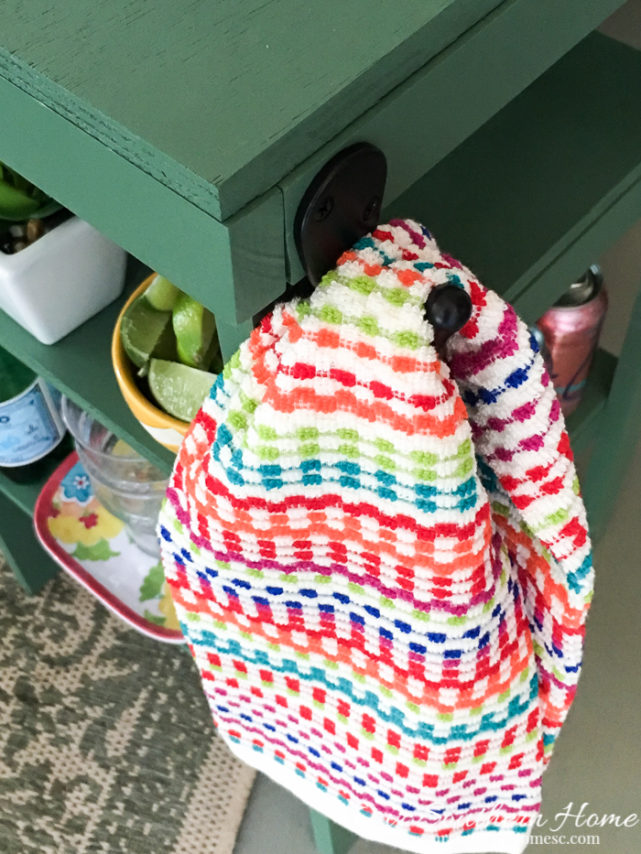
A towel at hand is a must for a beverage stand to wipe off the drinks as you pull one from the ice bucket. Installing a hook makes it handy and easy to remove/replace.
I just love how my project turned out. Now it's your turn to head to The Home Depot's site and register for the Do-It-Herself Workshop in your area on June 16, 2016 from 6:30-8:00pm. What a fun GNO!
The workshops are free, demonstrative classes. While attendees won’t always be able to make and take the project, you will walk away with the skills to recreate the project at home. If you have specific questions about the DIH Workshop in you area, I suggest calling your local store and asking to speak to whoever teaches the workshop.
First go and sign up for the event HERE.
I'm not the only one that put my spin on this fun project! Now it's time to check out these other fabulous versions.
The Casual Craftlete Blog , Little Glass Jar ,
Fox Hollow Cottage, Twelve On Main,
Just Between Friends, One Horse Lane ,
The Crafting Chicks, Family Food Fun,
Inspiration For Moms, Petticoat Junktion ,
Our Southern Home , Artsy Chicks Rule ,
Iris Nacole, The Rustic Life,
Domestically Speaking , The Creative Mom ,
Live Laugh Rowe, Little Vintage Nest,
One Artsy Mama, Dagmar’s Home ,
Fancy Farm Girls , All Things Thrifty,
Whipperberry , Lolly Jane,
Landee See Landee Do
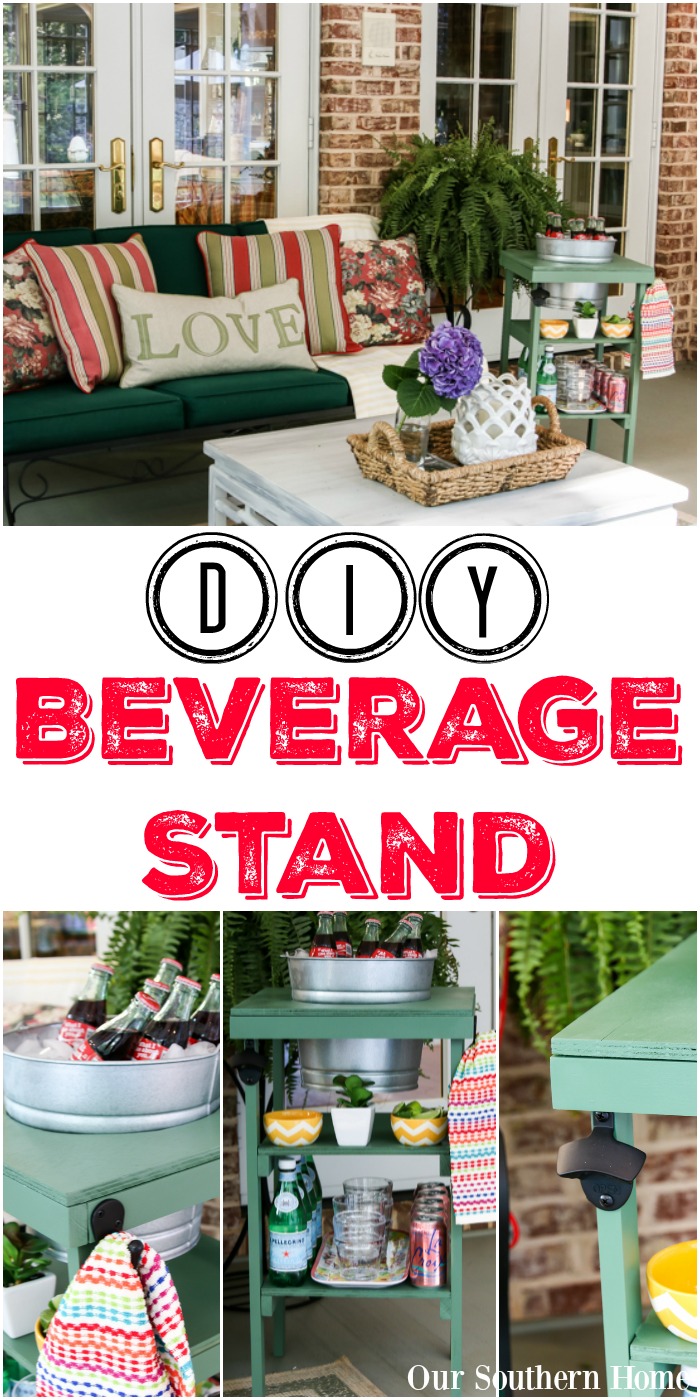
Be sure to PIN the above image for later and to share with friends!
The Home Depot offers several workshops each month for all ages and abilities.
- Do-It-Yourself (DIY)
- Do-It-Herself (DIH)
- Kids
**The Home Depot is partnering with me to participate in this Workshops Program. I am receiving compensation from The Home Depot for my time. All opinions are mine! This post complies with the Word Of Mouth Marketing Association (WOMMA) Ethics Code and applicable Federal Trade Commission guidelines.**


It looks awesome! Thanks for the idea!
Thanks so much!
Amazing Post, this is just another creative thing!
Your Dog is really cute 🙂
Thanks Christy!
Thanks so much, Rob! It was a fun project. Learning my way around tools. 🙂
I’ve been looking for ideas for a beverage stand to put in our backyard patio and this looks to be just perfect! Thanks for sharing this. It will go really well with the theme we have going back there 🙂
Thank you!
love your blog!! this is a great idea!
Thanks so much!!! I so appreciate your visits!
This turned out so cute! After I saw your tweet about it I registered at my local store and can’t wait until Thursday!!
Christy, love the color and the add of the little towel hook!!
Your beverage station is so cute, Christy! Love the color!
LOVE the color! Perfect for you porch. Cute models!!