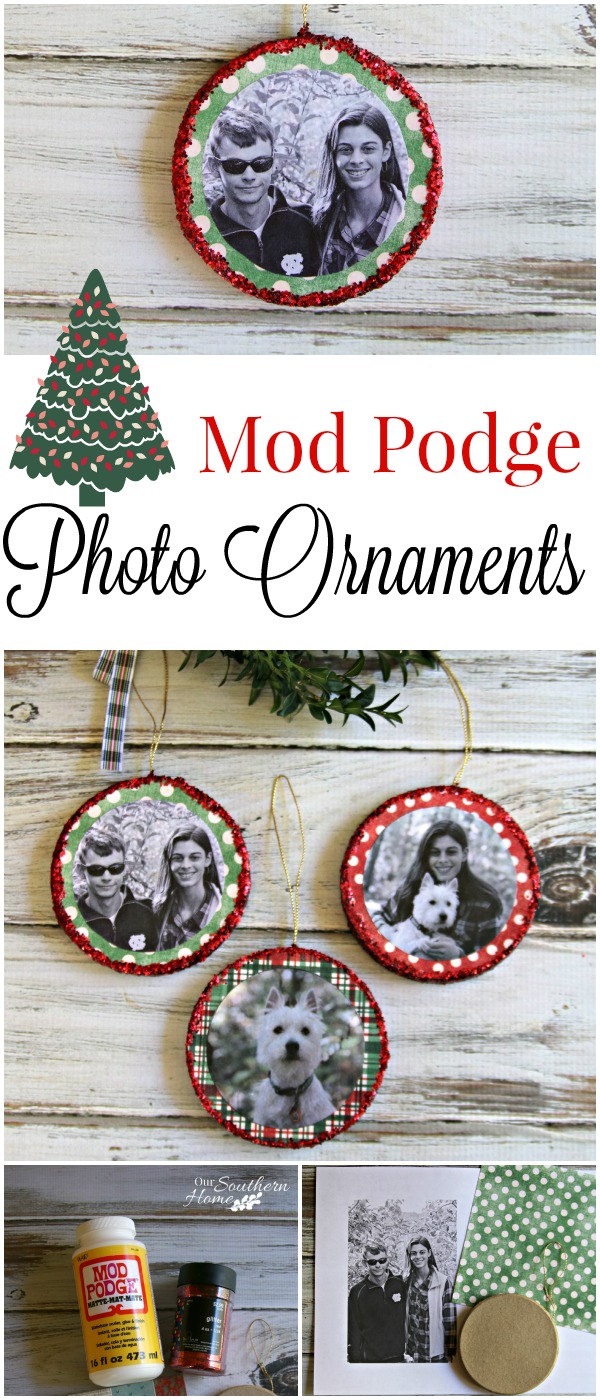
Mod Podge Photo Ornaments
I know it's hard to believe, but Christmas is right around the corner.
While it's not time to decorate, we can do a little early prep and crafting beforehand to enjoy the holiday.
That's where 31 Days of Hand-made Christmas ornaments come into play. For the month of October, we've been sharing one new ornament each day! You can find the complete list below.
There is so much creativity shared by each and every blogger this month. Many thanks to the fabulous ladies from An Extraordinary Day, Cupcakes and Crinoline, Yesterday on Tuesday and Silly Pearl for hosting the fun event.
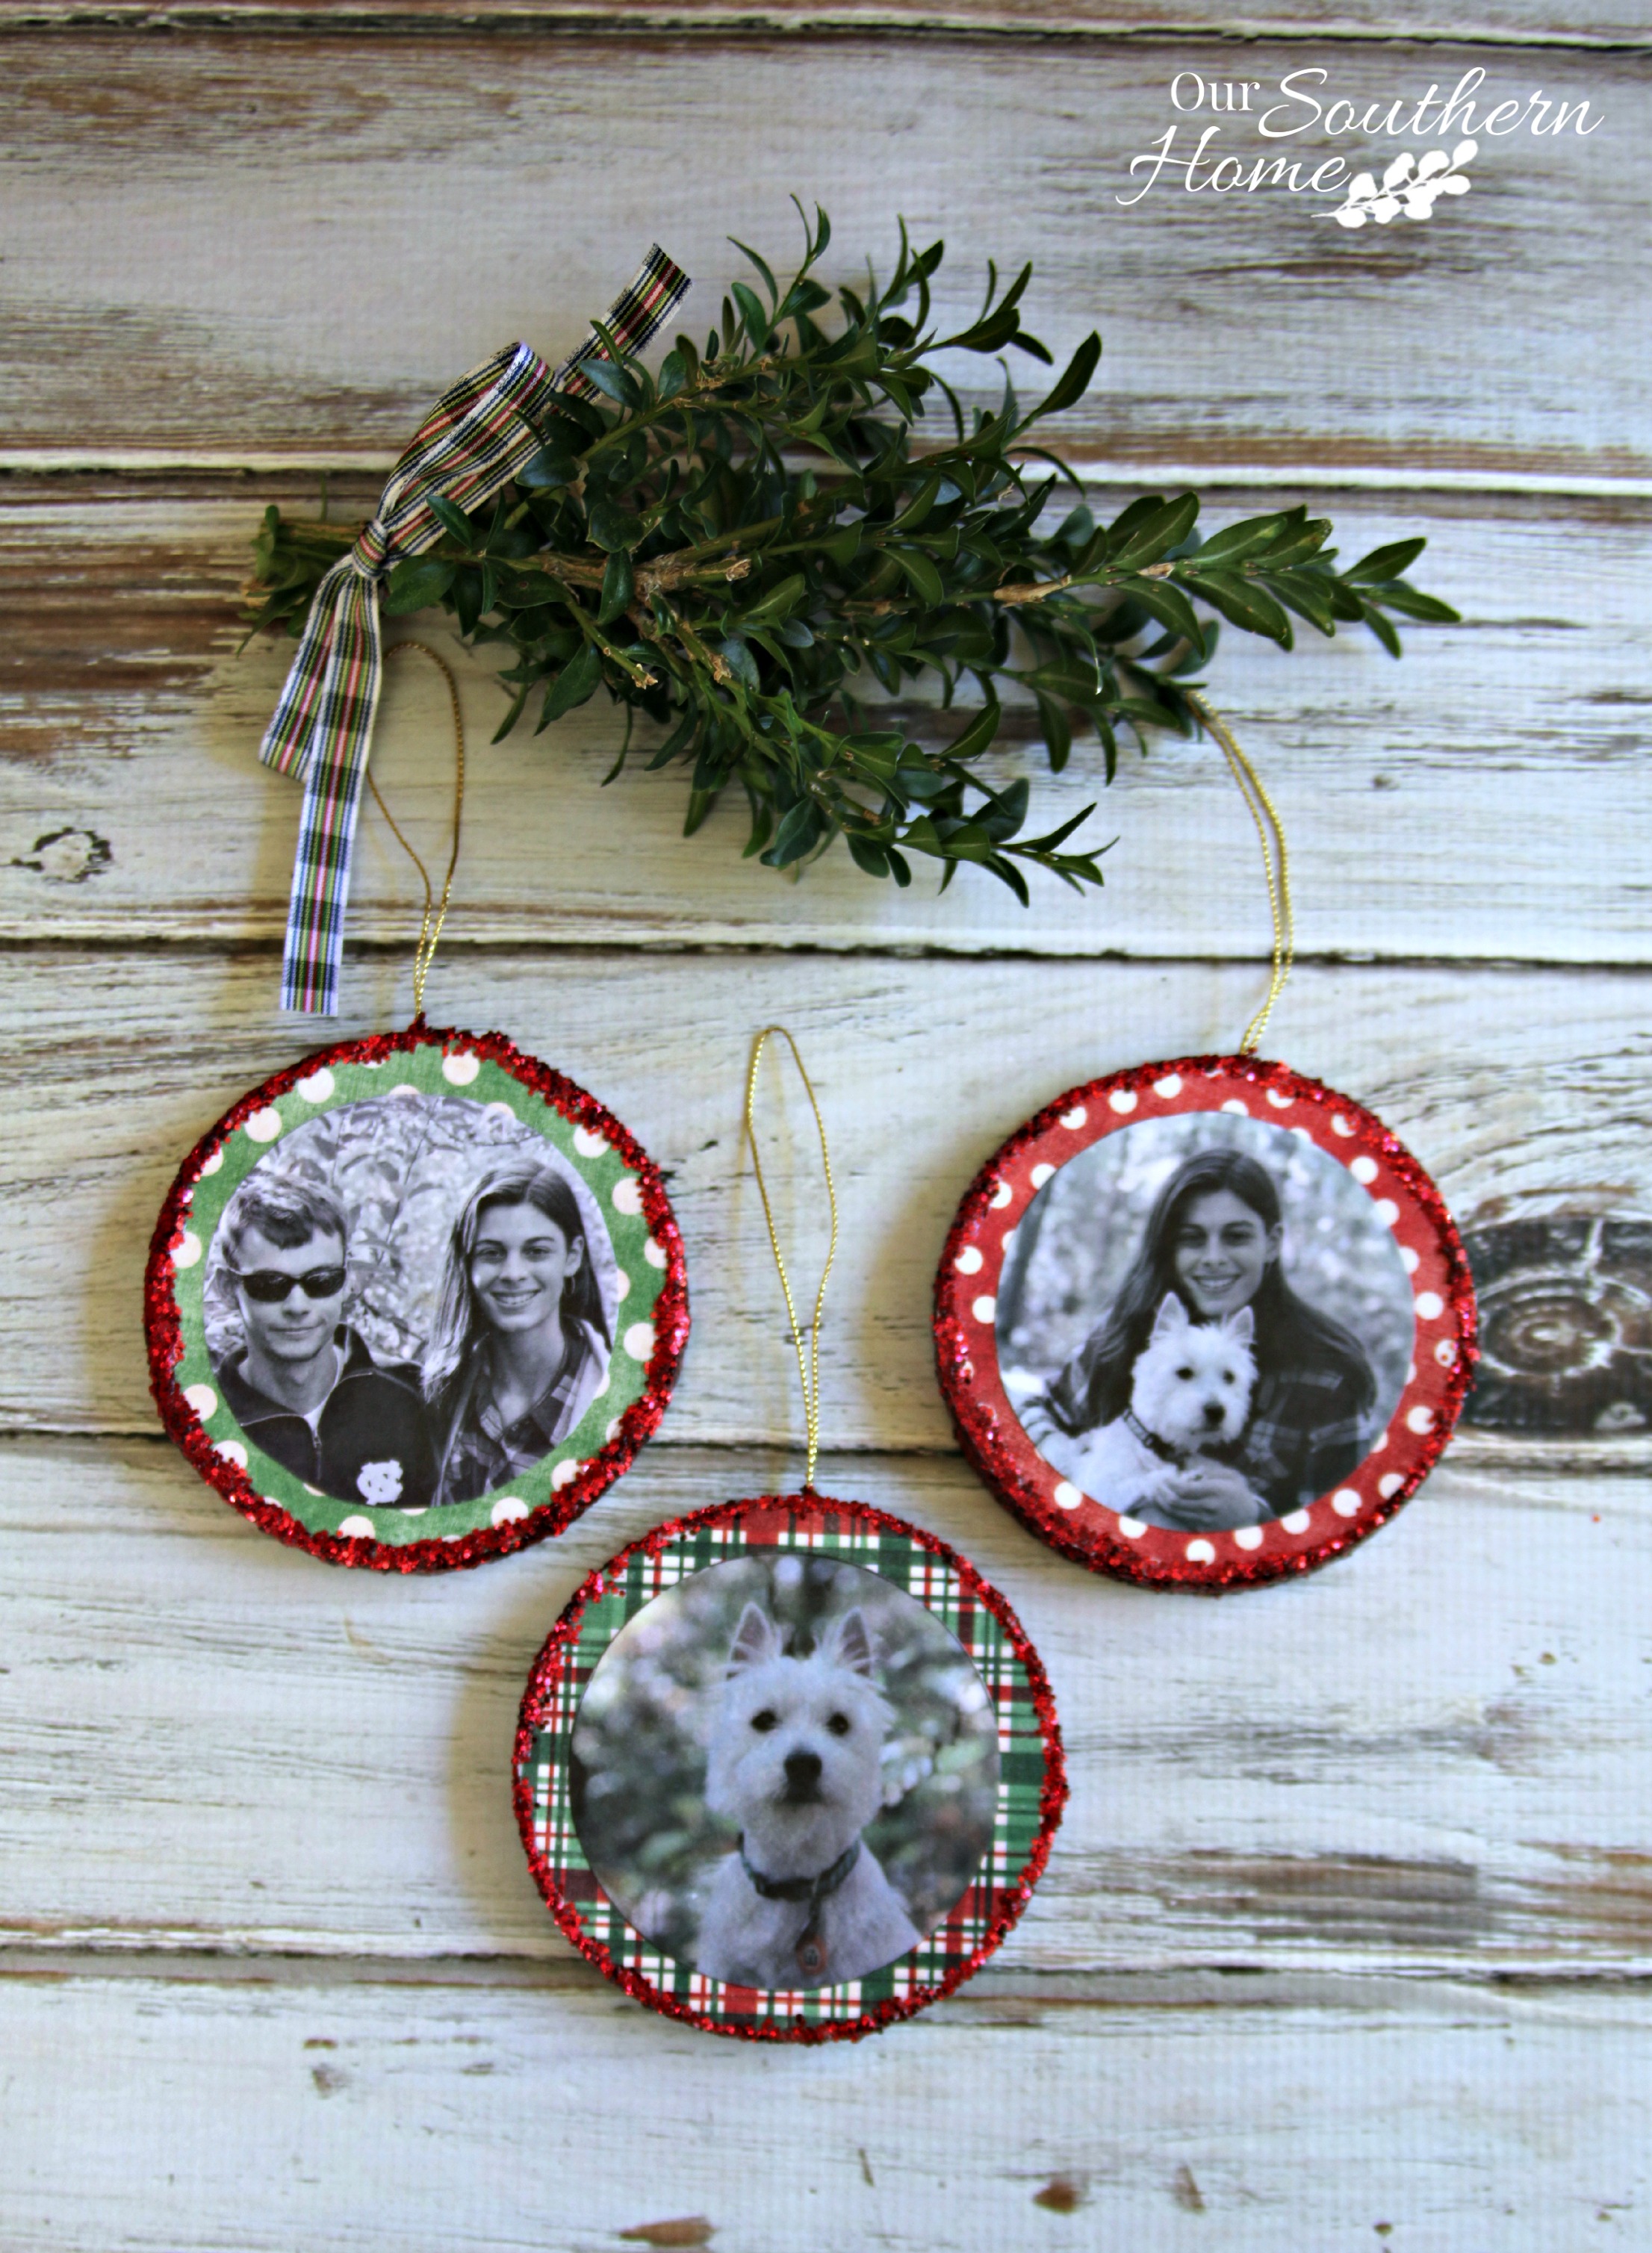
I'm a sucker for a photo ornament. My kids are in college and high school. We hang photo ornaments each year. I love pulling those out and reminiscing.
Don't tell anyone, but I still have my kids have their photo taken with Santa each year! It is a treasure. I even have a gallery wall that I created with the photos that you can see HERE. (I really need to take new ones….that post is from my very early years blogging and a poor camera!)
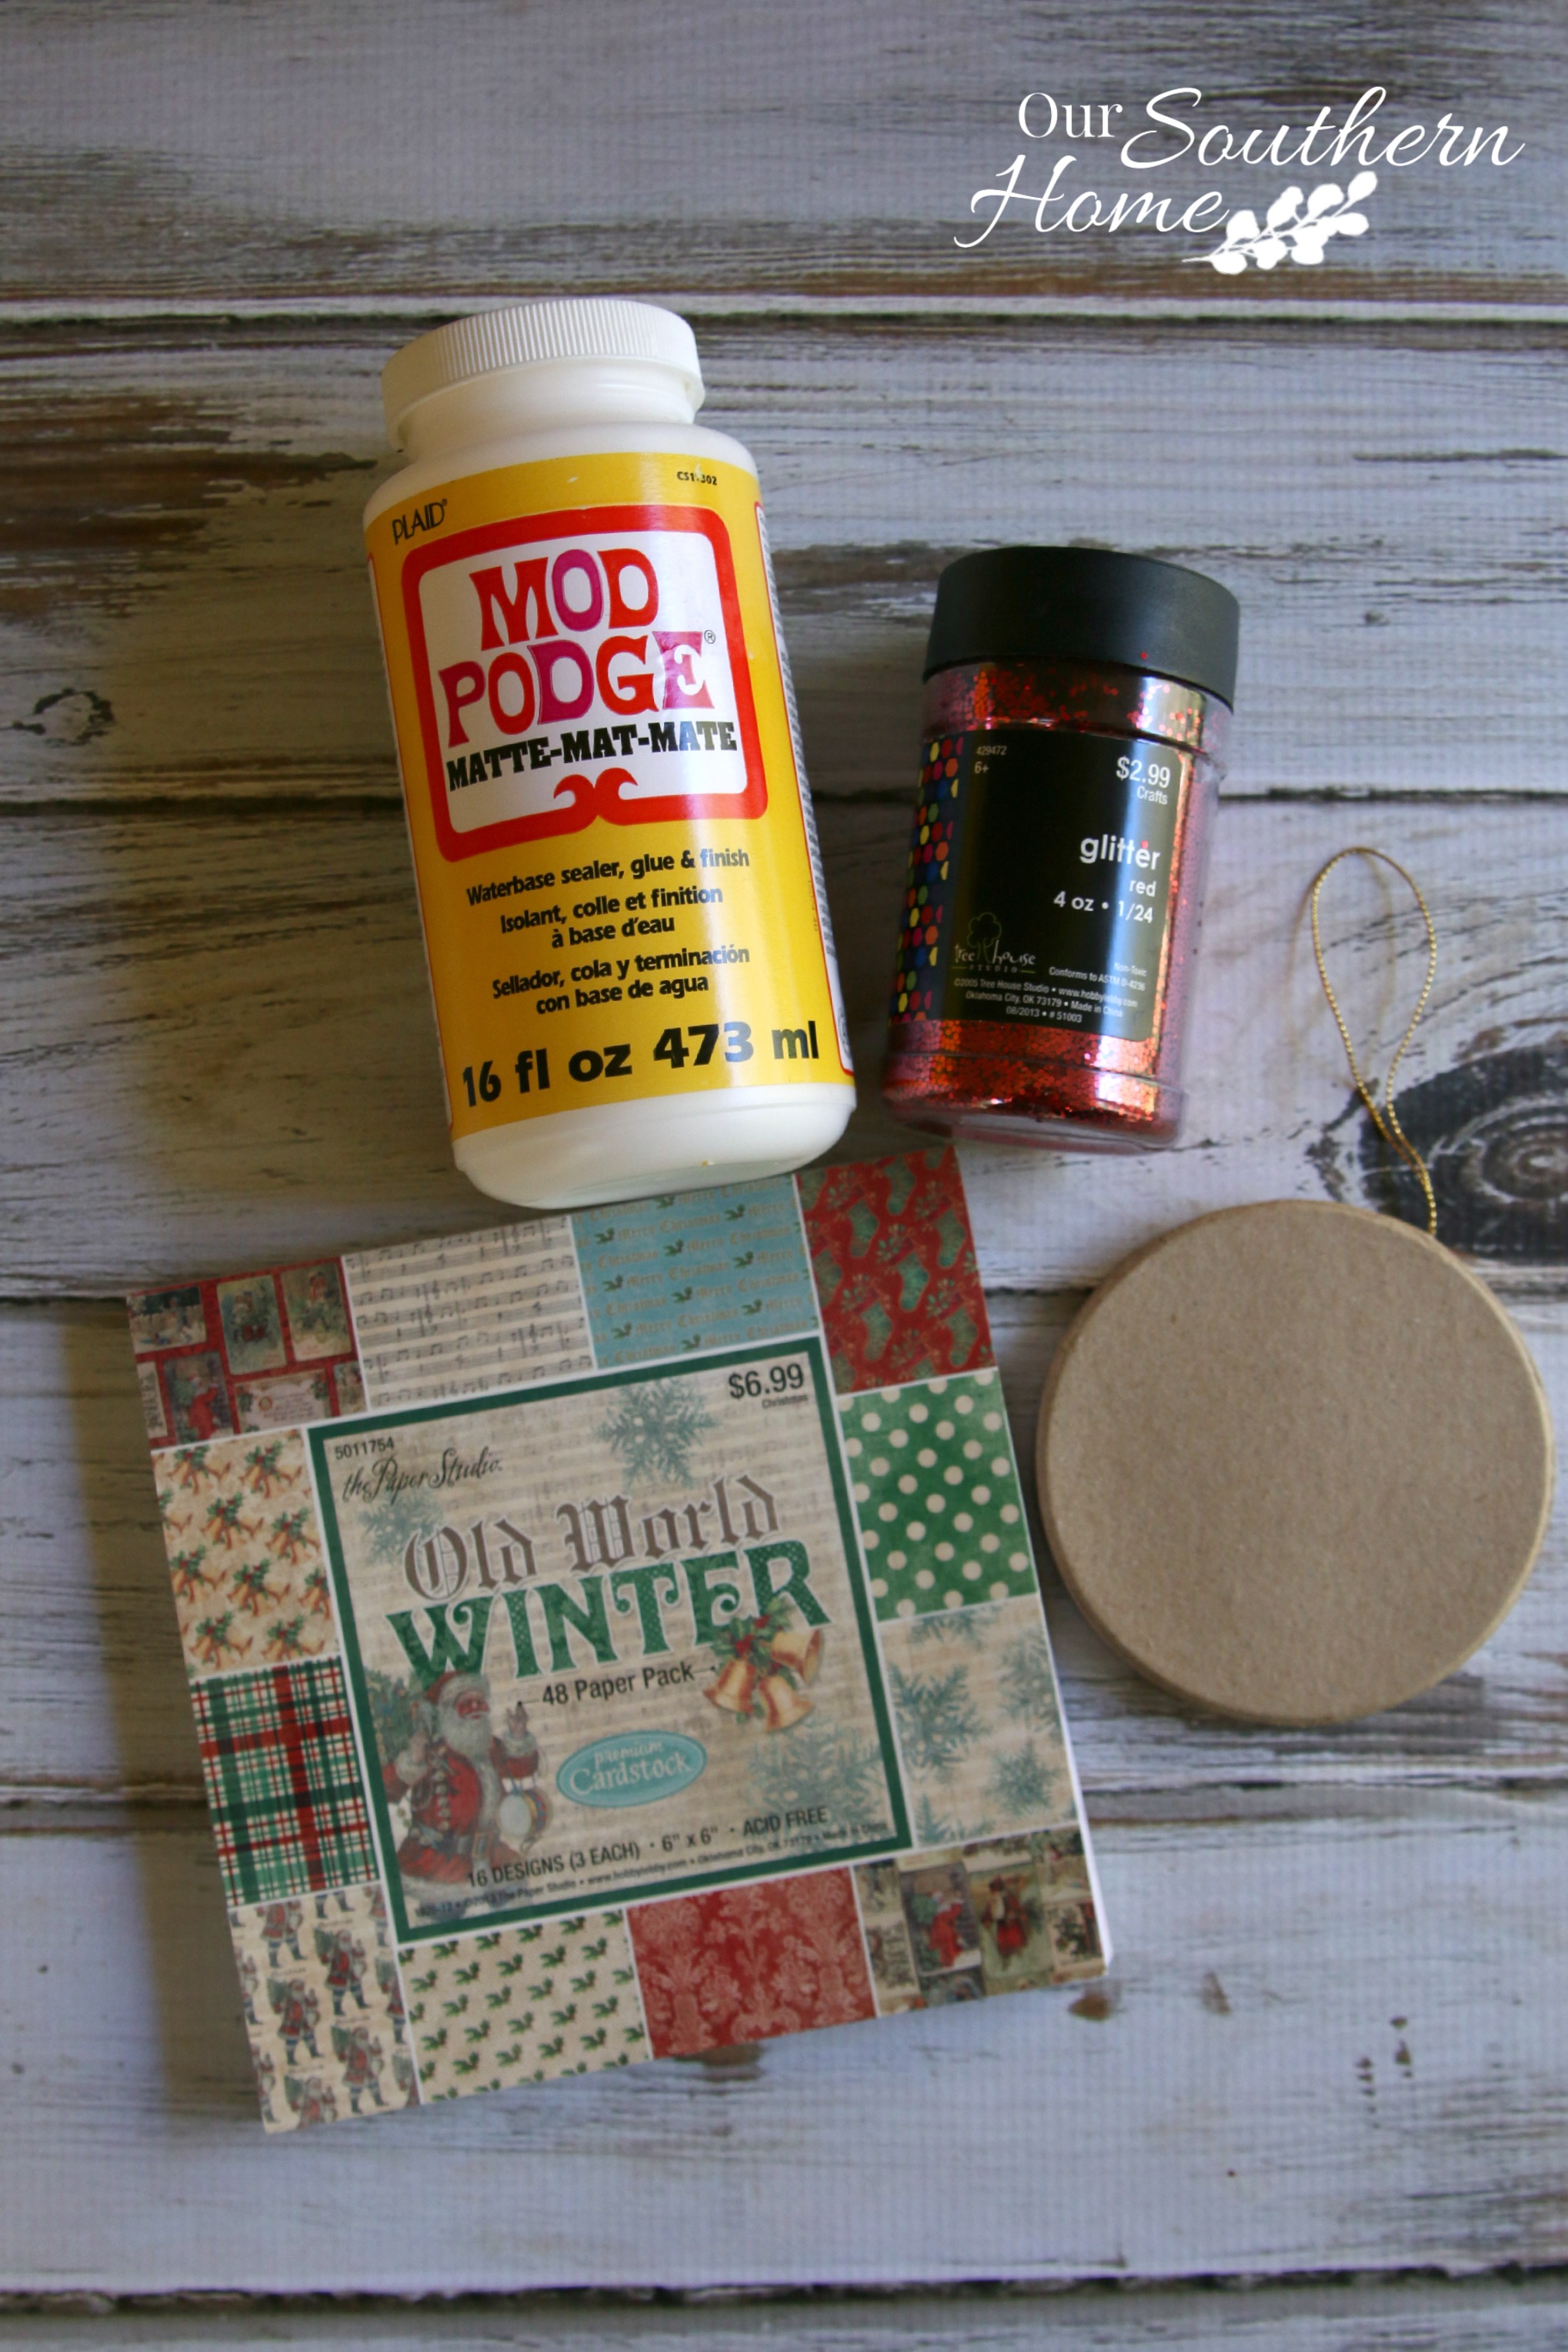
You will need the following items:
- Scrapbook paper
- Mod Podge
- Small paint brush
- Paper Mache ornaments
- Scissors
- Pencil
- Glitter
- Photo copy of black and white photo
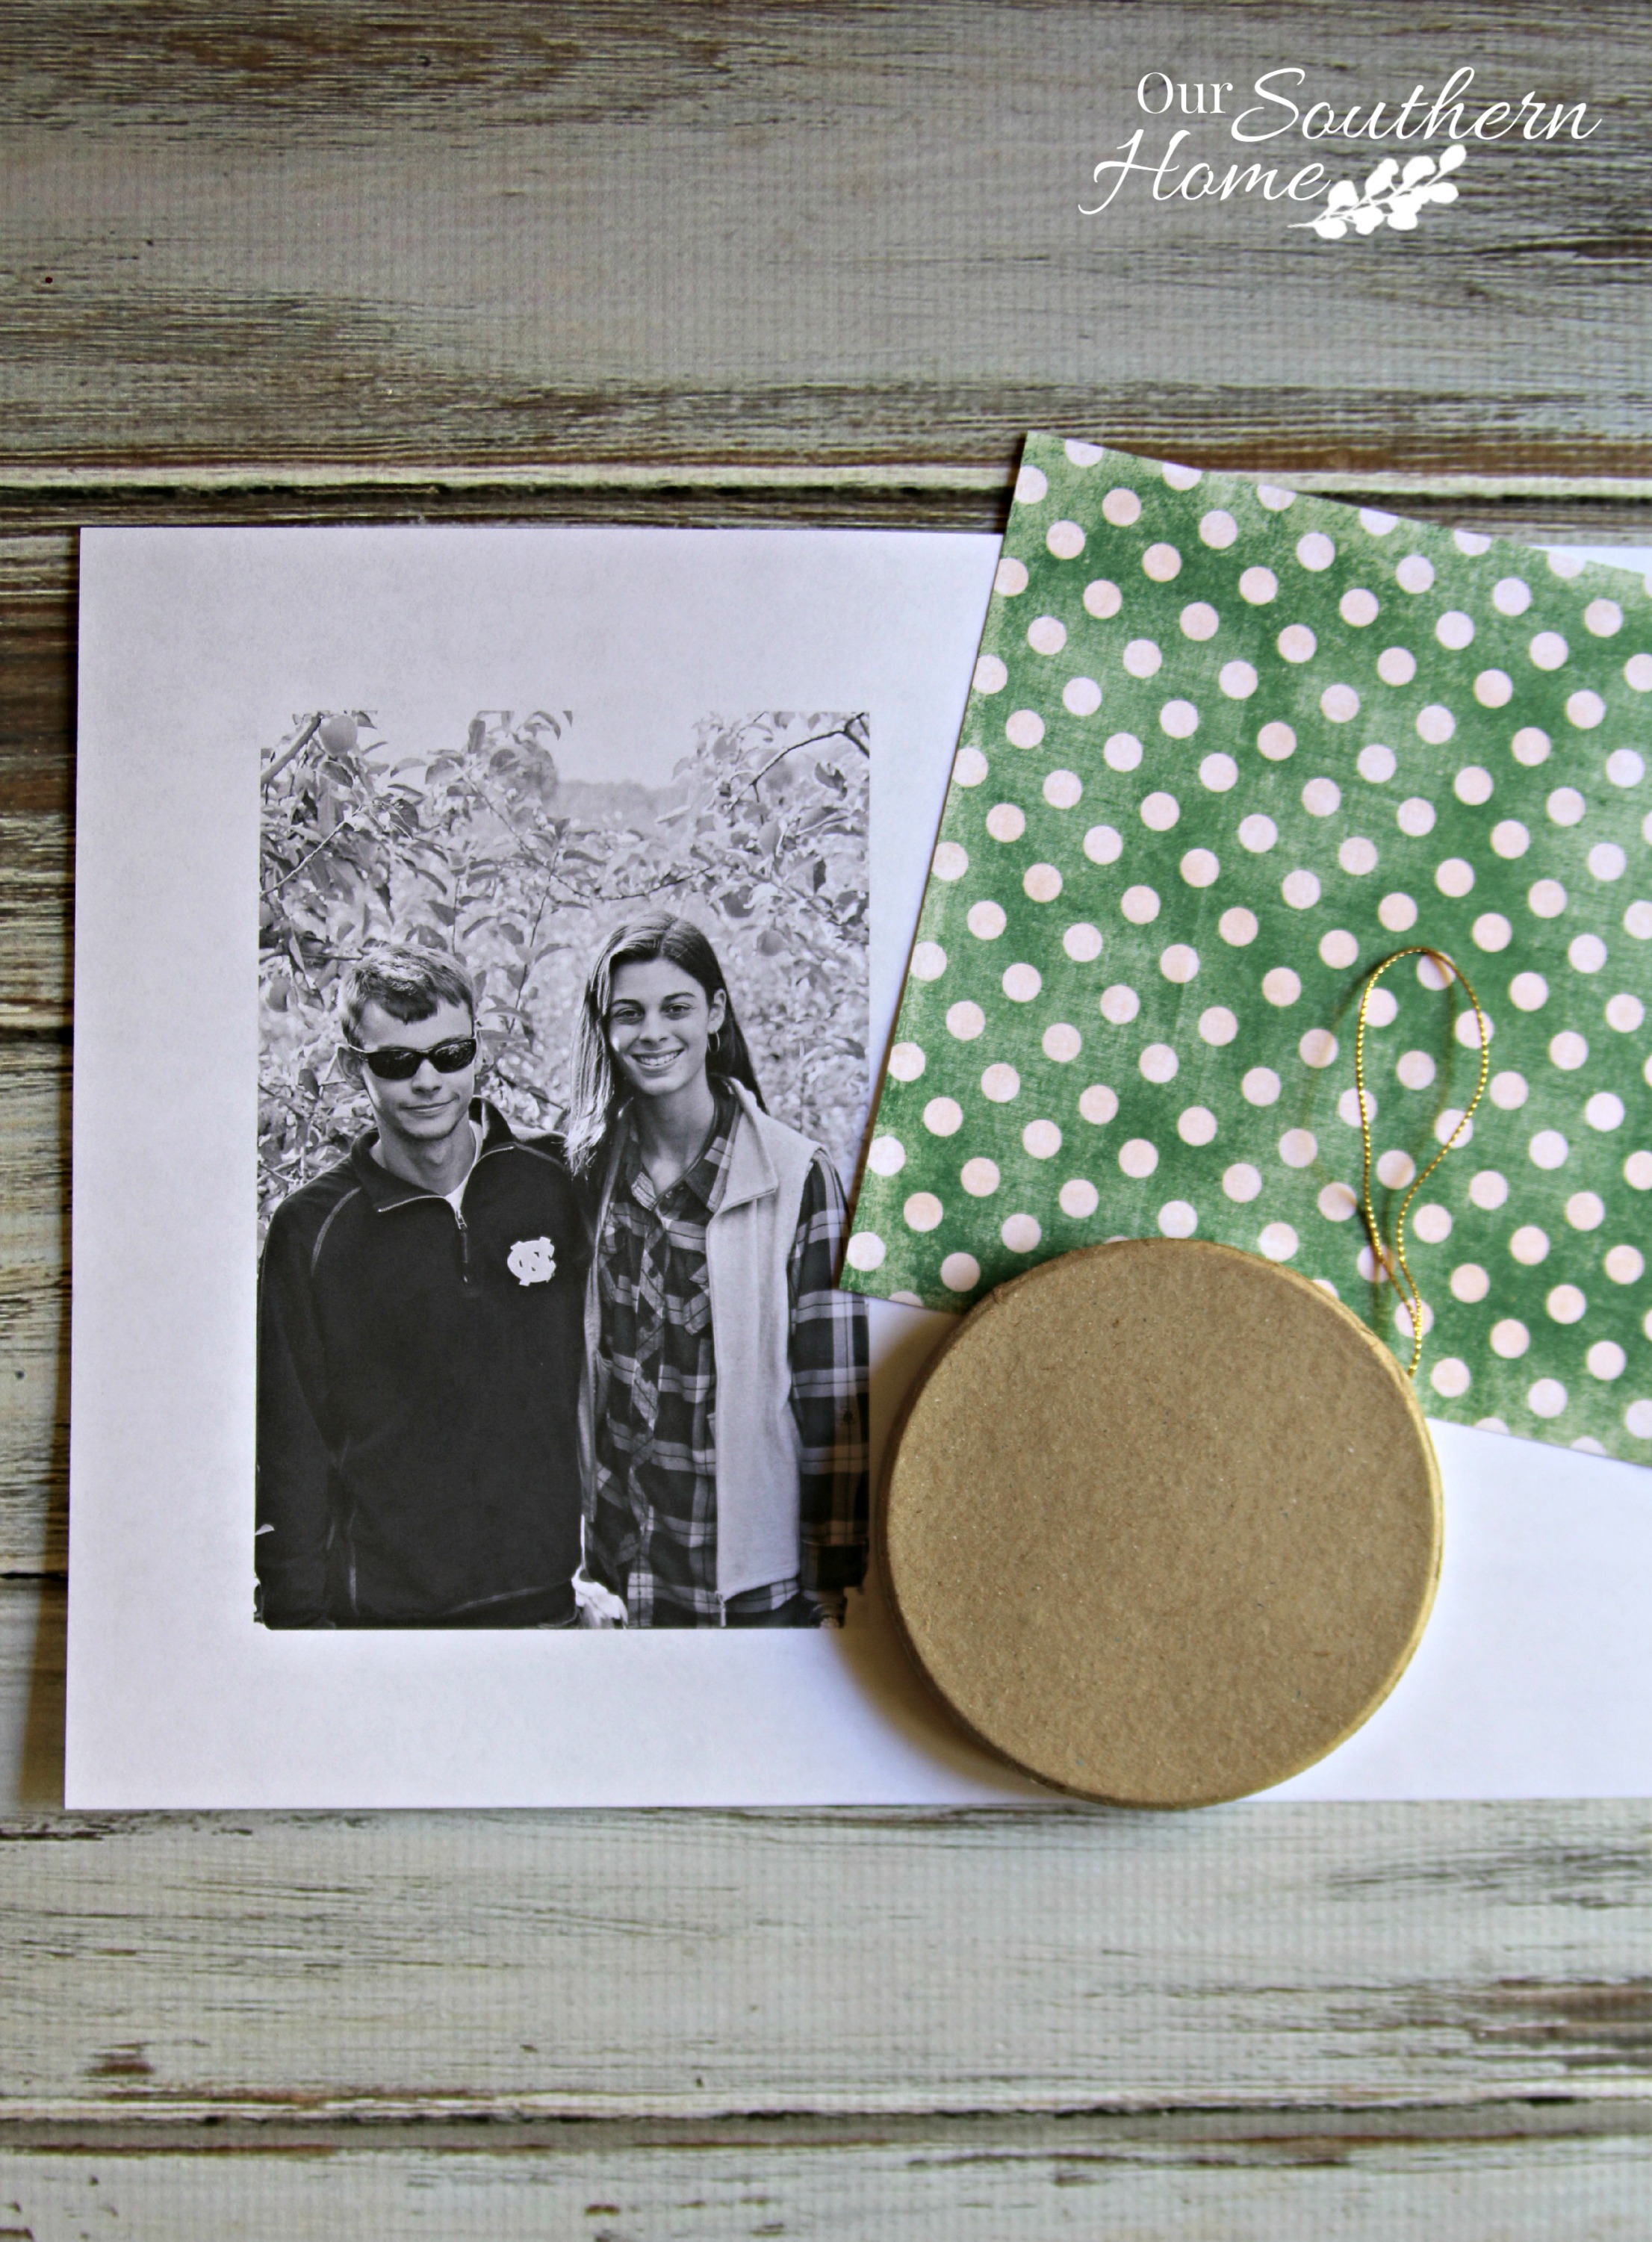
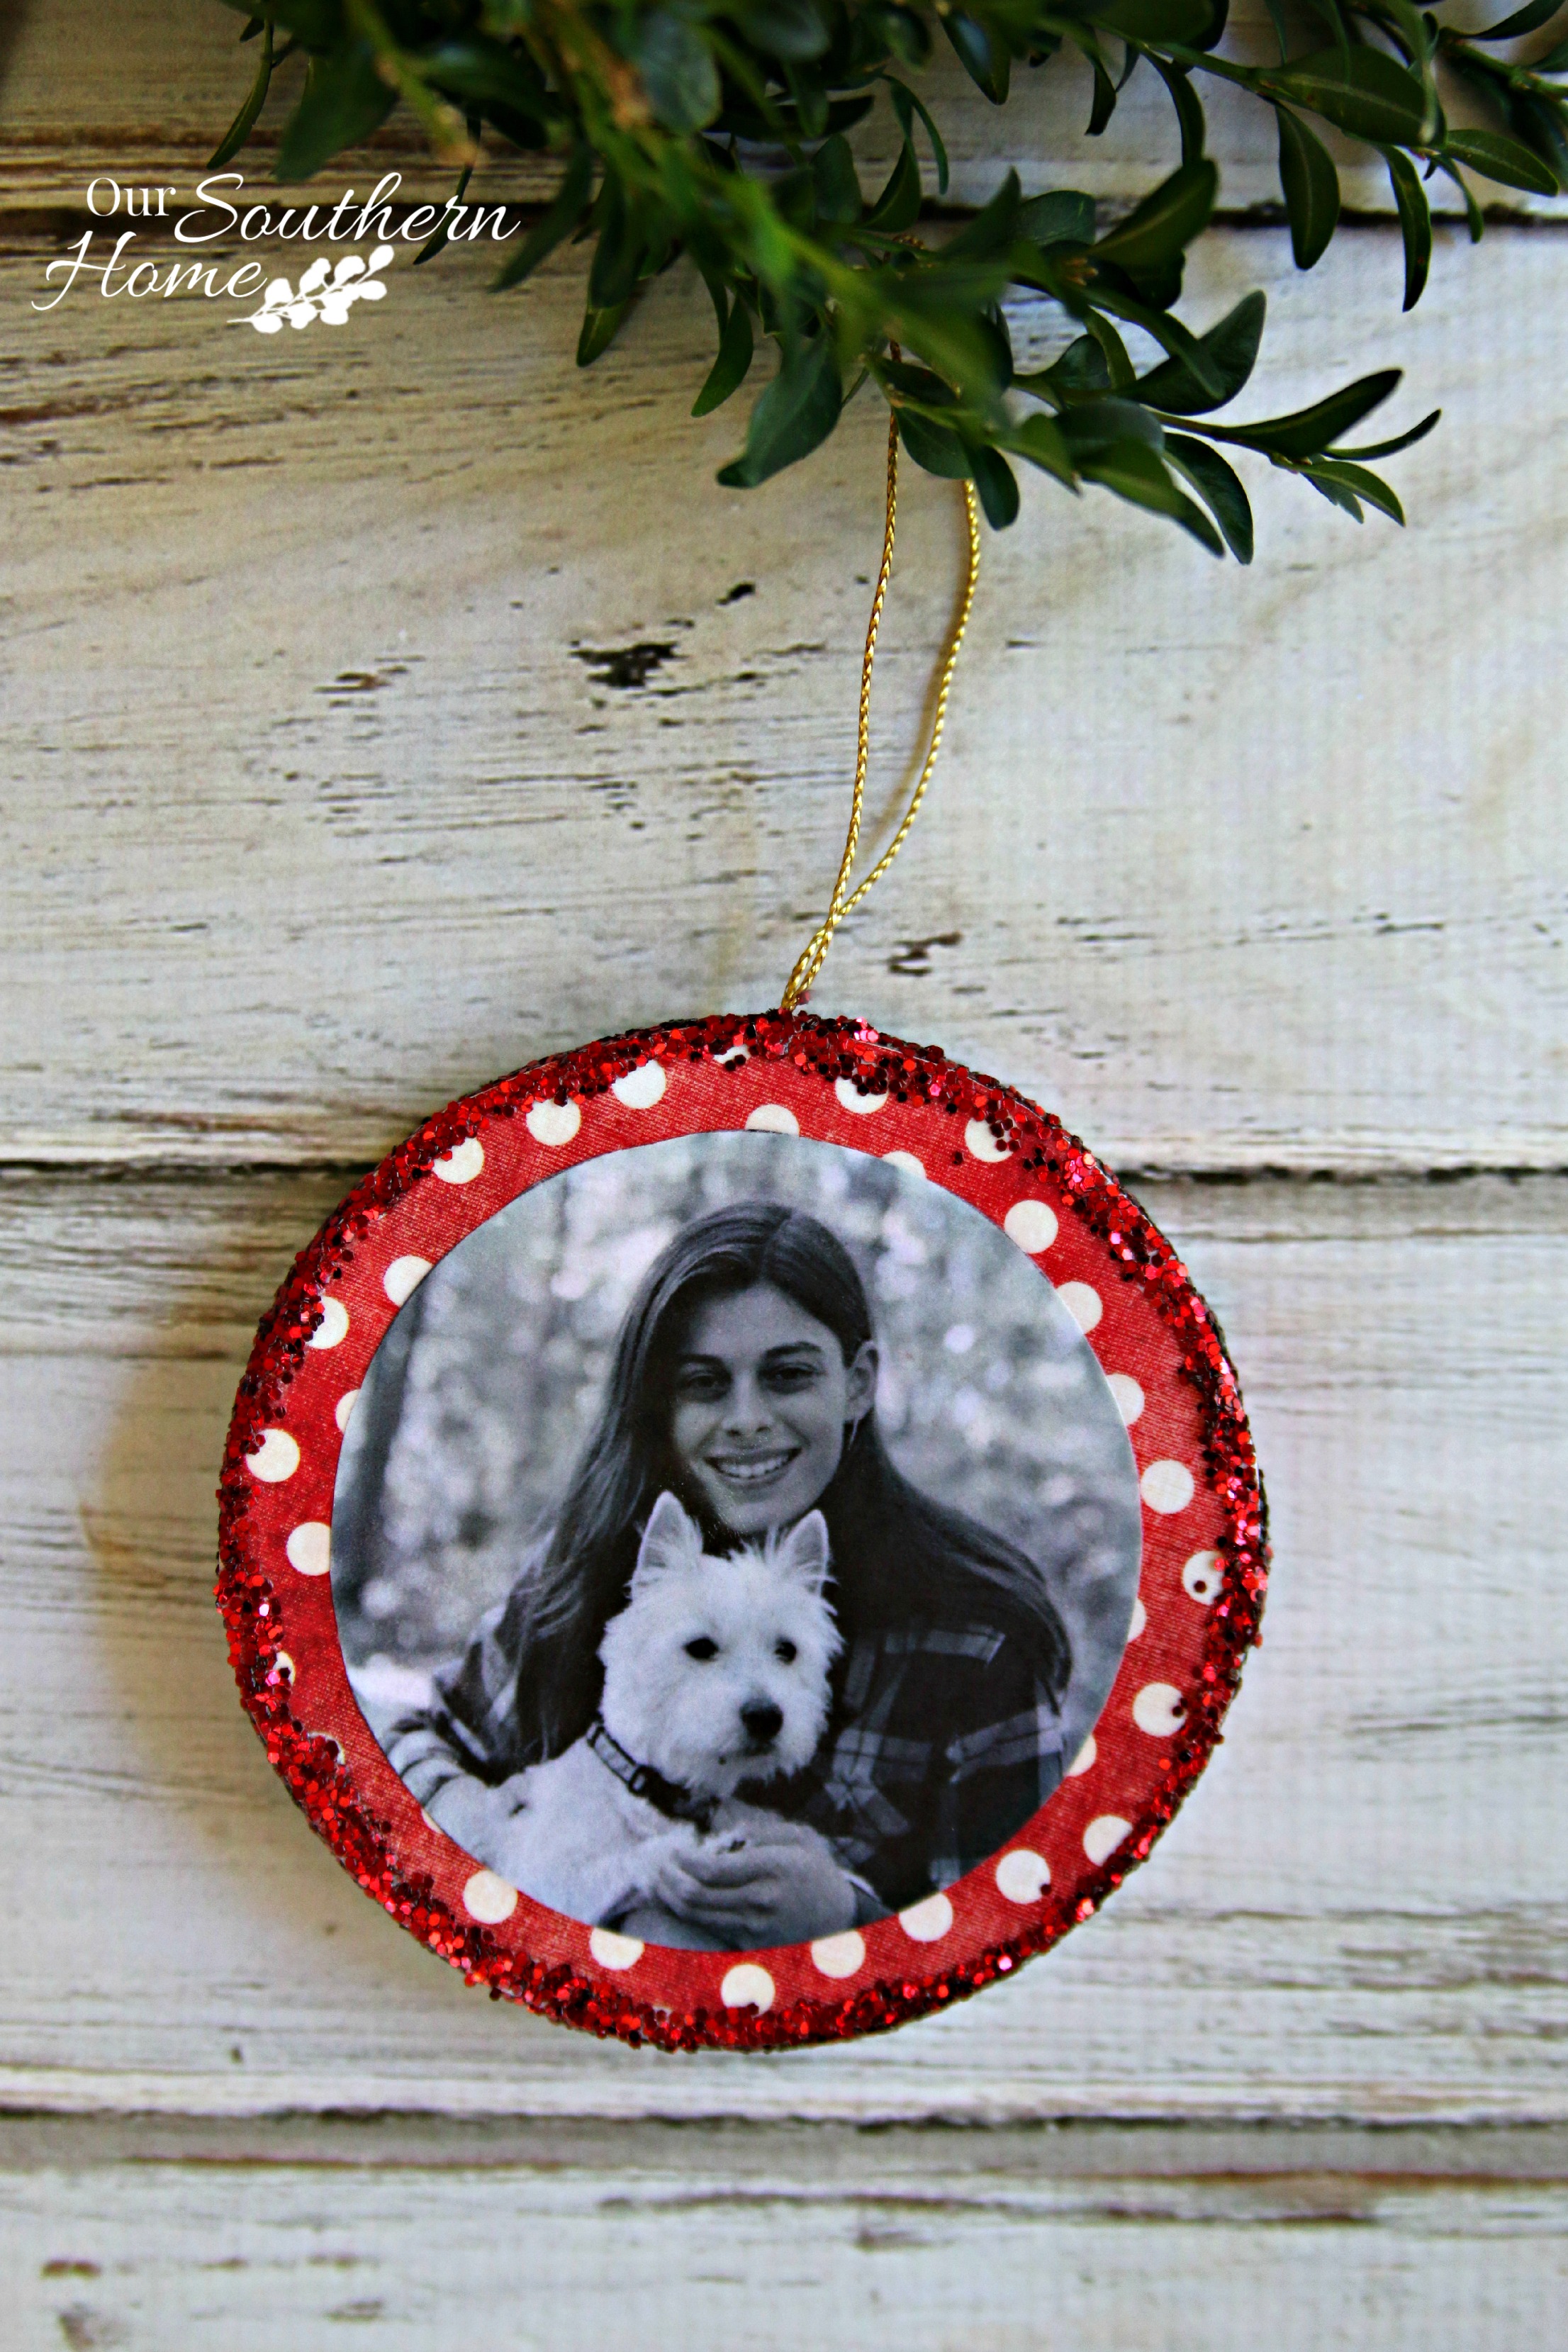
These photos were taken last weekend when we went to Skytop Orchard in Hendersonville, NC to go apple picking. It was such a wonderful day. I thought they'd be great for this project.
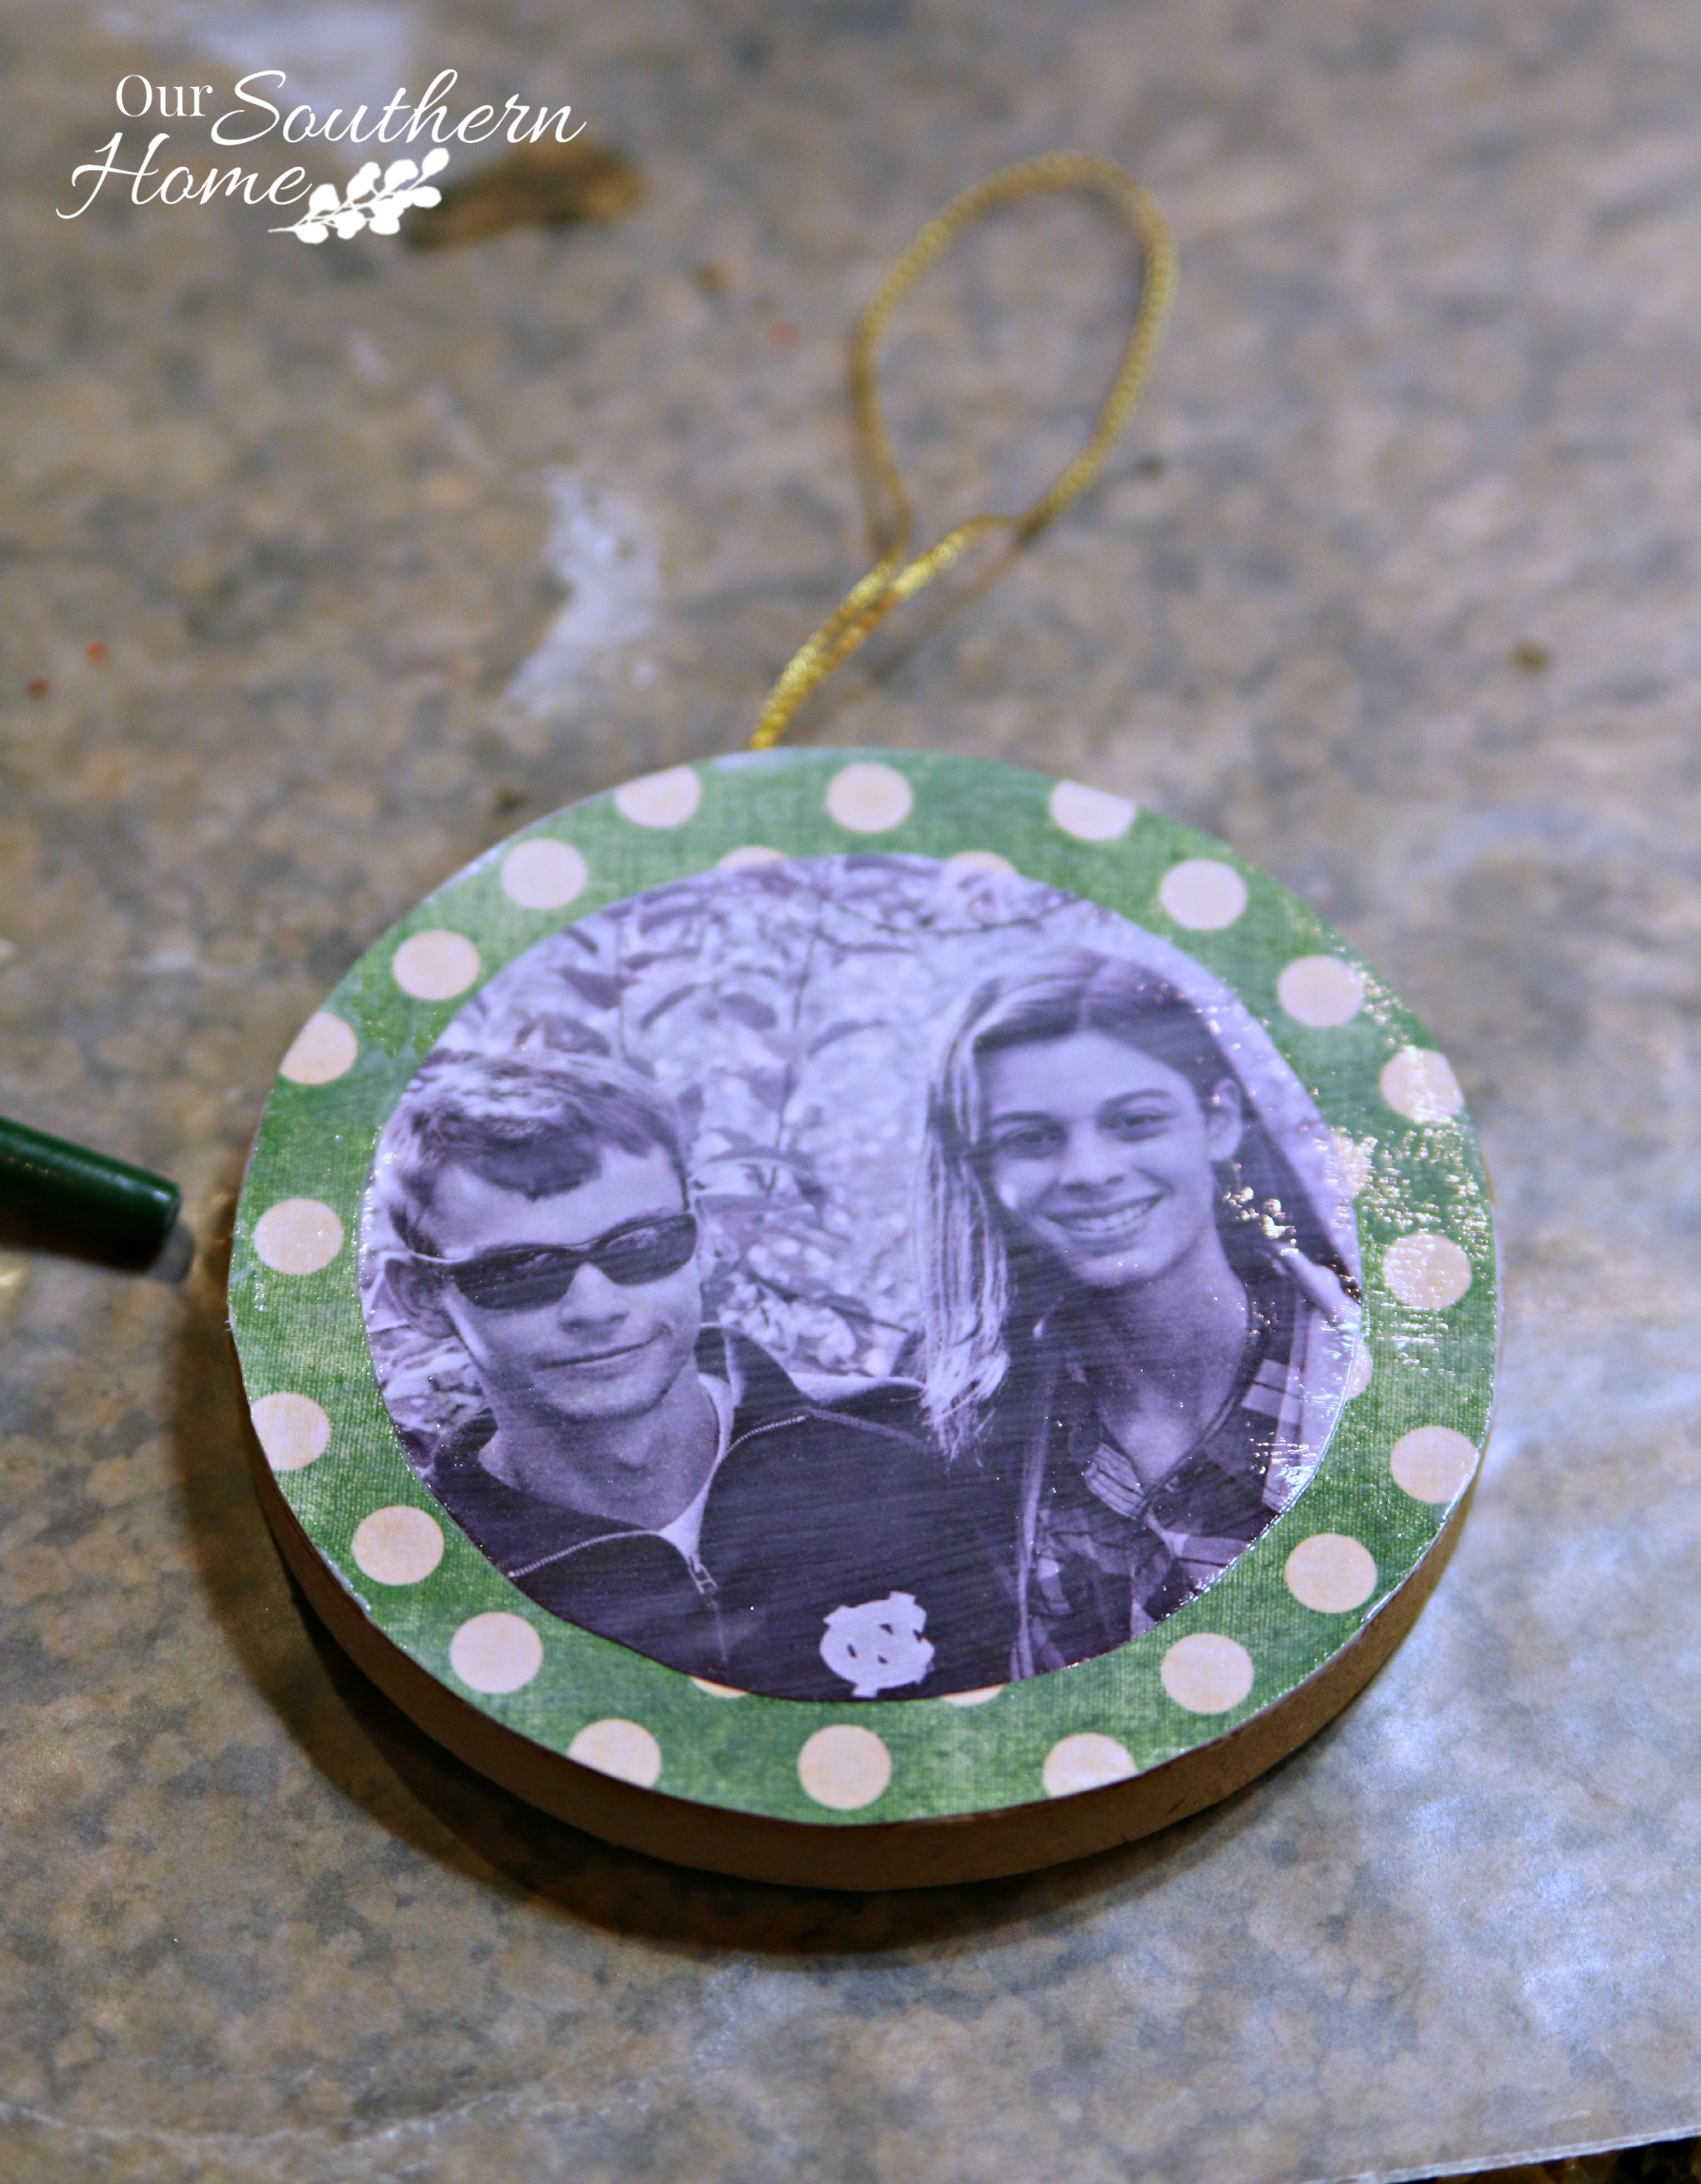
I uploaded my photo into an editing program like Picmonkey and turned it from color to black and white. I wanted the contrast against the colored scrapbook paper.
Then simply print the photo on regular copy paper. You may have to play around with the size of your chosen ornament. I went with 4×6. Do not print on card stock or photo paper. Mod Podge works best with thinner paper.
This one is still wet from the Mod Podge. This is what you will do:
- Use the ornament to trace onto the backside of the scrapbook paper. Cut it out. That's the polka dot paper.
- Find a glass or some smaller object to trace the photo with that will give you a nice outer edge of the polka dot.
- Using a small artist brush, apply Mod Podge to the top of the paper mache ornament. Then apply a layer of Mod Podge to the backside of the polka dot paper. Place the paper on top of the ornament. You've got time to position it. Use the side of a credit card or scraper to smooth out any bubbles. I didn't have any with the paper being smaller.
- I let that set up a few minutes.
- Do the same with the photo copy circle. Make sure you put a layer of Mod Podge on the top of the polka dot paper.
- Apply a final coat of Mod Podge to the top of both layers like in the photo above. Basically follow the instructions on the Mod Podge label.
- Let this dry completely.
- I like to do all of this on waxed paper. It doesn't stick to it.
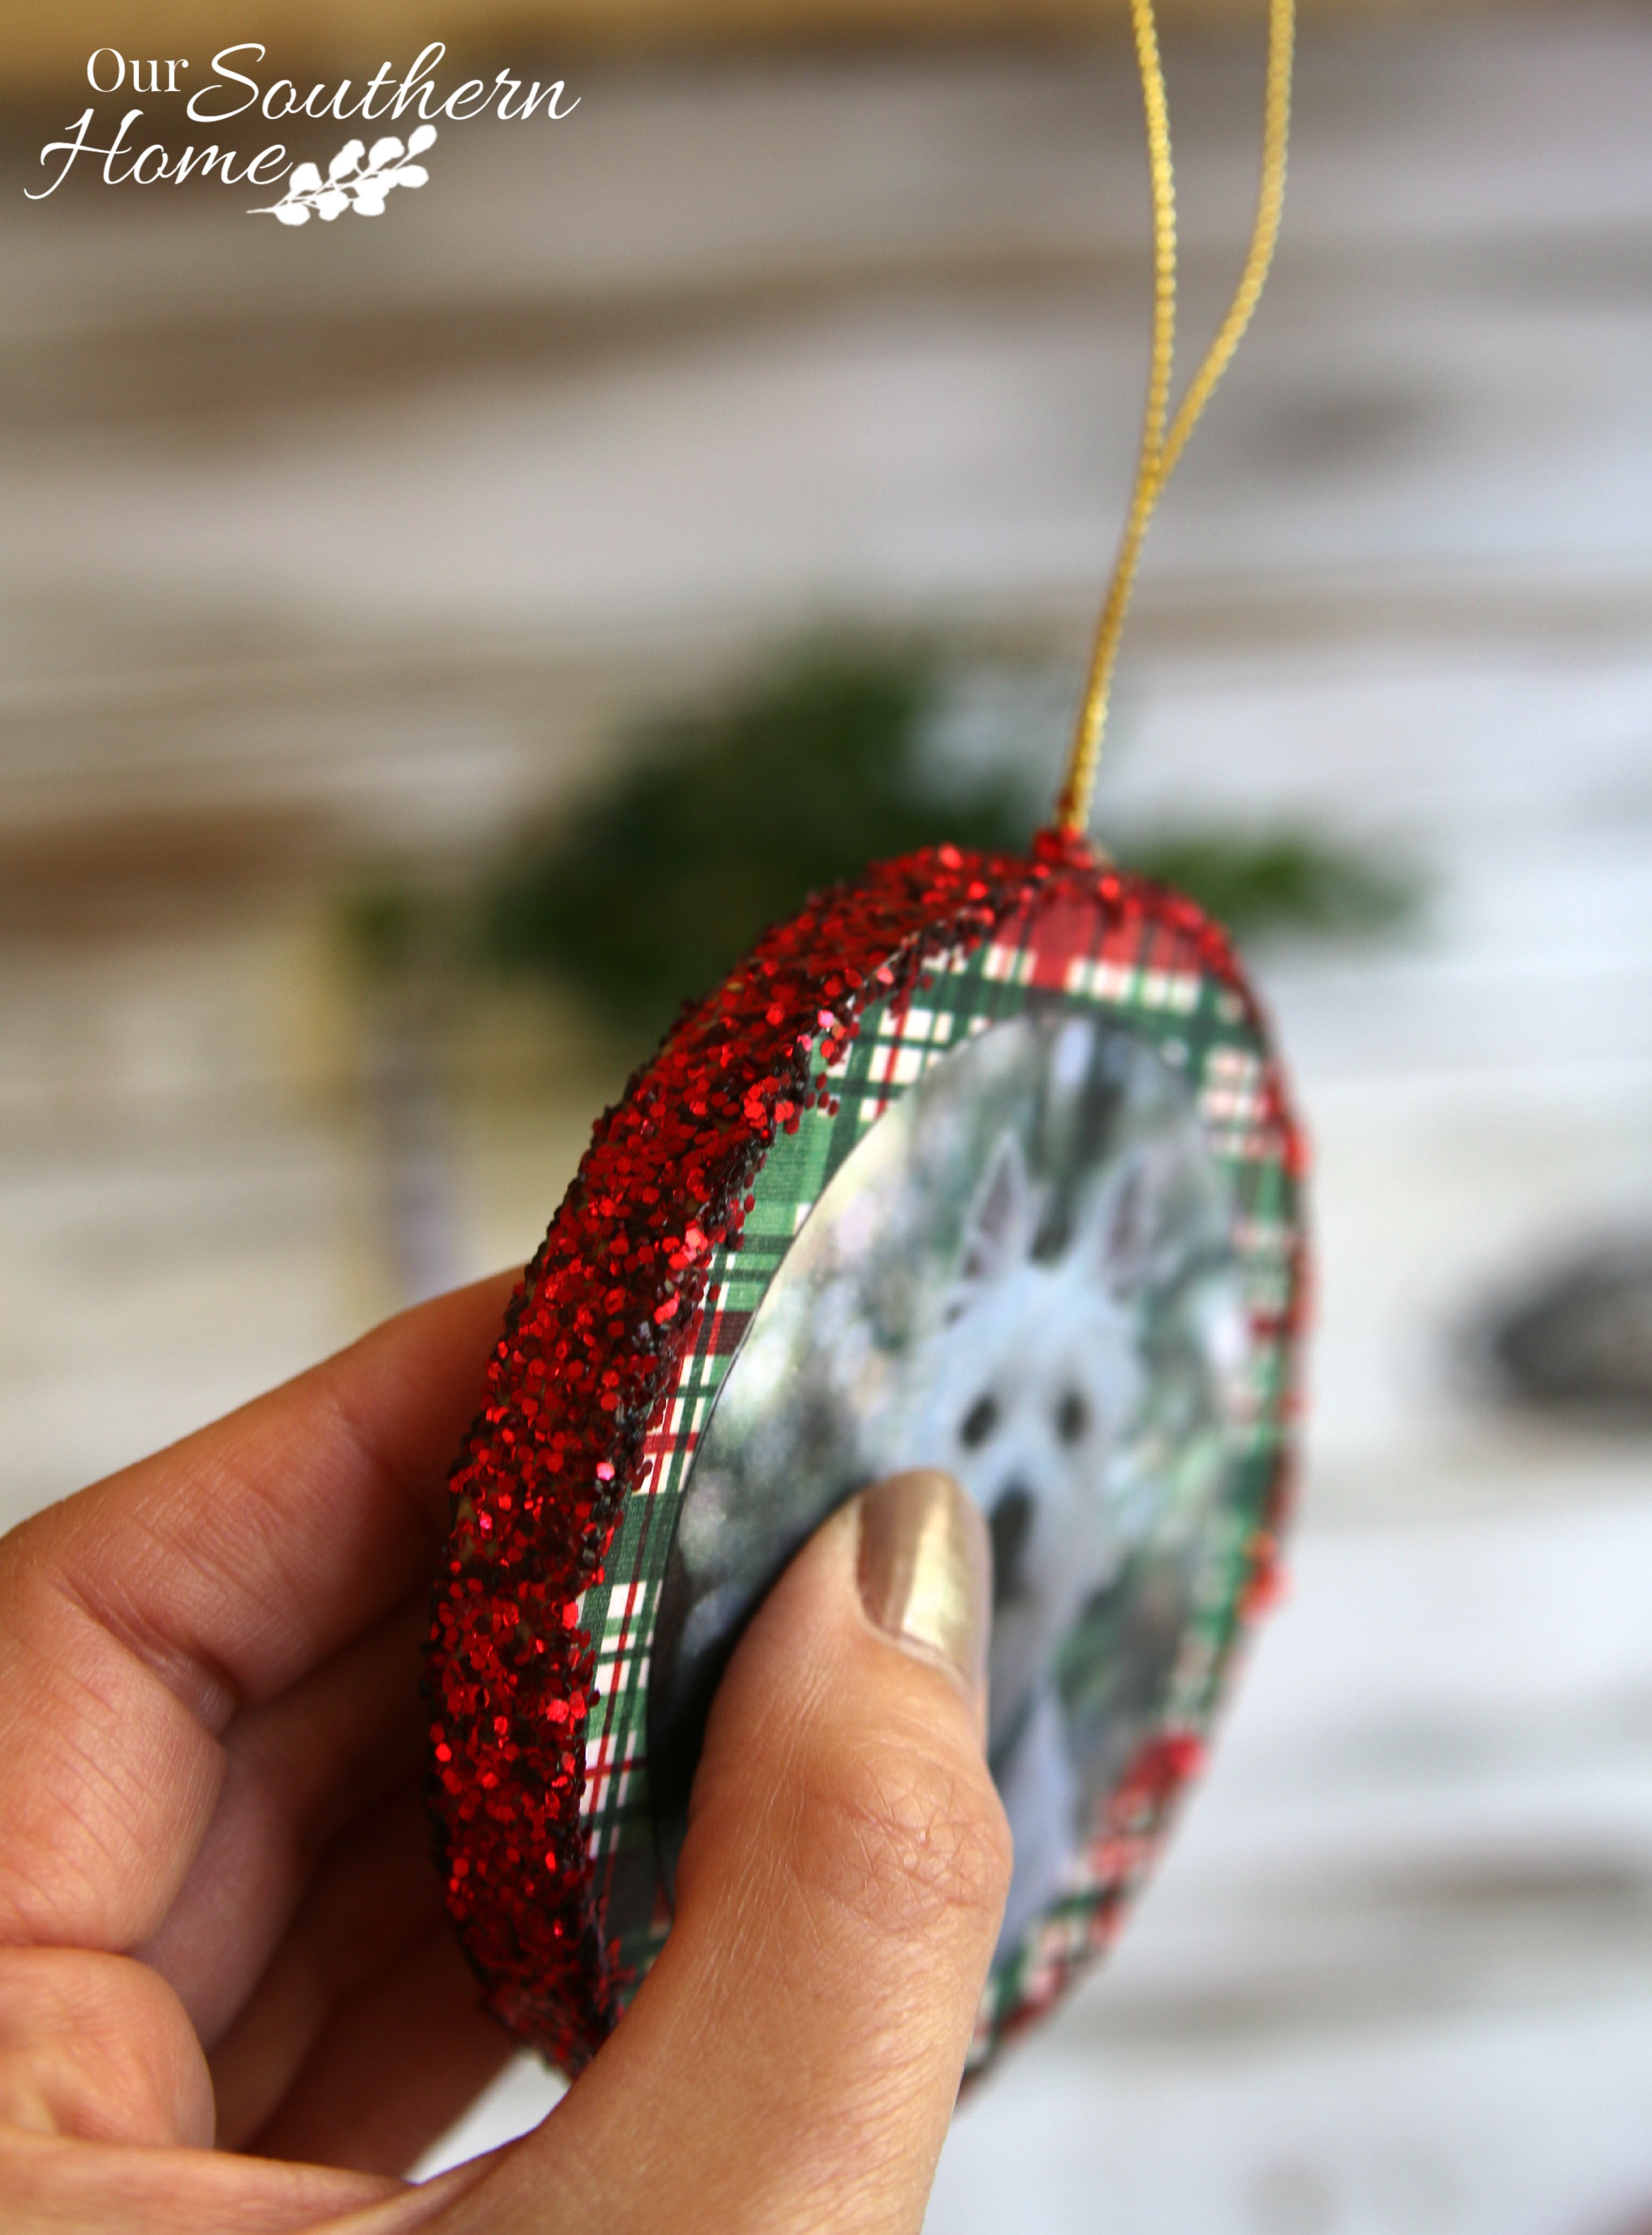
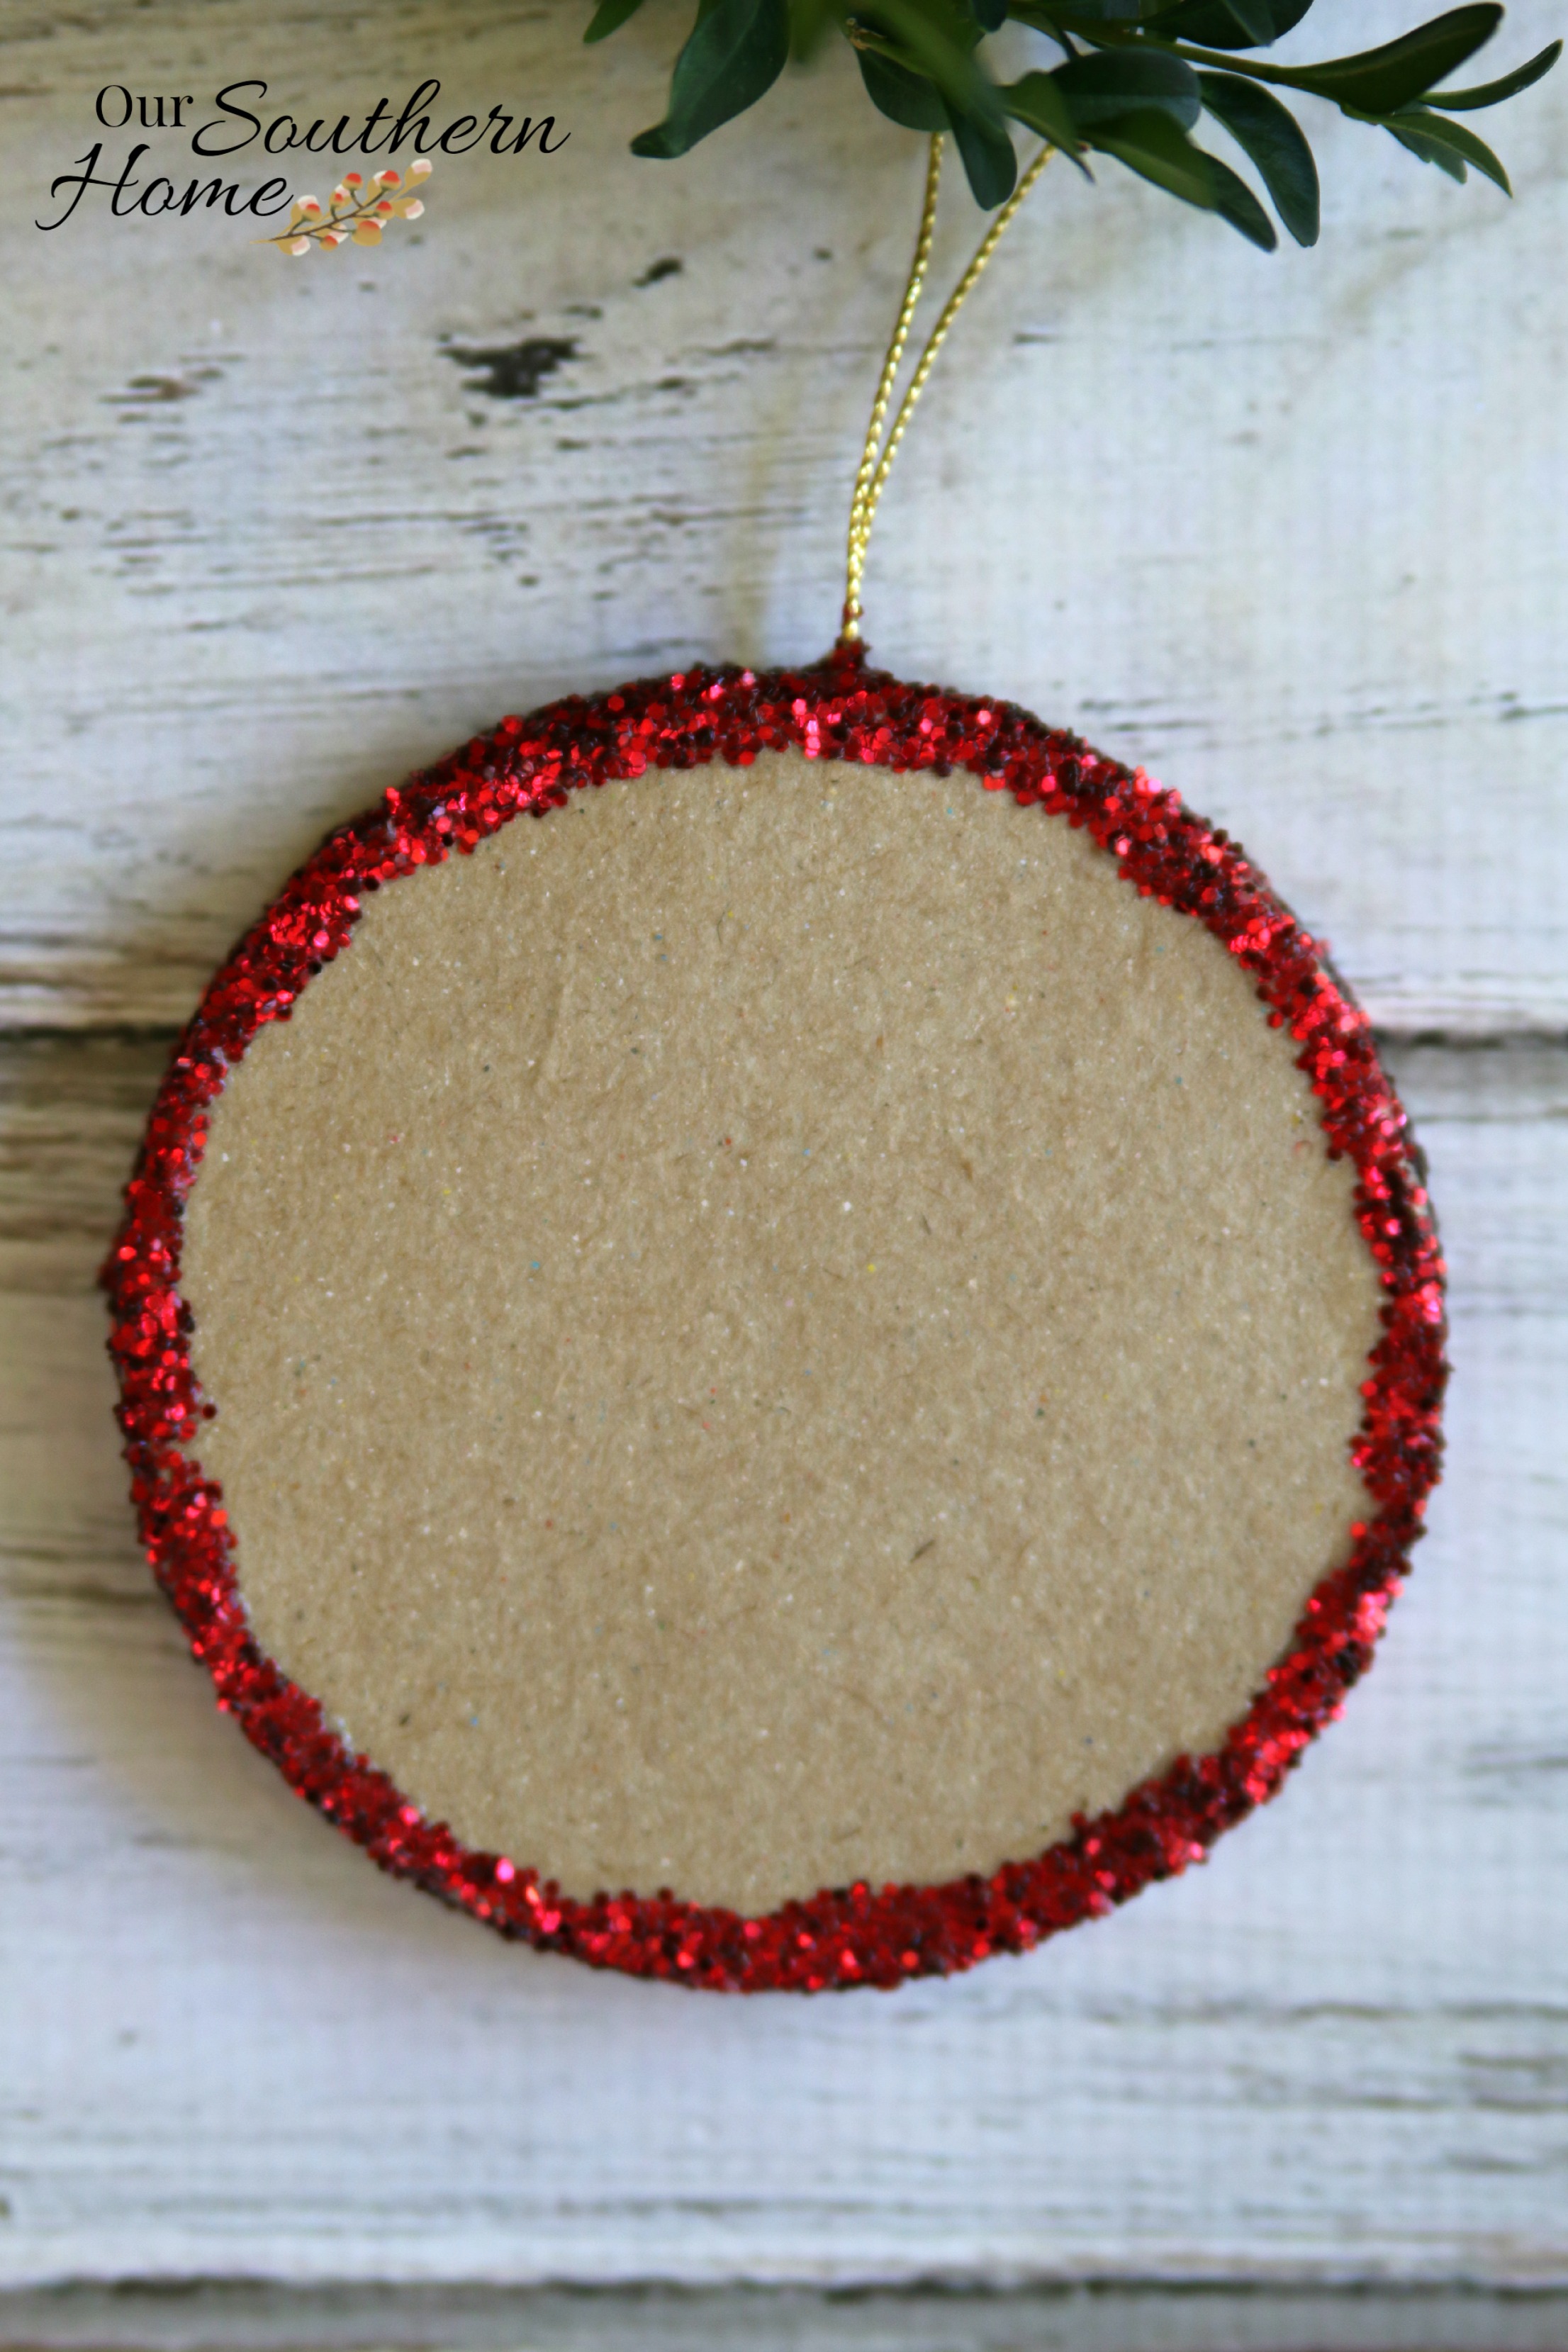
Once your ornament is completely dry, paint the sides of the ornament with Mod Podge. I slightly bushed the top and bottom of the ornament.
Then lightly roll the ornament on its sides in a plate with glitter until the entire edge is covered. This way you have a tiny amount of glitter along the top and bottom.
Hang the ornament somewhere to dry completely. You could use a clothes pin to attach it to a wire coat hanger. I hung mine from the kitchen chandelier.
You are not done! The secret to not having glitter falling off the ornaments constantly is to apply a top coat of Mod Podge to the glittered edge once the initial coat is dry. Don't be afraid. It will go on white, but will dry clear like in the photo above. The glitter will stay in place!
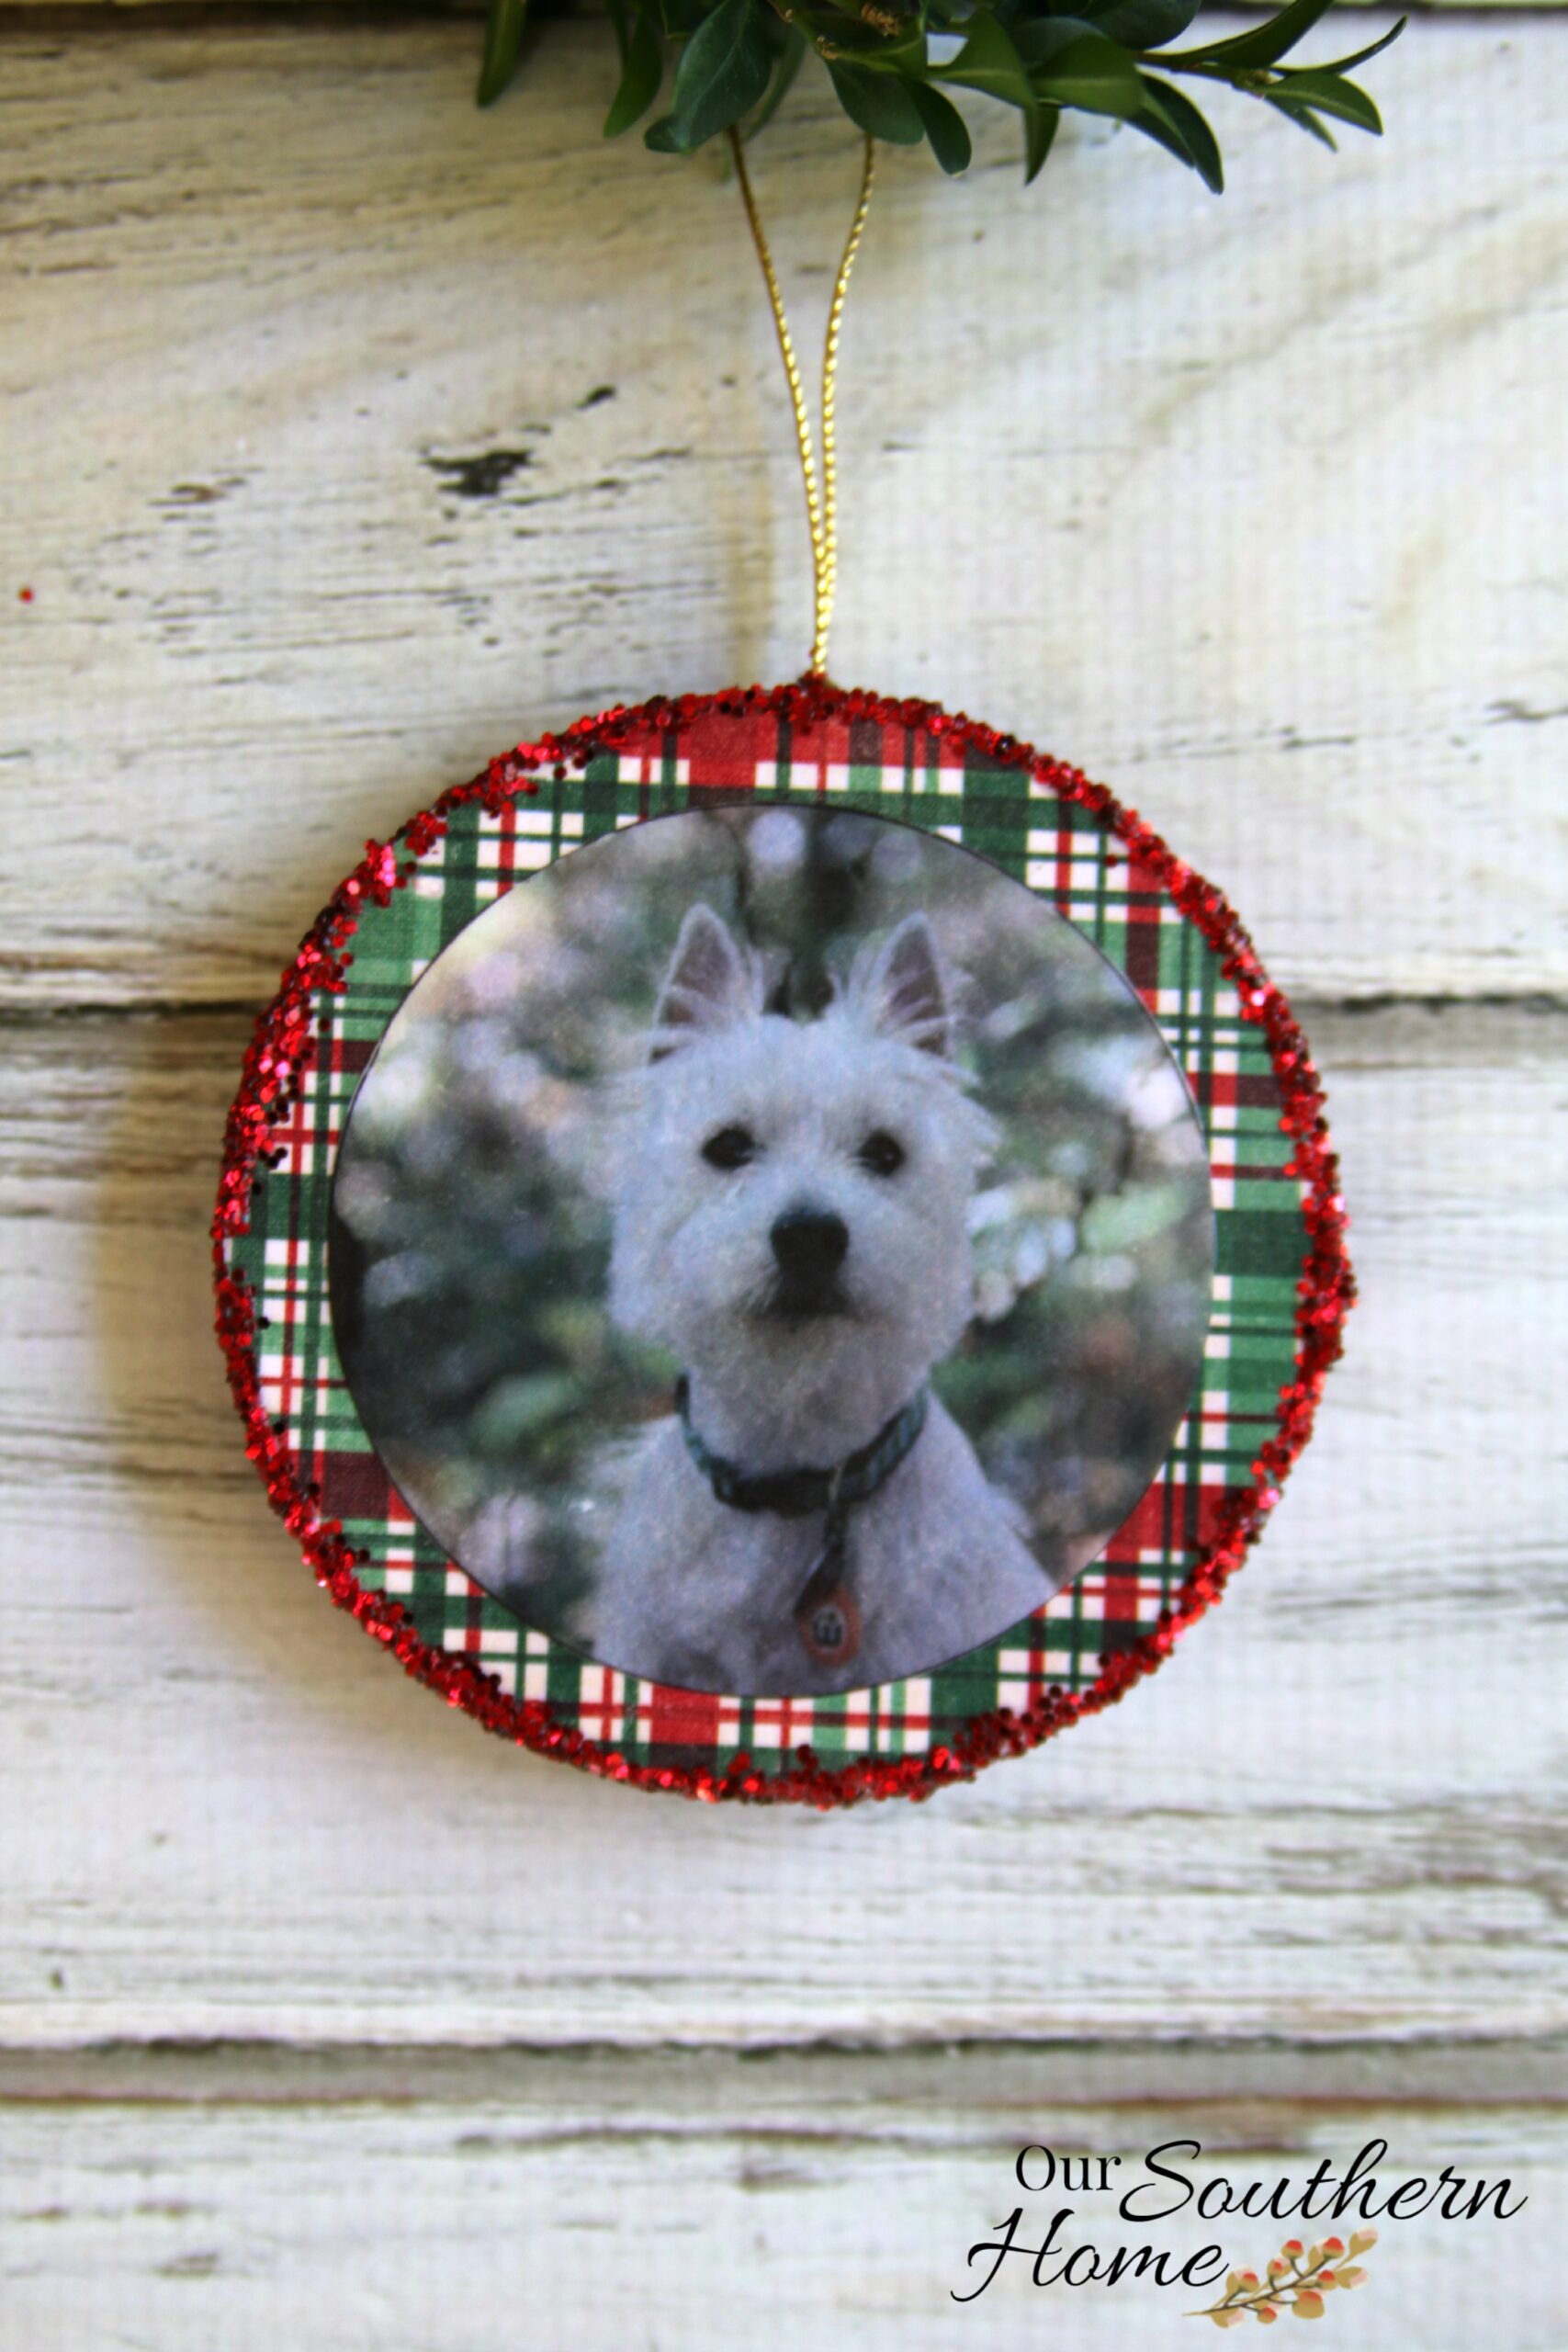
Yes, Bentley went with us to pick apples and had a grand time!
Such sweet memories of that fall day.

Woods was on fall break from college so it was an extra special weekend.

I love this little small pad of winter scrapbook paper. It's great for little projects. You could just as easily buy the 12×12 sheets and make all of your ornaments with the same background paper.
Here is the backside of the ornament. You could scrapbook the back or leave like this to write the date or a memory about the photo.
I thought I'd let the kids do this. Let it come from their own thoughts and handwriting. I may go back and add a bow to the top, but for now I like them simpler.
Be sure to PIN the above image for later!
Follow the Handmade Christmas Ornaments Pinterest page, where the blog hop ornaments, as well as past ornaments we’ve created, will be pinned.
Here are all 31 Bloggers in order of their appearance over the 31 Days.
Yesterday on Tuesday
The Silly Pearl
Cupcakes and Crinoline
Celebrating Everyday Life
AnExtraordinaryDay
All Things Heart and Home
Petticoat Junktion
Sew a Fine Seam
Shabby Art Boutique
Morena’s Corner
From My Front Porch To Yours
Pet Scribbles
Sweet Pea
Dukes and Duchesses
Simply Kelly Designs
Town and Country Living
One Artsy Mama
The Crafting Nook
Our Southern Home
StoneGable
Love of Home
Lovely Etc.
Remodelando la Casa
504 Main
Knick of Time
Refresh Restyle
The Cottage Market
My Uncommon Slice of Suburbia
Heathered Nest
Sum of their Stories

I’d love for you to follow along on social media!
–>> Facebook | Pinterest | Instagram | Twitter | Google+

Home Stories A to Z Not Just a Housewife Kammy’s Korner The Happy HousieDesign Dining and Diapers Liz Marie Blog Funky Junk Interiors Savvy Southern StyleTatertotsand Jello DIY Show Off Redoux Interiors Between Naps on the PorchThe DIY DreamerOh My Creative Little Miss Celebration Just a Girl and Her Blog Sand and Sisal InteriorFrugalista House on the Way Addicted 2 DIY I should be Mopping the FloorMiss Mustard Seed Stone Gable- The Scoop Inspire Me Tuesday Feathered Nest Friday Treasure Hunt Thursday Northern Nesting
Buffer
I love these ornaments and want to try making them. However, I have a question, can I use an actual photograph or should I print the photos on copy paper?
In reading instructions, not sure, wondering if you apply the Mod Podge over the front of picture. I make photo ornaments and not too happy with the way it looks with the Mod Podge on top of the picture, please advise as I have a few I need to make early on this week for gifts. Thanks!
Yes, I apply Mod Podge over the photos. I use thin coats. Happy crafting!
Sorry for the late reply, but yes Mod Podge goes on top of the photos as well. I apply a thin layer.
These are so pretty, Christy. I love how you combined your ornament with what truly matters most – family! hugs, mb
Love these! So cute and fun!
I used to make photo ornaments every year, but haven’t the last couple of years. Yours have inspired me to do it again. Pinned!
Love these!! So cute and your family is beautiful!!
Debbie
I admired a tree done all in photo ornaments when I went on a Christmas home tour last year. Maybe with your inspiration, I will et started in time to do it myself this Christmas.
So love this idea! Incorporating black and white photos are kinda cool too! love it!
How sweet! I love that all your babies were celebrated with these cute ornaments!
Such cute and meaningful ornaments! I love the glitter and the colors paired with the black and white photos!
How absolutely sweet idea!!! Looks amazing. That’s a sweet thing to do and keep loving memories all over the tree!!! Love it!
XOXO
These are so cute, I love things that are so personal.
Your mod podge over the glitter tip is so right, I do that myself and love how much less mess I get. I used to be put off glitter for fear of it leaving a trail everywhere it went!
I love this! I know that you love pulling your ornaments out year after year and looking at how your kids have changed over the years. Since I don’t have kids, I need to make an ornament for Sherman!
Now I know why you had red glitter everywhere last week ha ha! These are absolutely adorable! I too am a sucker for photo ornaments, and these turned out so cute that I just might have to make some for us too! XO
Christy these are precious! I love memory ornaments and how special to do some every year and watch the family grow and change over time…I love the glitter edges too 🙂 ox