Orvis Inspired JOY Wall Hanging

Today is my first holiday project to share with you for the upcoming Christmas season.
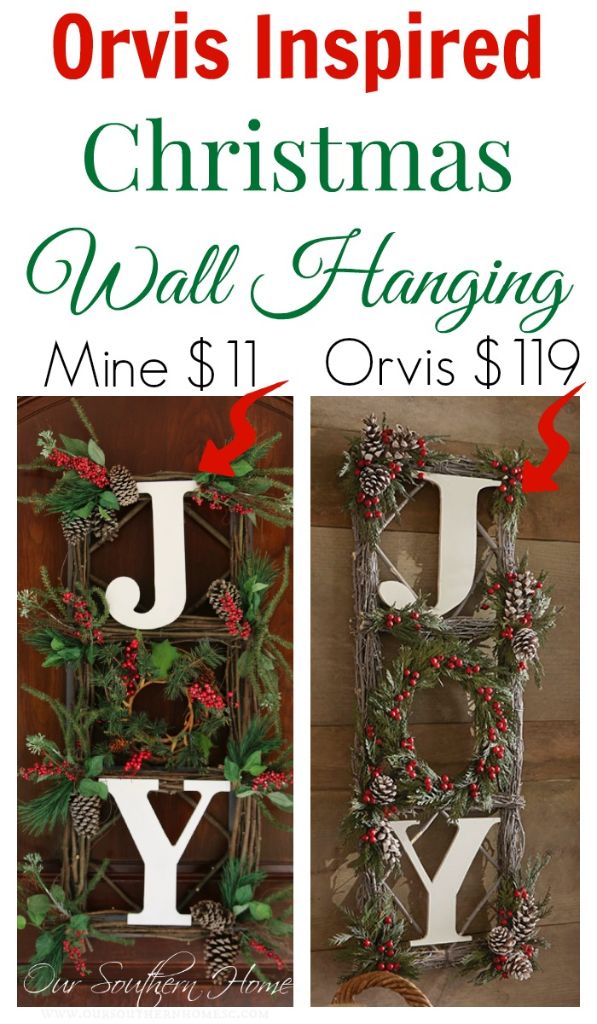
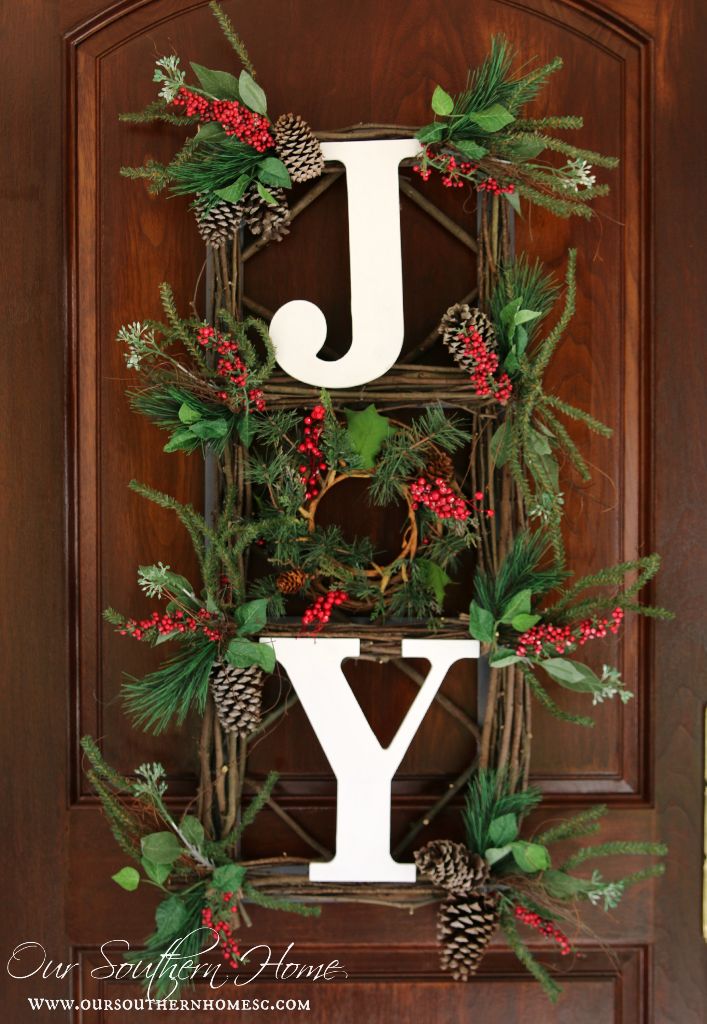
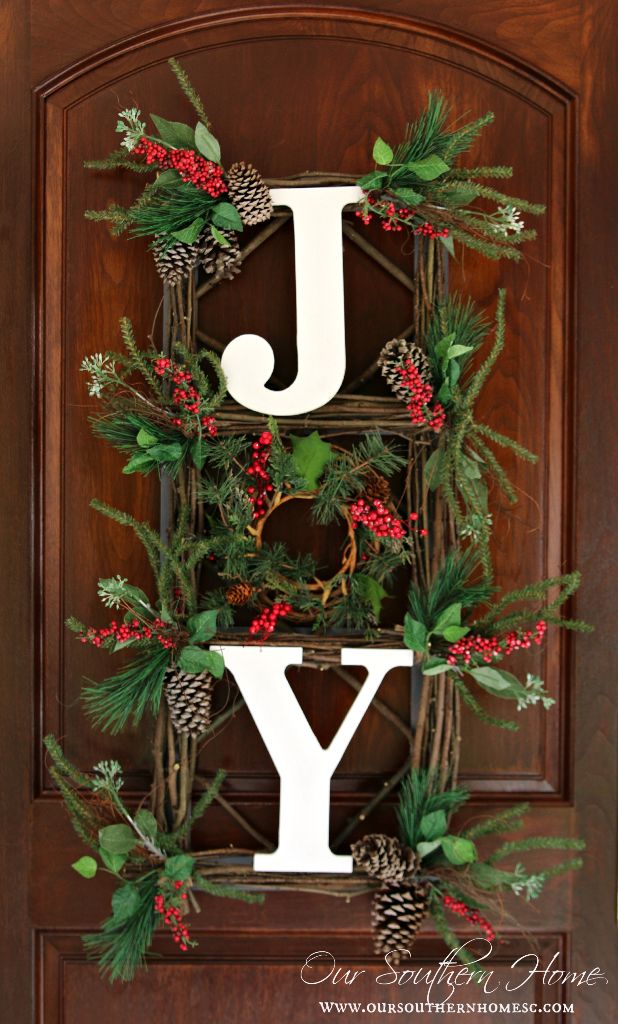
Today I'm sharing my Orvis Inspired JOY Wall Hanging. It can be used as a wreath.
Be sure to checkout all of the other projects below from my blogging friends! Check back all week for new projects added!
You will need:
10 foot piece of lattice for the frame
E6000 adhesive
J and Y 9.5inch craft letters
white paint
grey or brown spray paint
glue gun
floral wire
twine
scissors
pruning shears
holiday floral picks
pine cones
small wreath for the “O”
clamps
It's not an exact match, but I'm very happy with it!
The Orvis version is $119. Mine is $11! I used a lot of what I already had. You could also use fresh greenery and berries.
This was a really fun project, but not a quick one! I worked on it off and on for 2 days. I'd say I have about 3 hours in it. Now that I've made it, I could do it much faster the next go around.
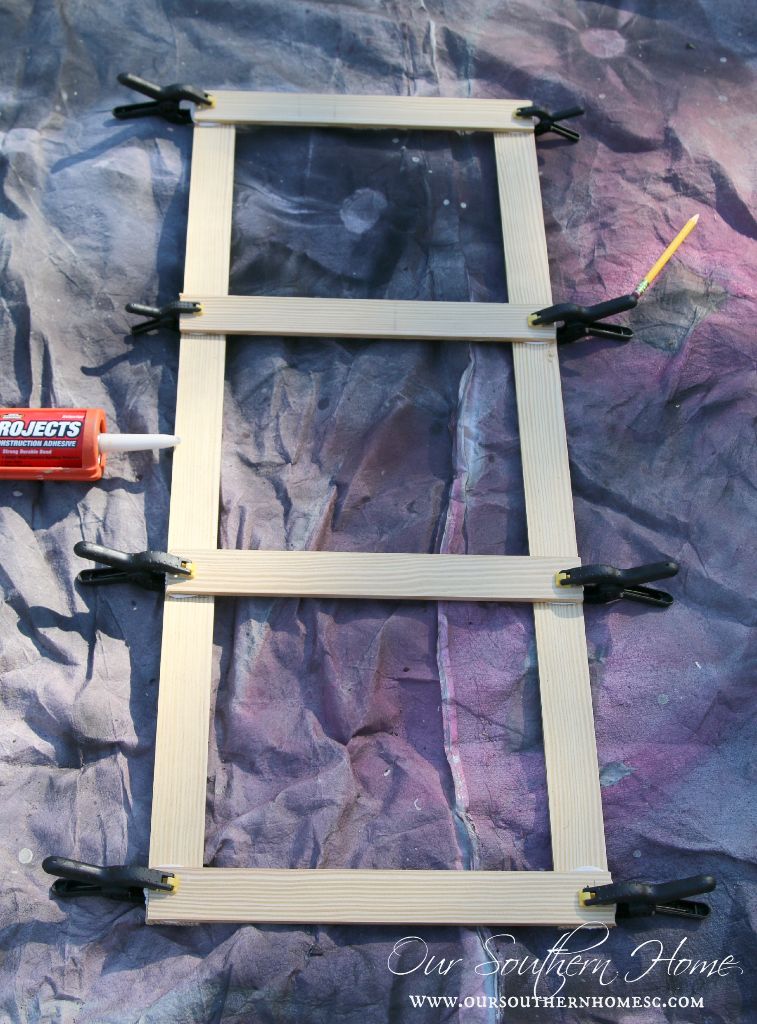
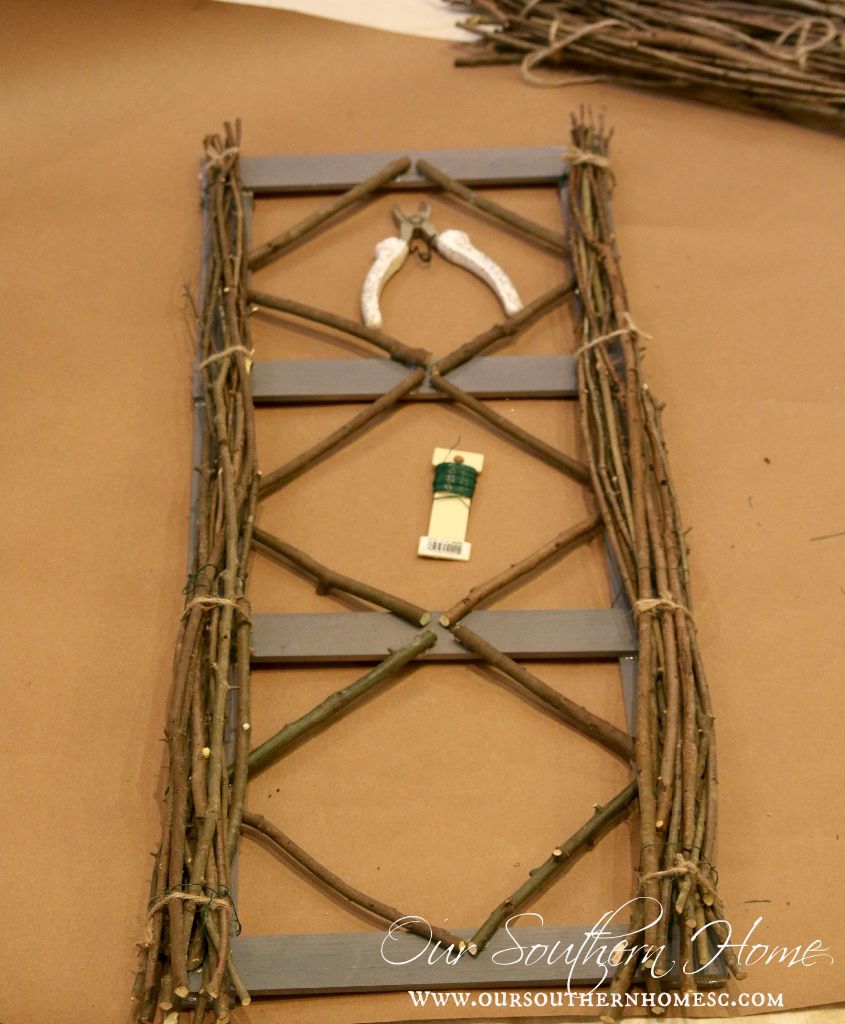
Use a hand saw to cut the sections for your 10 foot stick of lattice. You will need 2 pieces 31″ inches in length. You will need 4 pieces 12-1/2″ in length for the center sections. Glue the sections together as above using clamps to help set in place. I left this to cure while hunting for sticks and pine cones. I started with Liquid Nails Project adhesive and didn't like it. I ended up using my E6000 which is amazing! Clamp to secure.
Gather lots of nice straight sticks/twigs. You will bundle 2 sets to fit the 31″ sides and 4 bundles to go on the center sections. I bundled them with twine.

I had grey spray primer on hand and I just used that. You could use brown or even leave natural. Even stained would look nice. I just did one coat. It really isn't meant to be seen.
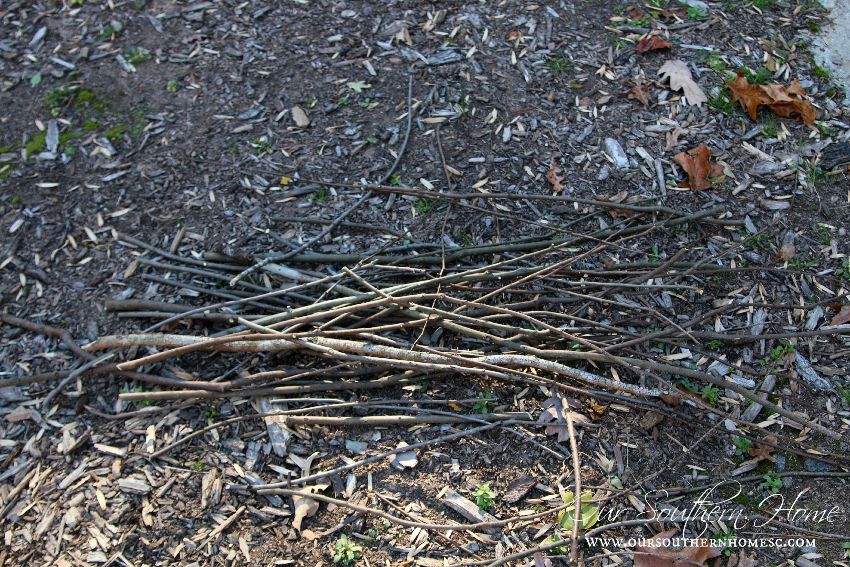
Large pile of sticks

I cut 4 sticks for each section to form a diamond. No measuring….just look and cut. I attached with hot glue.
The sides will be your 2 long bundles of twigs. I bundled them in 4 places that would correspond with the cross pieces so the twine would be hidden. I wired them to the frame with florist wire.
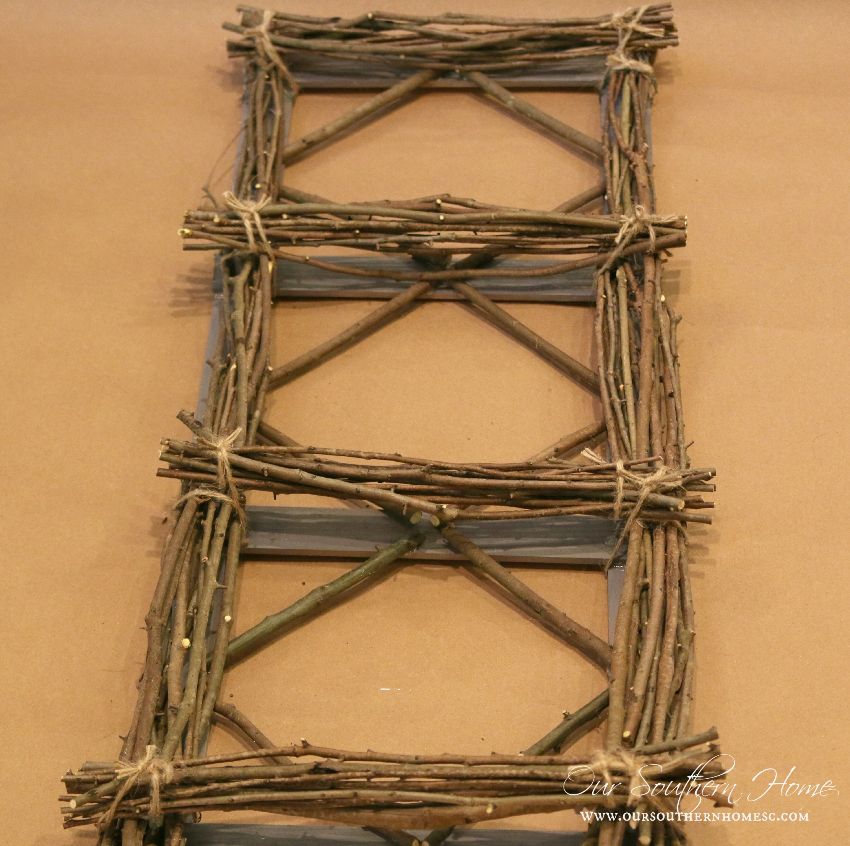
I attached the top cross sections of twigs with hot glue on each end and tied with twine.
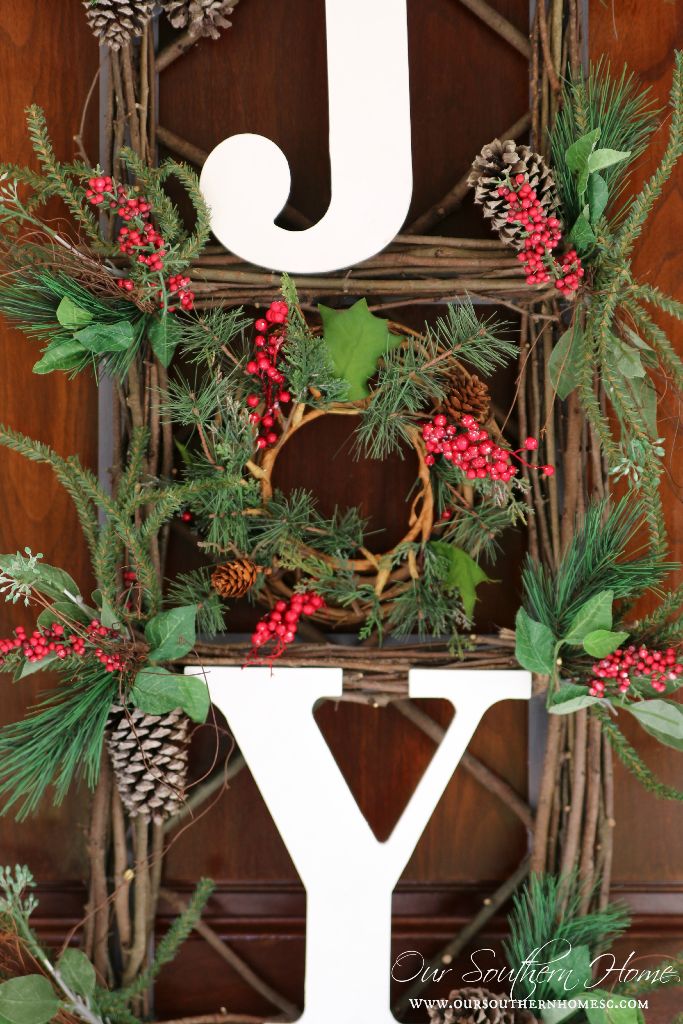
Then you go and tuck in greenery, glue pine cones, glue letters and wreath.
For the wreath “O” part, I took a small grapevine wreath and layered a pillar candle ring on top to make it fuller.

I am not sure where I'm going to hang it yet, but it will be either on the front porch or by the side door entrance.
Be sure to check out all of the other fabulous Christmas Knockoff ideas below! I'd love for you to pin and share!

Link Parties that OSH parties at on occasion! Sunday: DIY Show Off Monday: Between Naps on the Porch, Home Storis A to Z , Inspiration Monday– Refresh Restyle Tuesday: Not Just A Housewife, All Things Heart and Home, The Scoop at Cedar Hill Farmhouse and Inspire Me Party at A Stroll Thru Life, My Uncommon Slice of Suburbia Wednesday: Savvy Southern Style Thursday: My Repurposed Life, From My Front Porch to Yours, Friday: French Country Cottage, Miss Mustard Seed Furniture Friday, Common Ground, Imparting Grace, Keep Calm and Link Up, Craftberry Bush – Inspiration Gallery Friday, SnapCreativity – Show and Tell, Tatertots and Jello
Buffer


Thank you for the wonderful tutorial. I just got through making one myself. Earlier today I hung it up outside and it looks awesome!!
I like yours better! This is so pretty and the rustic twig look is exactly the style I’m looking for this year.
Thanks so much Mary Beth!
This is absolutely amazing Christy! I can’t believe how much you saved making this yourself. You did an incredible job I love how yours looks it’s beautiful!
Thanks so much, Dria!
Christy, your project is amazing! I like it even better than the Orvis one! Really!! Love, love, love it!
I love it! What an awesome knock-off!
Thanks, Leslie!
Thank you – I love this and can’t wait to make it for the holidays.
Thanks so much!
Christy, What a stunning piece! It would look great on our front porch! 😀 Awesome tour! Jeanette
Thanks so much!
This is great! I love twig crafts and decor. Your tutorial is a duplicate of the Orvis wreath too. Next, I’ll be in my yard looking for twigs to make this! Sharing!!
Thanks friend! So looking forward to using it with plaids on the porch!
Christy, love the way yours turned out! This is a great holiday alternative than the plain old wreath! Well done!
~Tami
Thanks so much, Tami!
Christy! This is stunning! Yours looks amazing, even better than the original! XO
Thanks bunches, Christy
You did a really awesome job on this one Christy!!! I love it!!! I want one for my front door too. 🙂
Nancy
Thanks, Nancy! I love the outcome…a little work, but such fun!
This is so pretty and should be much enjoyed this holiday season. Yours is definitely just as nice if not better than the expensive Orvis version.
Thanks bunches, Paula!
You did an amazing job Christy! Yours turned out much better! I like that yours isn’t frosted.
Thanks friend! Ready to jump into Christmas decorating!
Great door decor for Christmas! I love the use of the word JOY, living a life of joy is such a gift to oneself and to those with whom you interact. I like your knock off with the greenery better than the Orvis’ original! Great job! Enjoy sharing the joy throughout the upcoming holiday season.
Oh, Chloe…I couldn’t have said it better myself!!! Thanks so much! Hugs..Christy
Christy great knock off. Orvis needs to contact you for your version. Not only less money but better!!!
Cindy
Cindy you are so sweet!! Thanks bunches!
Christy,
This turned out beautiful. I love how easy you made this knock off. Perfect and so much cheaper. Love!
Thanks Vanessa. It was such fun. Ashlyn enjoyed helping collect the twigs!
Great job, Christy! I like yours better than the original!
Thanks Angie! I am loving our Knock off series! Such fun!
Very Nice!!!! I like yours better!!!!
Thanks so very much!
What a great knock off! I really can’t tell the difference. You could even make it snow covered — painted white — give it lights. The possibilities are endless. I think the reason it took the length of time it did is because of the glue — it has to dry.
Thanks so much! You’ve got some great ideas!!! 🙂