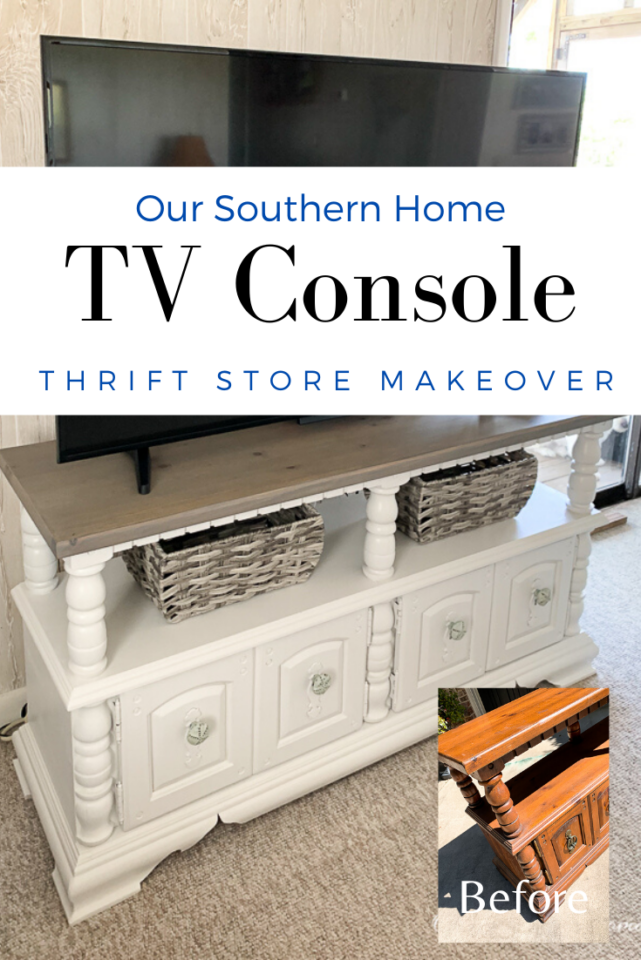
TV Console Makeover
Welcome to another fabulous month of thrifty makeovers from the team!
This month is a little different for me in that I found my project to transform from the Facebook Marketplace.
I can't wait to share with you how this TV console went from just ok to fabulous beach cottage chic.
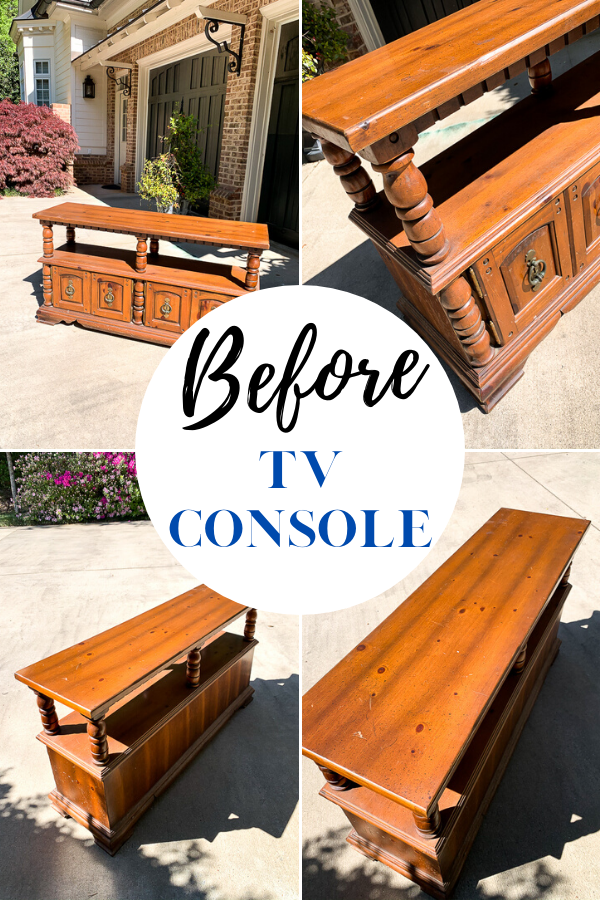
I got this perfect for us console table for $50 back in Early March.
Let me give you a little back-story on why I've been looking high and low for one….brand-new, Facebook and thrift stores.
We share a modest beach cottage with my husband's sisters and their husbands. It was built in the early 70s. We purchased it in 1993. Since then property values on our beach have skyrocketed. In all likelihood, if we ever sold our house; It would be bulldozed and a beach mansion would be built in its place. We joke quite frequently about that little fact.
We are starting to remodel it. Last fall we gutted the kitchen and have a brand new one. Last spring we did the hall bath. Up next, we want to replace all of the old carpeting with luxury vinyl planks.
In an effort to save money, we decided to cut the cord with our very expensive satellite cable service. We decided to get internet (I know crazy that we didn't have internet) and stream TV with YouTube TV. We can now have TV and internet for about $20 less than what we were just paying for Dish!
With that change, we needed to upgrade to a smart TV. With a new, larger TV…..we needed a new longer, console.
Everything that I was looking at in our price range, was not real wood and just didn't think it would stand the test of time with heavy use. Lots of little kids and pets around.
I decided that I'd take care of finding something second hand that I could makeover. That is what I do for a living!
Y'all….this TV console is HEAVY!!! It is solid. Enough chit chat…..Let's get down to the how-to.

How to make over a TV Console
Transform a piece of furniture with this two-toned look!
Materials
Tools
- wagner sprayer
- orbital sander
Instructions
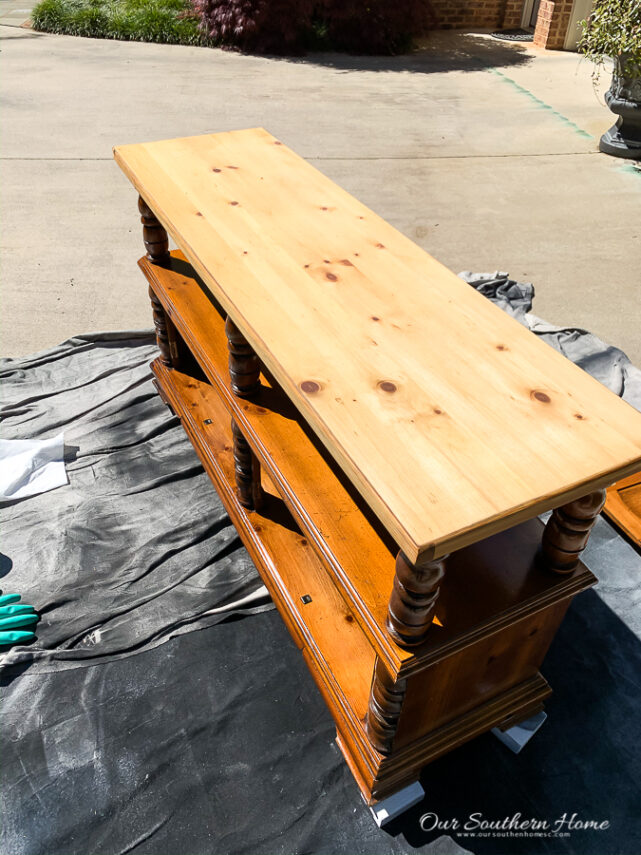
- Sand down the top to the raw wood where you will be staining.
- Sand first with medium grit to remove the old stain
- Finish with an extra fine grit
- Remove hardware and doors
- Dust piece
- Clean the entire piece with TSP cleaner
- Let dry
- Apply a pre-stain conditioner to raw wood with a foam brush.
- Stain the top with a t-shirt. I used 1 coat (let dry) Apply with the grain in the same direction.
- Tape of the the top so you won't get paint on it.
- Prime the areas that will be painted.
- Paint with desired paint color my brush or with a sprayer
- Apply a matte sealer to the top.
- Apply a satin sealer to the pale gray that will not yellow. (water based is my preference)
- Clean hardware and reattach. I painted and sealed my hardware with the same products as the body.
- enjoy!
Be sure to read the instructions above in the printable How-To card.
Look how pretty that raw wood looks. It sanded off easily and quickly in that it is pine.
Be sure to use a pre-stain conditioner with raw wood. Doing this will give you a nice, even stained top.
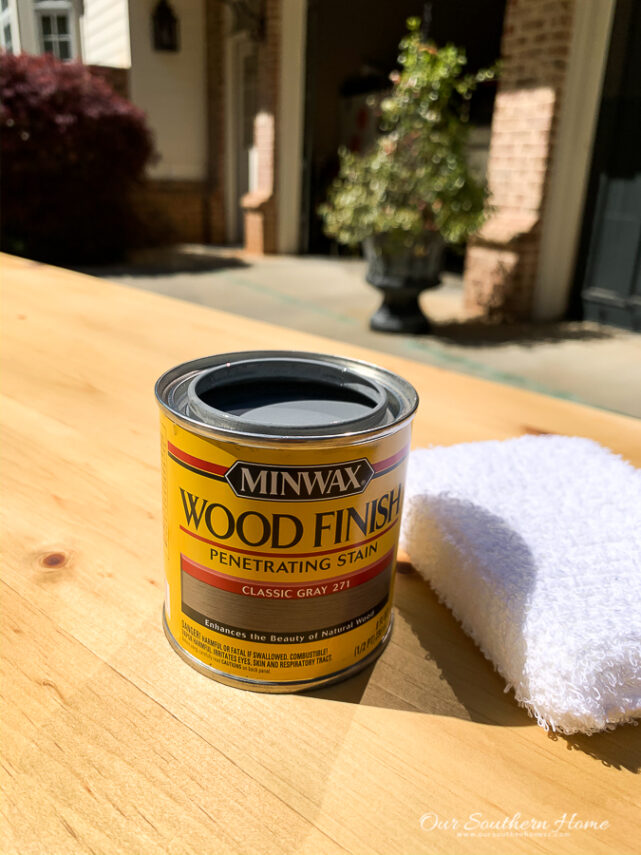
This was my first time using this color of stain. You can see how gray it looks in the can, but applied to the wood it ends up with a nice color that looks quite coastal. It's exactly what I wanted!
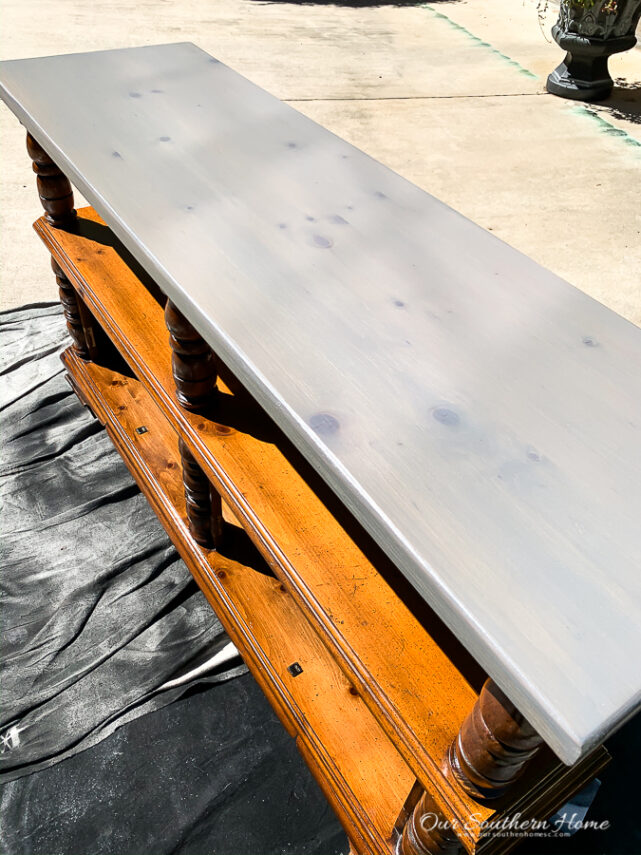
I'll admit, that I wasn't totally sold at the point above. The stain still on the bottom is totally throwing it off.
I only applied 1 coat of stain with the intent of possibly doing a second coat after painting the bottom. I just didn't want it too dark for the beach.
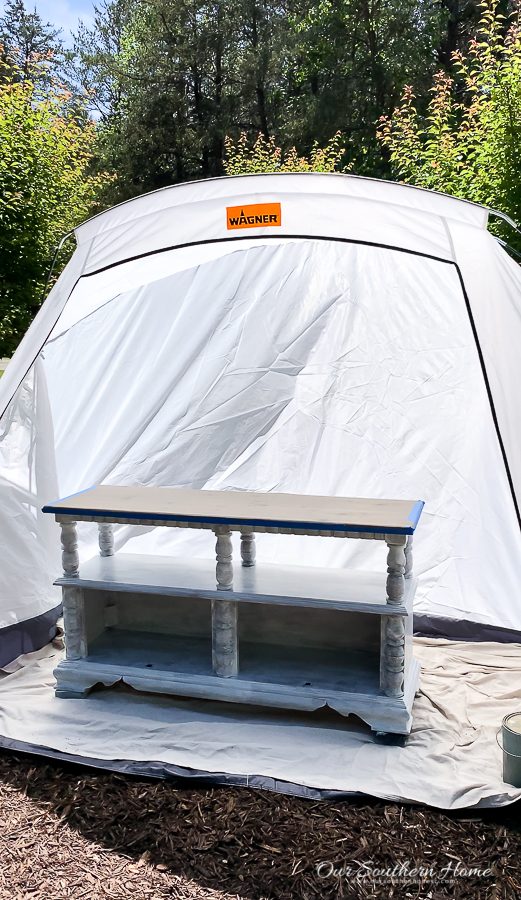
I primed the bottom by hand with a brush. I decided to spray the actual color with my Wagner Flexio sprayer in this handy spray tent. It makes the job so much faster and even. You can totally paint it by hand.
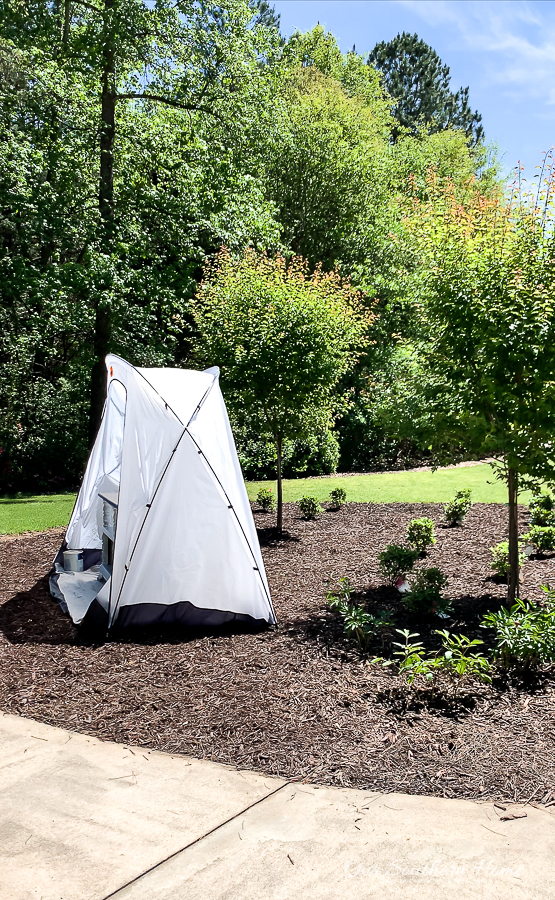
The spray tent made my job doable in that this day was quite breezie.
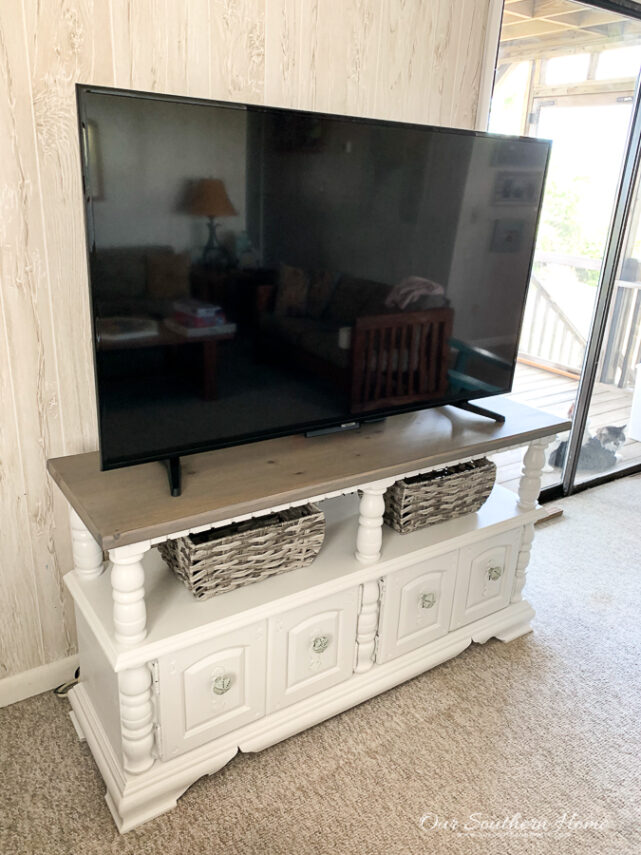
Here it is at the beach house. We went up for a couple of days a couple of weeks ago. It was a quick in and out. We had to go for a couple of issues at the house. We took Jack, Bentley and a huge cooler of food so we didn't have to go anywhere.
I apologize for not having any nicely, styled photos. I literally snapped these photos with my cell as we vacuumed ourselves out the door to head back home.
I am so happy with how it turned out. I'm glad that I went with a matte sealer for the top. Everything is linked above in the materials list.
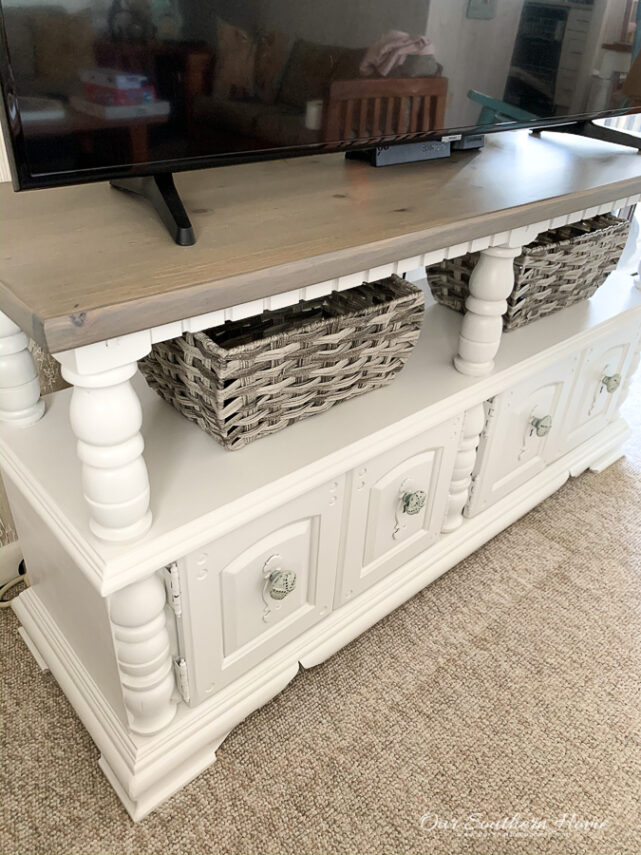
Ashlyn gets all the credit for picking out the paint color. I didn't want a bright white, cream or too gray. This color is so light gray that it looks white, but warm.
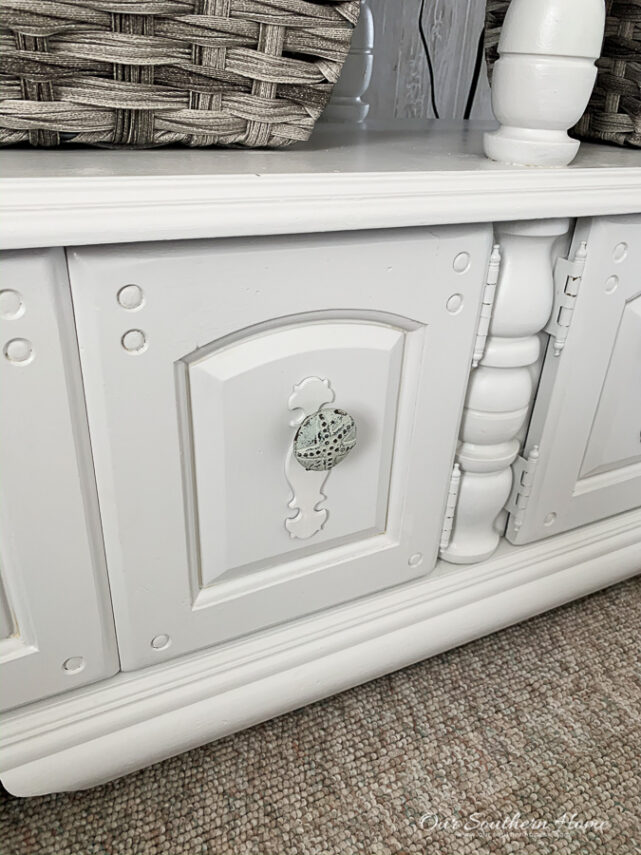
Let's chat about the hardware. We weren't loving the original hardware. We ended up painting the hinges because the original gold just didn't work. They stuck out too much. I painted them so they'd disappear. They may need occasional touch up. The gold metal plate creates 2 holes in the door. I didn't want to go to the trouble of filling those holes and measuring for new. We found these coastal knobs at Hobby Lobby for 50% off. They worked perfectly in place of the large round pulls that screamed 70s.
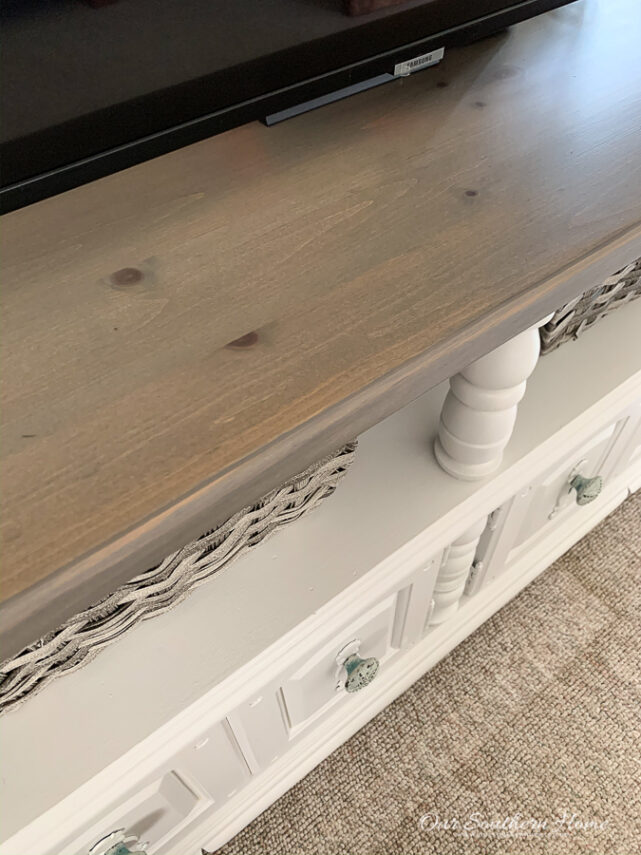
I only completed 1 coat of stain. I love how it's a warm gray and shows the grain and knots in the wood.
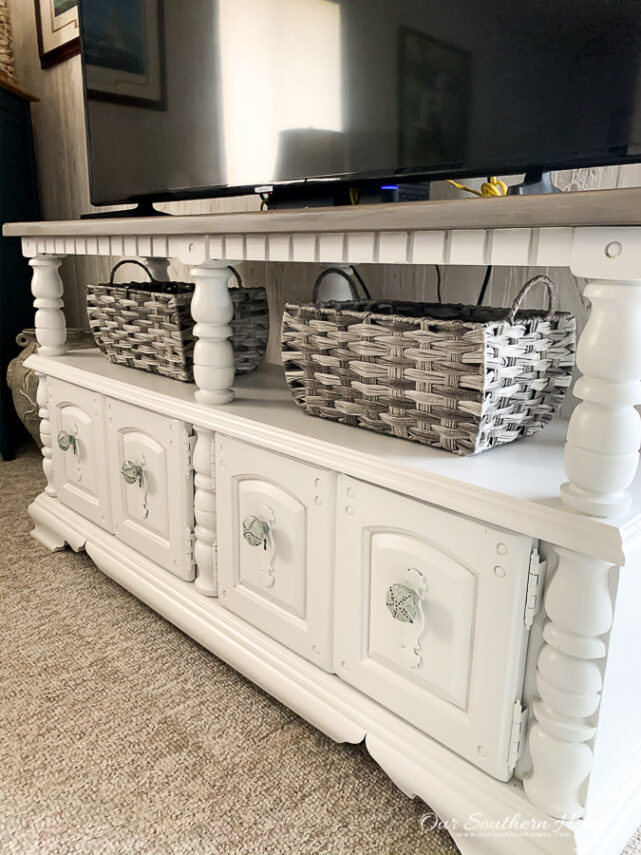
The baskets are a great size and color for the console. They are actually plastic-like and came from Lowes. They'll be perfect for small games, books and decks of cards. The hidden area behind the doors will work for games and puzzles.
It fits the space and TV perfectly! We are very pleased with how it works in the space.
You'll find exact links to the items used above in the materials list.

Be sure to visit the other projects that are NEW this month from my blogging friends!
Check out the before photos! It's a creative month for sure!!


That’s the kind of piece that you’d never think would ever be pretty, but you did it! Great job.
Oh wow, that is so pretty. I love the gray stain!
Thanks so much, Kathy! It was a pleasant surprise.
Christy, great transformation. Looks great!
WOW this is really beautiful, you did such a great job!
Thanks so much, Kristin!
Christy,
Wow! I love the stain with the warm white paint. Most people would have passed on that piece because they just can’t see past the ugly. 🙂
Super job my friend!
Pinned
gail
Thanks so much, Gail! It’s perfect for the beach.
AH-mazing! The stained top makes all the difference. Kudos on one of the best transformations I’ve seen.
Ahhh, Maggie! You are so sweet. Thanks so much!
The power of paint and a little stain! Well done. Just being able to see the transformation when you initially see a piece is the gift here. Knowing what to take home! Great job Christy!