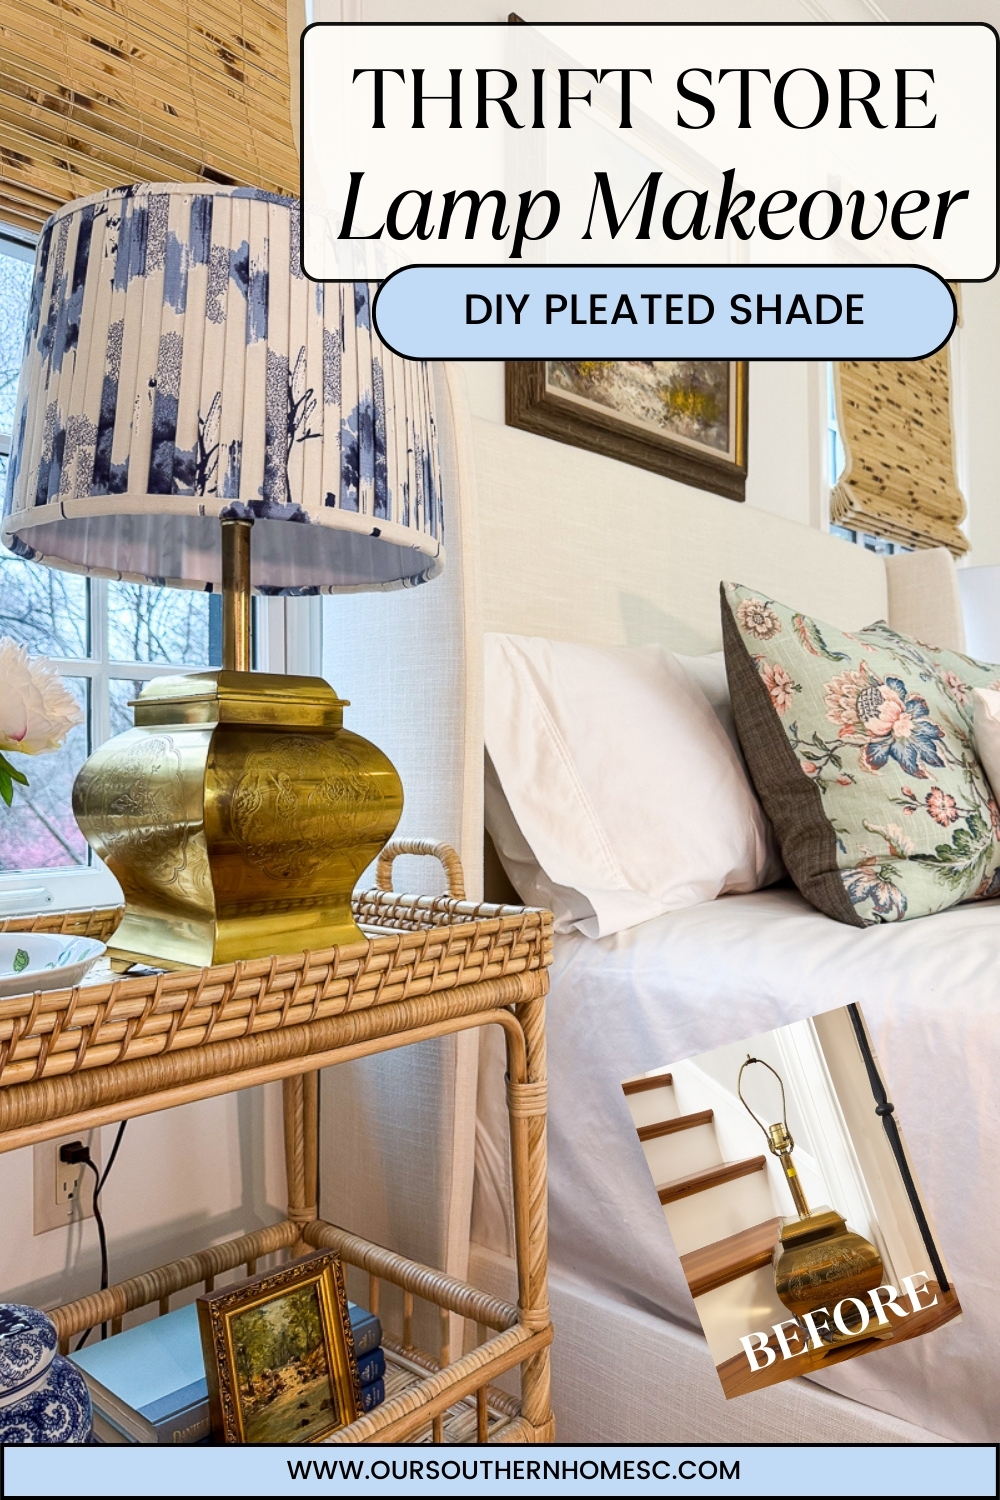
DIY Pleated Lamp Shade for a Thrift Store Lamp
This easy tutorial helps you create a DIY pleated lamp shade for a thrift store lamp to customize your room.
Latest from OSH
- Simple Layered Summer Tablescape with Collected Decor
- How to Make Piña Coladas in an Ice Cream Maker
- Saturdays on the Porch #86
- Saturdays on the Porch #85
- Easy European Wall Art with Thrift Store Frames
This post may contain affiliate links. If you purchase something using one of my links, I may earn a small commission from the retailer costing you nothing more. You can read more on my disclosure page. Christy Little of Our Southern Home is a participant in the Amazon Services LLC Associates Program, an affiliate advertising program designed to provide a means for sites to earn advertising fees by advertising and linking to amazon.com.
Thrift Store Makeover Day

Join us each month for NEW thrifty ideas from the team. You'll find links to all of the projects below.
Use the slider below to see the before and after!


There’s nothing better than a great thrift store find—especially when it has the potential for a stunning transformation! I scored a pair of beautiful Asian brass lamps with no shades. I decided to DIY a fabric pleated lampshade to match my decor. The result? A completely custom, high-end look for a fraction of the price! In this tutorial, I’ll show you how to create your own pleated shade, so you can refresh any lamp to fit your style perfectly. Let’s get started!
Supplies for DIY Pleated Shade for a Lamp
- Lamp
- Shade
- Fabric
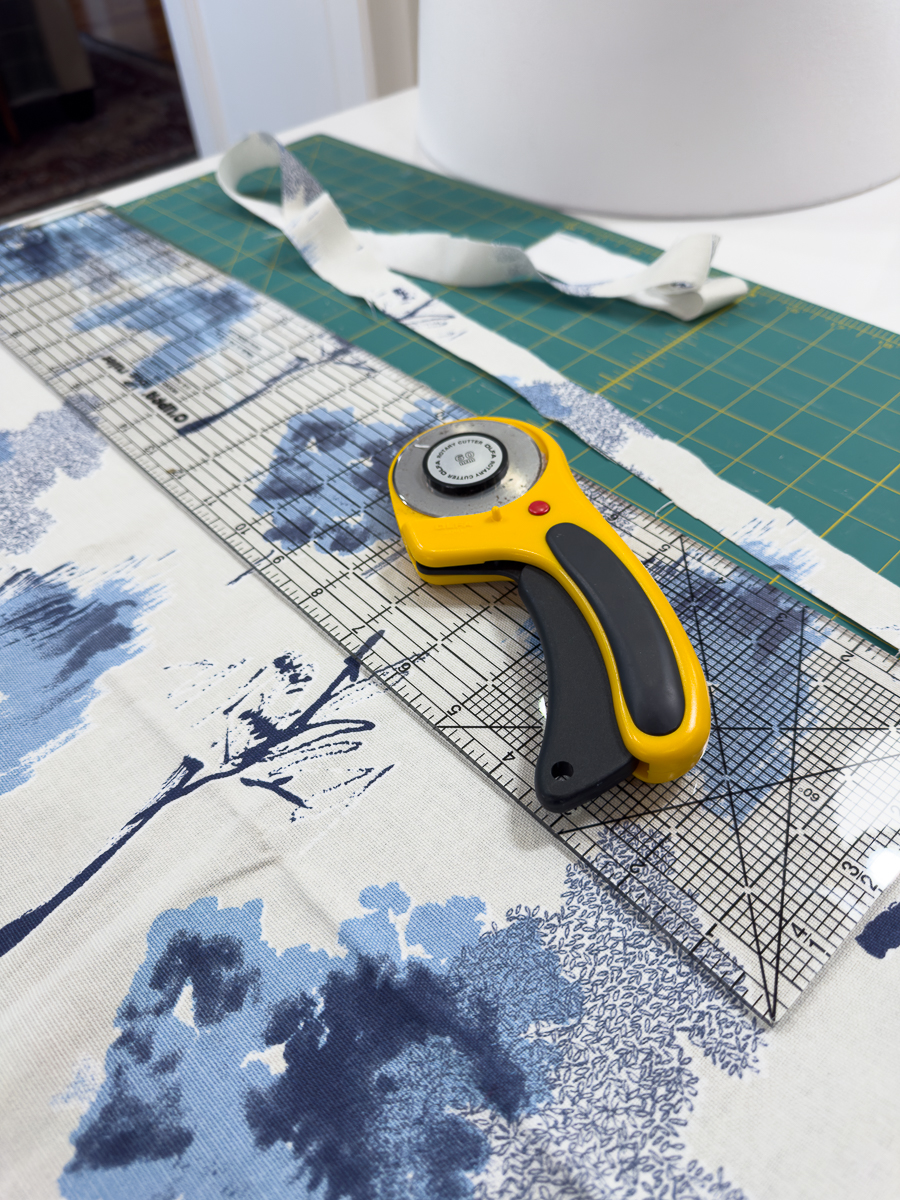
- Cutting Mat
- Rotary Cutter
- Scissors
- Sliding ruler with lip
- Tape measure
- Mini glue gun
- Mini glue sticks for fabric
- Set of bias tape makers
- Never Dull
You'll want to use a mini glue gun for this project. A small bead of glue is a must. This allows you to be precise. I used fabric glue sticks. It is all linked above.
You can make all of the strips without a bias tape maker, but it is a huge help. Plus you get the same size strip each time.
We have a local fabric shop that is only open one long weekend a month. It is worth the visit if you are in the upstate of SC. It is called All About Fabric. I bought a large stack of precut fabric that was sold by the pound. I got a lot for $32! They also have online sales.
How-To Make a DIY Pleated Lamp Shade


I bought these last year. As soon as I saw them, I grabbed them up. They are a bit beat up, but that is ok. It adds to the vintage charm.


Never Dull is a wonderful product for cleaning up brass. It will clean and add a bit of shine. It is quick and easy to use. No mess at all.


I picked up a 2 pack of shades at Homegoods which worked perfectly.


I squared up my fabric. I would cut your strips 2 inches longer than the length of the shade to start. Then once you get a feel for the process, you can most likely decrease those strips by an inch.
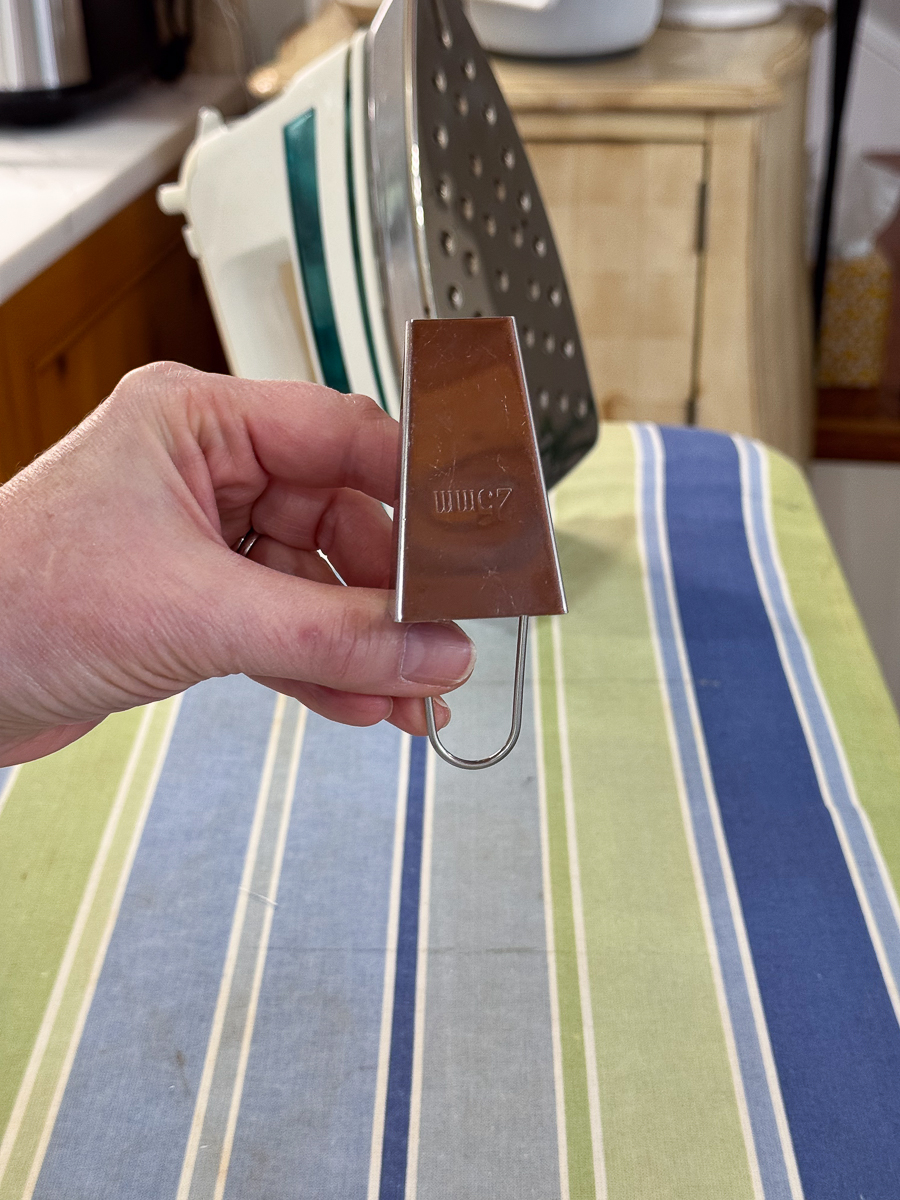
This is the 25mm bias tape maker tool. You will want to cut your fabric strips 2 inches wide.
These tools aren't necessary, but make the job so much easier and faster.


Using a bias tape tool speeds up the process. This was my first time using it. It has a slight learning curve, but once you get a hang of things, you are cranking these strips out!
Cut an angle from one end of the strip. If your fabric has a specific direction, make sure you do this the same on each strip. I cut the angle off of each bottom. Just do a couple at a time to test.
The angle is needed to thread the fabric inside the largest bias maker in the multi-pack. Wiggle it through until you can grab the end.
Pull it through a bit. When you flip it over, you will see how it folds the edges in for you.
Notice the little handle tab? You pull that as you iron the strip on the right side of the fabric. It keeps your fingers from getting scorched by the iron.


You will quickly produce a uniform strip that is crisp with ironed-down edges.
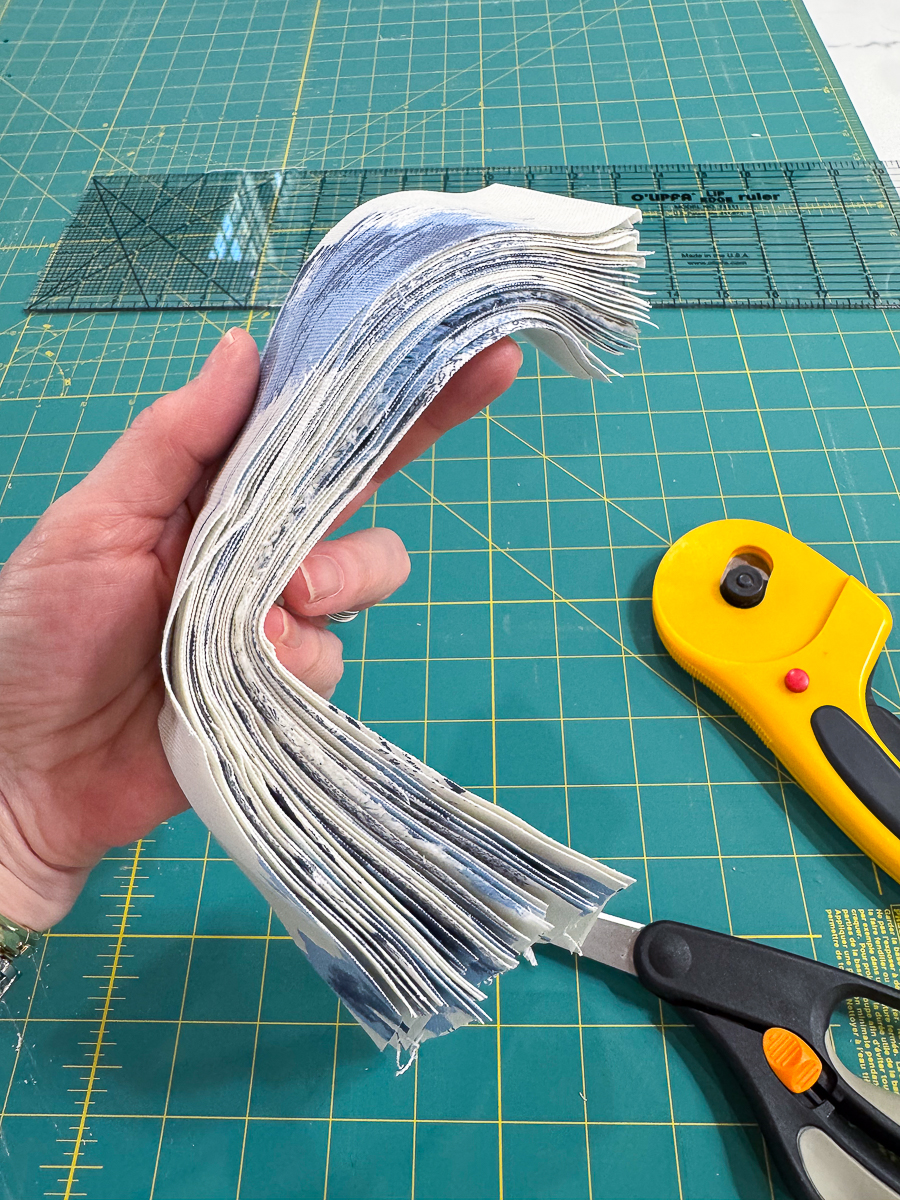
You'll end up with a nice stack of strips. The number of strips will depend on the size of your shade. Mine are on the larger side. I encourage you to take notes on the number of strips you make if doing a pair of shades. I have notes on the first shade. When I go to make the 2nd shade, I'll make the same number.
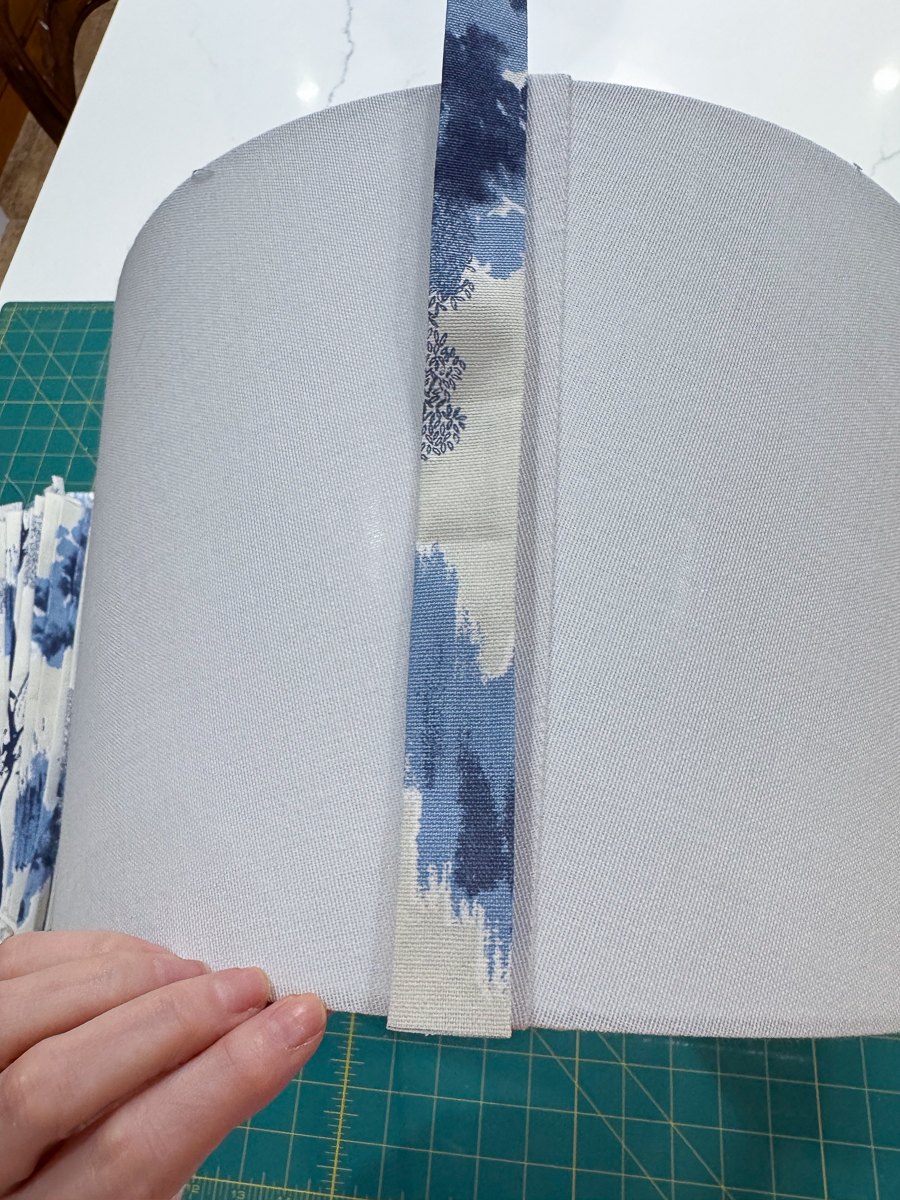
Lay out your first strips to test the length before you make too many. I started and ended at the shade seam.


Glue one strip at a time. Please make sure that if you have a pattern that it is going the right direction. The excess fabric was going at the bottom of the shade. You will apply a bead of glue at the top. Press the top down. Then glue just the bottom of the stip down. No glue will be used anywhere else.
My shade is slightly graduated meaning that the top is just a bit more narrow than the bottom. As a result, I put the strips tighter together at the top. They are then spaced a bit wider at the bottom.
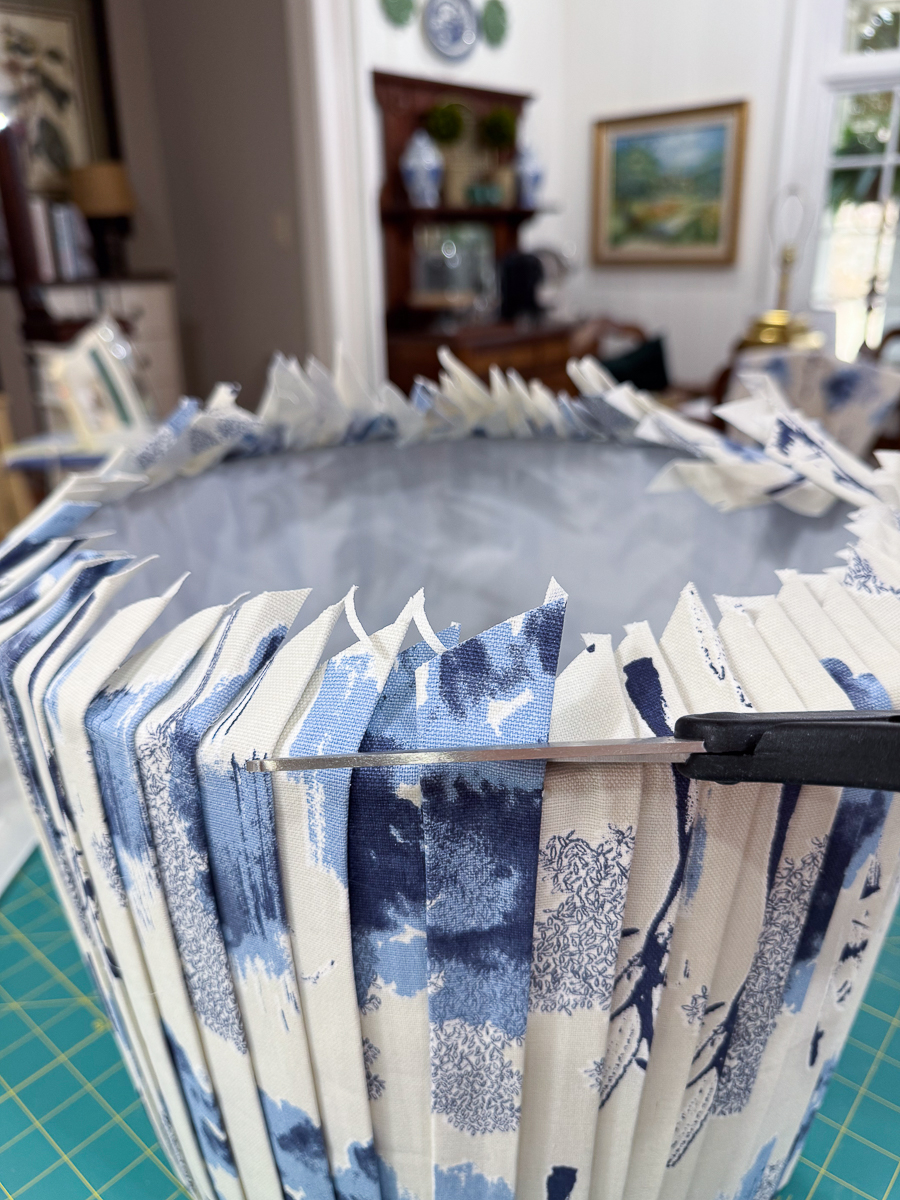
When you are finished, cut the excess fabric off the bottom.

Measure around the opening of the shade. I made a very long bias strip in the same size to finish the top and bottom of the shade. This covers all those edges.
I then glued it to the front of the shade and around to the inside.
Important Notes
- I had 2 pieces of fabric. Each piece was approximately 55″ x 51″. 1 Piece finished 1 shade.
- A piece of fabric made 2 strips to finish the top and bottom of the shade + pleat strips
- Each shade used 73 strips for the pleats.
- Work in assembly fashion after you get the hang of the first few strips.
- Cut all of the strips.
- Angle all of the strips.
- Run each strip through the bias tool and iron.
- Glue strips to the shade.

I won't lie. This project is easy and no-sew, but it does require patience and time. It is so worth the effort!
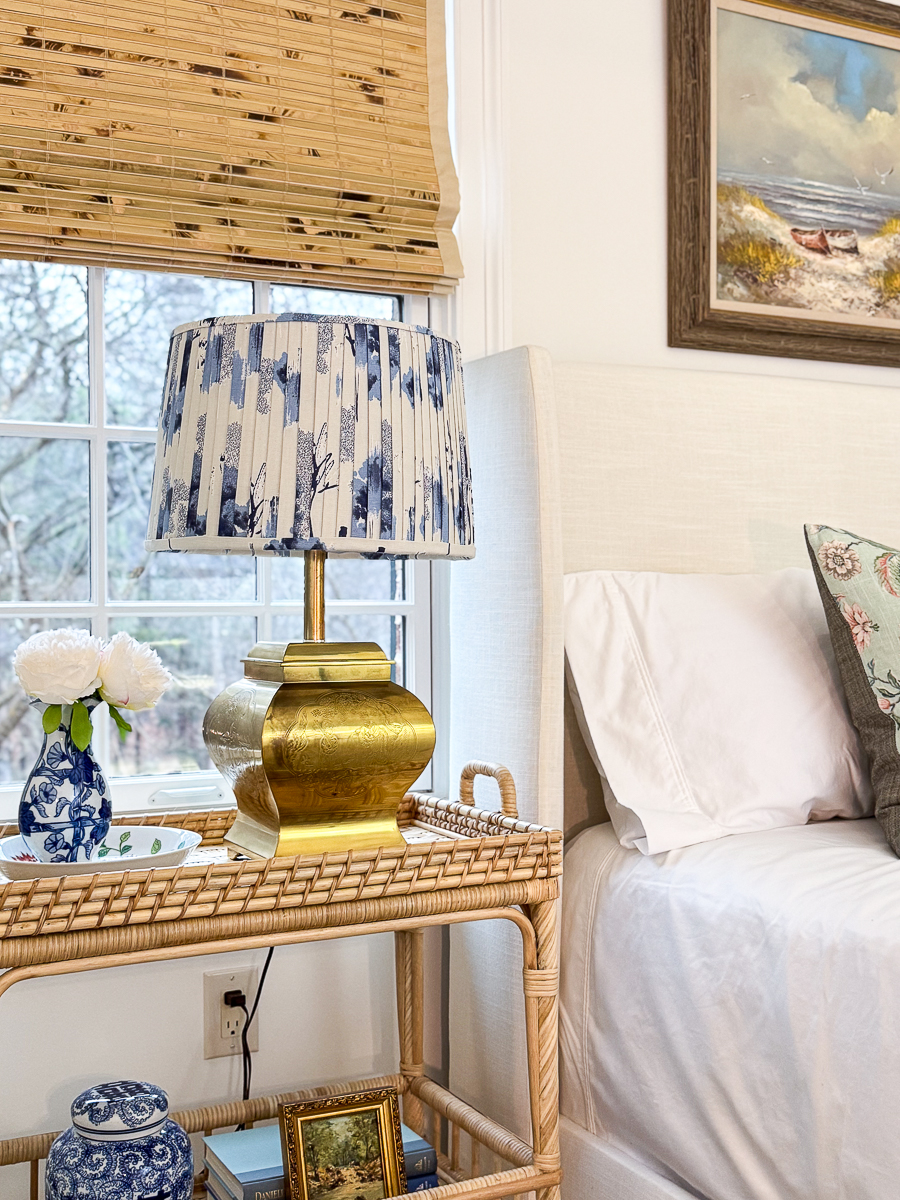
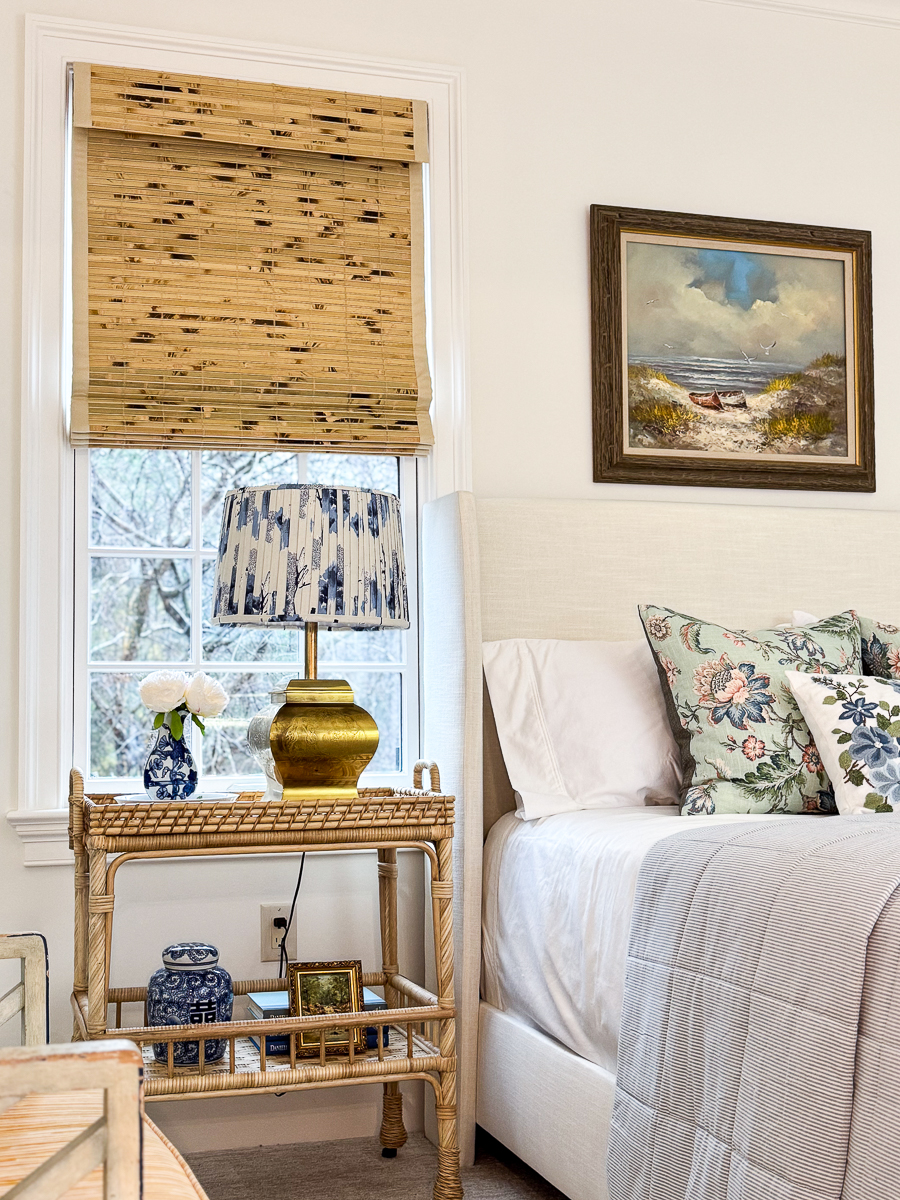
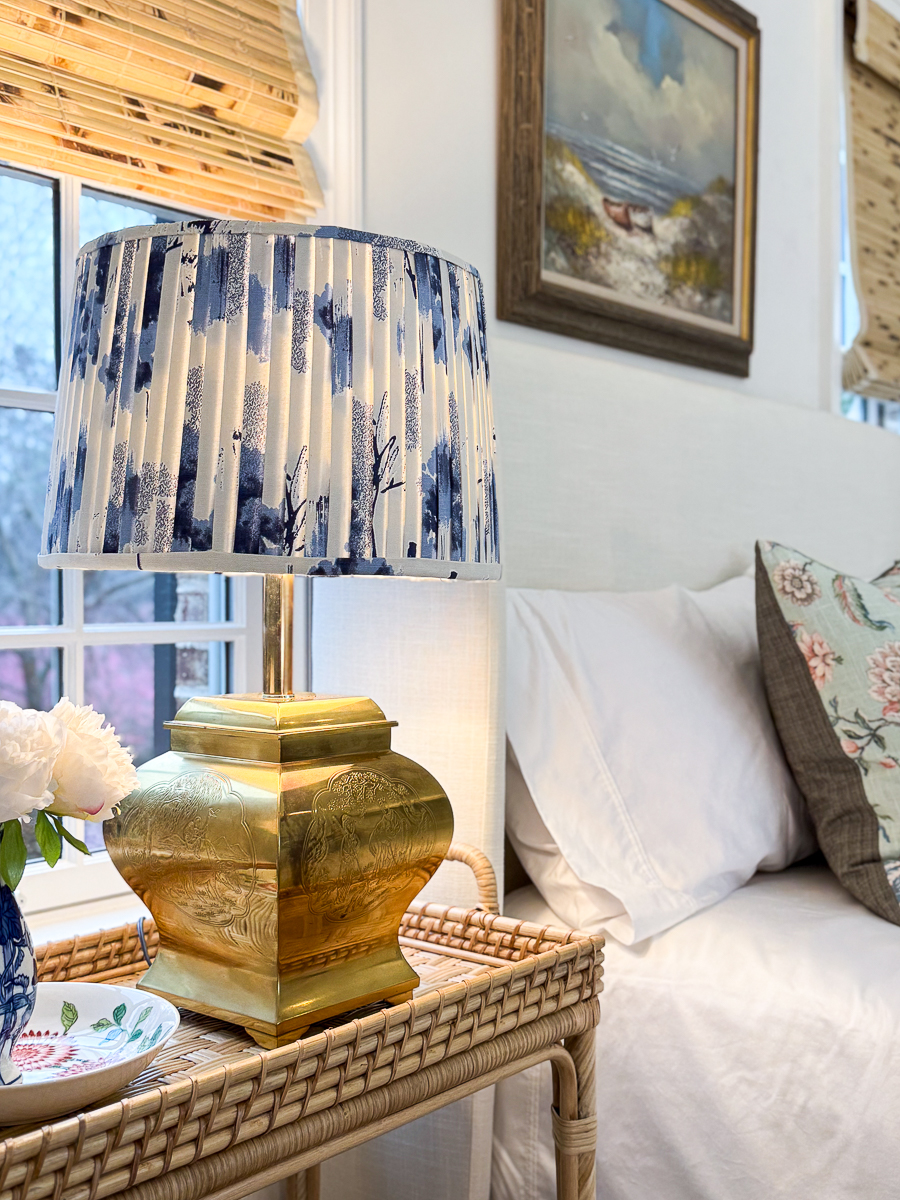
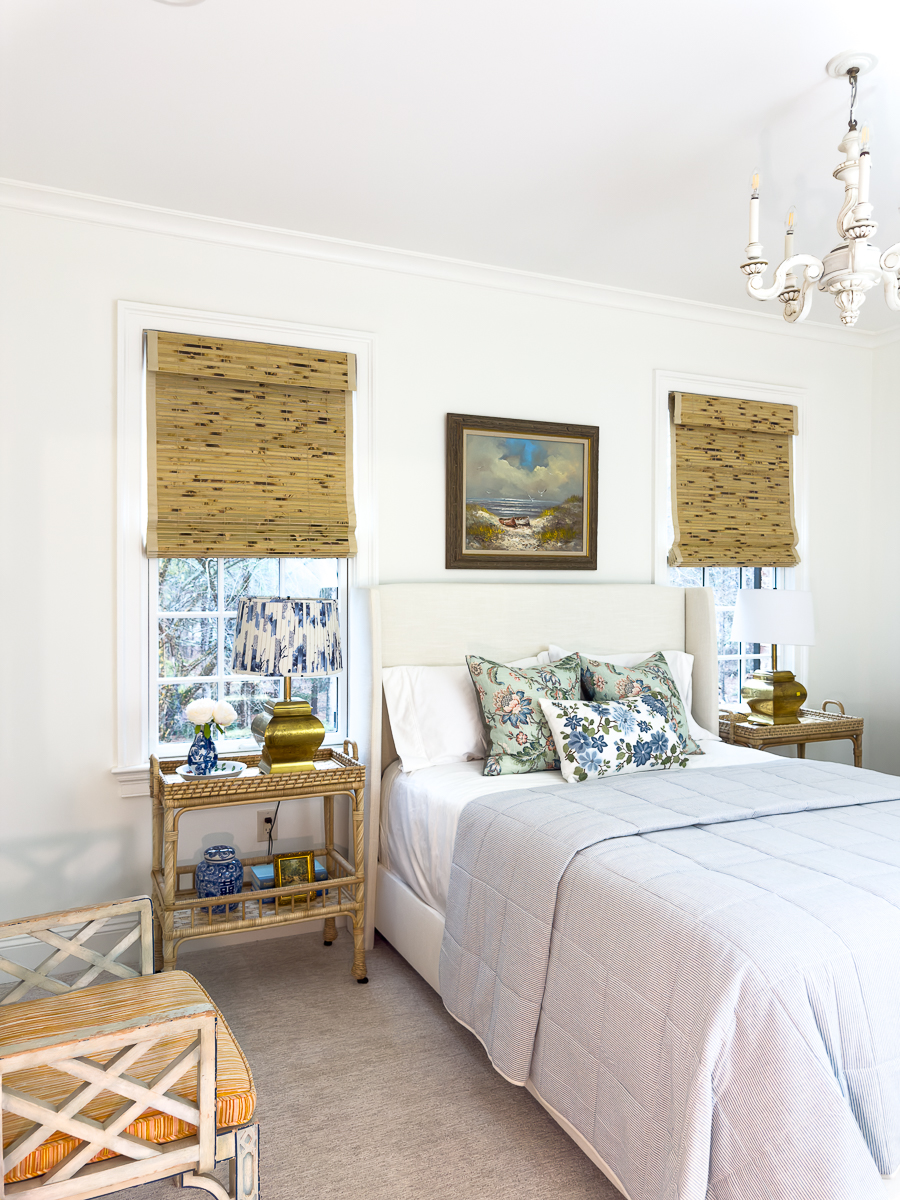
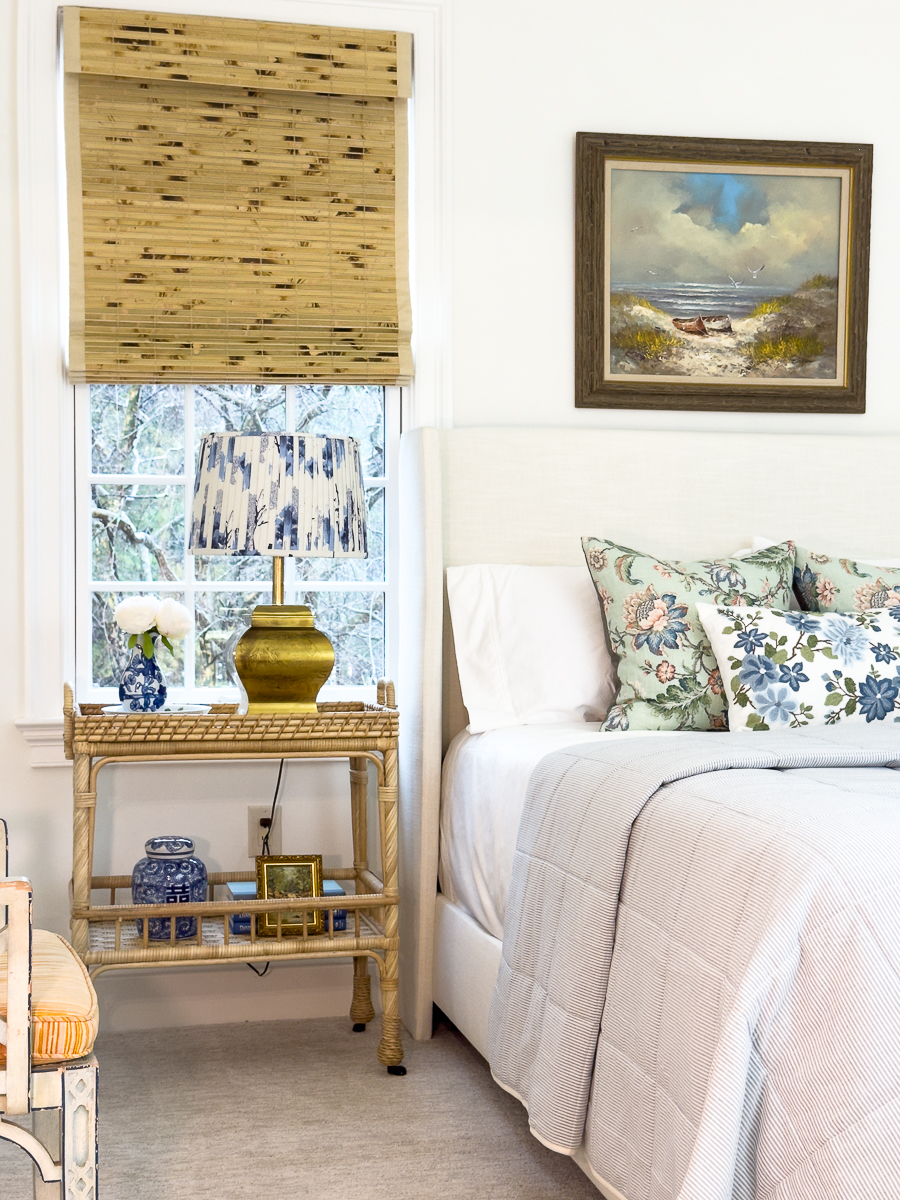
Styling the Shade with the Brass Lamp
This was Ashlyn's bedroom growing up. It's taken me 2 years to finally start getting excited about making this a guest room.
Fortunately, my lack of interest has allowed us to do a bit here and there.
I am enjoying the pattern that the shade gives to the space.
I hung the thrift store art above the bed a few days ago.
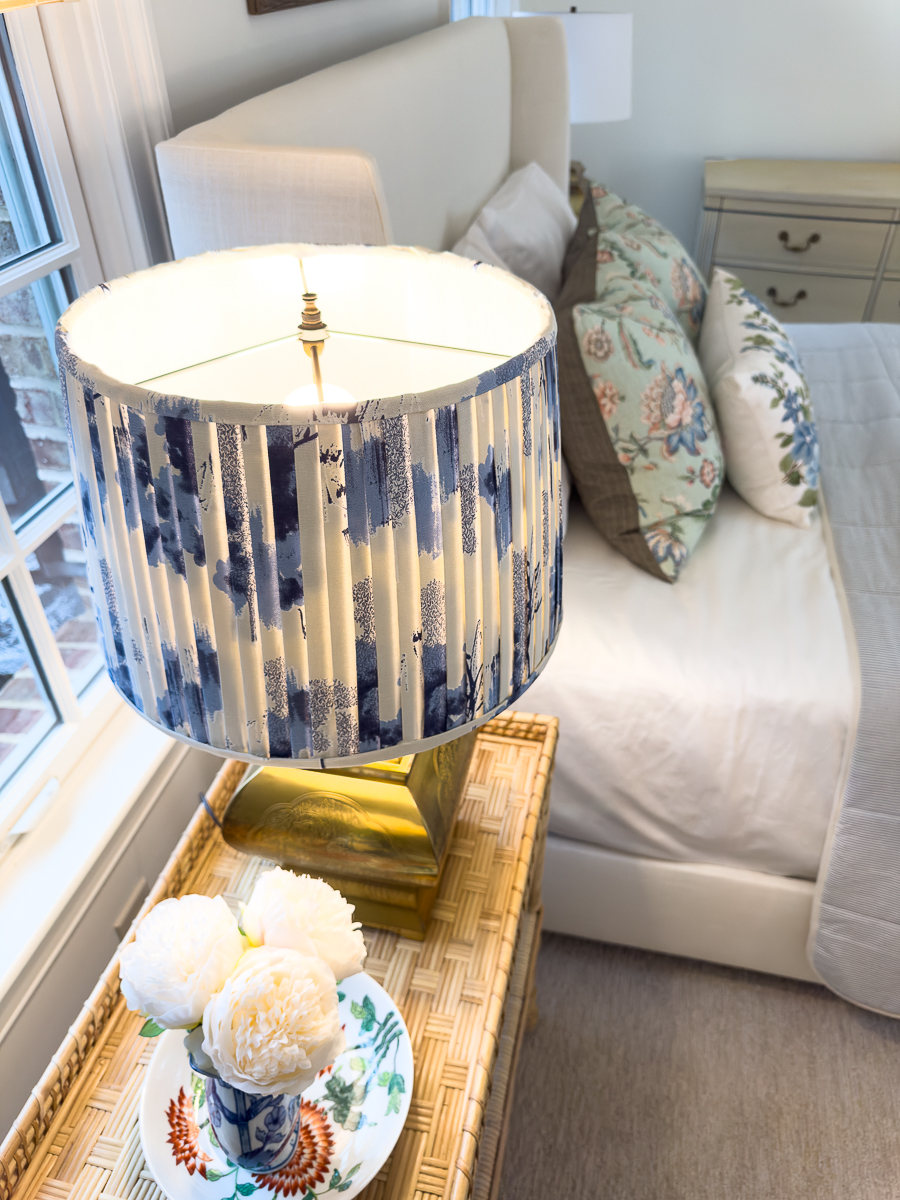
I picked up the floral pillows at Homegoods last week.
You want to use thinner decorator fabrics like cotton or linen. Upholstery fabric would just be too thick.
You want it thin enough for light to come through as well as to pleat easily.
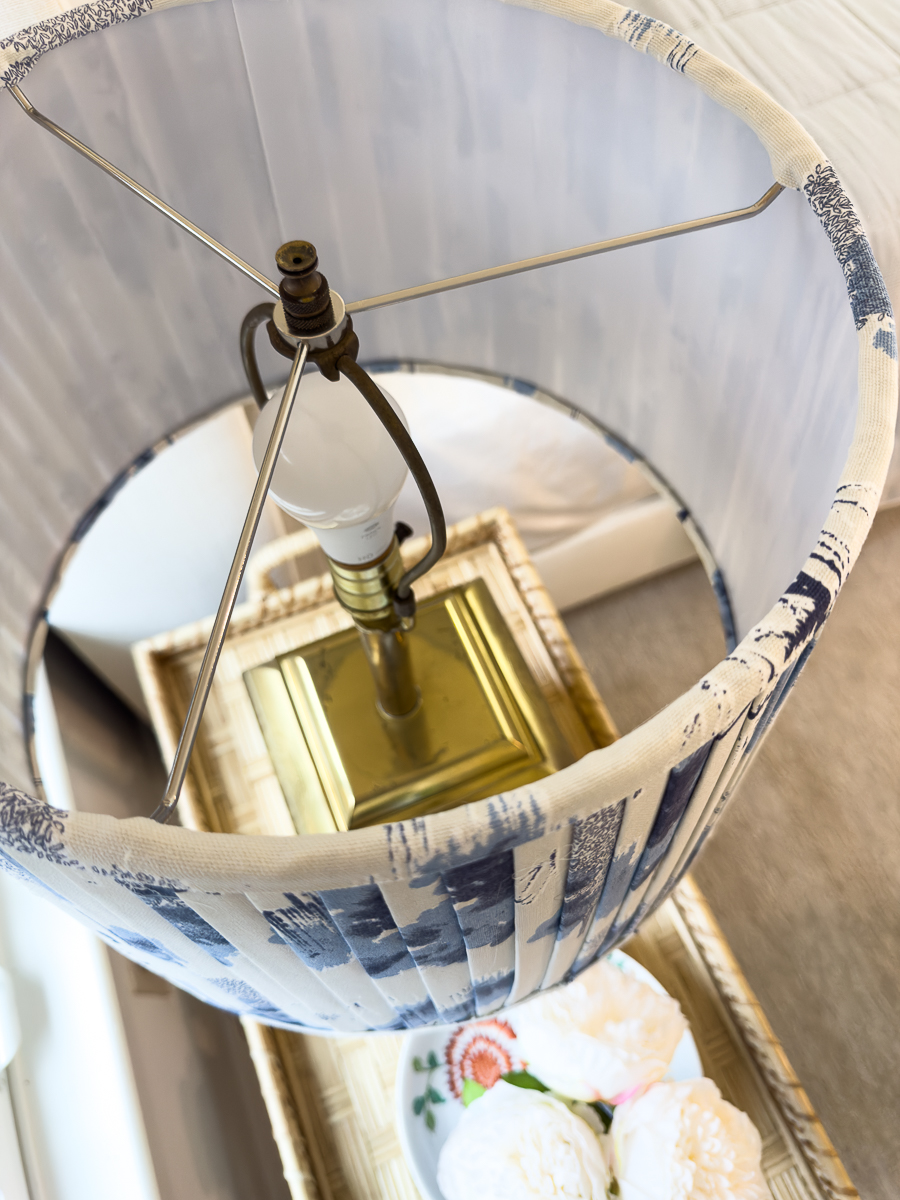
I like using the same size bias tape on the upper and lower edges of the shade. It gives a nice finished look on the exterior and interior of the shade.
This shade took much longer to complete than I anticipated. Look to the right to see the lamp that is not completed. I really like the look of the pleated shade.
The next shade will come together much more quickly. I will finish it this week.
Bar Cart/ Nightstand | Queen Bed | Ready-Made Pleated Shades | Lumbar Pillow | Stripe Quilt
More to come in this room:
- Curtains
- Throw rugs on either side of the bed
- pillow shams
- sleeping blanket
- throw blanket
- paint the vintage dresser
- mirror for dresser
- more artwork
Check out this month's Projects from the Team
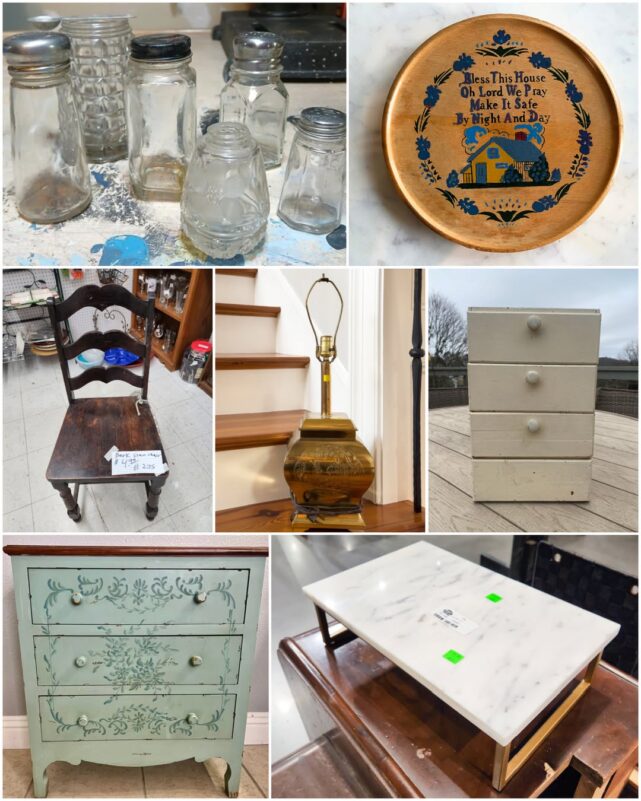
How to repurpose miniature glass dishes-Petticoat Junktion
Rub-On Transfers For Thrift Store Upcycles-House of Hawthornes
Cutting a Kitchen Chair Down to Size-My Repurposed Life
Thrift Store Lamp Makeover-Our Southern Home
Vintage Wooden Box Upcycle-Shop At Blu
How To Paint Furniture To Look Like Wood-My Uncommon Slice of Suburbia
Fixing a Cracked Marble Tray with Kintsugi-Sadie Seasongoods


Christy has been creating content for Our Southern Home since 2012. She has been featured in numerous print and online publications. Her classic, eclectic design approach spans her home and fashion style. Christy has a way of mixing store-bought with thrift store, antique and vintage finds. As a recent empty nester, she is having fun navigating this new stage of life. Read more about Christy HERE. Be sure to subscribe below. You can also contact me HERE.


I love how the new shade looks- and with that blue and white fabric, it’s VERY you!! Can’t wait to see how the second one looks in the revamped guest room.
Oh my gosh, I didn’t even know that bias tape maker even existed! Love the new look. Also love that bar cart bedside stand!!!
This is really pretty Christy, I never would have thought of cutting strips to give it that pleated look. What a great makeover!
Amazing! I thought you were going to do something with the lamp, what I pleasant surprise when I saw that pretty blue shade. Fabulous tutorial Christy.
Pinned!
gail
Christy, this is a fabulous tutorial. What a way to create a custom look! I see this in my future. Pinned.