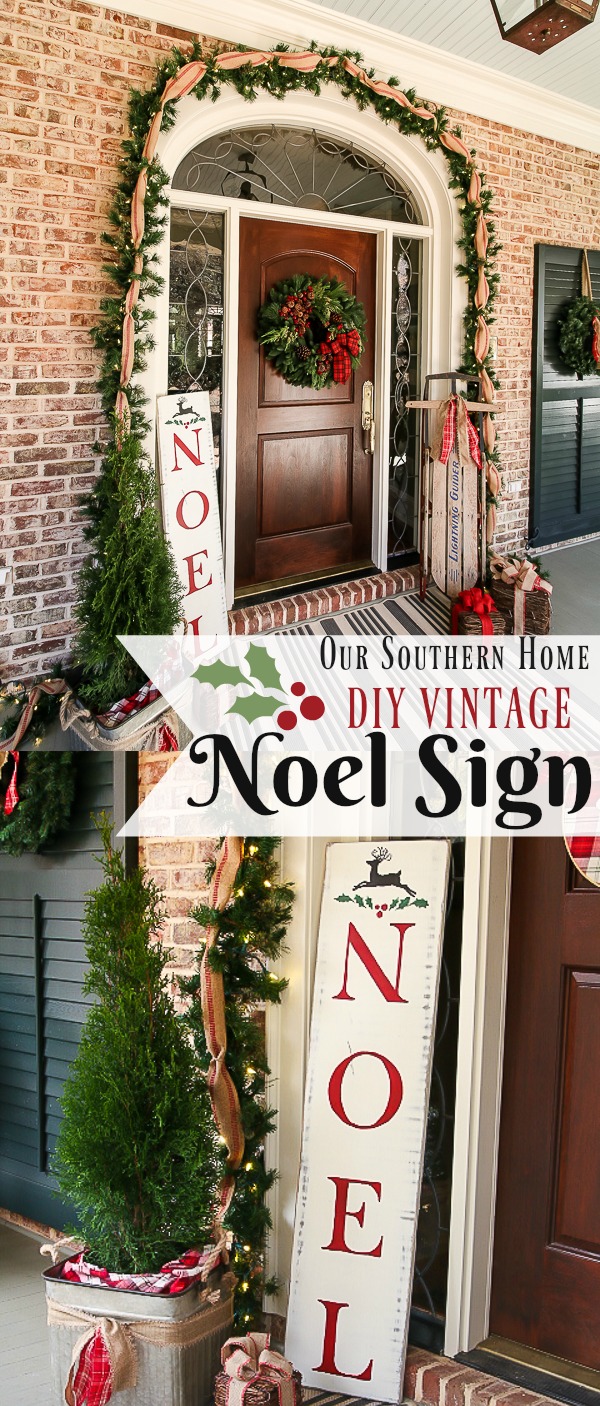
DIY Vintage Look NOEL Sign
Do you find yourself wanting to just stay home and nest during the holidays? I know I do. I want to enjoy the labor of love that has been put into creating our Christmas Home.
Christmas is my absolute favorite time of the year for many reasons.
My idea of the perfect holiday evening is sitting by the fire in the family room with a glass of wine, my loved ones close and watching a Christmas movie.
I am actually behind on my Christmas decorating this year. I got a terrible cold which put me out of commission about 10 days. I hope to be finished by this weekend so I can kick my heels up and enjoy!
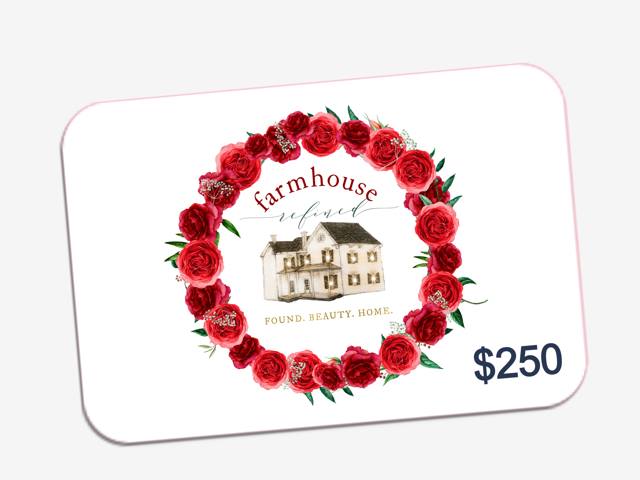
Yes, I like to bHome for the holidays. A huge thank you to Kelly from My Soulful Home for inviting me to the tour this year. Be sure to read to the end of the post where there are details on entering a $250 GIVEAWAY via bHome given by Farmhouse Refined.

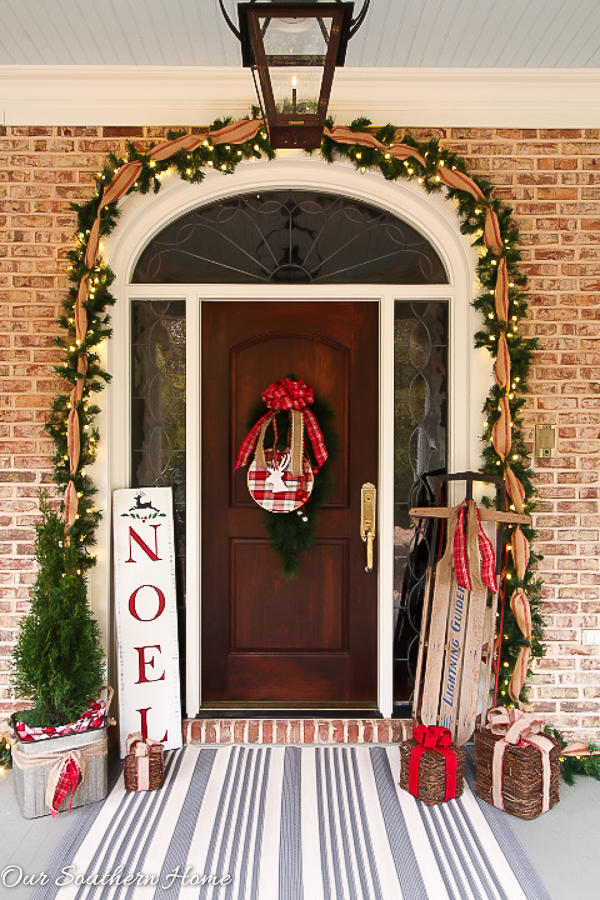
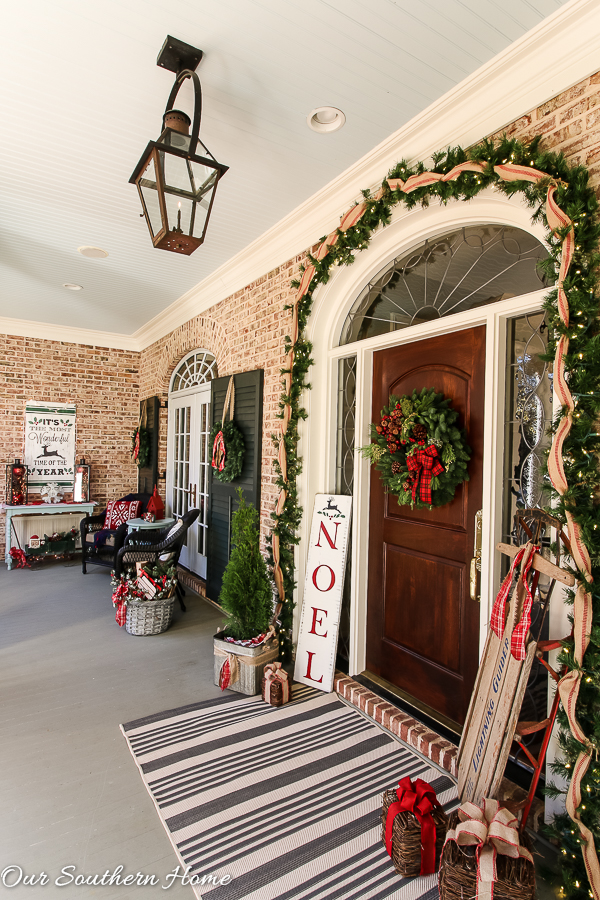
Earlier this week, I shared our Christmas Porch which you can see HERE.
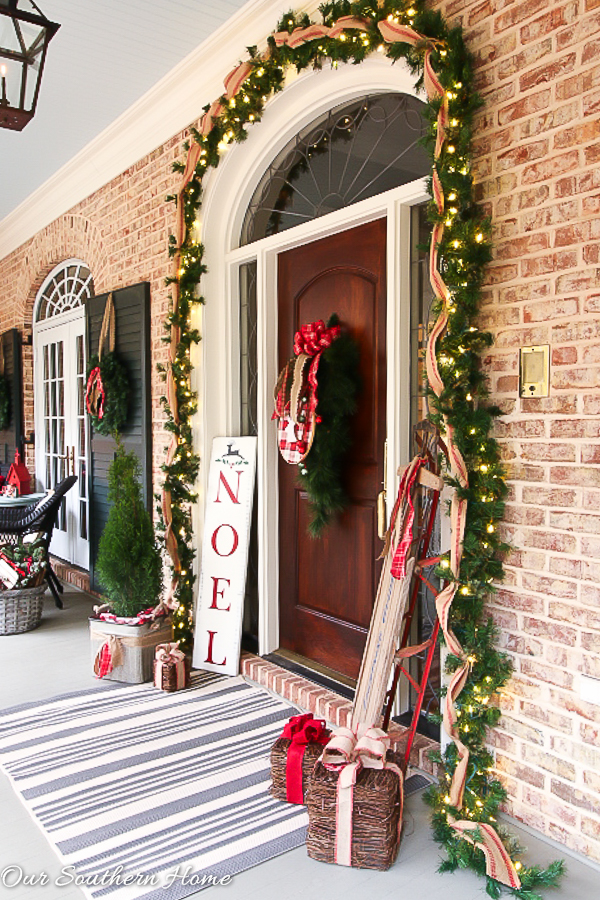
I made a new DIY Vintage Look NOEL Sign that I'm sharing with you today!
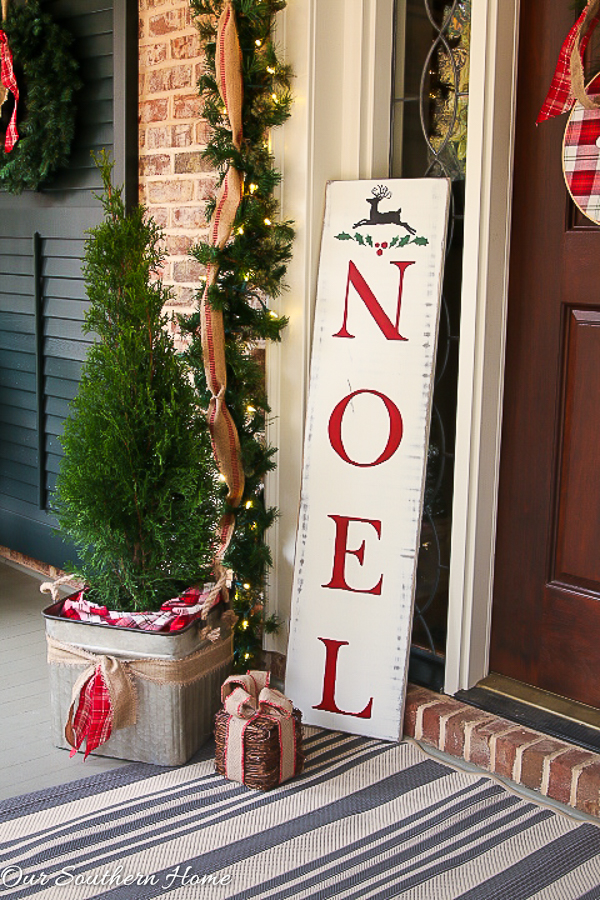
I absolutely love decorating with signs. They are so easy to make and really cheap! I am currently working on an 8 foot “Merry Little Christmas” sign to go over our breakfast room window. I can't wait to get it hung! That rug actually came in the very day that I took photos of the porch. It was so worth waiting on it to come in. You can find it (affiliate link) HERE.
Here is what you will need (affiliate links provided)
- 4 foot pine board from Home Depot. They have these cut to size.
- Minwax stain
 in Dark Walnut or similar
 - Print our of NOEL pdf
- Americana Decor Chalky Finish Paint in Everlasting
- Americana Decor Chalky Finish Paint in Rogue
- Americana Multi Surface Satin in Black Tie
- Americana Multi Surface Satin in Green Beret
- Rust-oleum clear spray sealer in, Matte
- oil pastels
- tape
- ball point pen
- paint brushes
- artist brushes
- rags
 in Dark Walnut or similar
 Paint in Everlasting
 Paint in Rogue
 Beret
Beret in, Matte


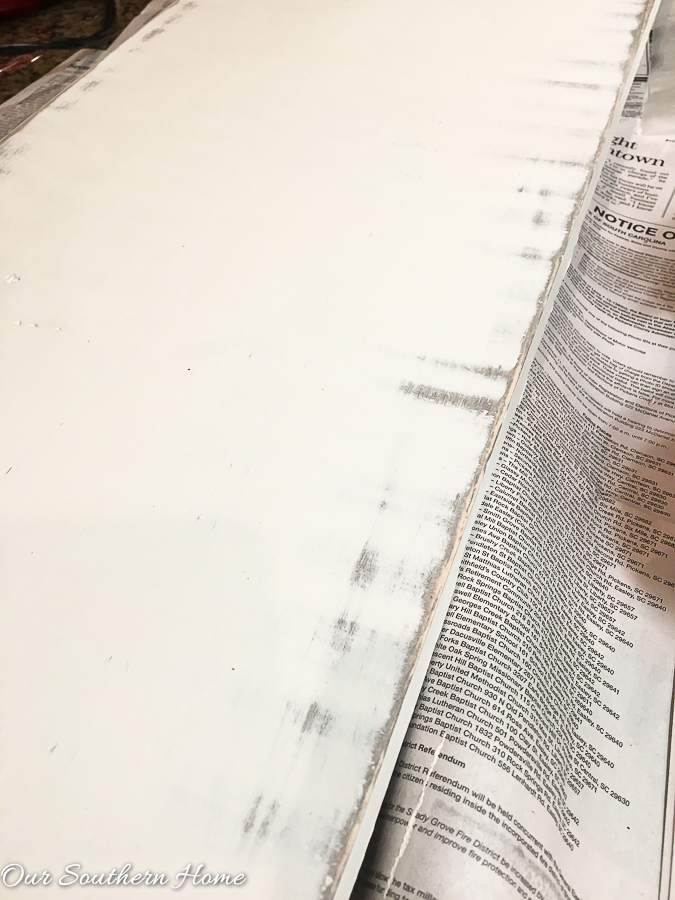
I totally didn't take a photo of my first step! Stain your board on one side. Let that dry completely.
Paint both sides of your board in Everlasting. I painted 2 coats. Let that dry.
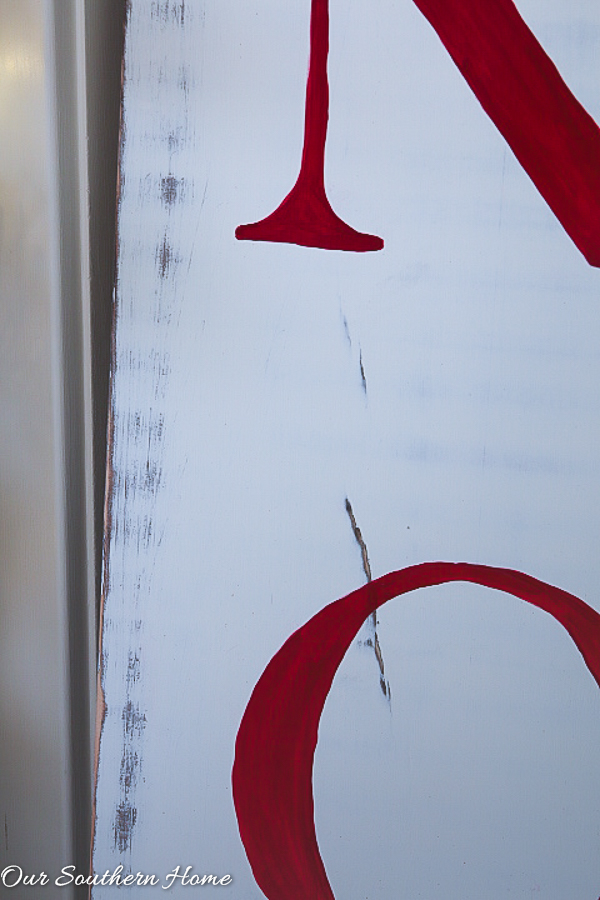
Distress the front side only of the board. You don't have to paint the backside. I did because it would be leaning against the glass of the front door. I wanted the back to be attractive from inside our home.
Now you are ready to transfer your letters, but first you need to print this out.
NOEL PDF Free Printable (Download and print on regular printer paper)
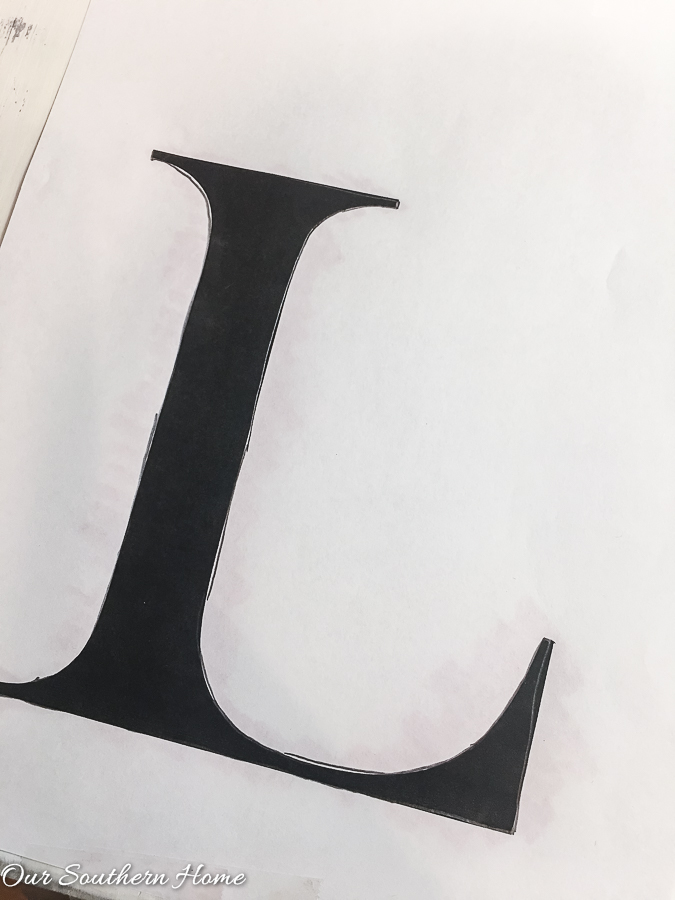
Position NOEL vertically on your board leaving enough space at the top for your reindeer design. You will want to tape the pages together so that you can easily flip it over and color with the oil pastels.
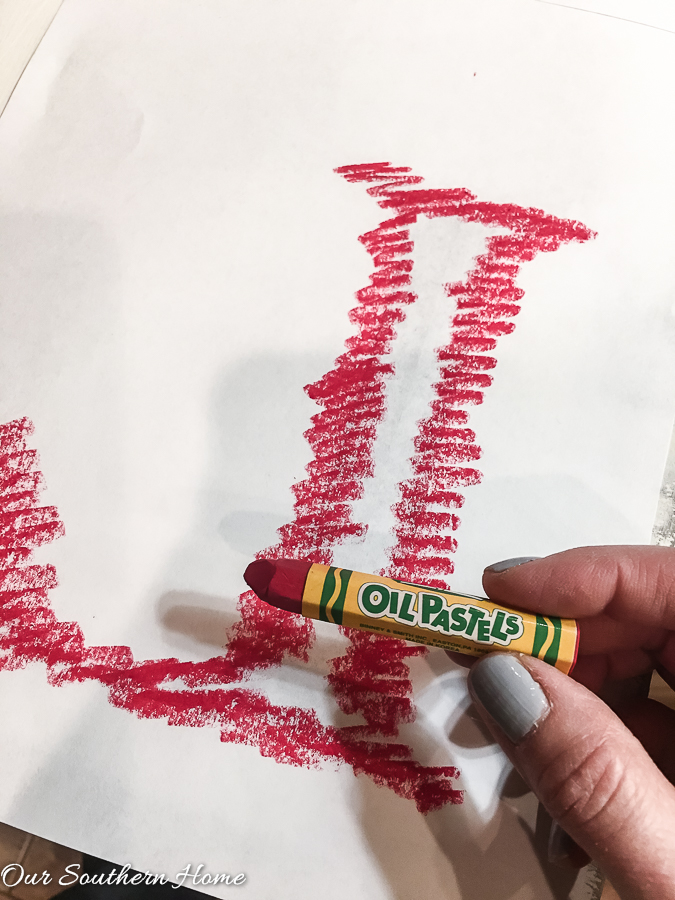
Color with the oil pastels on the backside of each letter. Flip NOEL back over to the front side. Reposition on the board and secure down with tape. You do not want your NOEL to shift while tracing.
With a pencil or ball point pen, you will trace the outline of each letter.
HINT: Use the same color oil pastel as you will paint. I've been using this method for years and I find it the easiest.
The red oil pastel will then transfer to the board.

This is what it will look like. Now you will get to paint in the lines!!!

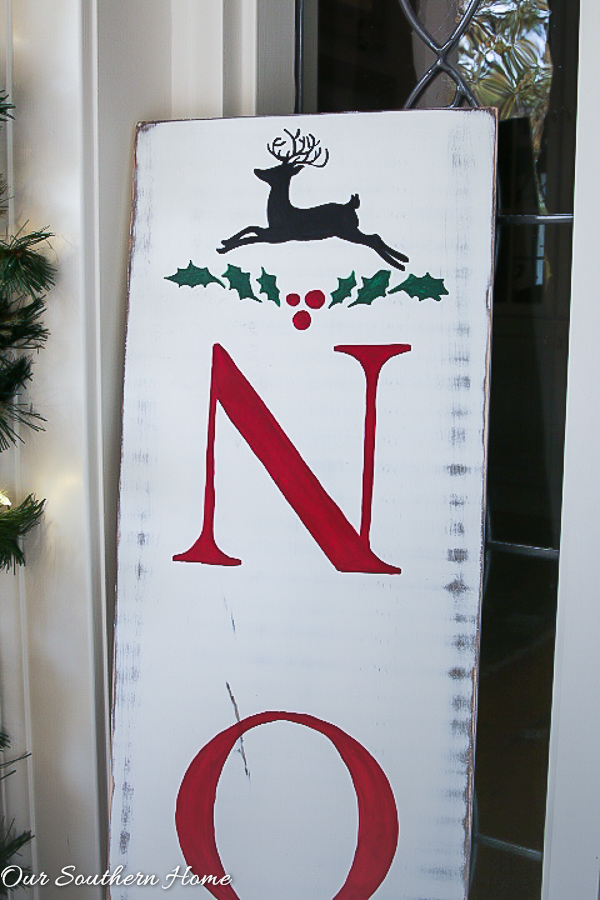
You can download the reindeer here. Print as an 8×10 (full page) on regular copy paper.
Position the above reindeer at the top of your sign and transfer using same method. Remember to color the oil pastel on the backside so when you flip it, it will be right side up.
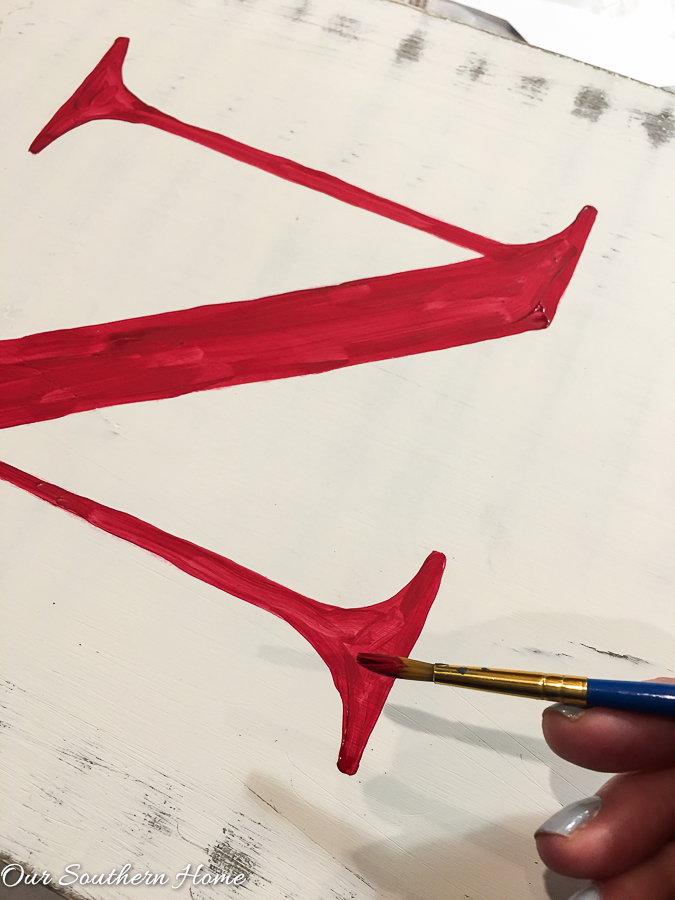
Red can be a difficult color to paint. It took 3 coats. I wasn't interested in being perfect. I wanted that vintage look.
Use the red, black and green on the reindeer and holly.
I DID NOT distress the letters or the graphic. You can if you want, but I didn't.
Spray a couple of coats of sealer on front and the back.
HINT: Make a second sign on the back and you can flip them!
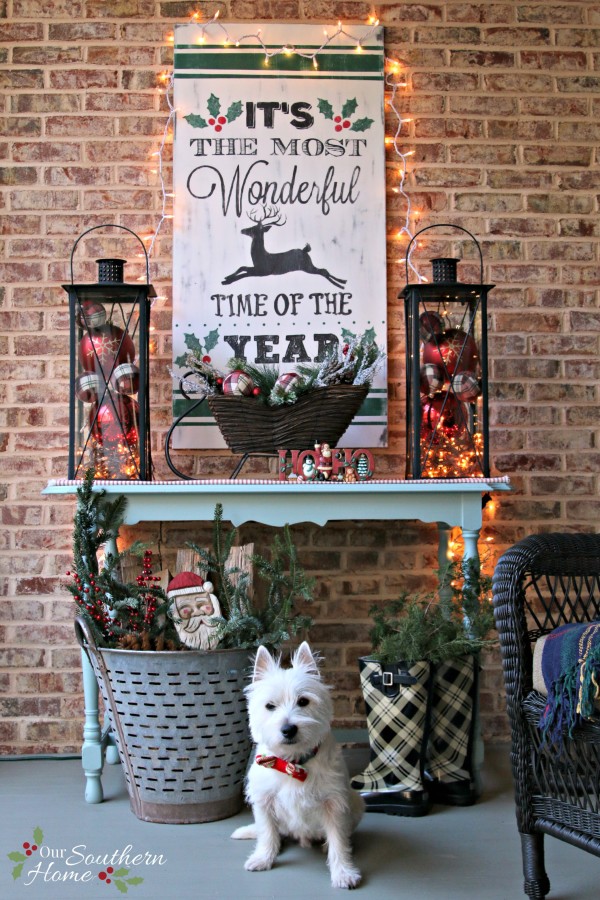
Notice the different wreath? I'll be giving one away just like it on the blog this Sunday! Be sure to subscribe so you won't miss the post!

Did you notice the sign on the brick wall. I made that one last year with the same technique. Click the photo below to take you to it!
Be sure to visit all of the other bloggers on the tour. So many ideas to spark your creativity!!
(USA residents only – winner randomly chosen on Dec 9/16 and notified by bHome app and email )
~ Now to enter to win the $250 Git Card to Farmhouse Refined ~
Simply pop on to bHome and TAP the star for Farmhouse Refined you will be automatically entered.
You'll also get a message confirming you are entered. Even easier now – only one TAP to enter!
Don't have bHome yet? ( very naughty! ) Download it for free to your phone or ipad and then follow the simple step to enter.
Good Luck!
(USA residents only – winner randomly chosen on 12/9 and notified on app & email )
Enjoy bHome, enjoy the Tour and most of all enjoy the Holidays…
Saturday


Day One

French Garden House * Shabby Fu Fu * Zevy Joy * Redhead Can Decorate * My Soulful Home
Join us Sunday for
Savvy Southern Style * Designthusiasm * Confessions of a Serial DIY'er * Laura Trevey * Celebrating Everyday Life * She Holds Dearly * Housepitality Designs


I see that the board if 4′ tall. How wide is it? Thanks for the tutorial!
It’s 11-1/4 inches wide. Merry Christmas!
How did you attach the garland over and around your front door?
I have 3 large nails. 1 in the center and 1 on each side where it starts to curve. Then I slide a bit of the garland behind the molding on the sides to keep it from blowing around. Merry Christmas!
Just love the process and the finished project of your NOEL sign. Your porch is gorgeous!
Thank you so very much. I love making signs!
Ok, the oil pastel transfer method is brilliant! So nice meeting you on the tour, I can see how much love you put into your home- amazing.
YES! Wine, Christmas movies, fire, check, check, check! And WOW do you do amazing signs! I’d like a couple sent to me please 😉
Hugs, Jamie
i must be living in a hole. i had never heard of this process to trace the letters. Love you sign…and your porch.. Happy holidays. lets get together for lunch soon.
Christy, the sign is fabulous and I just love the way your porch is styled!! So warm and welcoming to anyone who visits!!
Love this, Christy! So smart to use oils pastels in the same color as your sign to transfer the image! XOXO
Oh my gosh your sign is so cute! Thank you for sharing your tutorial, it looks so easy to create. I love how inviting this is and it would make a great gift for someone!
Christy, it’s the perfect sign for your entrance and looks totally festive.
Thanks for sharing the tutorial. Merry Christmas!
Wonderful sign Christy!!!…thanks for the great tutorial. The sign looks fabulous next to your door of the gorgeous porch of yours!!! Hope you are feeling better…glad to hear that someone else is running behind…my travels took me away from home too long!…Merry Christmas to you and your family!
This is just gorgeous!! I love your entryway and how this sign adds to the festive look!! Happy Holidays! xo H
I love this for the entrance, such a wonderful way to greet your guests!
Christy – LOVE your sign! And your adorable dog!! Thanks for being on tour with us!
Christy, your front porch looks so festive! Thank you for the sign directions, I love it and want to make one. It’s been so much fun to be on the bHome for the Holidays Tour with you. Xo Lidy