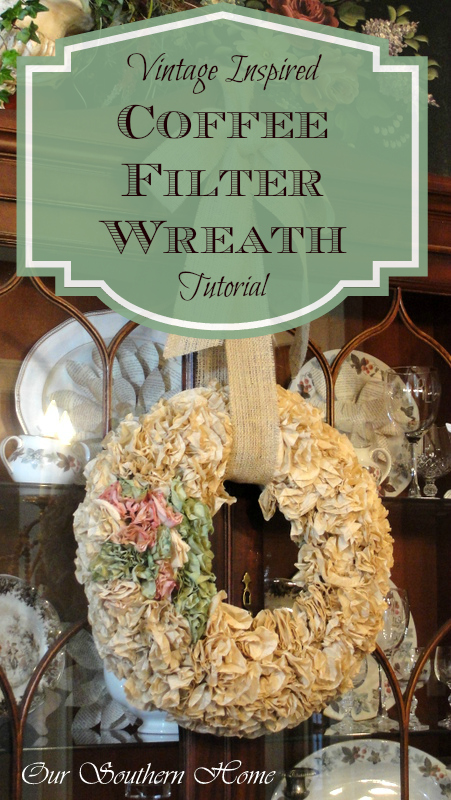
Coffee Filter Wreath Tutorial
I have been wanting to try my hand at a coffee filter wreath for a while now. There really are lots of beautiful coffee filter projects all over Pinterest! There are so many different takes and ways to make one. I decided to make a wreath for our dining room.
I'd like to share with you a tutorial on how to make a Vintage Inspired Coffee Filter Wreath. It really is a very inexpensive project. It's a great sit on the couch and catch up on the DVR project. This is where I confess that I watched The Young and the Restless, the Bold and the Beautiful and the Real Housewives of New Jersey while I made mine.
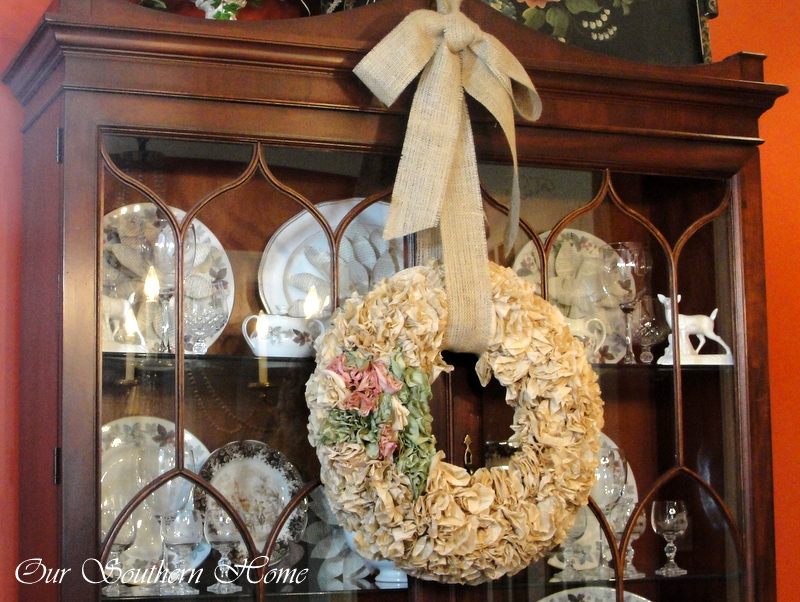
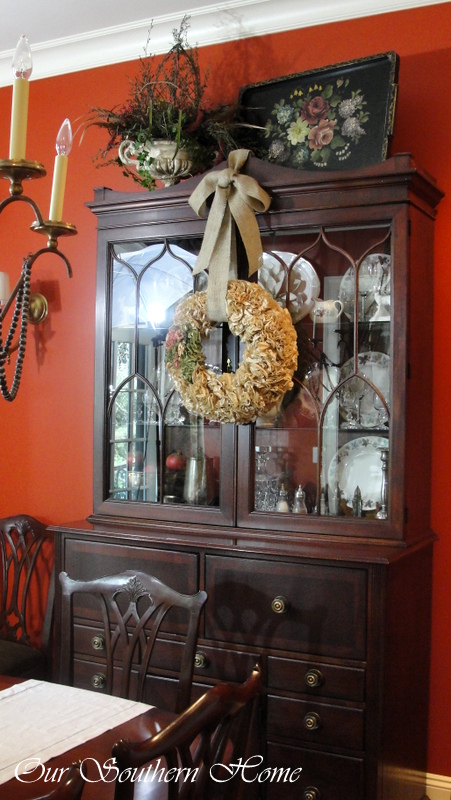
Here she is!
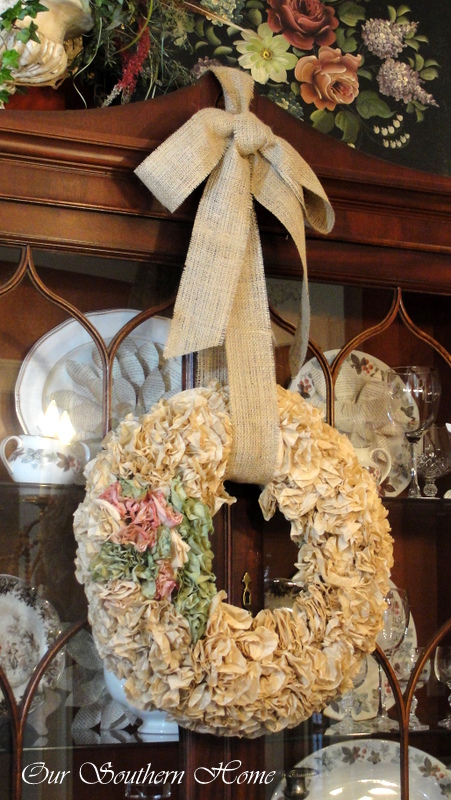
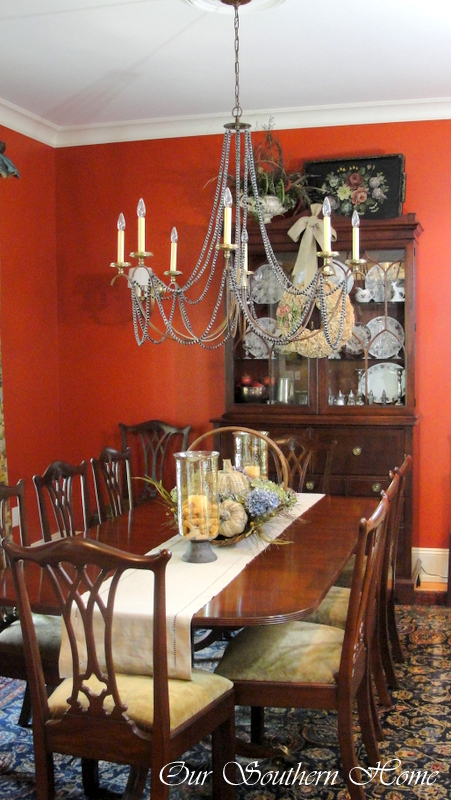
While I intended for it to be for fall, I may just leave it up year around. I really like the vintage feel!
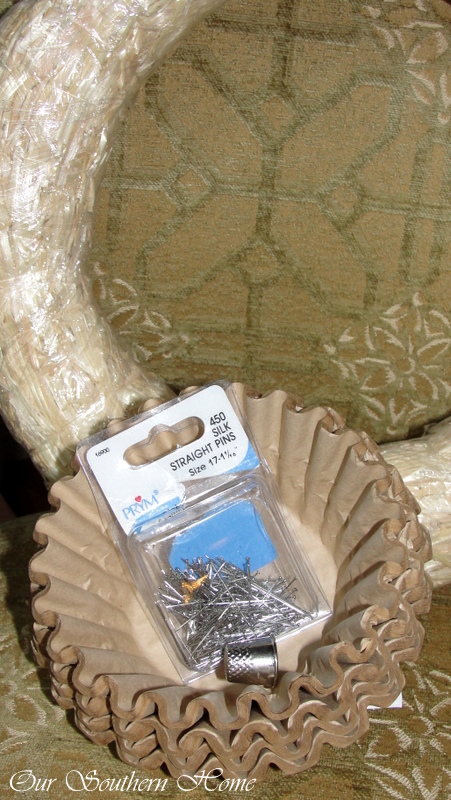
Gather Your Supplies:
- 14 inch straw wreath
- straight pins
- thimble
- natural colored coffee filters (not white)
- assorted acrylic paint colors of your choice
- bowls for paint
- ribbon for bow
Let's get nice and comfy on the couch. Turn on a favorite TV show or movie and crumble up lots of coffee filters. LOTS! I used 1 package. Of course you could make yours less dense and use fewer filters.
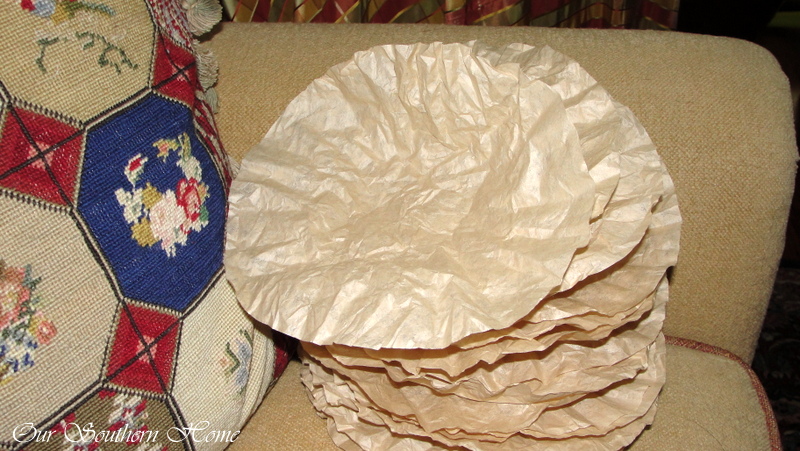
You will need lots. Just ball them up and then open them back up. This step just adds to the vintage look.
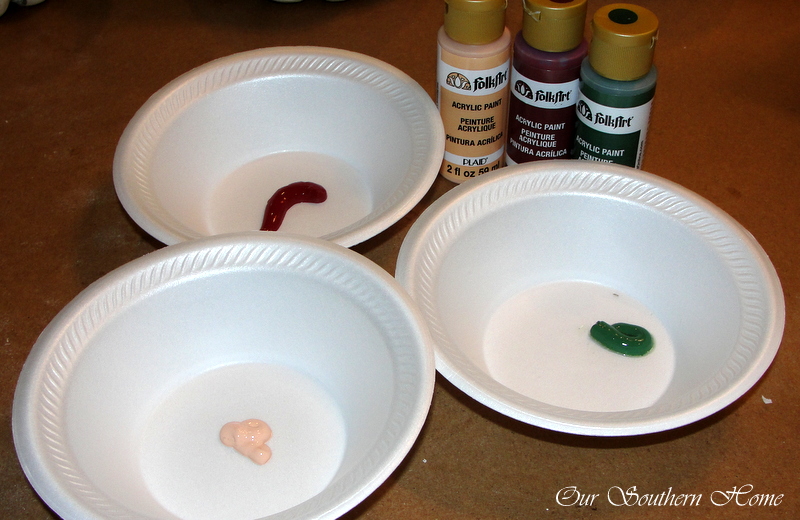
I picked 3 acrylic colors that I had on hand that were fall like and blended with my decor.
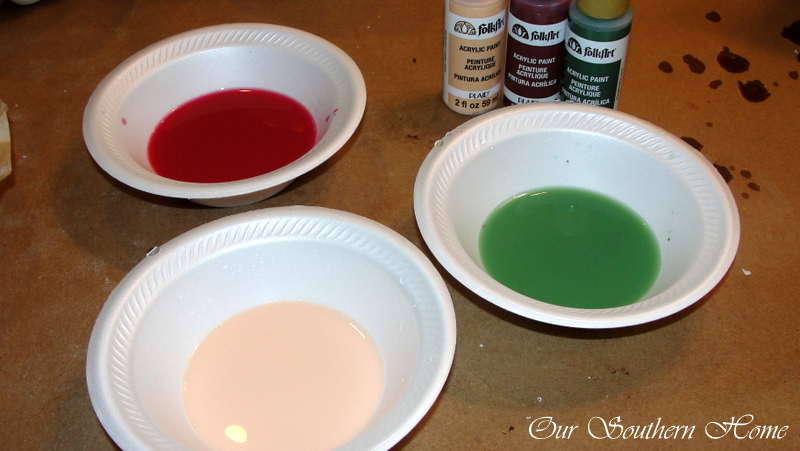
Add water to make the paint very thin. I didn't measure…..it's just very watered down. The brown paper for my work space sure has seen better days. Multiple projects were going on at the time…lots of multi-tasking!
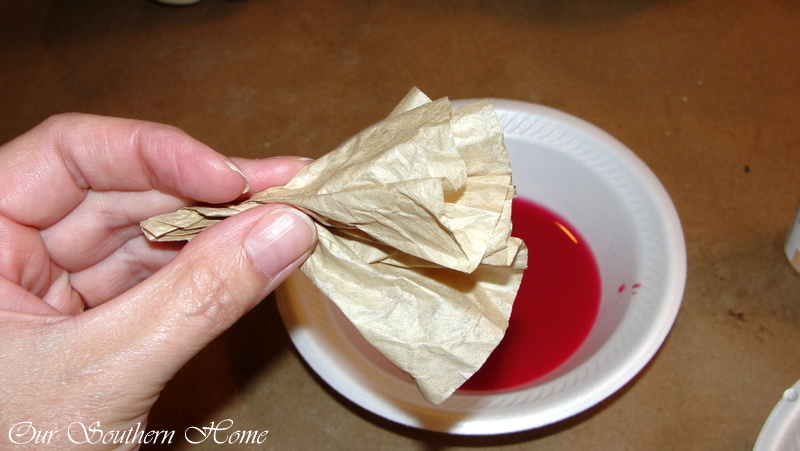
Somewhat gather the center of the filter and twist at the end like a flower.
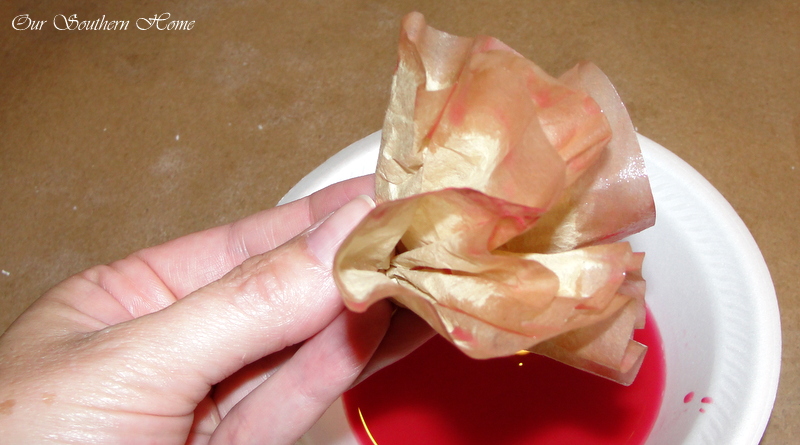
Dip the ends in the paint and let it soak it up a few seconds. You will see that it is very subtle.
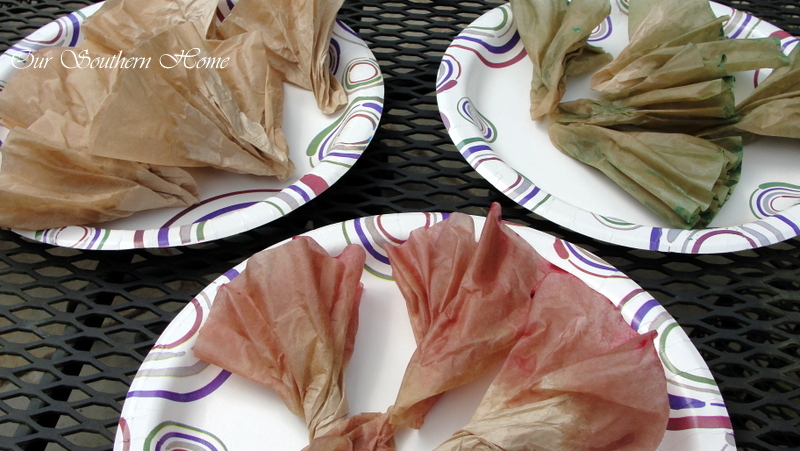
Place the desired amount on paper plates or waxed paper to dry. I was impatient and wanted to finish the wreath so I put them outside to dry faster. I made about 8 of each color. This will create the flower effect for the wreath.
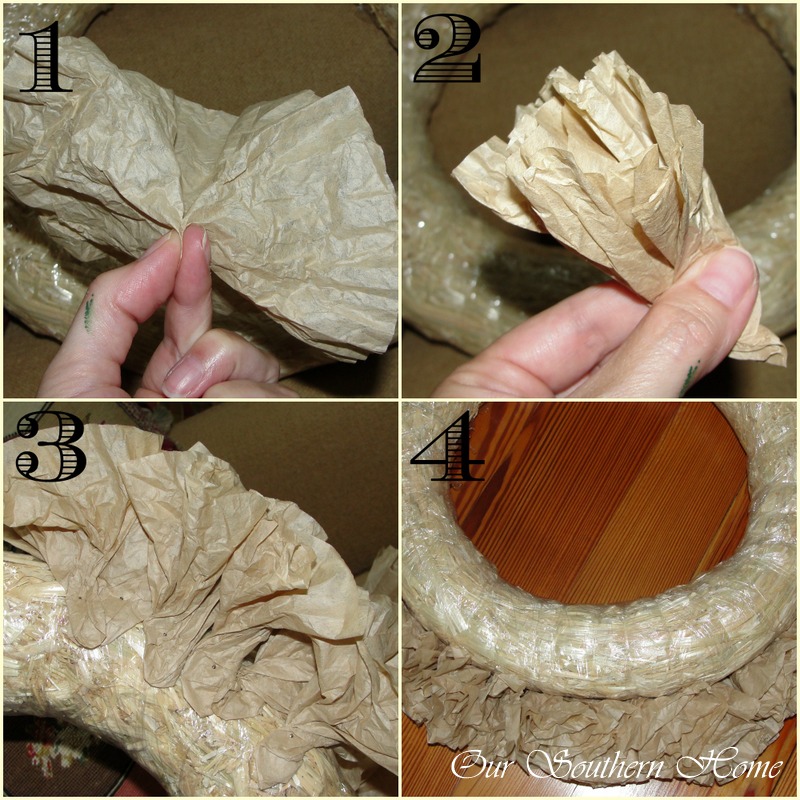
While those are drying you can complete the bulk of the wreath. 1) Take the center of the filter and twist to form the flower. 2) It is open at the top. 3) Leave the plastic on the wreath. It won't be seen and will keep things neater. Otherwise straw will be falling everywhere. On the backside of the wreath with my thimble I pushed in the pins to hold each filter. Try to keep that outer first layer and center layer pretty even so your wreath will look in proportion. 4) Here it is flipped over. Now fill in all over the wreath saving a space for your colored flower.
I really made my wreath dense. You could make it have a lighter look by placing the filters farther apart from each other. I like the fuller look. It is really very light.

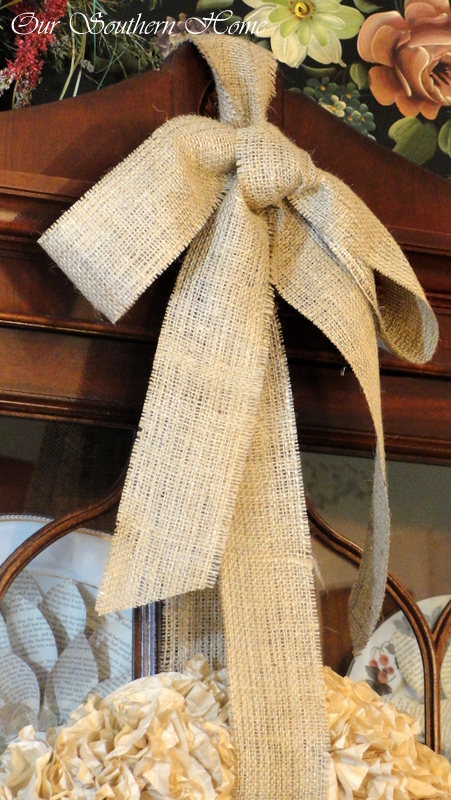
I love Command hooks. They do not damage surfaces and are great for hanging seasonal decor. I hung it upside down on the back of the china cabinet pediment. Then I made a burlap bow for hanging.
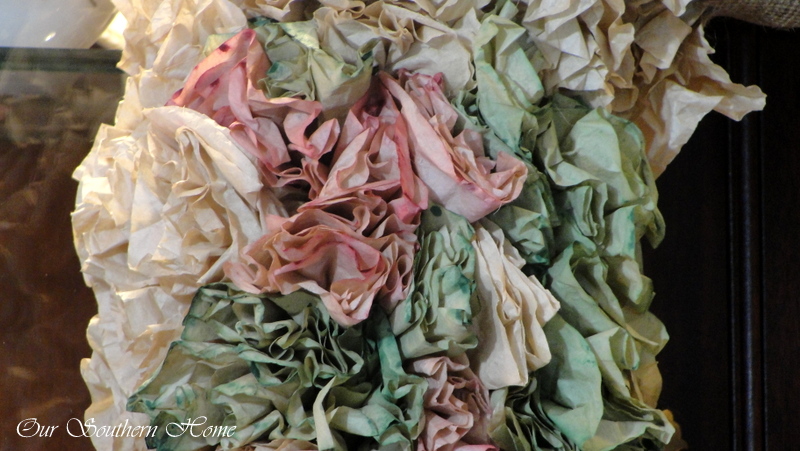
Up close detail of the colors~
This is definitely a project that I would do again. Coffee filters are so easy to work with and cheap!!!
My Fall Tour can be found HERE.
This week's Fall Porch Tour is HERE.
I hope you are enjoying cooler fall temps where you live. It is finally starting to stay in the 70s here in SC! Have a lovely week and thanks for stopping by!

Link Parties that OSH parties at on occasion!
Saturday: Funky Junk Interiors
Sunday: DIY Showoff, Three Mango Seeds
Monday: Between Naps on the Porch, Alderberry Hill/Make the Scene
Tuesday: The Scoop, My Uncommon Slice of Suburbia, Home Stories A2Z/Tutorial and Tips, Inspire Me Party, Project Inspired{d}, Brag About It Tuesday
Wednesday: Savvy Southern Style
Thursday: From My Front Porch to Yours, 52 Mantels, Stone Gable, Home and Garden Thursday at A Delightsome Life, The Shabby Creek Cottage,No Minimalist Here
Friday: French Country Cottage, My Repurposed Life, Miss Mustard Seed Furniture Friday, Common Ground, The Charm of Home, Rooted in Thyme,Imparting Grace, Keep Calm and Link Up
Buffer


Very pretty, love the subtle colors and antique feel.
Oh so pretty!!!
Thank you Christy for the wonderful ideas and tutorials.
So welcome! Thanks!!!
I love that wreath! My niece is having a baby and I think something like this would look beautiful in a baby’s room.
Thanks so much! It would be beautiful in a baby’s room!!!
Thanks! It would be beautiful in a baby’s room!
It’s gorgeous! Like you, this DIY wreath in still on my to do list. I found a huge 24 ” straw wreath at a sale for $2 ! I know I’ll need twice the filters. I really like how you added a bit of color to a few of them. New follower 😉
Thanks so much JoAnn! You got a deal on that wreath! Yes, you will need a lot of filters, but it will be so worth it!!! So happy to have you here! 🙂
I love it Christy! I would leave it up all year too…love the vintage feel of it. 🙂
Nancy
I loved this Christy in you Fall tour! So glad you added a tutorial! It’s beautiful ~Sonya
should be your Fall Tour 🙂
So very pretty! I agree with Paula – it looks as though it’s made from dried Hydrangeas. And it looks so easy to make. I think I’m going to have to try it. Thanks!
very pretty,I have all of the supplies but just cant seem to get motivated to do so, maybe I will start today! Thanks.
This is so pretty! It looks like it’s made from dried Hydrangeas. I would leave it up all year.