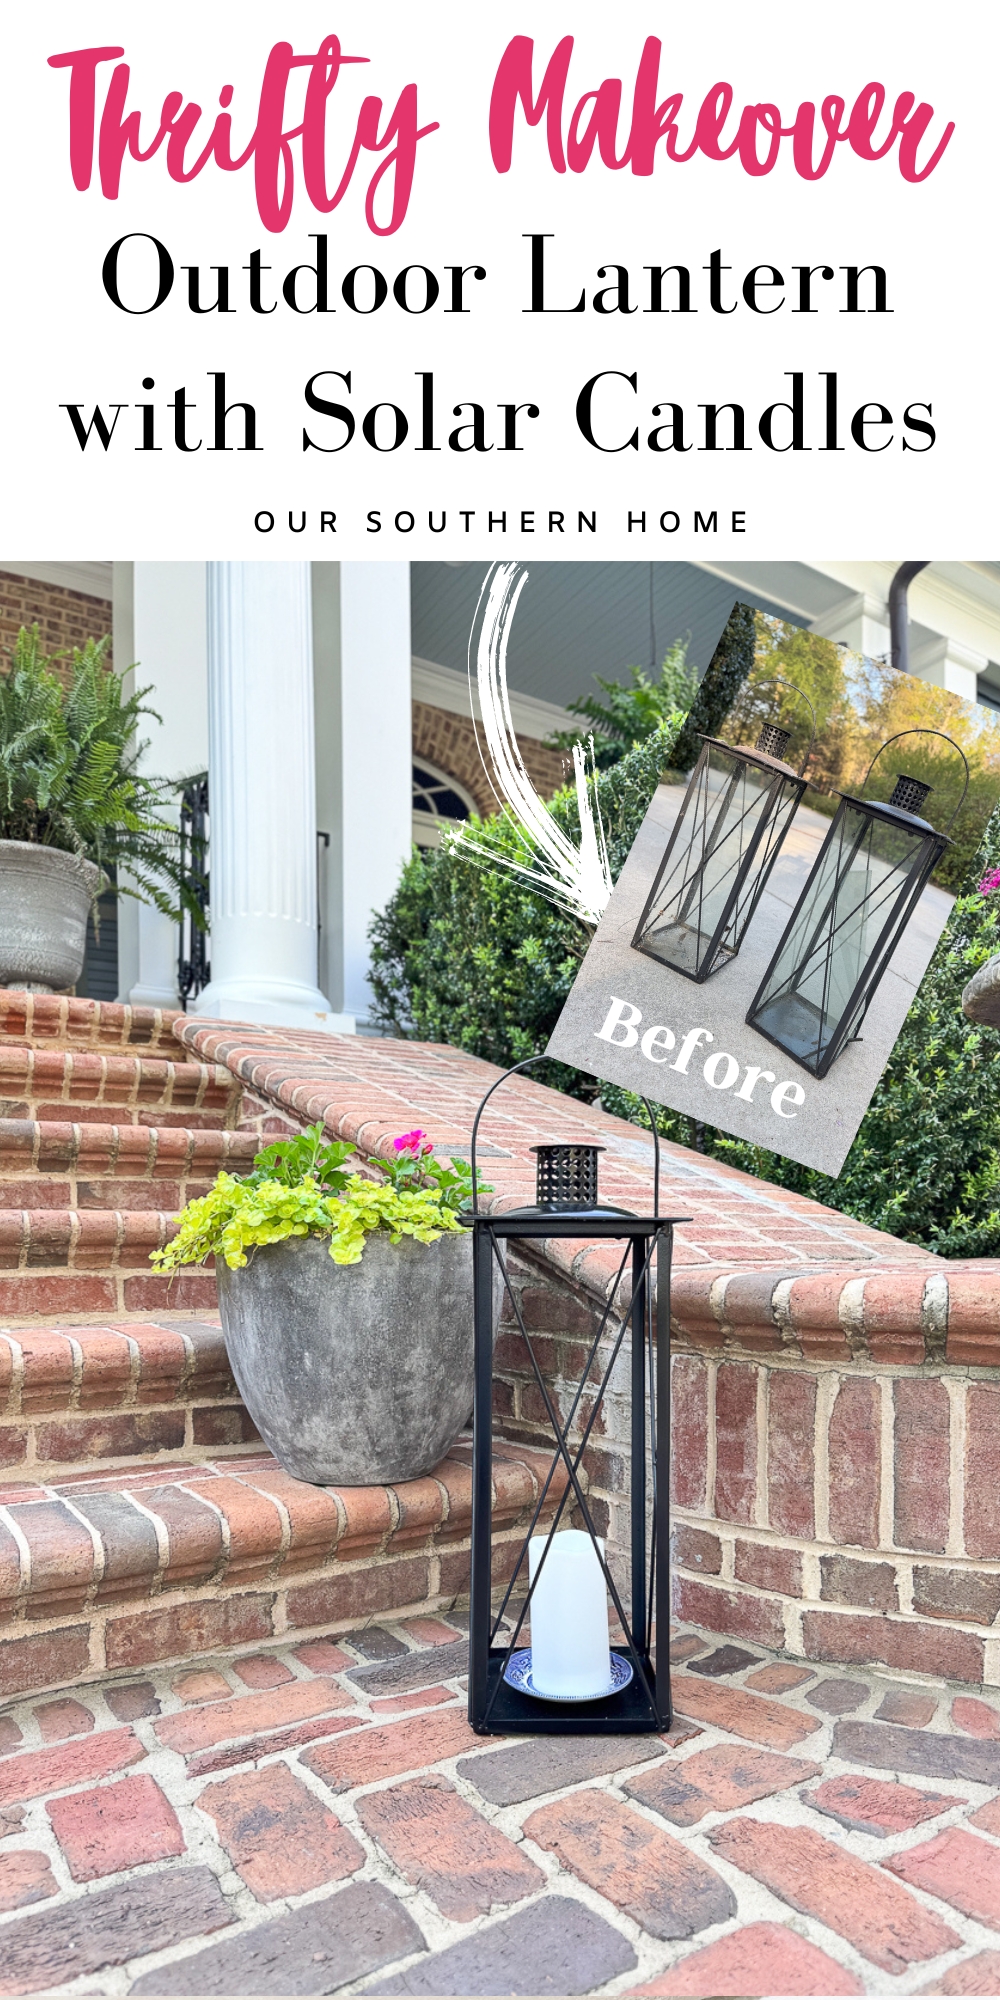
How to Restore a Lantern for Outdoor Use
Learn how to restore a decor lantern for outdoor use with these simple tips using spray paint to create a welcoming outdoor space.

Welcome to this month's thrifty makeovers. Each month we come together to share our treasures with a new look. Sometimes the items have a different look and use. Other times, they have been freshened up to give them new life.
I do not have a shop or booth, so everything that I create is either for our home, our Airbnb or for the kids.
Latest from OSH
- Saturdays on the Porch #86
- Saturdays on the Porch #85
- Easy European Wall Art with Thrift Store Frames
- Piano Bench Makeover with New Color and Fabric
- Style a Classic Coffee Table with Thrifted Items
This post may contain affiliate links. If you purchase something using one of my links, I may earn a small commission from the retailer costing you nothing more. You can read more on my disclosure page. Christy Little of Our Southern Home is a participant in the Amazon Services LLC Associates Program, an affiliate advertising program designed to provide a means for sites to earn advertising fees by advertising and linking to amazon.com.
Thrift Store Makeover Day

Join us each month for NEW thrifty ideas from the team. You'll find links to all of the projects below.
Use the slider below to see the before and after!


These lanterns almost didn't happen. This is the story of a husband who lives with his hoarder wife in a small southern town.
Said husband, is proud of his wife and the things that she creates for their home on a budget.
He knows that she does thrift store makeovers for her blog.
She has things in the attic, in closets, in the garage, in the potting shed….and yes…even in the crawlspace.
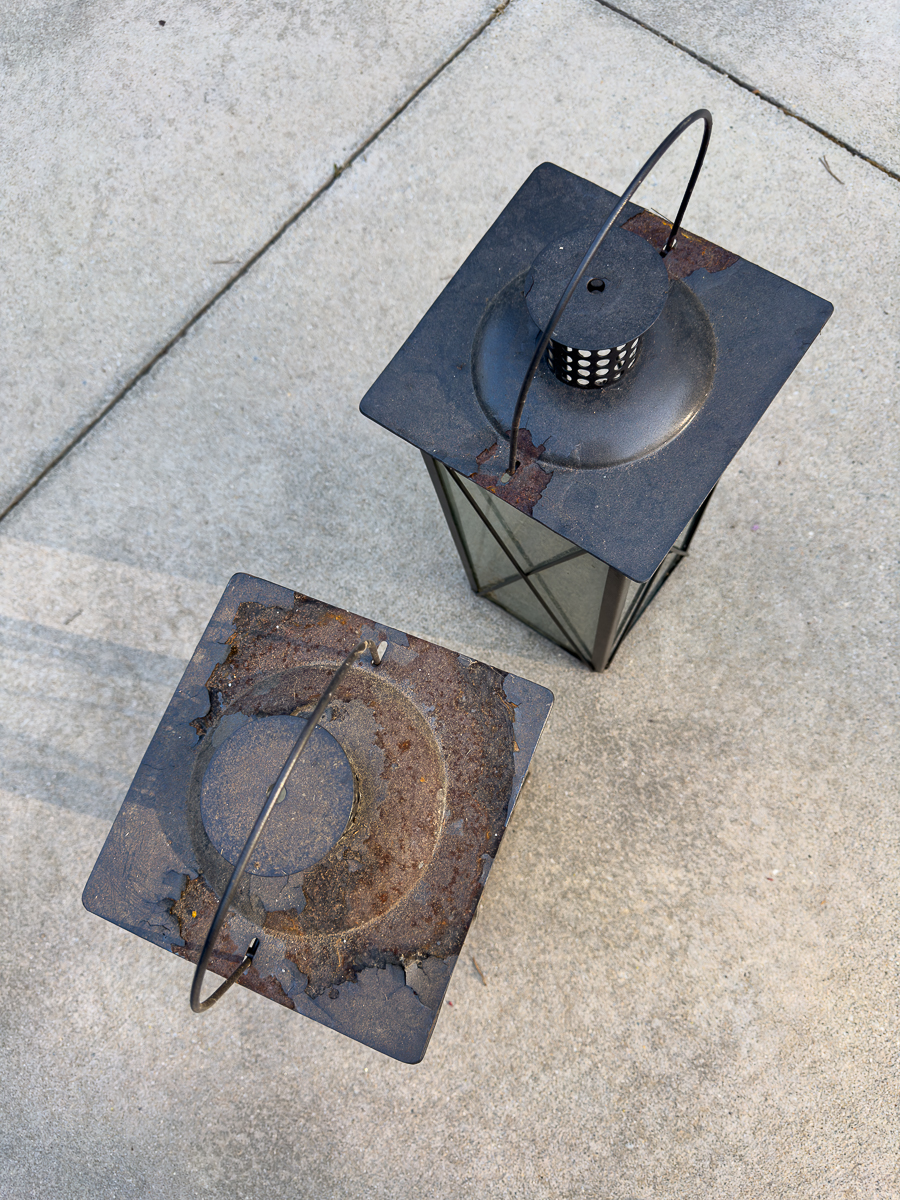
He retrieved her urns from under the house to plant the yearly ferns. He found these busted lanterns.
She happened to catch a glimpse of him transporting these old and busted lanterns to the truck for its weekly trip to take our garbage.
Oh, if you could have seen her…… envision a slow-motion run yelling NOOOOOOOOOOOO.
She assured him that they were in fact salvageable and had been on her list to do in an upcoming post….wink wink.
This project was completed within the week!
How to Restore a Lantern for Outdoor Use
This is a simple project to complete with basic DIY skills. Your outdoor space will thank you! Do you have an old lantern on your porch? If so, get your supplies together.
Supplies Used
- Lanterns
- Paper Towels
- Sandpaper and possibly steel wool
- orbital sander
- Stiff putty knife/metal scrapper
- protective gloves
- cleaner
- drop cloth
- spray paint
- disposable gloves
- thrifted saucers
- solar pillar candles
How-To
These basic skills will apply to many spray-painted projects.
You may wonder why I opted not to refurbish this as a glass lantern.
Personally for the outdoors, I prefer the asthetic appeal of no glass. Why? Bugs and dirt. They get inside these outdoor lanterns and look nasty if you aren't constanting squirting glass cleaner. I've got no time for that.
Step 1: Remove any Glass
I used my gardening gloves for this step. If working with glass, please protect your eyes and hands. You never know what kind of sharp areas you may encounter from either the metal of the lantern or the broken glass.
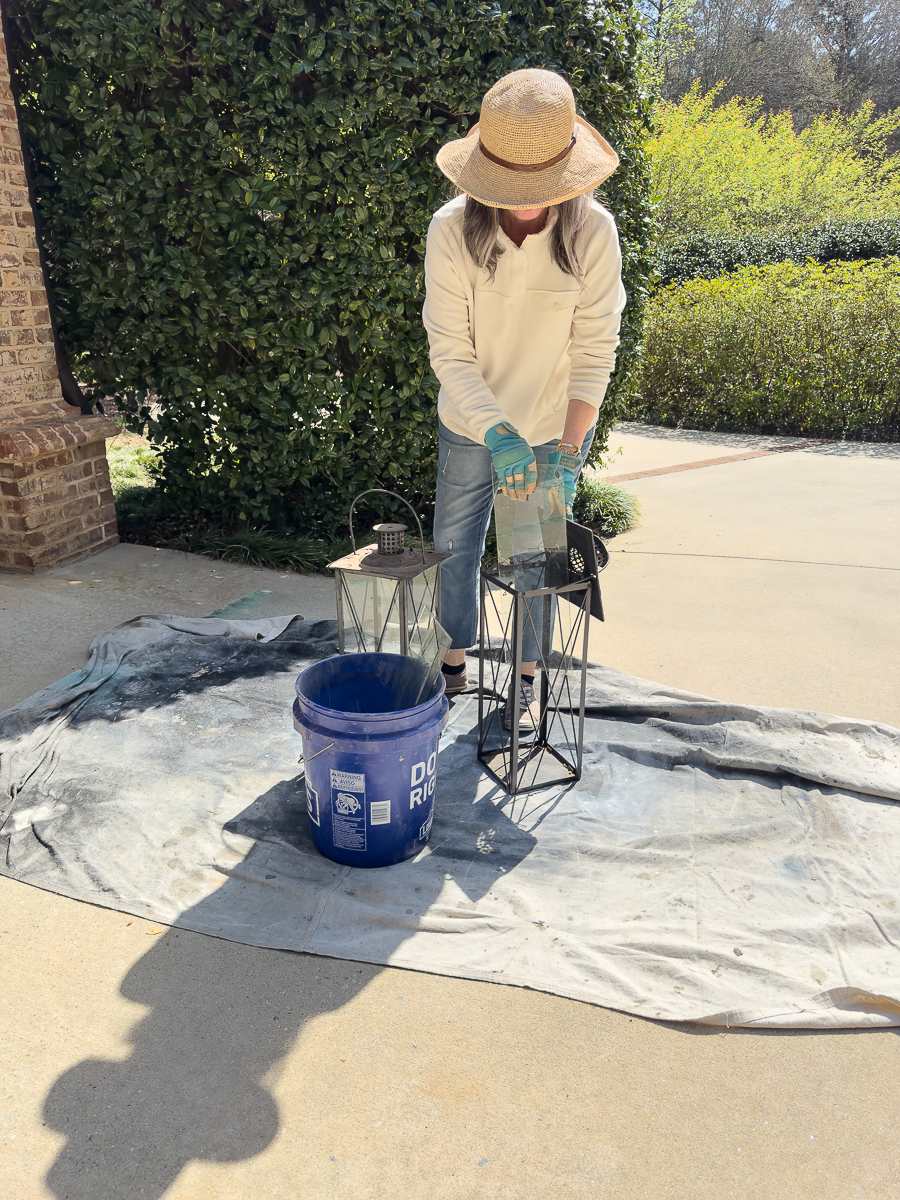
You may have glass bumpers and tabs that have to be removed or bent out of the way to remove the glass.
For safety, I deposited all of the old and broken glass in an old bucket. We will wrap it up later for the trash.
Step 2: Rough Clean
My thorough cleaning will happen later. For now, I just used a few paper towels to remove dust and spider webs to see what I was working with.
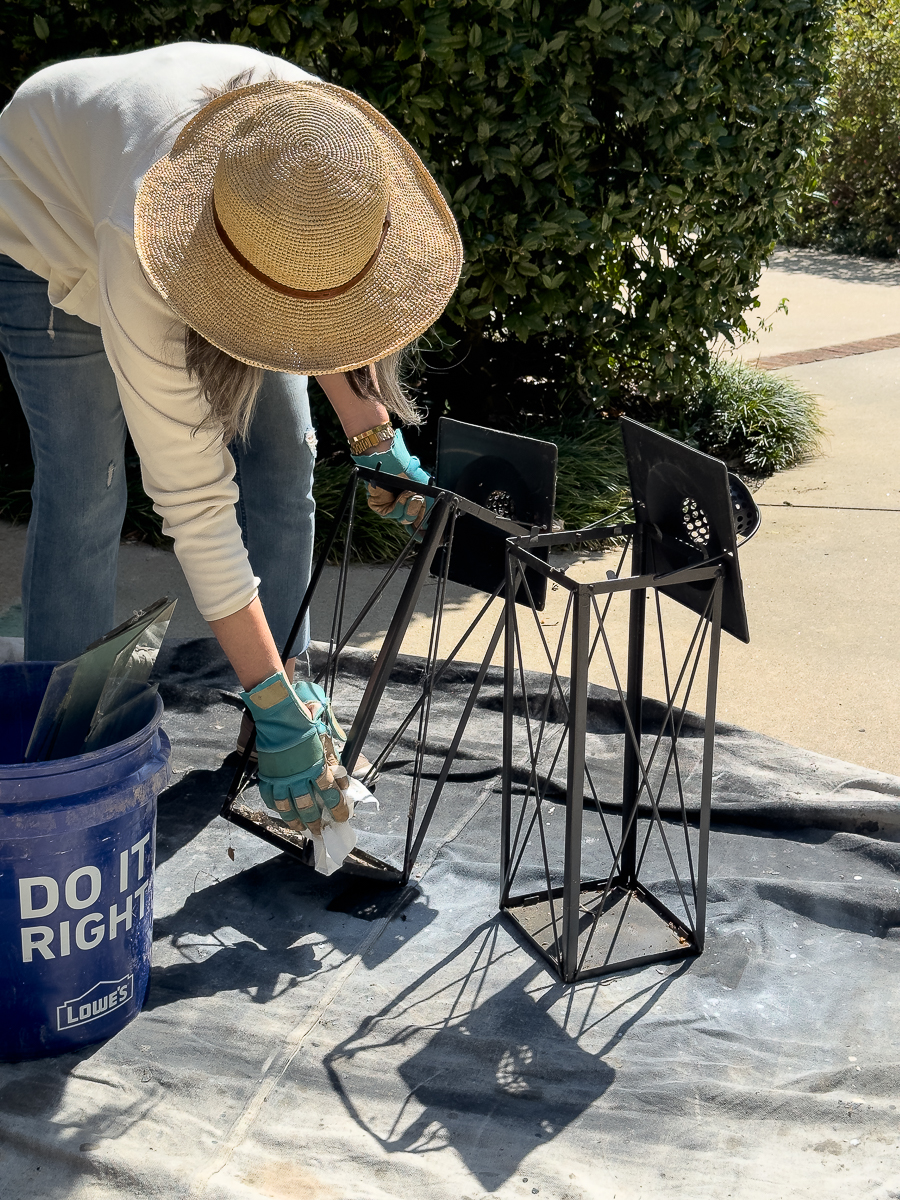
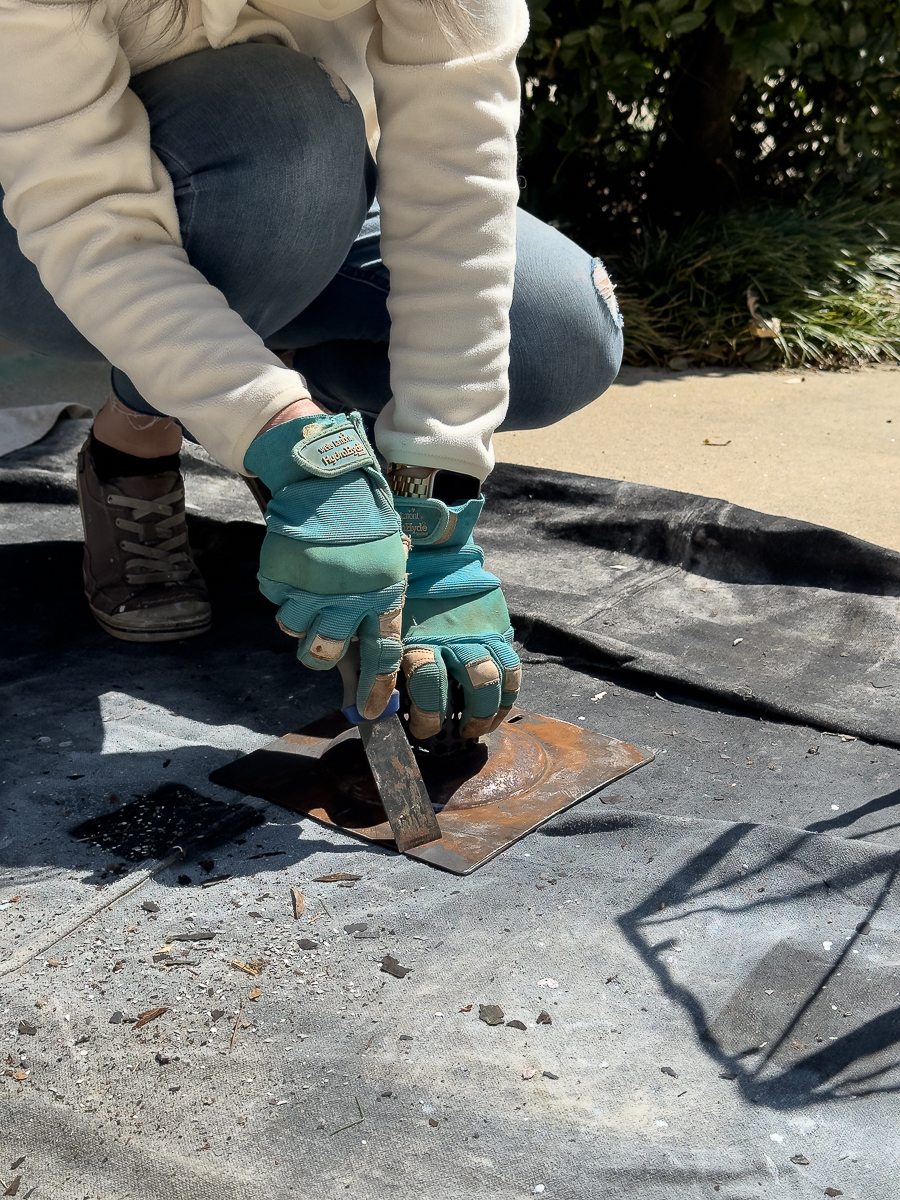
Step 3: Remove Peeling Paint
I did not use steel wool, but if you have something more precious, you could use steel wool for your final sanding.
I worked with a scrapper and my orbital sander to remove all the peeling paint. I did not try to completely remove the finish. I wasn't going for perfect.
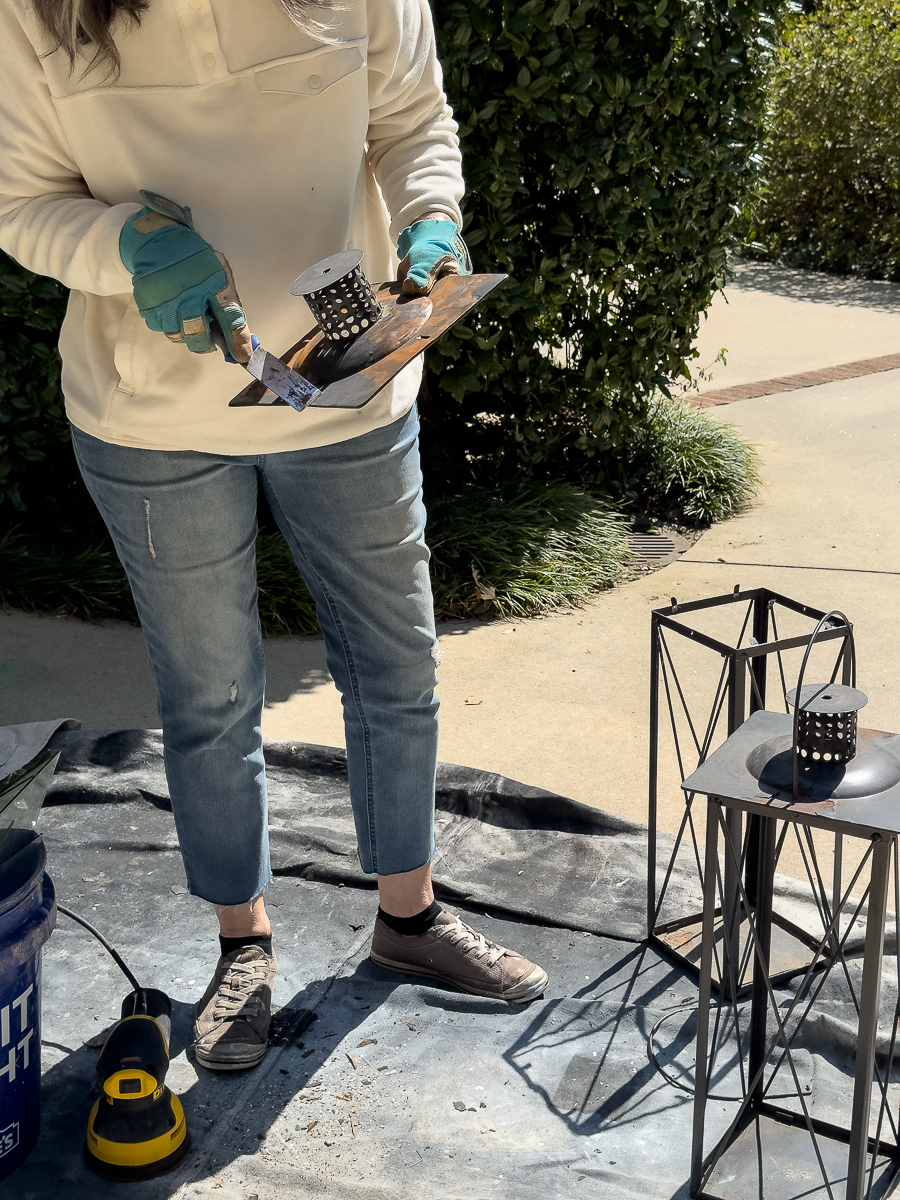
I just wanted to remove any peeling paint so that my new finish would adhere. Honestly, anything was better than what I started out with.
My old orbital sander just went out. It has served us for many years. It's such a great sander that we bought the same one again.
One thing that made the project a bit easier was to disassemble the parts. They hooked into each other so it was simple to remove the top.
Step 4: Clean the Lantern
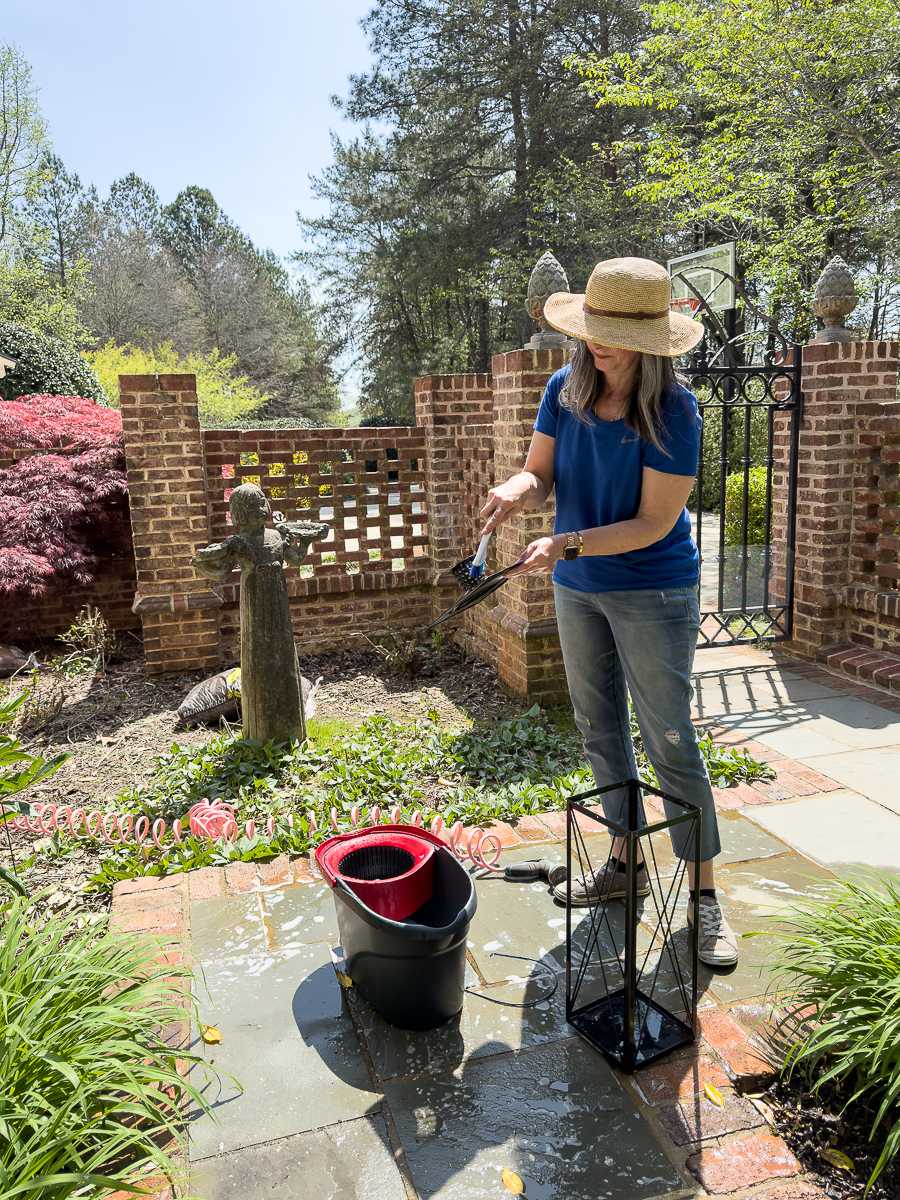
I used some Fabulosa cleaner with water for this step. I used a household cleaning brush.
Rinse it thoroughly and dry in the sun,
By the time, I had cleaned up from these previous steps, it was dry and ready for paint.
Step 5: Prep for Painting
We have finally entered spray panting season in the south. Well……as far as the temps are concerned.
- Check your can of paint for temp recommendations. That is an important thing.
- I would not have spray-painted if too windy.
- Protect your surroundings with drop cloths. I used a sheet of styrofoam from packing materials.
- Blocks or risers are beneficial for lifting objects off the ground for painting.
Step 6: Painting
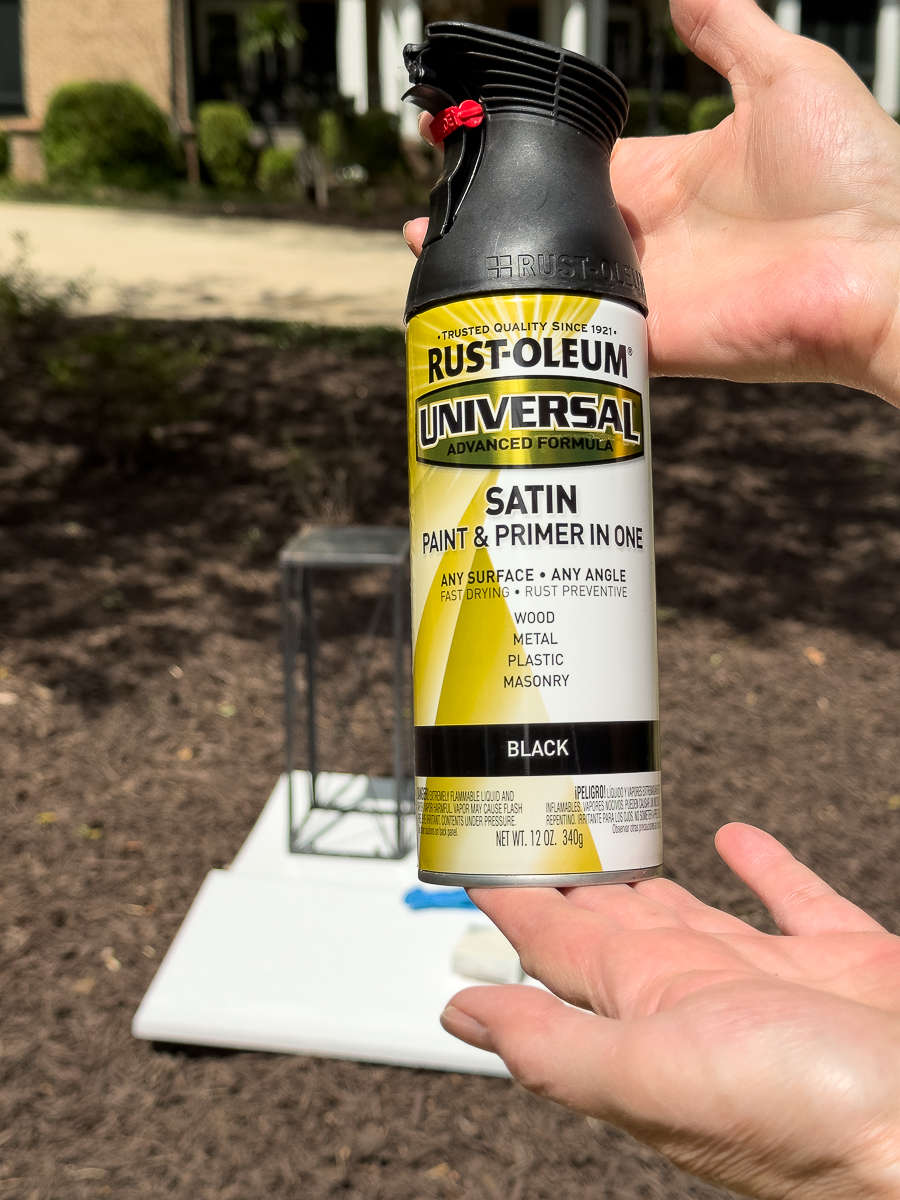
- Shake that can well!
- Don't paint too close or you will get drips. I prefer to paint in short bursts.
- I like to paint the lanterns upside down first to get all of the underside. I did 2 coats this was. Let it dry thoroughly between coats.
- Flip the lanterns and pieces and finish with a couple of light coats. Dry between coats.

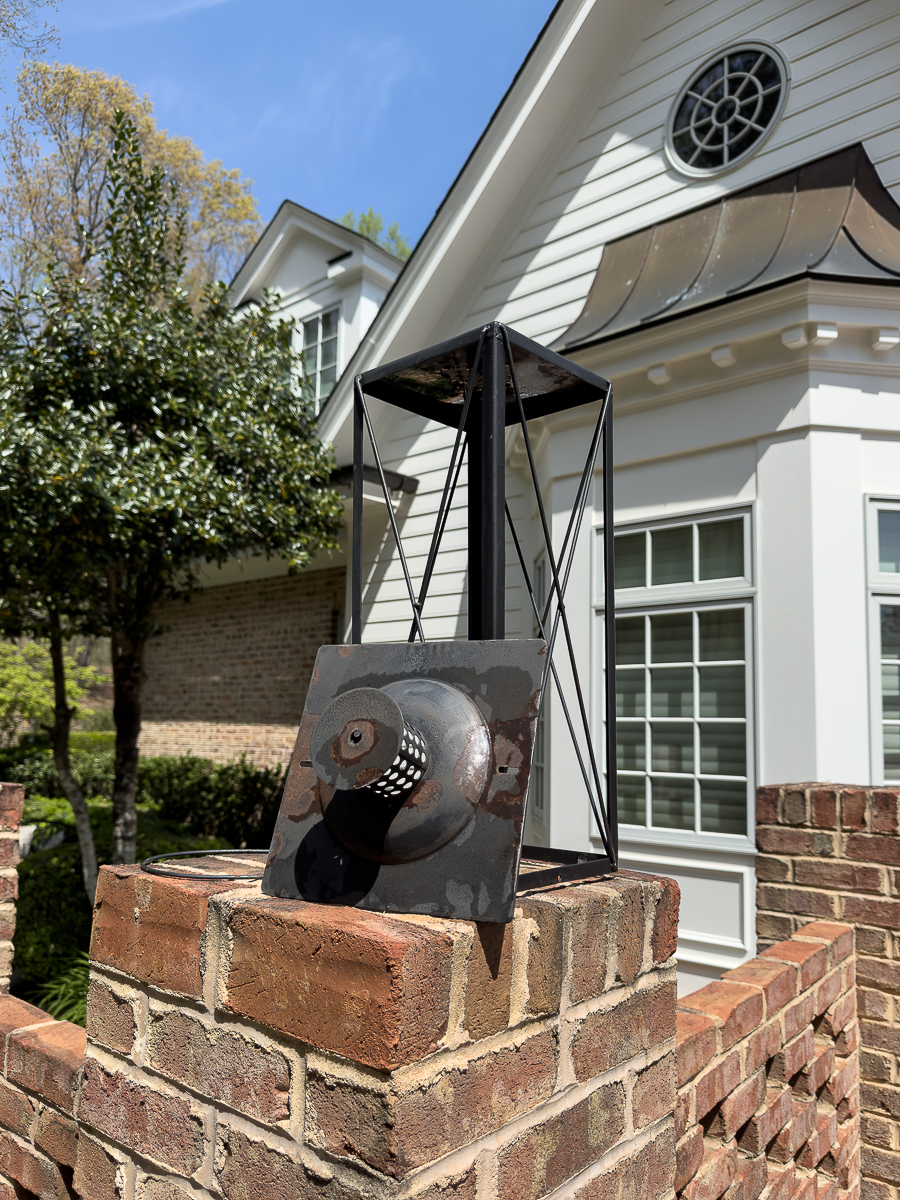
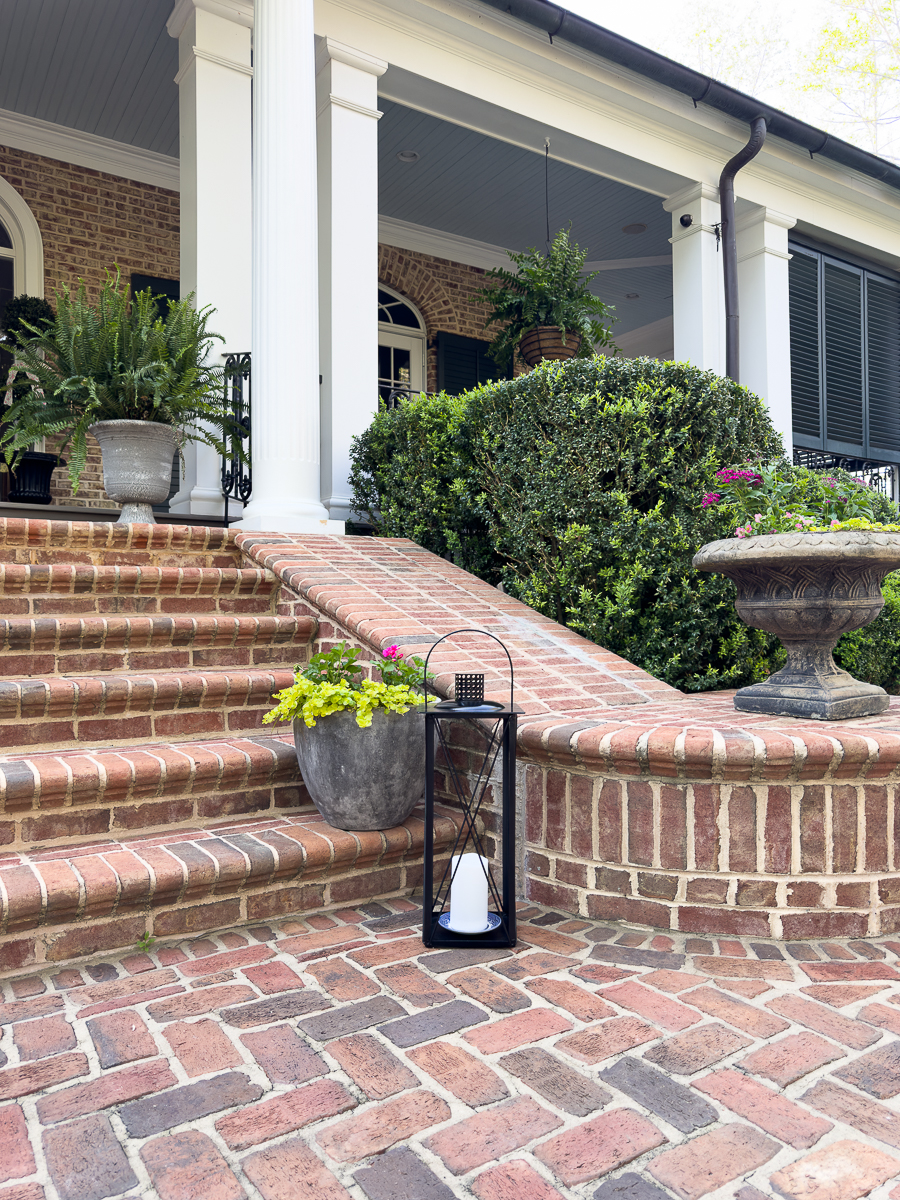
Step 7: Styling – The Fun Part
These will be used outside. I am unsure yet of their final resting place. It might be exactly in this spot. It might be on the back patio.
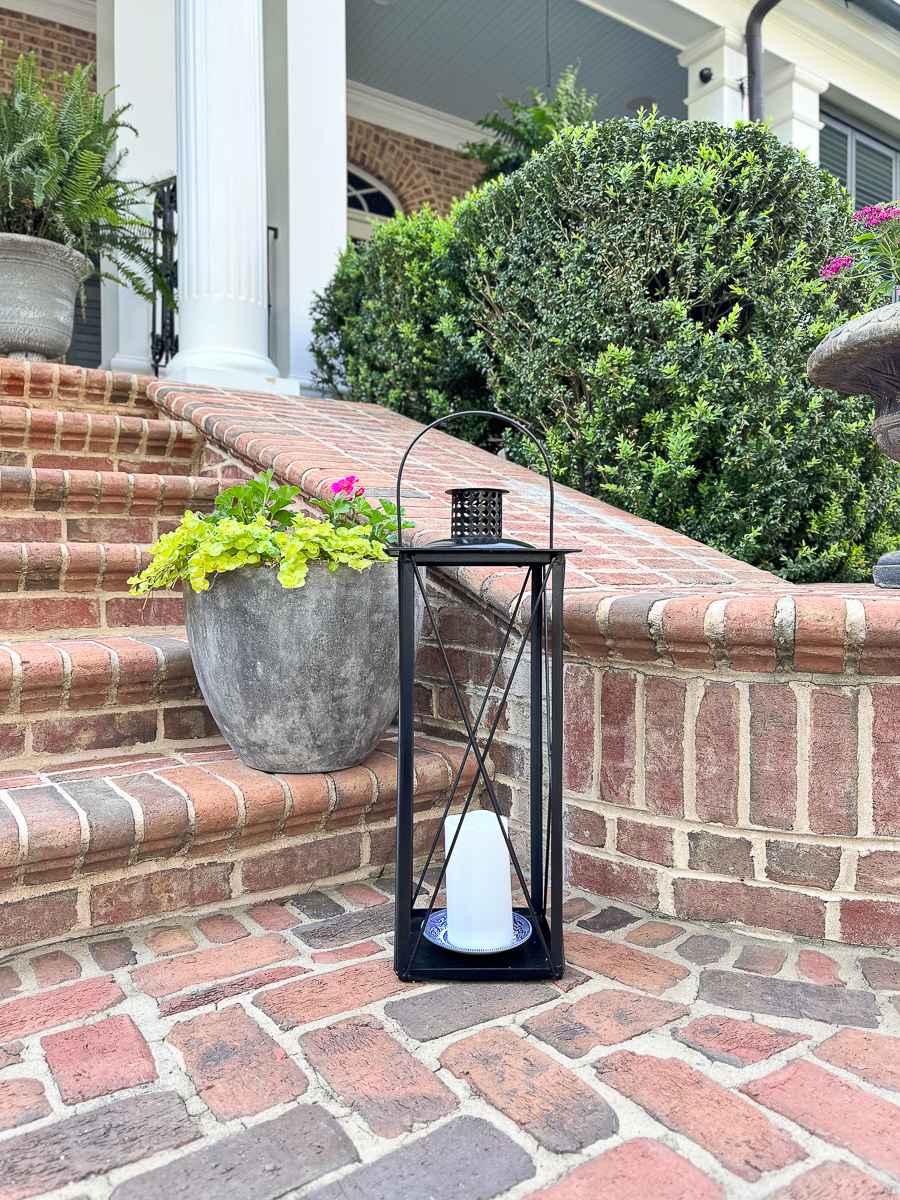
Knowing me, they will live in both areas as I am constantly changing up accessories.
When I was searching online for outdoor candles, I was pleasantly surprised to discover solar pillar candles.


This grabbed my attention because I love these solar lanterns that I have in both medium and large.
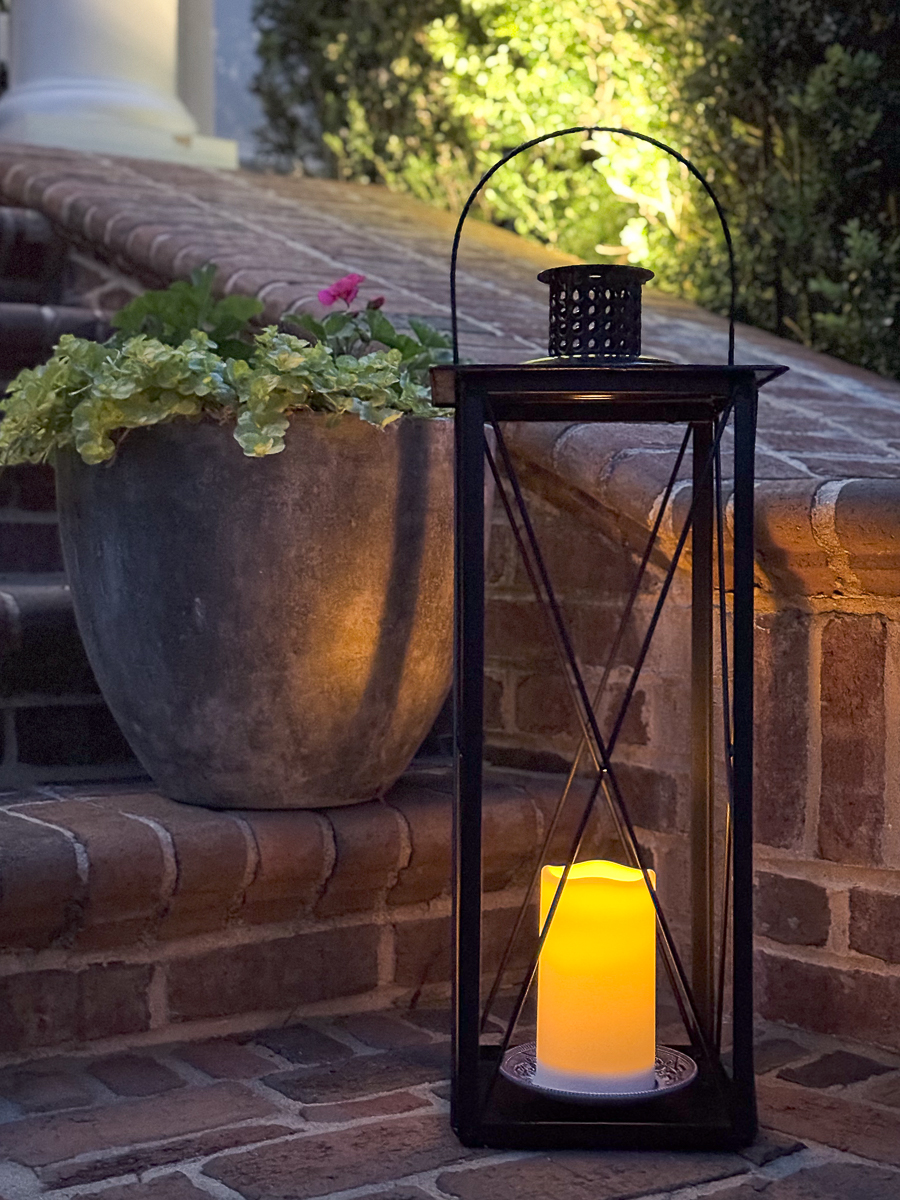
The candles arrived the very day that I was photographing this post. I placed them in the sun around 2 pm and photographed them at 5:30 pm.

I then had my hubby help to remind me to go outside after dark to take a couple of photos of them at night.
I am so happy with them!!!!
I have a few blue and white teacup saucers. To add a little pattern to them, I placed the saucer under the candle.
I am so pleased that I caught these lanterns before they ended up at the landfill!!!

Decorative lanterns give a great warm welcome. Solar candles are just the icing on the cake! I do plan to move them on the porch in inclement weather. The candles say they are waterproof.
I hope you are inspired to possibly give fresh life to something for your outdoor space. You could apply these skills to your metal and wrought iron furniture, garden sculptures, plant stands and more!
Here are a few more projects from OSH that are on the front porch!
The Latest Thrifty Makeover from the Team
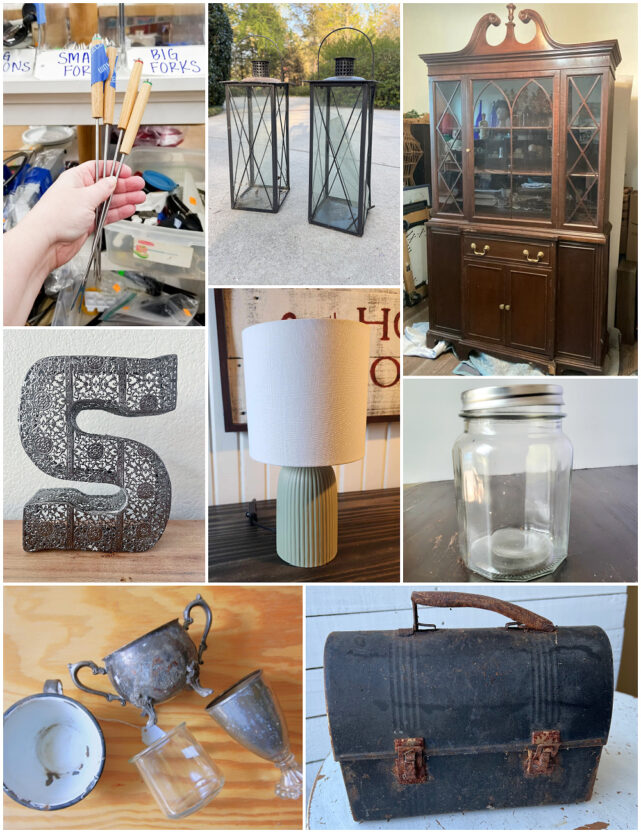
Domestically Speaking – Mother's Day Candle
My Repurposed Life – Lamp Refresh with Paint
Petticoat Junktion – Spray Paint Faux Succulents
My Uncommon Slice of Suburbia – Succulent Letter Planter
Sadie Seasongoods – Fondue Forks as Plant or Herb Markers
Organized Clutter – Vintage Metal Lunchbox Planter
Shop at Blu – Upcycled MCM Cabinet
Watch the video tutorial HERE.


Christy has been creating content for Our Southern Home since 2012. She has been featured in numerous print and online publications. Her classic, eclectic design approach spans her home and fashion style. Christy has a way of mixing store-bought with thrift store, antique and vintage finds. As a recent empty nester, she is having fun navigating this new stage of life. Read more about Christy HERE. Be sure to subscribe below. You can also contact me HERE.


Always amazing what a little scrubbing and paint can do for a gorgeous update! Looks great!
I can picture you…running…screaming NOOOOOO…. 😉 And worth every moment of it! Just look at them now.
I’m dying laughing at you hoarder scenario complete with the slo mo NOOOOO! This is repeated in thousands of households around the world…including mine! Thanks for the inspo! I have 5 of these waiting for refresh. Pinned1
WOW, it looks like it’s brand new, great makeover. I have a few dated lanterns outside I could update 🙂
Just like brand new! Awesome upcycle project! Pinned!