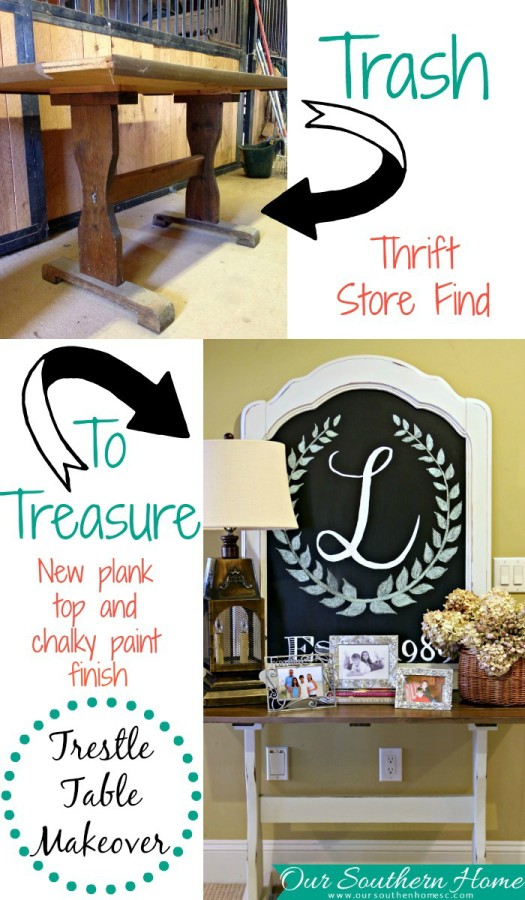
Distressed Trestle Table Makeover
Welcome to this month's furniture makeover!
The theme is Distressed.
I'm sharing my distressed trestle table makeover.
I love this technique. I'm a fan of gentle distressing along the edges where natural wear and tear occur.
While extreme distressing does not exactly fit my home, I love it nonetheless.
This is a piece that I completed a while back, I just haven't gotten around to blogging about it. I've got quite a few of those lying around.
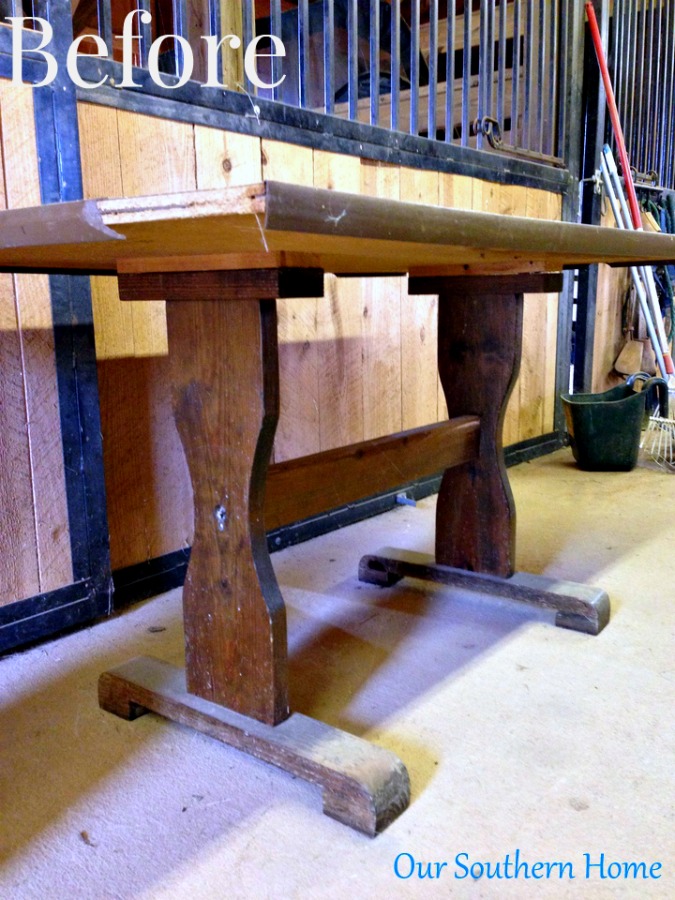
I eyed this lovely specimen for a long time at the thrift store. No one wanted it. Go figure…
I finally bit the bullet on half-price day taking it home for $10. Quite frankly I would have never paid full price for it.
Of course, you should have seen the eye rolling when I brought it home by Mr. OSH. I think he actually enjoyed this undertaking. I really wish that I had my Kreg Jig when we did this project.
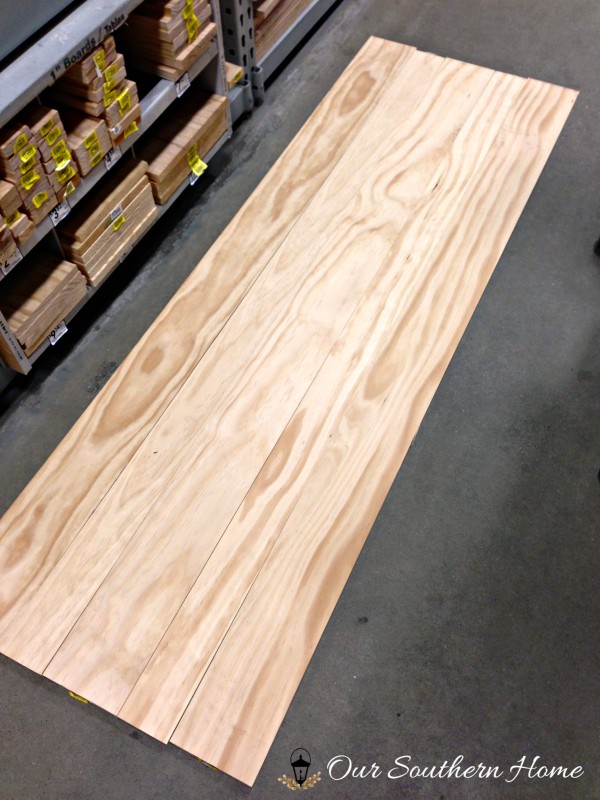
We went to the home improvement center in search of wood for the plank top. If you notice I alternated board sizes. I purchased pine stain grade boards.
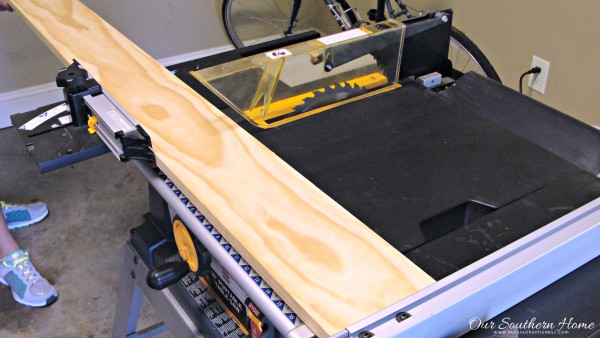
We borrowed a table saw from a friend. I'd love to have one someday! We have a skill saw, but really wanted nice sharp lines.
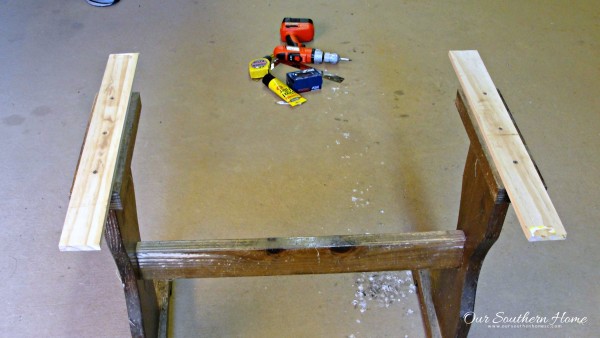
We removed and trashed the old particle board top complete with plastic trim. It was not salvageable.
We screwed in 2 supports for the top.
This is where I wished that I had my Kreg Jig! A Kreg Jig is used to bond boards seamlessly like I did with my Home Sweet Home Sign.
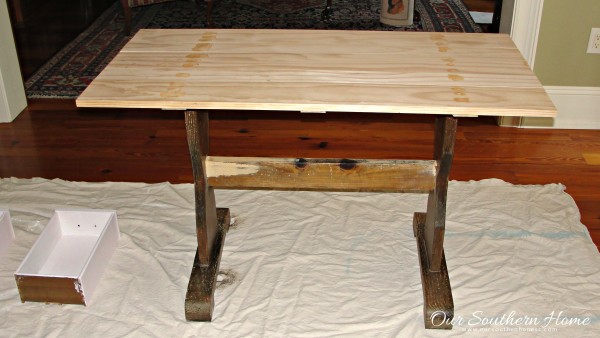
A boat load of wood putty was used on the base. It was pretty beat up and chewed up. We did countersink the screws in the plank top. Be sure to use stainable wood putty if you plan to stain.
Lots of sanding happened at the barn before I was finally able to bring it in to paint and stain.
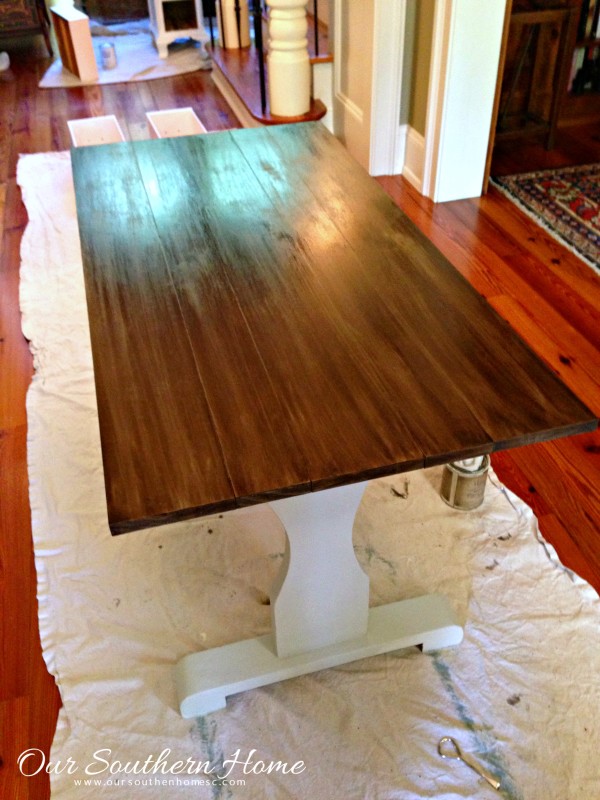
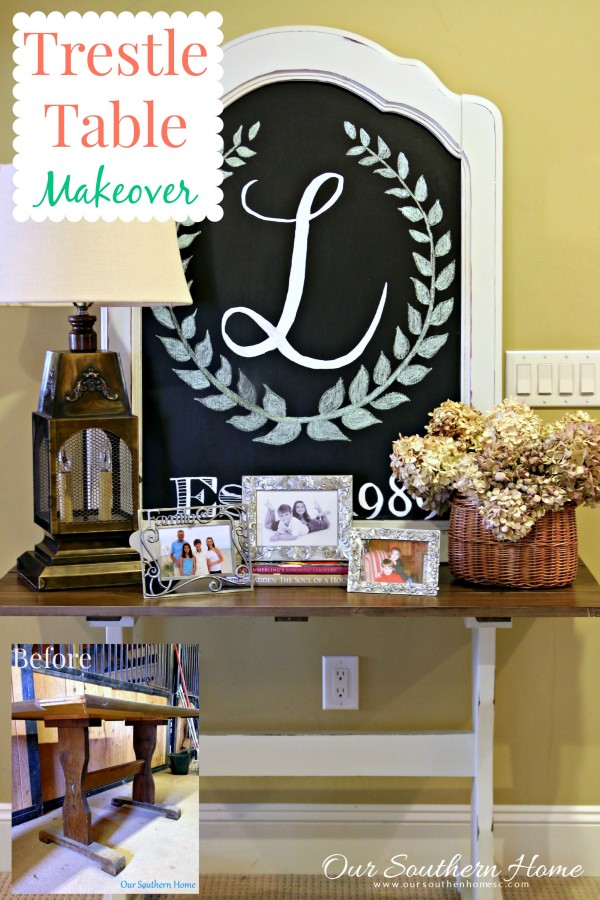
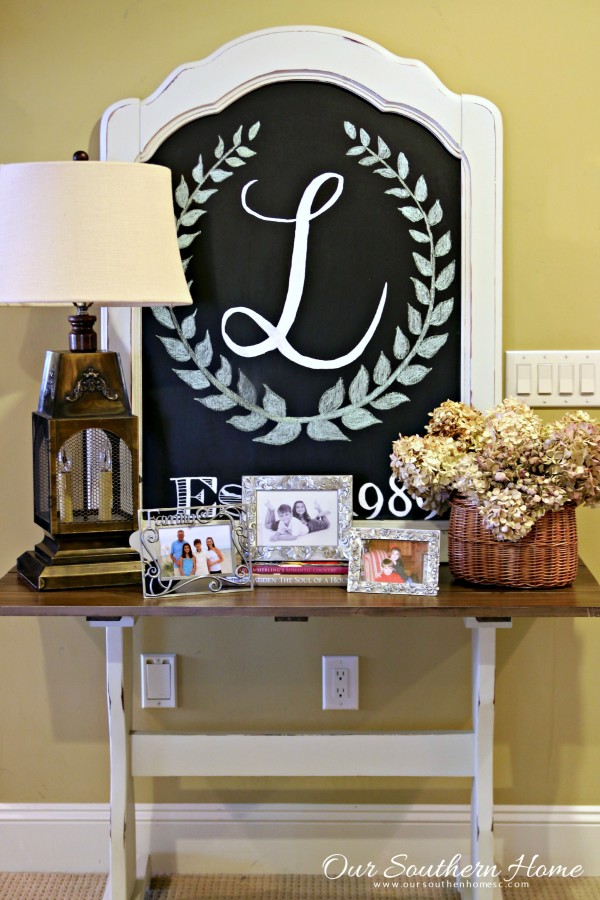
The base was painted with 3 coats of Maison Blanche paint in La Bonne Terre. The top is stained with Minwax Dark Walnut. The base was lightly distressed and waxed with Maison Blanche clear wax. The top was sealed with Minwax Wipe-on Poly in satin.
When I completed this project, I also had my son's grain sack antique desk project going on. It is one of my favorite paint projects. I guess because it looked impossible at the start. You couldn't walk in the foyer or family room for quite a few days! Lots of painting going on!
What I learned from this first experience: Make an apron to go around the front to hide the support. I may go back and do this. Honestly, we don't notice it.
I applied a light pressure as I removed the stain to form the striations. Be sure to remove in one swipe across so it is continuous.
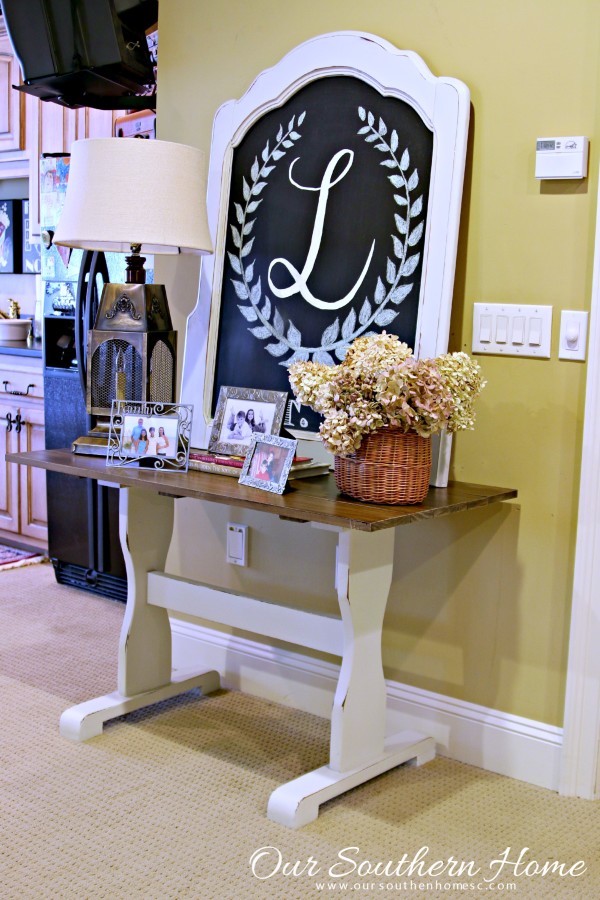
This is situated in the bonus room upstairs which houses a media area and rec area. It's like an upstairs basement. The table goes perfectly here. A big upcoming project that we have is to paint over the gold walls and go with a lighter more neutral color. Honestly, I'm dreading it…..big time. The ceilings and wall are all the same color since they are angled. Anyone want to come help?
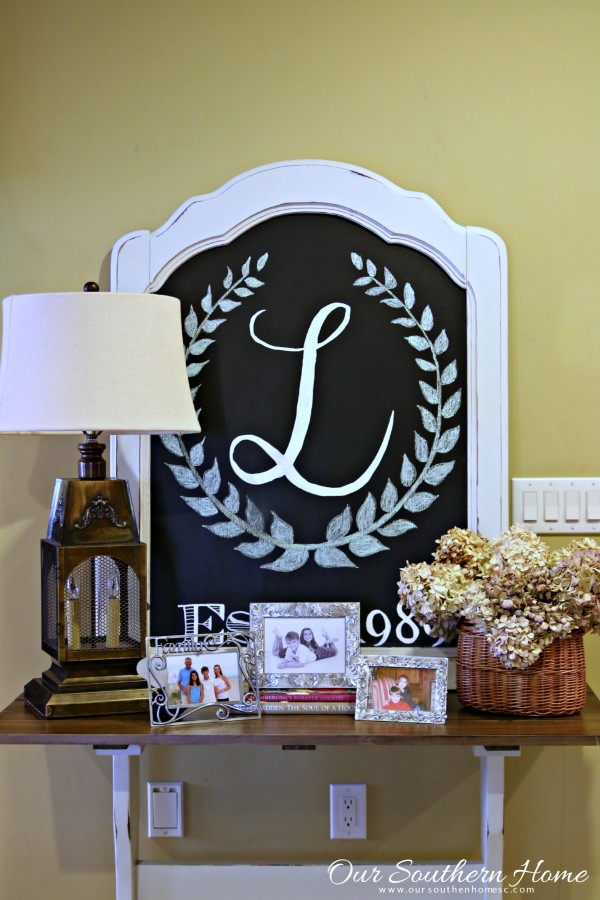
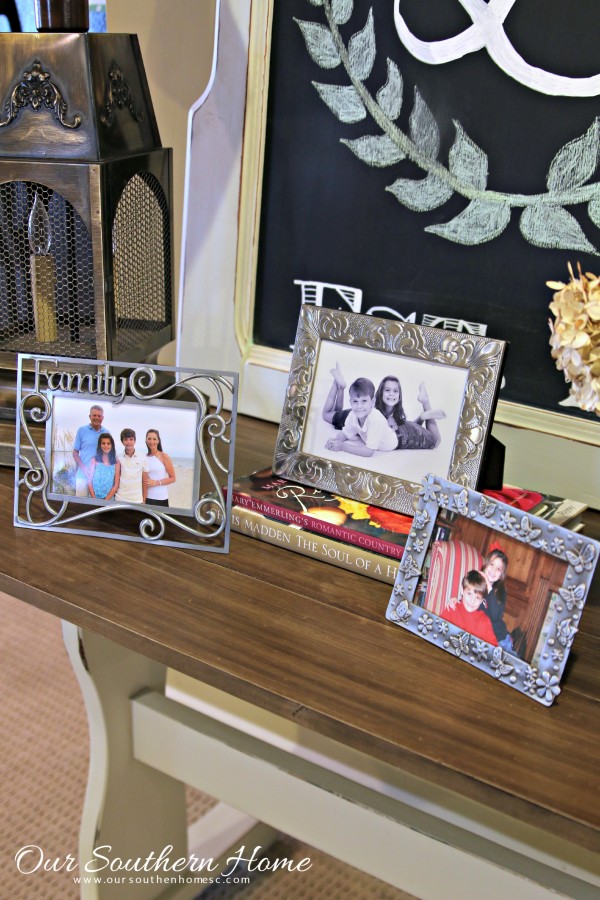
The chalkboard was also a thrift store find. It was a heavy mirror. You can see its transformation HERE. You can also print your own monogram art like mine HERE for FREE. You can see the subtle distressing.
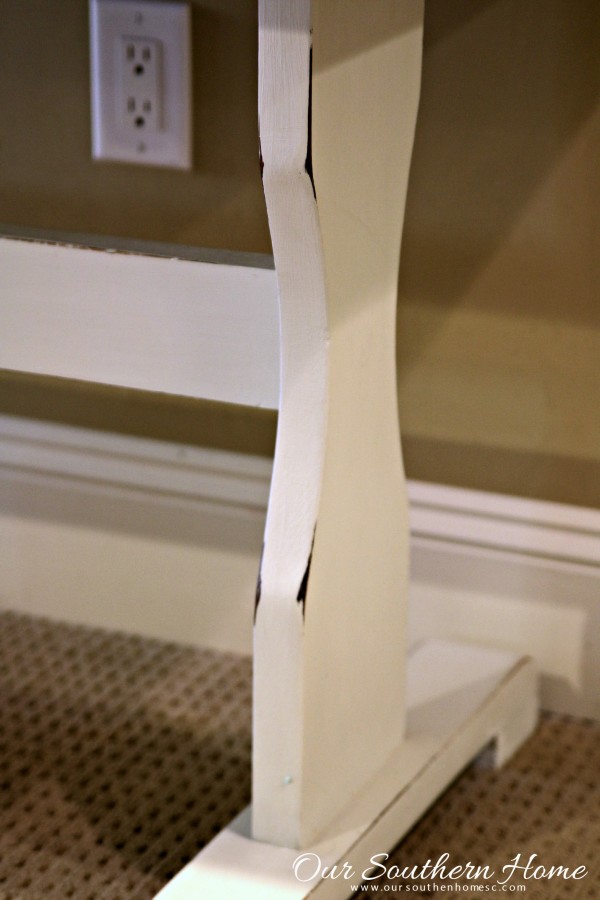
The dark wood coming trough really gives it character. Most of my pieces just have subtle distressing.
Other projects from our monthly features that I have completed are below:
Console Makeover with White Wash
Farmhouse Coffee Table Makeover
Thrift Store Toy Chest Makeover
I’d love for you to follow along on social media!
–>> Facebook | Pinterest | Instagram | Twitter | Google+
It's time to check out all of the other DISTRESSED projects from this month!

Home Stories A to Z Not Just a Housewife Kammy’s Korner The Happy HousieDesign Dining and Diapers Liz Marie Blog Funky Junk Interiors Savvy Southern StyleTatertotsand Jello DIY Show Off Redoux Interiors Between Naps on the Porch The DIY DreamerOh My Creative Little Miss Celebration Just a Girl and Her Blog Sand and Sisal InteriorFrugalista House on the Way Addicted 2 DIY I should be Mopping the FloorMiss Mustard Seed Stone Gable- The Scoop
Buffer

Wow, what a difference Christy!!! Love that top and it looks great all styled up in your space. 🙂
Nancy
Thanks so much, Nancy! It was a fun project.
Wow! What a treasure you and Mr. OSH created together. I love it! And the striations in the stained top with the distressed base really makes it so cool.
Thanks Therese!!! I think he actually enjoys the projects!
Trash to treasure to right! This is so lovely, and the added top is perfection!
Thanks so much!
Just love your vision on this project! Yes, a Kreg Jig would have made the table top assembly easier, but it looks like you did an outstanding job! Love the contrast of the white base and wood top:)
Christy, What a fun project. The top looks great and I love the dark peeking from under the white. Jeanette
Great redo, Christy! That’s awesome you had all the in-progress pics! Your house must be huge, a rec room? I need to steal some of that extra space. 🙂
Beautiful makeover! Making a new top for this piece was a great idea and I love the contrast of the stained top with the wooden bottom. I’ll bet that the original owner would be shocked if they could see this piece now!
Refreshed and rustic. Perfect!
Christy, I love the trestle table and sure anyone from your thrift store would be shocked at the transformation. I think my alltime favorite before and afters are from the ugly brown to a creamy white look. It’s a winner every time!
~Tami