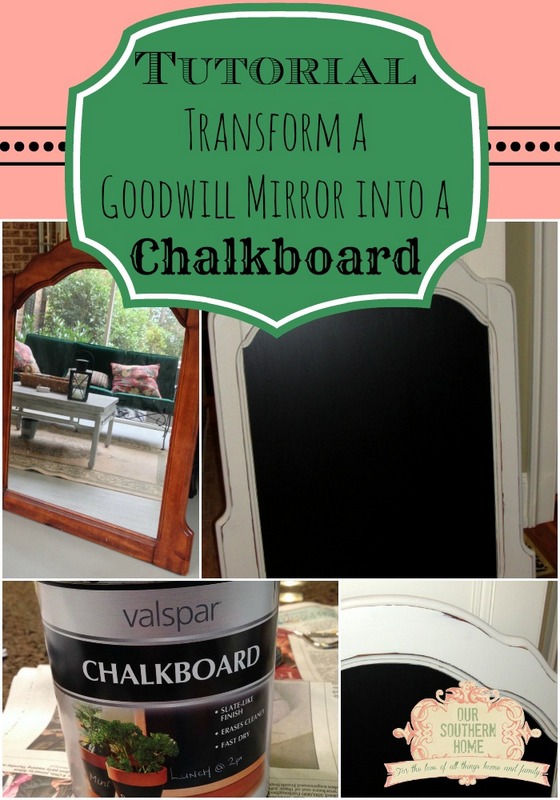
Goodwill Mirror to Chalkboard Tutorial
I confess I have a bit of a problem with finding my way into thrift stores. I've even gone out of my way to turn around and go back after my inner self said”NO”….keep driving. My inner self starts screaming, “You have a growing stash in the garage. Where will you park your poor car if you buy another piece!”
On a lighter not, I have been staying away until I get caught up on what I have. I do struggle with that nagging feeling that I may be missing out on that perfect find!
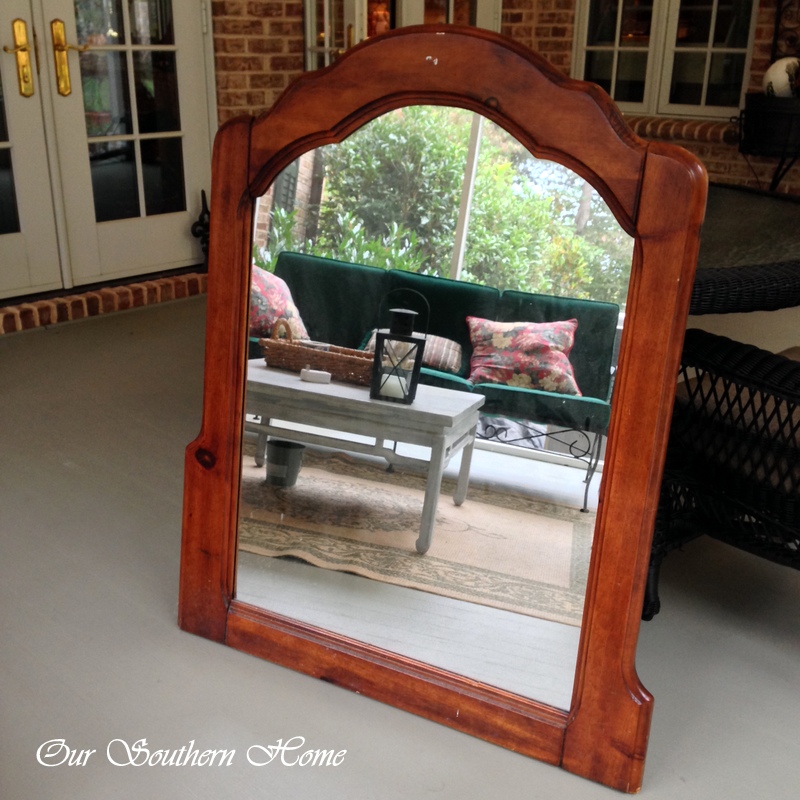
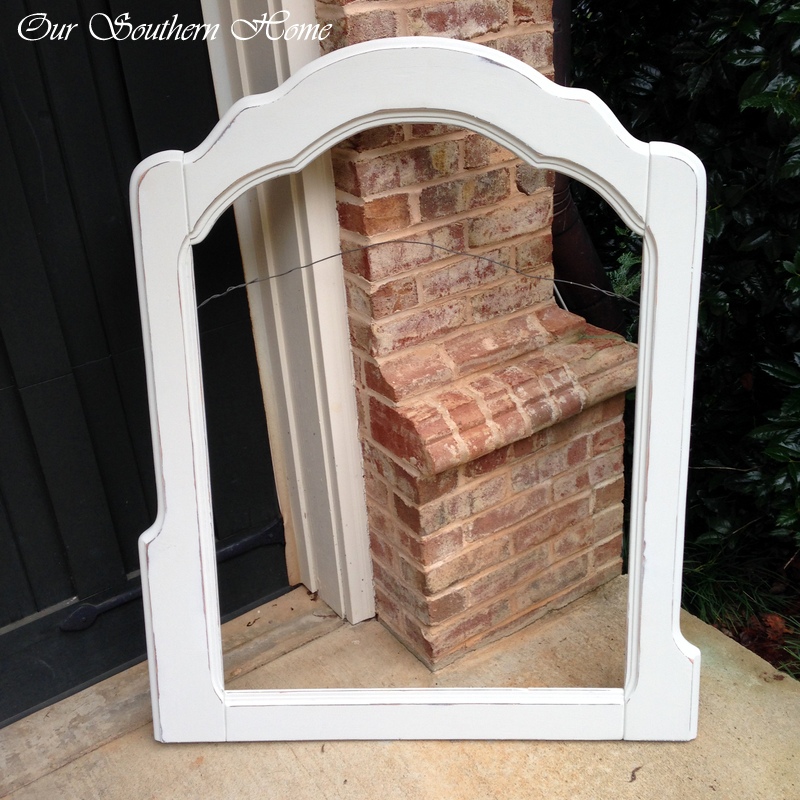
This summer, Ashlyn and I found this very heavy dresser mirror at Goodwill. It's not perfect..looks like it was part of a set due to the unevenness of the sides. Do you notice? Once it is in place and things are around it, it disappears. I knew exactly where I wanted it to go, and it is now hanging or rather leaning in our family/media room over a table that we made this summer.
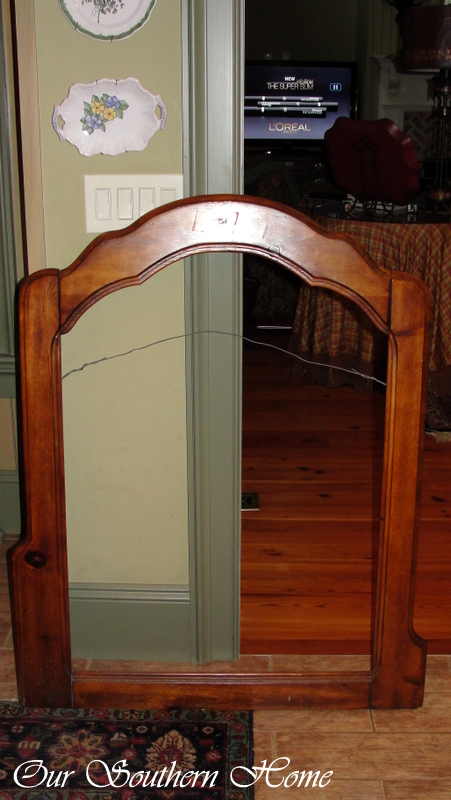
I removed the backing and took out the mirror. Without the mirror, it's not near as heavy! Don't throw the backing away or any filler material used to fill the space between the mirror and the backing. In this case, it is several sheets of cardboard.
Clean the mirror well before painting.
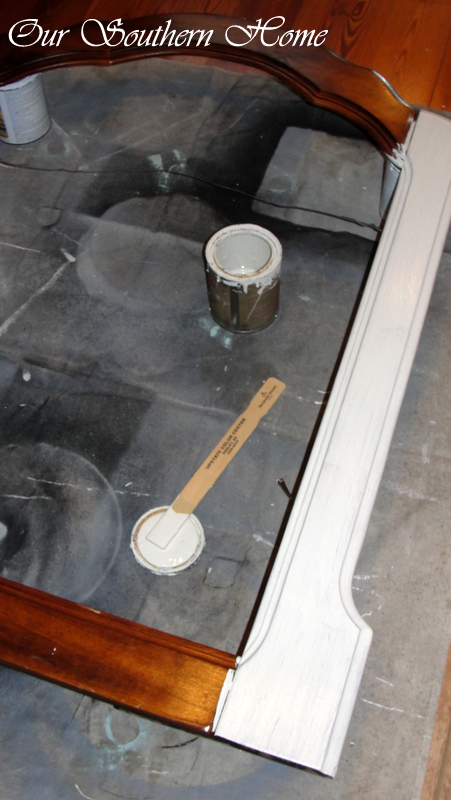
Since I knew I wanted to place this chalkboard over a table that my husband and I made this summer, I decided to use the same paint color. I still need to share that table with you! With chalk paint there is no need to sand or prime. I painted on two coats of Maison Blanche paint in La Bonne Terre. I love this color. It is a creamy off white with a hint of green.
Two coats were all it needed!
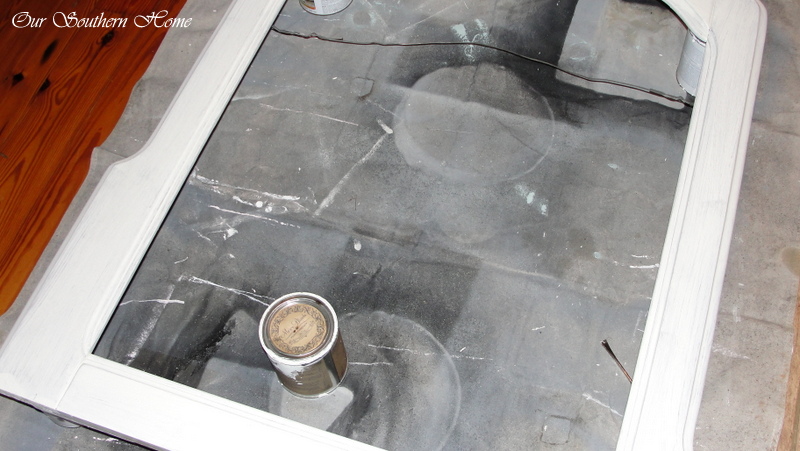
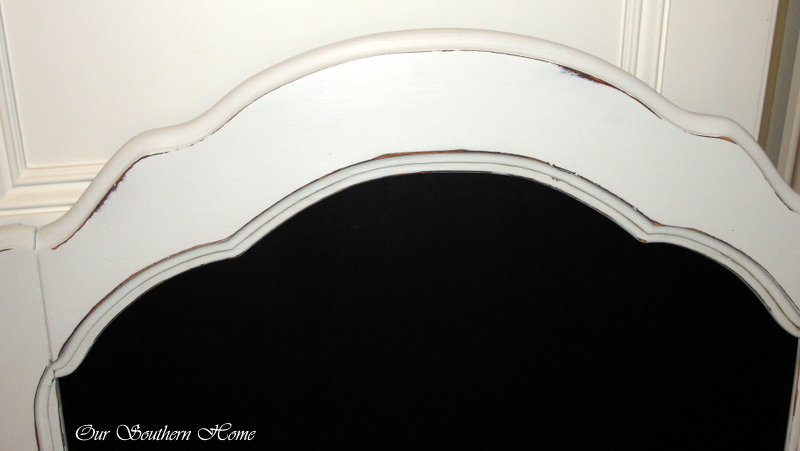
Dry time is very fast with this paint. Later that day, I took it outside and lightly distressed it with my electric palm sander. This make the job so fast! You could also use medium grit sand paper or a sanding block and just a bit of elbow grease. My hubby gave me my sander for Christmas last year, and I love it! My old one had worn out!
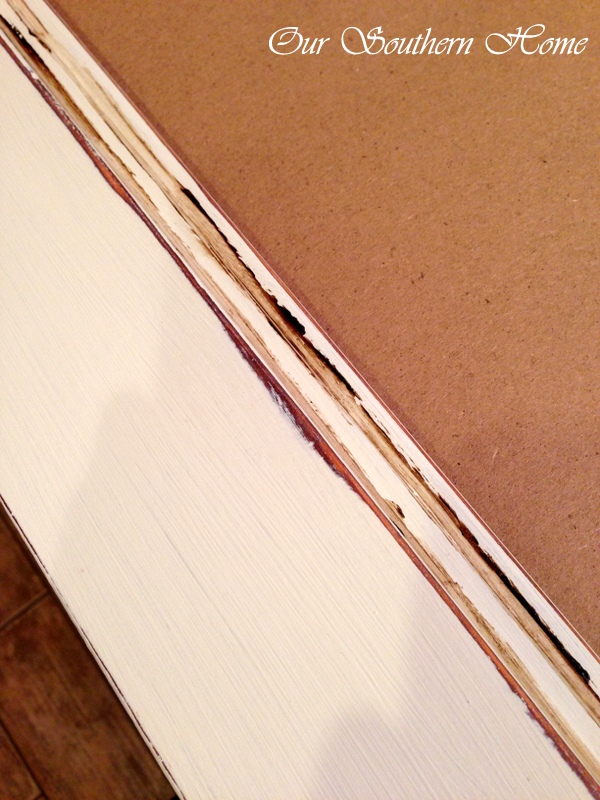
Here is up-close detail of the light distressing. I finished with two coats of clear wax and a light buffing.
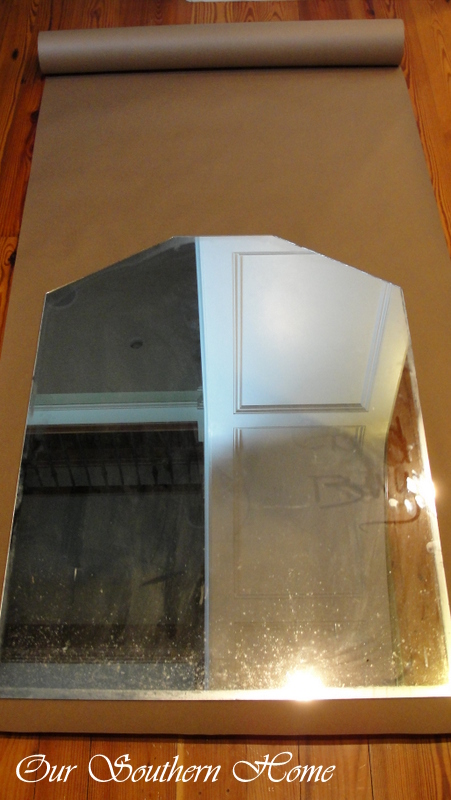
This mirror fit into a grooved out area. Don't throw the mirror away until you trace it to make a pattern. I used my roll of brown paper from Lowe's.
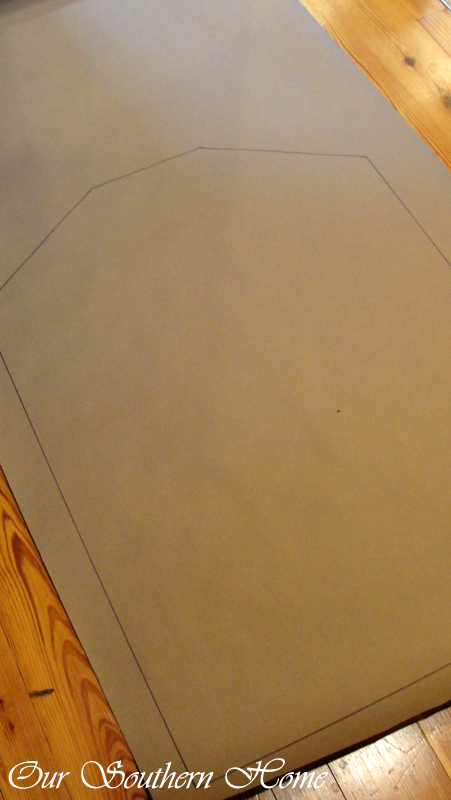
Trace and cut out the shape for the chalkboard. This will be used to cut out whatever you use for the chalkboard.
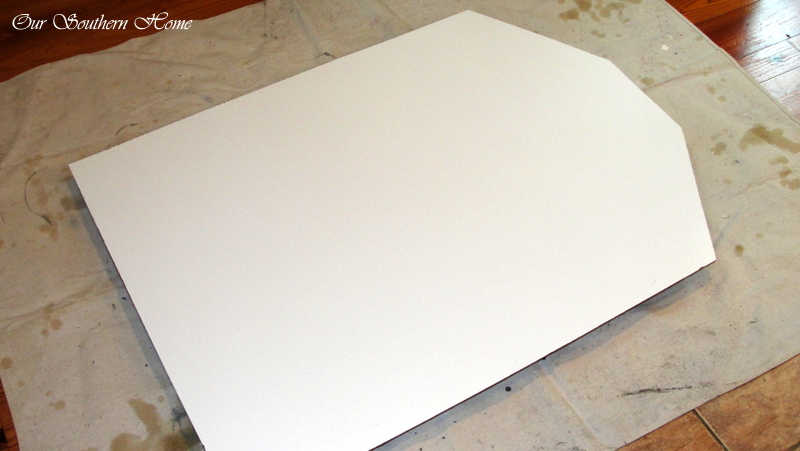
I know that home improvement stores will cut measurements of wood for you….no sure about specific patterns. With this, we have a friend that had this scrap piece in their garage. It is very thin and looks like particle board on one side and like a white board surface on the other side. It was cut with a miter-saw. I thought I'd give it a try to see if it would work. I cleaned it well before painting.
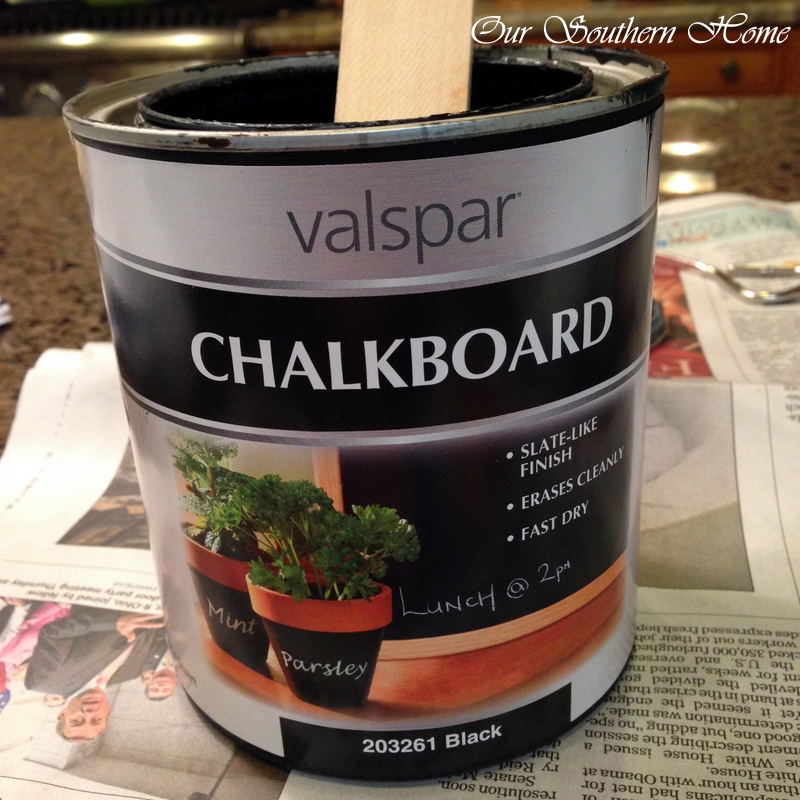
I applied two coats of chalkboard paint straight on the white side of the board. Any type of smooth board will work. I've even seen people use cardboard as the surface in smaller frames.
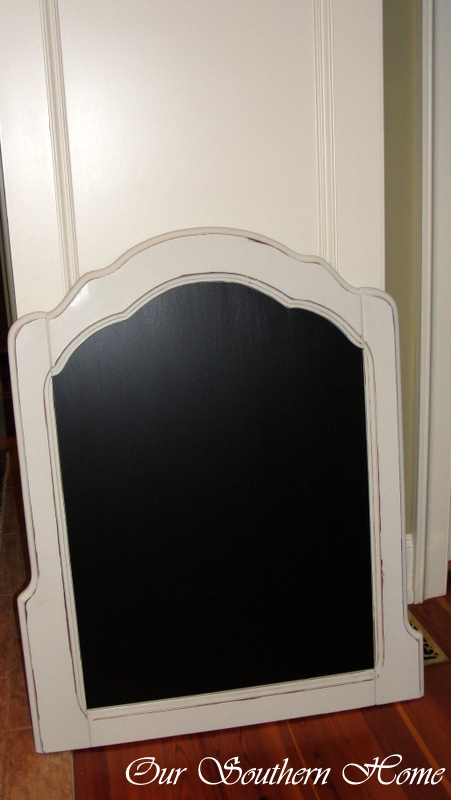
After the board was dry, I placed it back where the mirror had been. Then added back the filler sheets of cardboard and finally the backer board. Basically, you are putting the frame guts back together in the exact way that it was without the mirror.
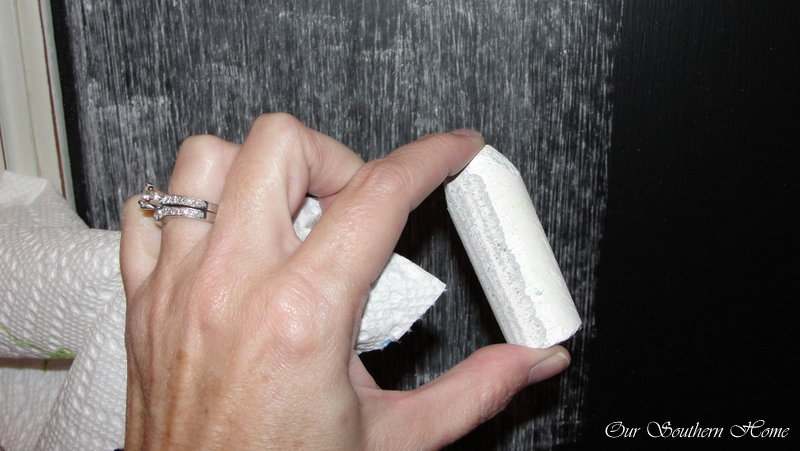
Be sure to prime the chalkboard surface first by writing all over it with chalk on its side. Then take a towel or eraser and work the chalk into the surface. This creates a surface which can easily be erased. If you prefer the new, freshly painted look….you can draw and wipe away with a wet cloth.
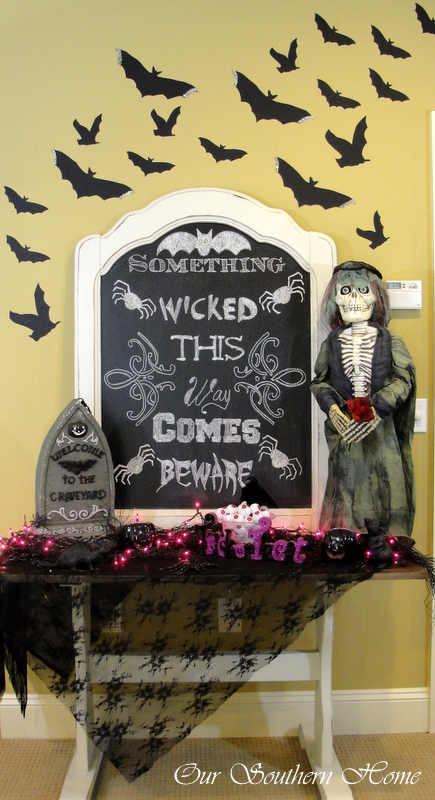
Here it is in my Halloween vignette. You can learn how to create chalk art like this HERE.
Thanks for stopping by! Let me know if you have any questions!


This sounds like a great project. At my favorite thrift shop there are several mirrors discounted. Also, there are several framed pictures discounted as well. Can you use chalkboard on the printed canvas board inside? Thanks for the inspiration.
Thanks! You can paint over what is inside, just make sure it is a smooth surface. You can also just paint the glass. Have fun! ~Christy
Hi, Christy. I have a quick question….I made a chalkboard like this before seeing your blog and used the same type of board you did. Both sides were smooth so it didn’t seem to matter which side was painted on. The finished surface isn’t really smooth, though. At least, not like chalkboards I remember. It has a texture to it. Have you noticed this on your board(s)? Also, have you tried the paint on plexiglass?
Hi! No, I haven’t painted plexiglass, but pretty sure it would take. Might want to prime first. I’ve used it on mirror. I find that I get less texture when I use a spray can of chalkboard paint. I’ve used both. I don’t think any of it will ever be just like a good ole regular chalkboard though. What paint did you use and how was it applied? Christy
We’re using basic chalkboard paint purchased by the quart at Lowes. We have since tried brushing it on (foam brushes)and it’s a nice, smooth surface.
I’ll have to try a foam brush! Thanks for the tip!!!
Lovely – I really like the uneven part of the frame, makes it interesting! I haven’t had much luck w/chalkboard paint, except in a spray can. Have you ever tried just spray painting the mirror w/chalkboard spray paint? I do it all the time on smaller mirrors!
Thanks! I just recently tried the spray. It goes on beautifully!!!! I think I like the way the brush on writes on. Have you noticed a difference? Christy
What did you do with the mirror
We donated it to Restore (Habitat for Humanity). I didn’t have an immediate use for it and was worried about breakage with teens and pets. ~Christy
Looks awesome. Great idea about the goodwill store. 🙂
Could you just paint the chalk paint straight onto the mirror and use it??
Hi, Joanna! Yes you can just paint the mirror….and I have. This mirror was a monster in weight! I wanted to reduce that, so that is why I decided to discard the mirror and replace with something much lighter. It is a solid wood frame as well. It is much more manageable now for me to remove to do regular chalk art. Happy fall! ~Christy
Did you actually throw the mirror out after you had made the pattern from your neighbor’s board? Could you have used the mirror part on another project? I thought creative people never throws anything out! I saw that you had the roll of kraft paper..we refer to it as our “Crab eating tablecover.” Haven’t had any crabs in over a year and we used to have them almost every week with neighbors when we lived in our former home. Yummy! Miter-saw, is that the same as a compound miter saw or chop saw? DH has one that I’m wanting to learn how to use. guess now I’ll wait till after the winter season. Brr! 36 degrees out there this morning!
Betty,
Hi! I hope you are doing well. Yes, I did get rid of it. I had no need for it, so I do not wish to hoard things I really don’t think I’ll use. I do save lots to my hubby’s disappointment over the looks of my garage stash. Besides with 2 teens, a dog and 2 cats….I hate for a mirror to crash and someone or a pet get hurt. It just wasn’t worth saving. Cool about the crab eating table cover! We usually just spread out old newspaper or dollar store tablecloth. Have a blessed week!!! 🙂 ~Christy
A lovely idea and a very nice result. We are throwing too many things away in today’s society. Good to see people recycle and reuse 🙂
Thanks so much! I much prefer thrift store shopping opposed to shopping for new. You just have to have a creative vision! Thanks for visiting! ~Christy
This turned out fabulous!!! I’m getting ready to paint chalkboard paint on a mirror very similar to this. I was just going to prime the actual mirror and paint the chalkboard paint on it. Is there a reason why you removed the mirror other than the weight of it? Thanks so much!!
Hi, Tricia! Yes you can just paint the mirror….and I have. This mirror was a monster in weight! I wanted to reduce that, so that is why I decided to discard the mirror and replace with something much lighter. It is a solid wood frame as well. It is much more manageable now for me to remove to do regular chalk art. Happy fall! Good luck! I know it will look great! ~Christy
Oh, and thanks so much!!! 🙂
I have a mirror upstairs that is the perfect candidate for this project. Thanks for the inspiration!
What a great idea! It looks great!
Patty at Home and Lifestyle Design
I love reusing items in new ways! Great tutorial! I’m pinning this ~Sonya
Thanks so much, Sonya! Enjoy the 3 day weekend with the family! ~Christy
wow so cool! Thank you for sharing that tutorial! Unfortunately our thrift stores don’t usually have the quality stuff that yours does. But I keep checking!
We have some that are definitely better than others…it’s a lot of hit or miss. I find the best stuff at the beach 5 hours away! Tons of thrift stores!!!! Thanks so much 🙂
Christy, you make it look so easy with your detailed tuitorials. None of our thrift stores have good stuff like yours does. SA usually has am ample supply of ’70’s furniture..kind of out of my area but sometimes it is worth going out of your way for good bargains.
Thanks so much, Betty!! Most of my great stuff comes from the beach…5 hours away!! Tons of thrift stores there! Actually on the way there now for a wedding!
I LOVE IT!!!
Thanks so much, Martina!