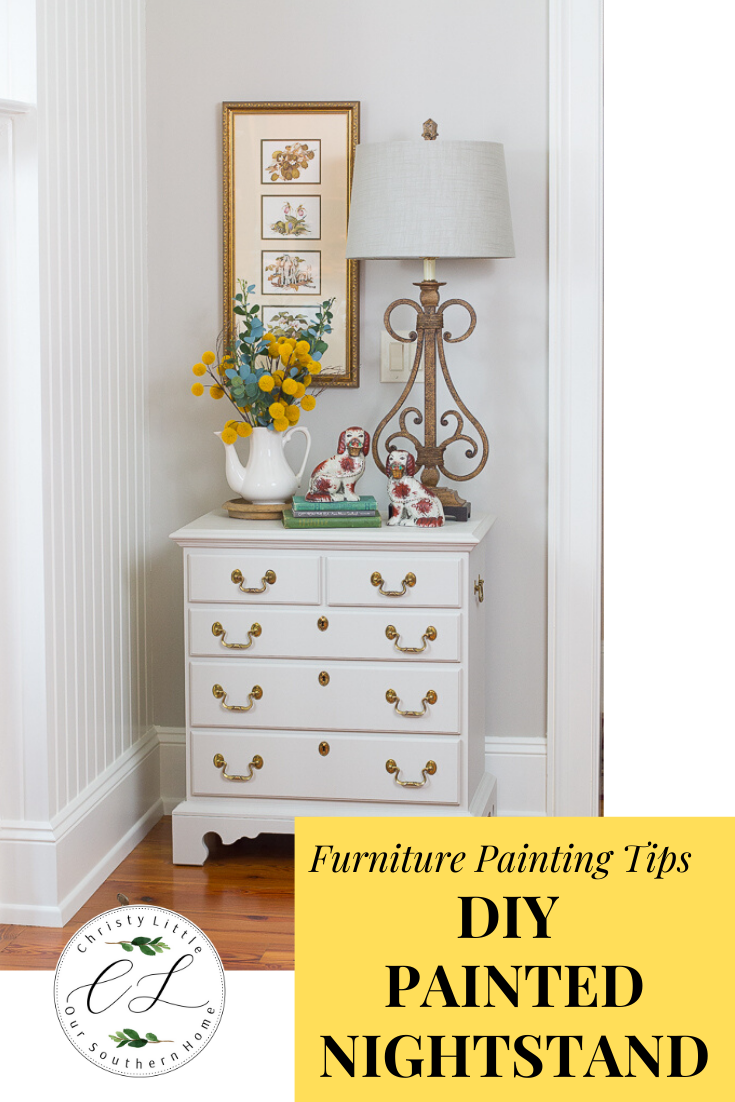
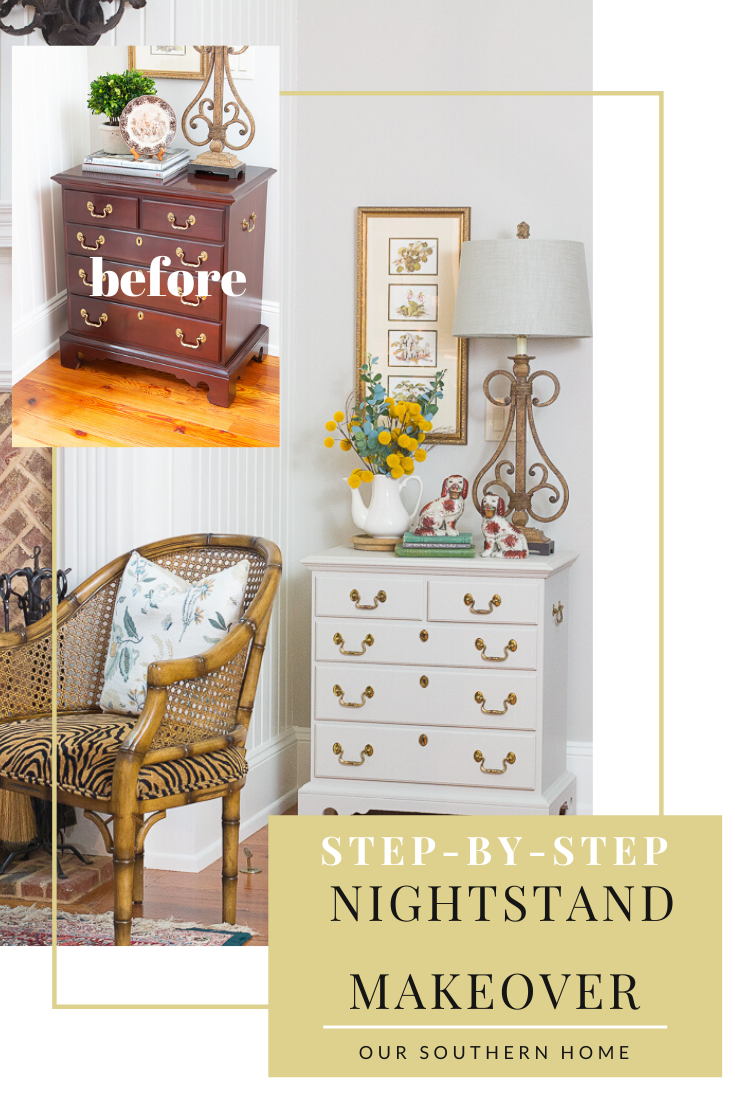
DIY Nightstand Makeover
This post is sponsored by KILZ® but the content and opinions expressed here are my own.
Have you ever had a project that you’ve been wanting to do FOREVER, but just never get around to it? That was me with today’s makeover.
DIY Nightstand Makeover
I am going to share with you my simple step-by-step process that will help you transform a piece of furniture even if you’ve never painted before with the help of KILZ® primer.

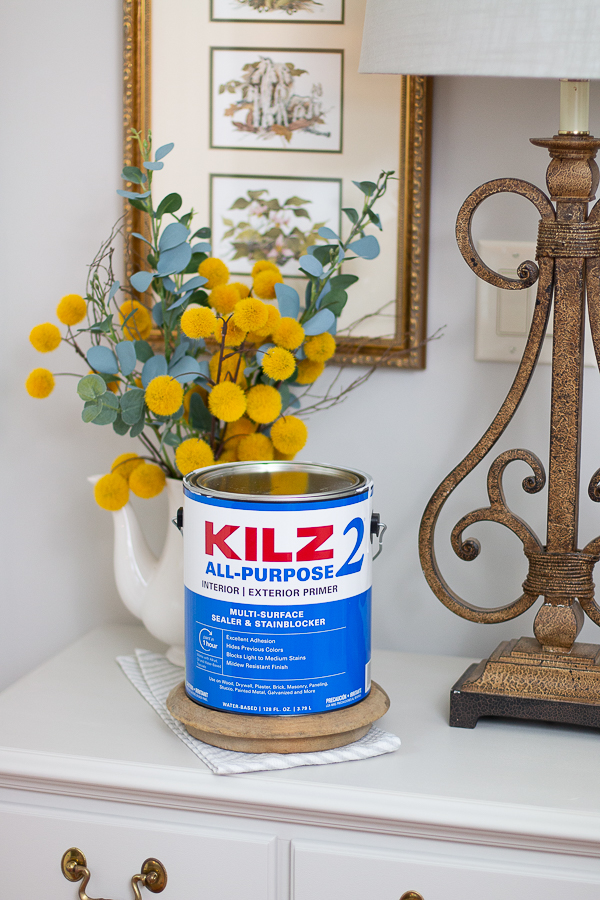
The KILZ® brand has a wide range of surface coatings from primers, to paints and specialty products. They are available in-store and online at over 30,000 retailers across the US and Canada.
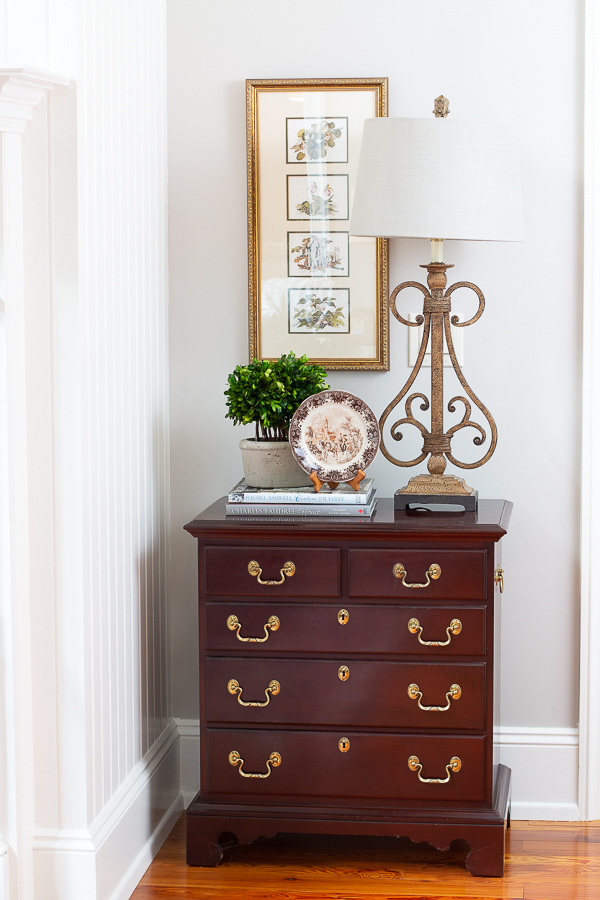
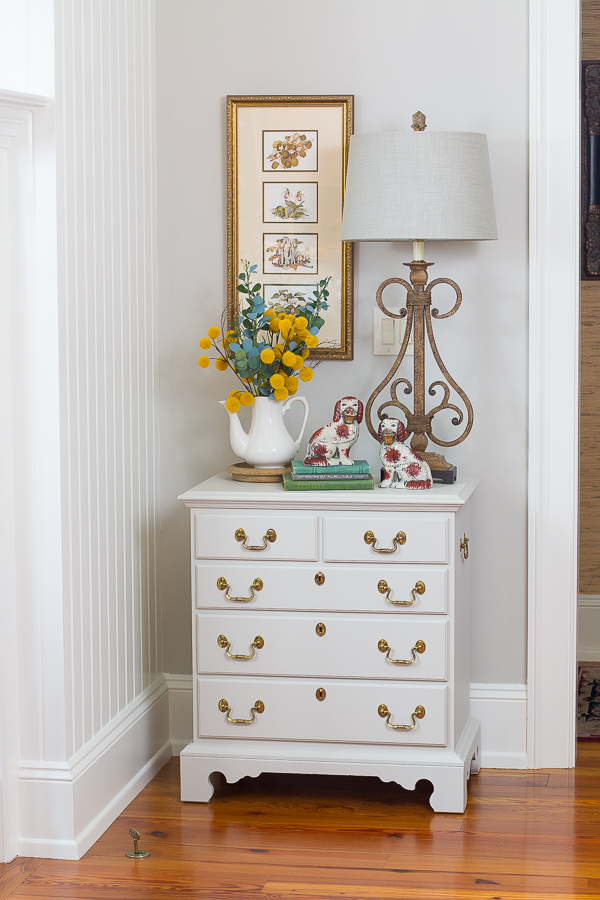
This nightstand is part of a pair from the solid mahogany bedroom suite that we purchased back in 1993. When we built in 2004, I knew that I wanted to break up the matching set look that we had going on in the bedroom. As a result, we have been using one nightstand in the guest bedroom and moved the other one to the family room.
It has been my ultimate goal to eventually paint the pair. It’s been a goal since 2004. Fast forward 15 years…….I know it’s been a while.
I’ve been doing a lot of repainting throughout the house. The main chore lately has been tackling the job of repainting all of our molding. I’m using this same KILZ® 2 All-Purpose primer to tackle that job as well.
I am using KILZ® 2 All-Purpose. It’s perfect for interior and exterior surfaces including woodwork, drywall, plaster, paneling, masonry, brick, painted metal and properly prepared glossy surfaces. It works well over oil and water-based products. I love that it cleans up with water.
This nightstand is a really pretty piece. I don’t dislike it as is, but it’s a little too dark and shiny for my style these days. It’s the perfect candidate for a DIY paint makeover.
Friends, the key to a professional looking paint job that will look amazing and last for years to come is all in the prep.
Supplies Needed:
• Cleaner and rag
• 100-150 grit sanding block
• 220 grit sanding block
• Paper towels or rag
• Angled paint brush
• Small foam roller with handle
• Screwdriver
• Drop cloth
• Painter’s tape
• Roller pan
• Paint cup with handle
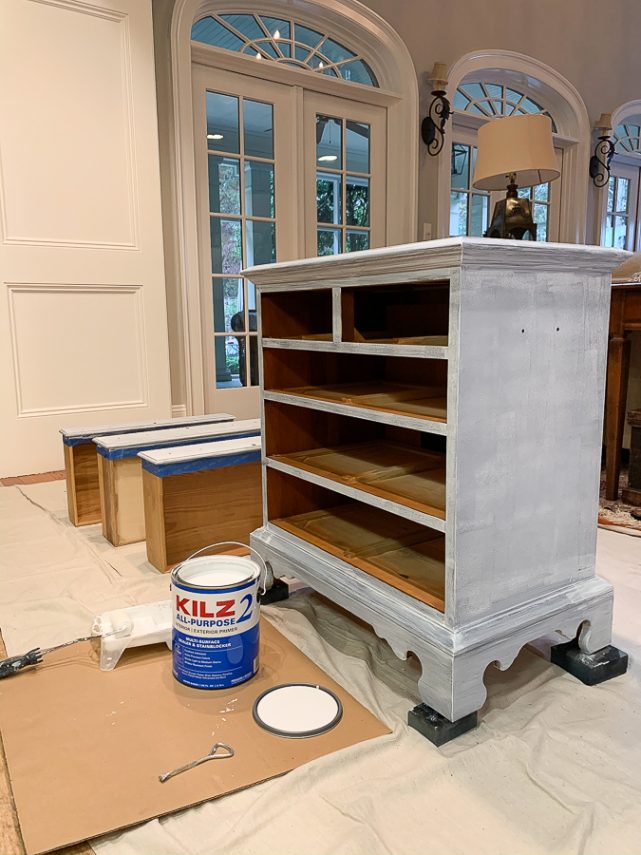
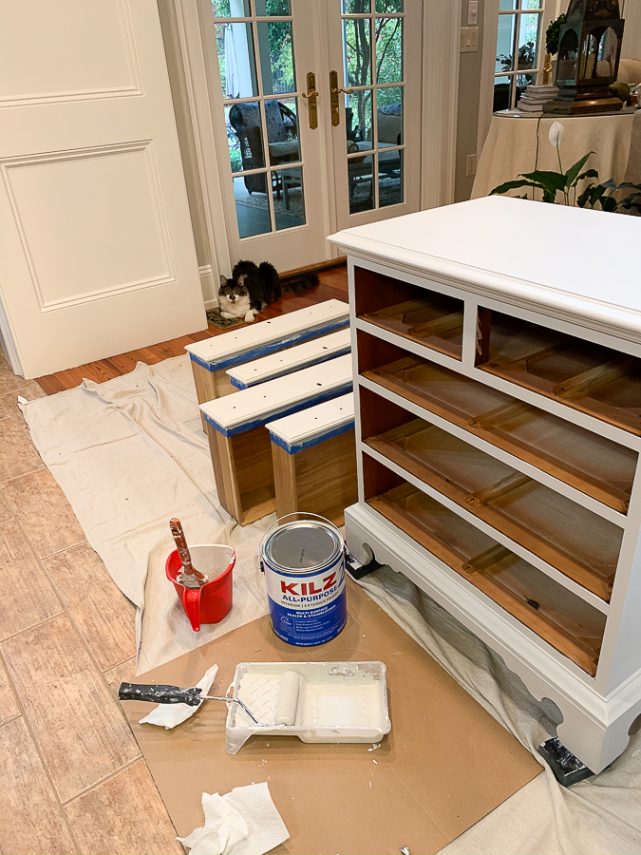
The very first thing that I did was to remove all hardware. Place it in a bowl or baggie for safe keeping.
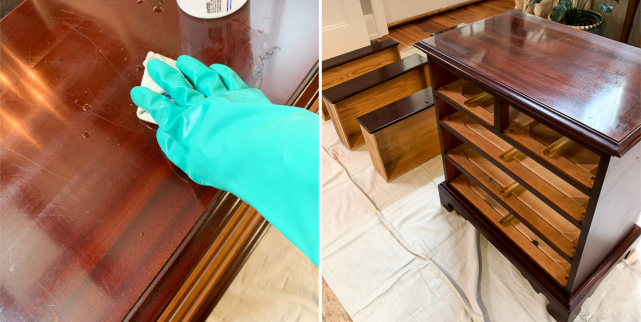
I thoroughly cleaned my nightstand to remove any dirt, grime or furniture polish buildup. You’ll want to use something that is non-soapy. The paint aisle has many options. I used a cloth to dry it off, but you could let it air dry.
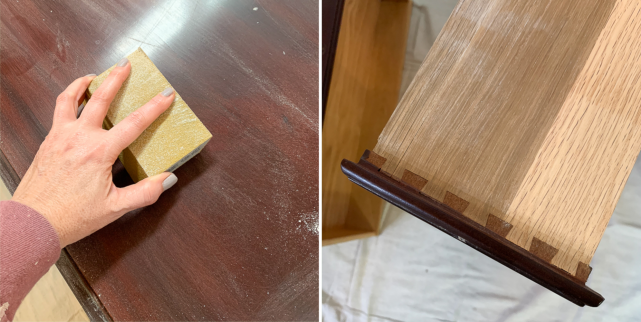
Since my nightstand had a bit of a shiny finish especially on the top and fronts of drawers, I sanded with a 120 grit sanding block. I just did this lightly. It took very little time. Make sure to sand with the grain of the wood. If you don’t, you may end up with some nasty scratches on your furniture. My goal here is to slightly ruff up the surface to dull the finish. This will give the KILZ® 2 All-Purpose primer some tooth to adhere to.
I wiped off any dust. For good measure, I gave it another quick clean with my cleaning solution. You want to make sure it is thoroughly dry before applying primer and paint. You do not want to start priming until all dust is removed.
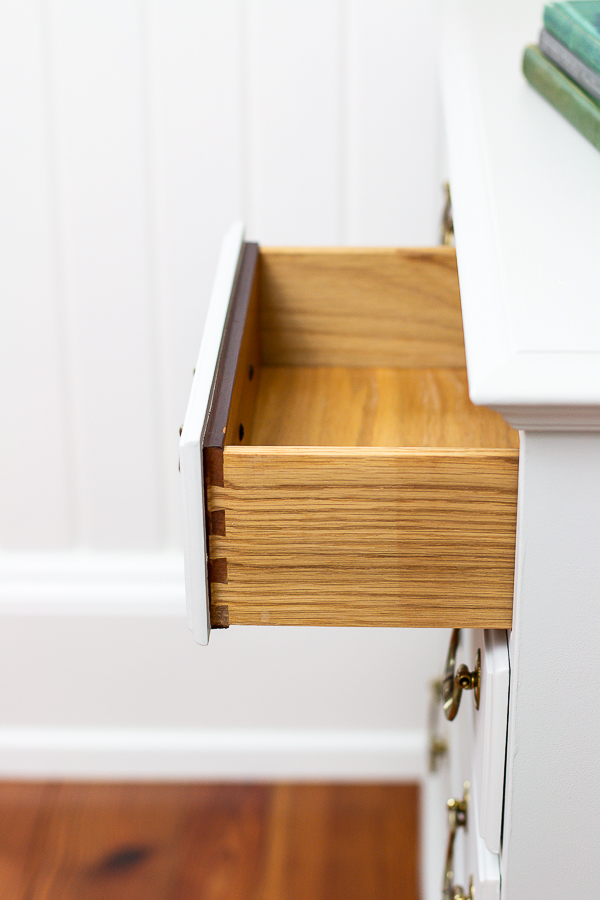
I was not going to be painting the sides of my nightstand drawers. You could if you’d like, but I wanted to keep a clean look for my piece. You can achieve that by applying painter’s tape to the drawers along all for sides. It will give you a nice sharp, crisp edge. Again, it’s all in the prep!
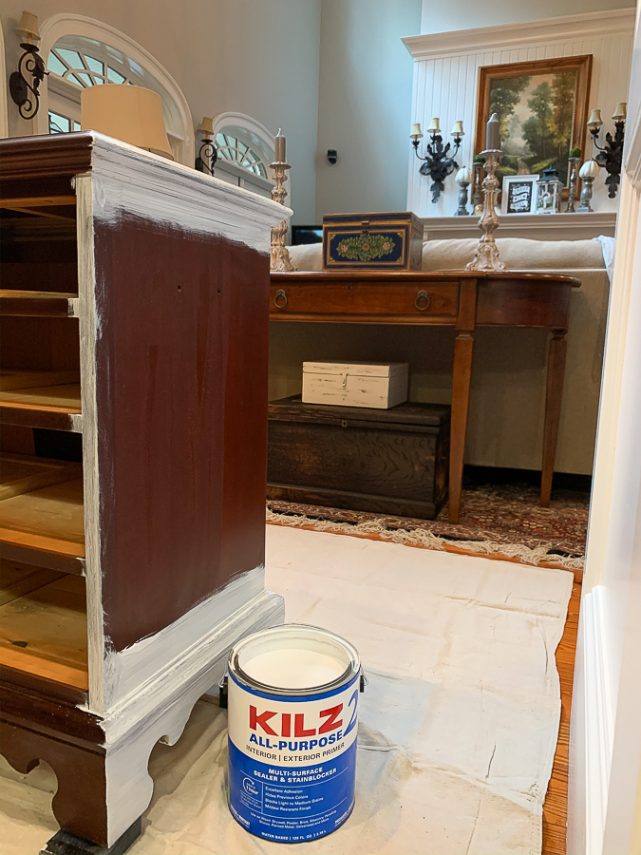
I prime and paint with the same method.
Be sure to lay down a drop cloth to protect surfaces.
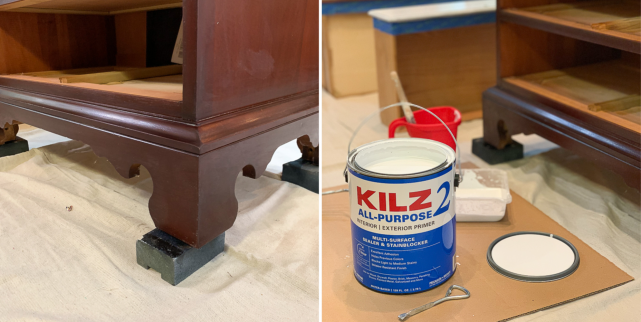
TIP: I always raise items that I am painting off of my drop cloth. You can use scrap wood like I am here or even old paint cans. Doing this allows you to get all the areas of the furniture feet.
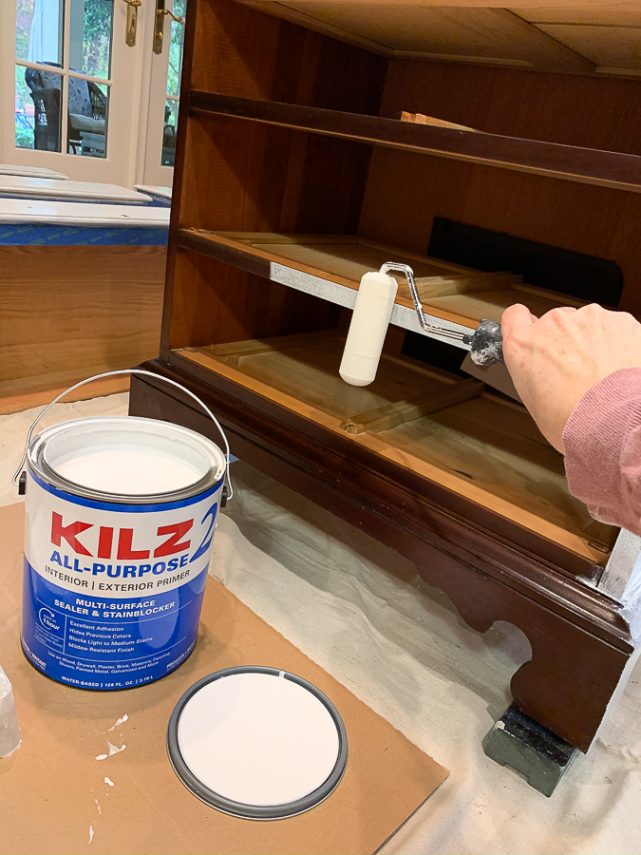
I cut in with a brush. Then I use a small foam roller that is marketed for cabinets to do the larger flat surfaces. It cuts down of brush strokes, gives even coverage and is quicker.
Not all paint products for furniture require priming these days. If you are in doubt, it never hurts to take the extra effort with priming. I’d rather prime first than regret not after I’ve finished.
Priming helps to protect the wood and give a smooth surface for paint adhesion and correct color.
Let your primer dry. With KILZ® primer you can paint as soon as 1 hour after applying!
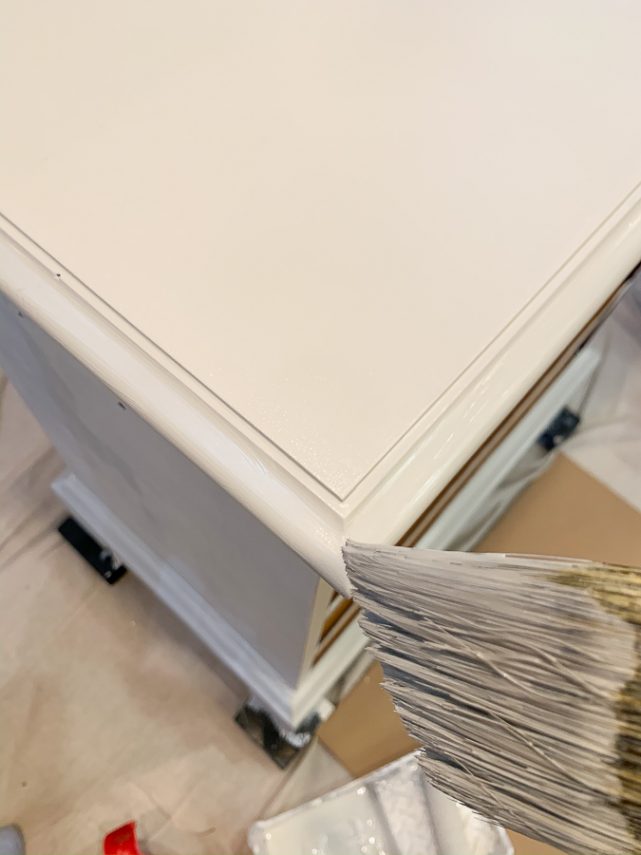
I apply my paint in the same manner as the primer. Read the instructions on your paint for dry time between coats. I let mine dry a couple of hours between the 2 coats that I applied.
TIP: After dipping your brush in paint or primer, always wipe off the excess on the cup. There is nothing worse that drips on your project. Always go back over your project as you work to correct any drips with your brush before it dries.
I let my nightstand dry and cure for 24 hours before reapplying my hardware and styling. It would be even better to let it go 2-3 days before styling. The longer the cure time the better.
TIP: If you have a piece that gets a lot of use, you may want to consider sealing it with a sealer to match your finish. Just read the recommendations with your paint.
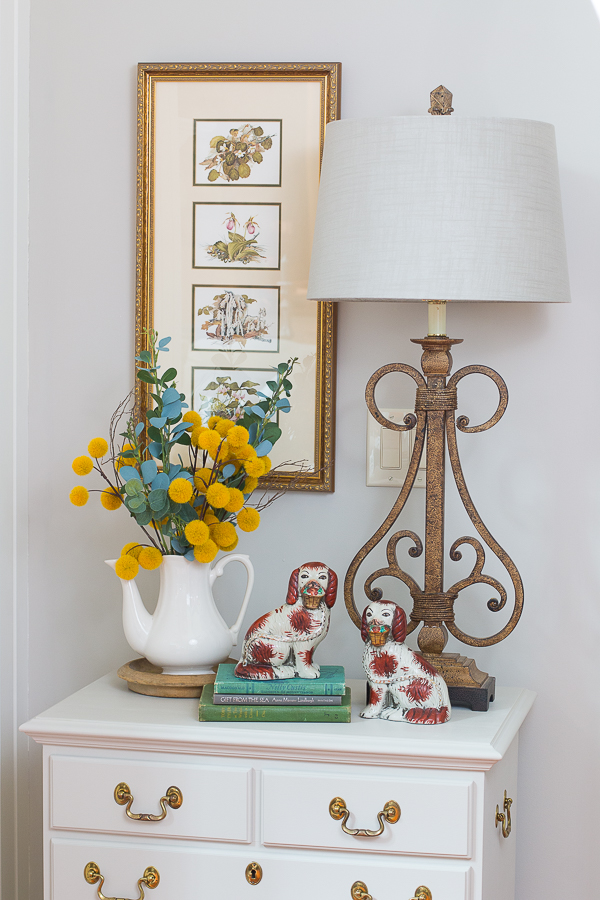
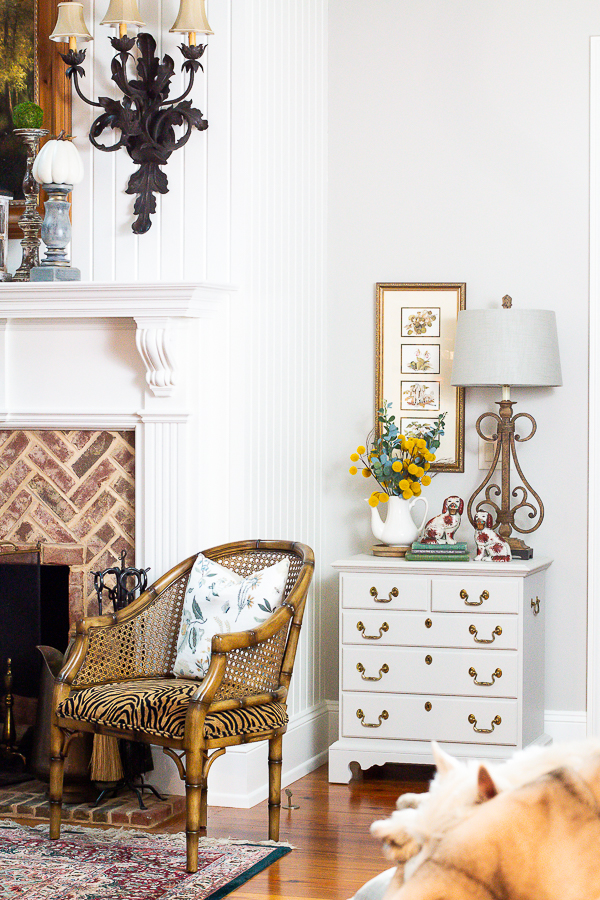
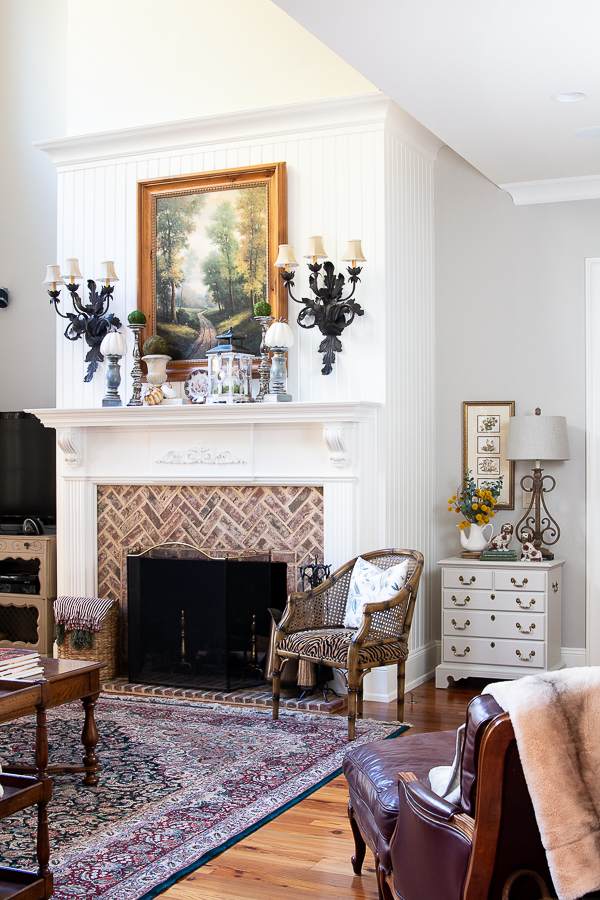
I am absolutely blown away with the difference! This little nook beside the fireplace is so light and airy now. What took me so long to pick up the paintbrush on this one?
I’m now going to apply the same technique and paint color to its twin in the guest room.

Nightstands are a great item to pick up in thrift stores, yard sales and online marketplaces. They have so many uses beyond the bedroom.

 Nightstand Uses:
 Nightstand Uses:
• Occasional tables
• Small foyer table
• Side tables by a couch
• Bedside table
• Bathroom
I hope you’ve been inspired to paint something! I’d love to hear your plans in the comments.
Check out KILZ® and all their offerings. I love browsing through their project ideas for inspiration.

Have a lovely day!


Wow, this looks beautiful! So fresh and updated! Great job!
Shelley
The fact that you bought a great piece of furniture means you can have it for many years and remake it as times & styles changes. It looks so nice.
Thanks so much! I was hesitant at first, but glad that I took the chance.
I have a small table I want to paint. Did you use the Kilz primer for every layer of paint? If not, what paint/color did you use? Thanks for info.
The bottom layer only is primer. The paint that I used is this> https://www.fromshabbytofabby.com/product/fusion-mineral-paint-goddess-ashwagandha-500ml-pre-order/
It looks beautiful. You did an amazing job. I love the white too. Stunning.