Vintage Look FARMHOUSE Sign
Hello, friends! I don't know about where you are, but it is COLD, COLD, COLD here in the south. We are experiencing and expecting the coldest weather of the season. Gosh that wind! They even mentioned a little winter precipitation first of the week!
Today is the first installment of the new year for your Decor Enthusiast team! We took January off. We were quite frankly worn out from the holidays and needed a little time to regroup and plan for the new year.
If you are new to this group, this is where you get to participate with us in our Facebook group and on Instagram. The 411 on the group is below.
This month's theme is…………..
Decorating with Signs
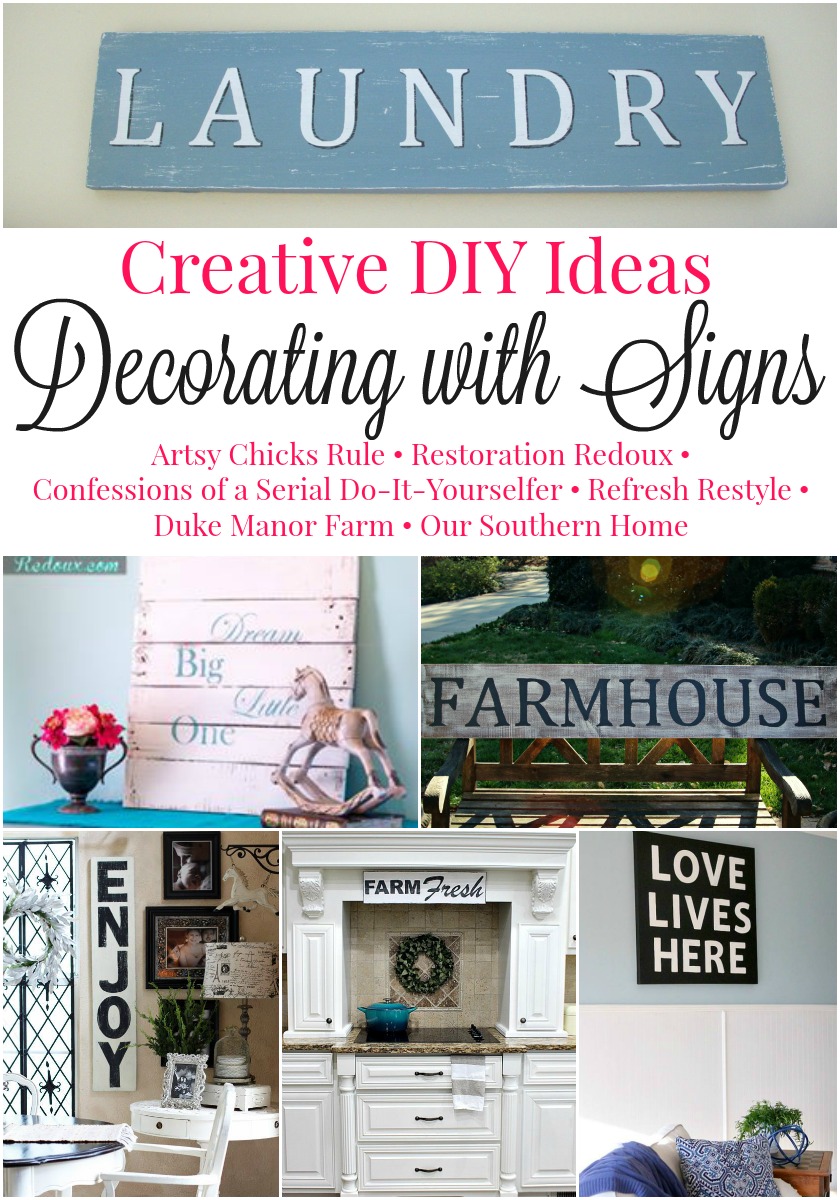
Be sure to PIN the above image and share with your friends!
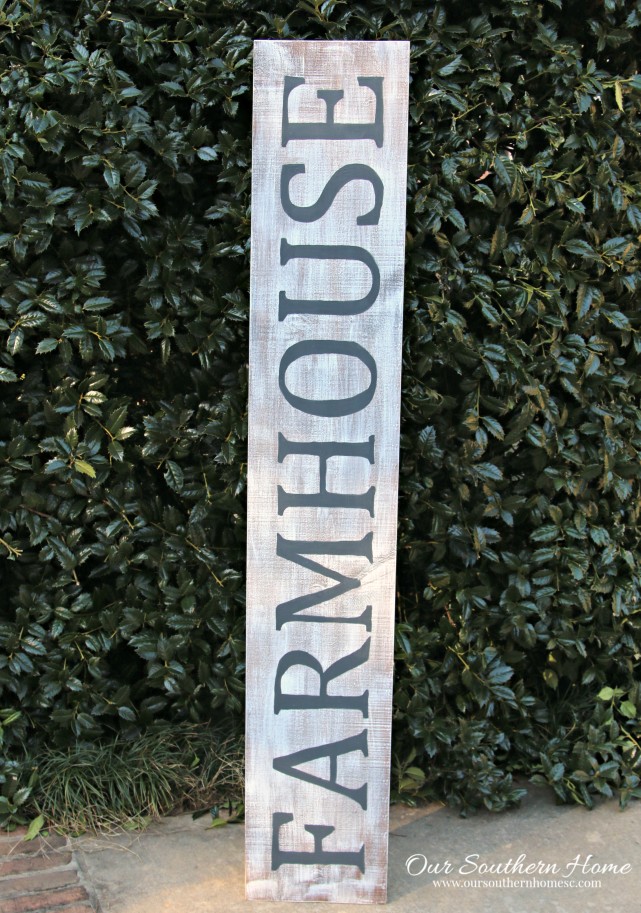
I adore signs. I am sharing how to make my Vintage Look FARMHOUSE sign with you today.
- You can find really pretty signs readily available in craft and home decor stores as well as online. There are many price points.
- Signs allow you to show your personality.
- alternative to traditional artwork
- can work in any room
- great in outdoor living areas
- can easily and cheaply be made
All of my signs have been made by me. You can use many different items to make signs. You might just be surprised!
- home improvement centers will cut wood that you purchase
- thrift store trays and platters
- old thrift store art
- baking sheets
- dollar store items
- old cutting boards
- endless possibilities
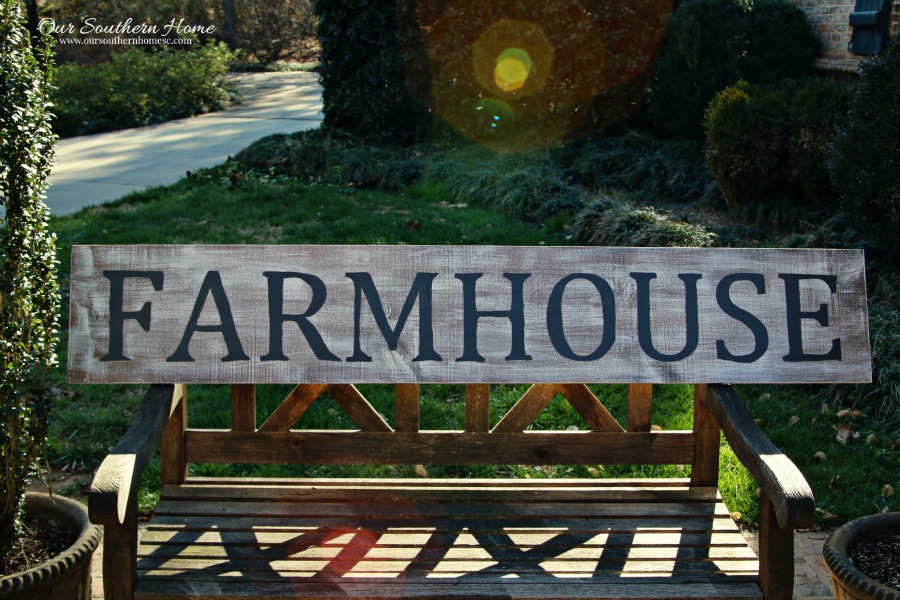
This is a really large sign. It is one of my favorites to date. The board measures 66 inches long (5′-6″ long) and 11-1/4″ wide. It's really not heavy. It's a pine board purchased at Lowes. I believe it was an 8 foot board. Once I positioned the wording on the board, I marked a line. The excess was simply cut off with a hack saw. All the edges and top were lightly sanded.

Ignore that funny green on the board at the end of the board. It's not green. It's where the sunlight is coming from the garage opening.
I applied a Minwax Pre-Stain Conditioner since I was starting with raw wood. I went to grab my Minwax Dark Walnut Stain
 and I was OUT! What DIYer runs out of stain? Me….I guess.
So I started to dig through my stash. No other dark stain in the house. I did have a java brown Rust-Oleum glaze. I decided to give it a go. Now had I known that I was out of stain I would have just skipped the raw wood conditioner.
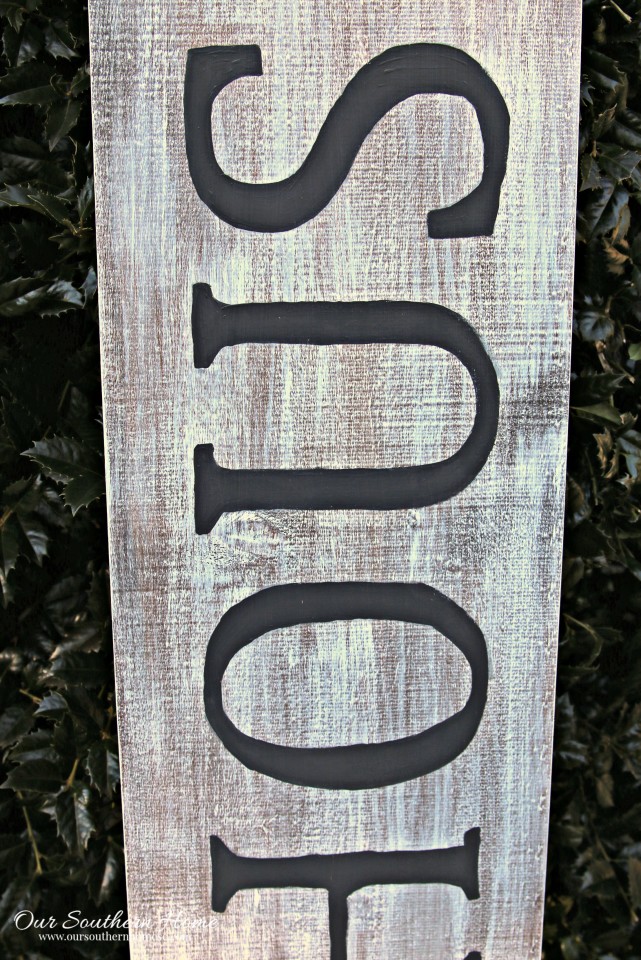
So what you see in the photo is the glaze brushed all over the board. That's why it's swirly looking. Stain would penetrate. This just sits on top of the wood.
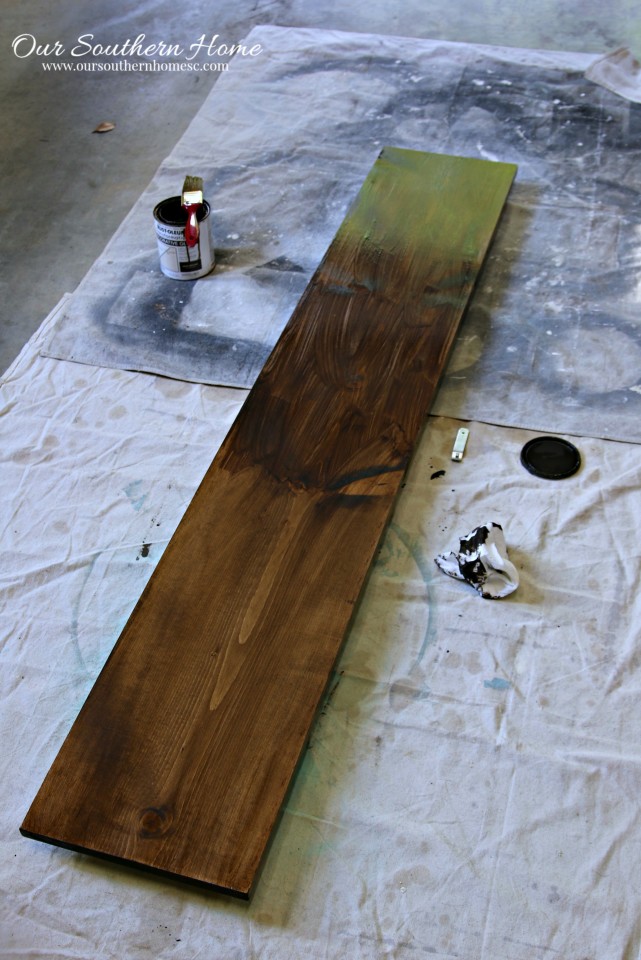
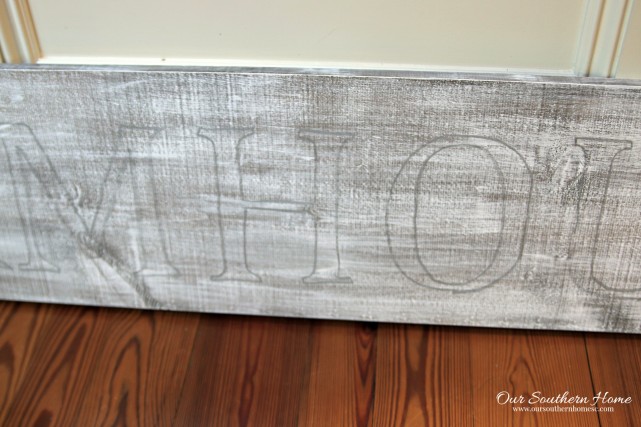
I took paper towels and then wiped the glaze all around and off. Can you see the difference between the area that has been wiped and not? I let this dry thoroughly.
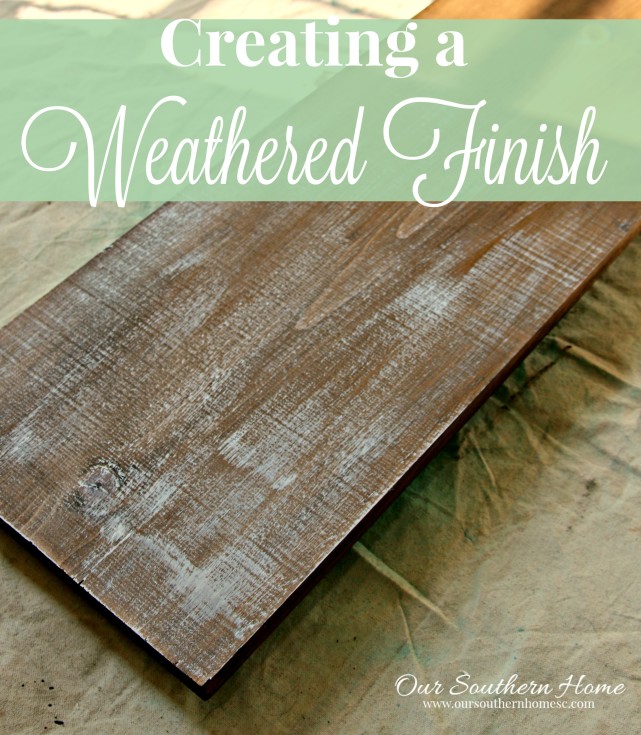
This is the fun part. I have found that if I strategically dry brush, that I can achieve a nice, weathered look without having to sand. It uses a tiny amount of paint and dries super fast! This is one coat. I added a total of 3.
I use Americana Decor Chalky Finish Paints in Everlasting .
.
To dry brush follow these steps:
- slightly dip the brush in the paint
- brush excess off on a paper towel
- start of lightly and begin to brush adding desired levels of pressure.
- Repeat until you have the desired weathered look.
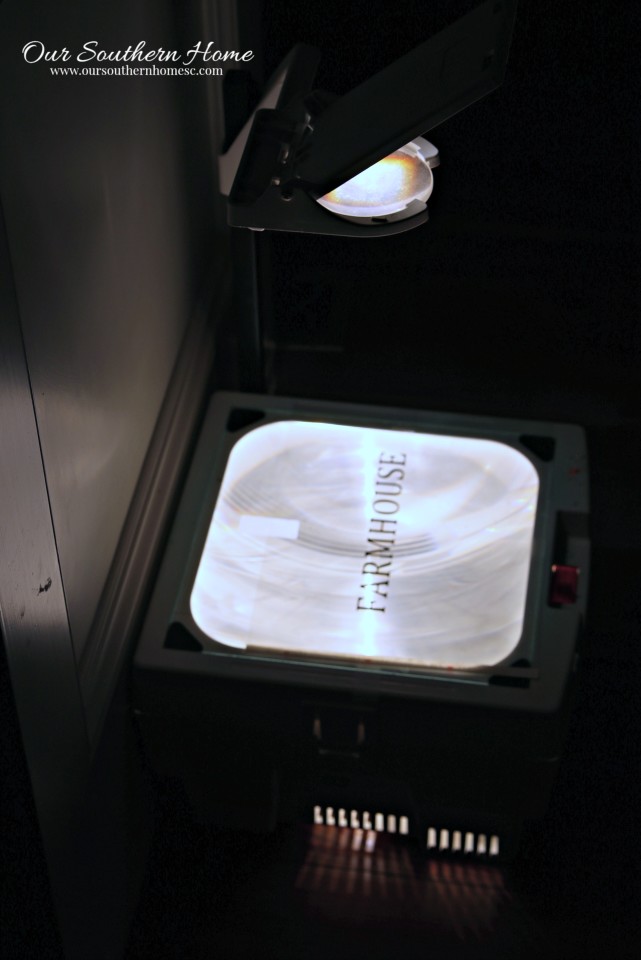
Design your font and print it on an overhead transparency if you have an overhead. I found mine at a thrift store. Your church probably has one you can borrow.
If you don't have an overhead, that's OK! You can use this method and this method.
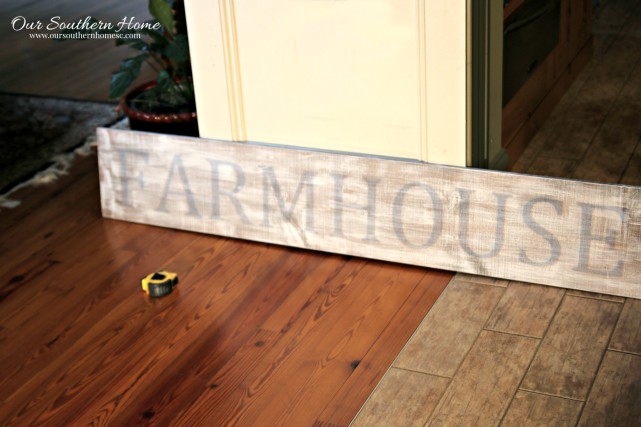
Project the letters on the sign and trace with a pencil.
Now you go back and fill in with a black paint. I used acrylic craft paint. No sanding needed. Then I sealed with a coat of matte finish spray poly.
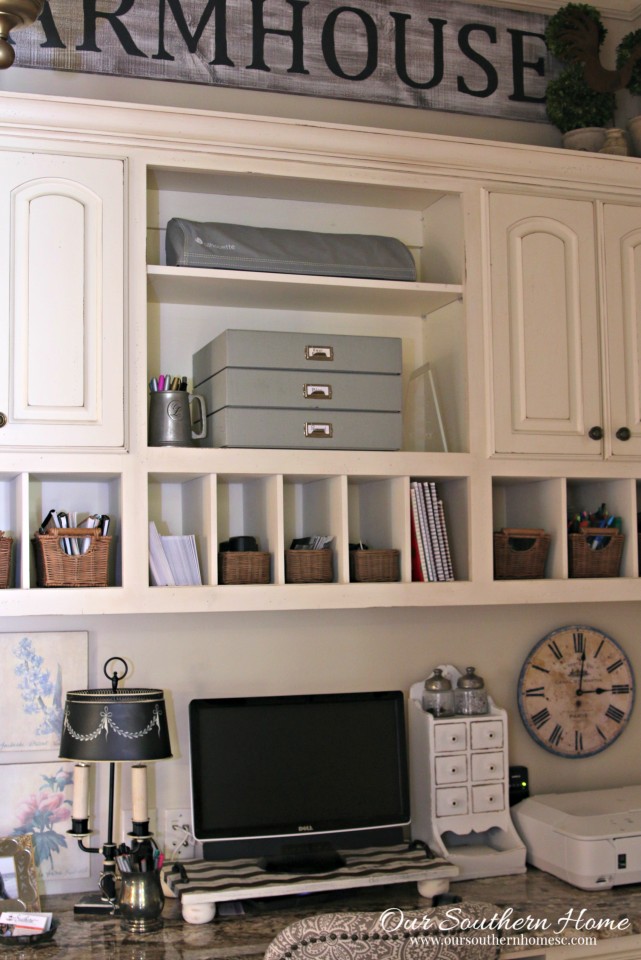
The sign is over my desk area in the mudroom. It is really impossible to photograph in here so I took it outside so you could see the details.
Be sure to PIN for later and share with your friends!
Now check out the other fabulous Decorating with Signs ideas!
Our Southern Home
Confessions of a Serial Do-It-yourselfer
Refresh Restyle
Duke Manor Farm
Artsy Chicks Rule
Restoration Redoux
Are you following the Decor Enthusiast Facebook Group? We have so much fun over there. It’s a place to share your decorating & DIY adventures as well as ask advice! We’d love to have you! Just remember….it’s a nice group…no negativity allowed. You can find it HERE. Share your signs with us in the group!
Don’t forget to join the challenge on Instagram with #DecorEnthusiastStyle  Please note that the hashtag has changed!

I’d love for you to follow along on social media!
–>> Facebook | Pinterest | Instagram |Twitter|Google+

Home Stories A to Z Not Just a Housewife Kammy’s Korner The Happy HousieDesign Dining and Diapers Liz Marie Blog Funky Junk Interiors Savvy Southern StyleTatertotsand Jello DIY Show Off Redoux Interiors Between Naps on the PorchThe DIY DreamerOh My Creative Little Miss Celebration Just a Girl and Her Blog Sand and Sisal InteriorFrugalista House on the Way Addicted 2 DIY I should be Mopping the FloorMiss Mustard Seed Stone Gable- The Scoop Inspire Me Tuesday Feathered Nest Friday Treasure Hunt Thursday Northern Nesting
Buffer

Thank you for sharing these tutorial. It’s a great way to add rustic charm to any home decor and the step-by-step instructions make it easy for beginners to follow along.
Thank you! It was a fun project.
WOW! I love what you did here. I love the trend of signs that have come in the last few years. Thanks for sharing this idea.
Thank you! I love designing and making signs!
Your Farm House sign turned out lovely. Your decision to take it outside for a better photo is probably well understood by fellow bloggers.
I absolutely love this sign! It’s very unique and would suit any southern home’s decor! Art projects like this are really fun and showing them off in your own home is a treat within itself! Nice work! Thanks so much for sharing this idea!
I am so impressed that you were able to create your own vintage sign! And it turned out so well! I think I need something like this for my house, but I don’t know if I could create it myself. Do you know where I could buy a vintage sign like this?
great looking signChristy! I wish I had a place for such a large sign.
I love making signs…
pinning!
gail
Thanks so much, Gail!
Thanks, Gail! I love making sings!
I love the sign and think the glaze turned out perfect as a base!xo
Nancy
Thanks, Nancy! I was a little nervous at first about the glaze. 🙂
I need your big Farmhouse sign to complete my wanna be farmhouse! Love it so much!
Thanks, Debbie! It was really a fun sign and cheap!
These signs look really awesome and don’t look hard to make. Thanks for sharing this idea, it’s absolutely creative and inspiring!
Thank you!
Thanks, bunches! They are really simple to make!
Another sign another nice job. This decor group sounds like something I need to check out.
Thanks so much! Would love to have you join the Facebook group. Just search Decorating Enthusiasts for the private group!
I LOVE this sign and I love the aged look you gave it! XO
Thanks so much, Christy!