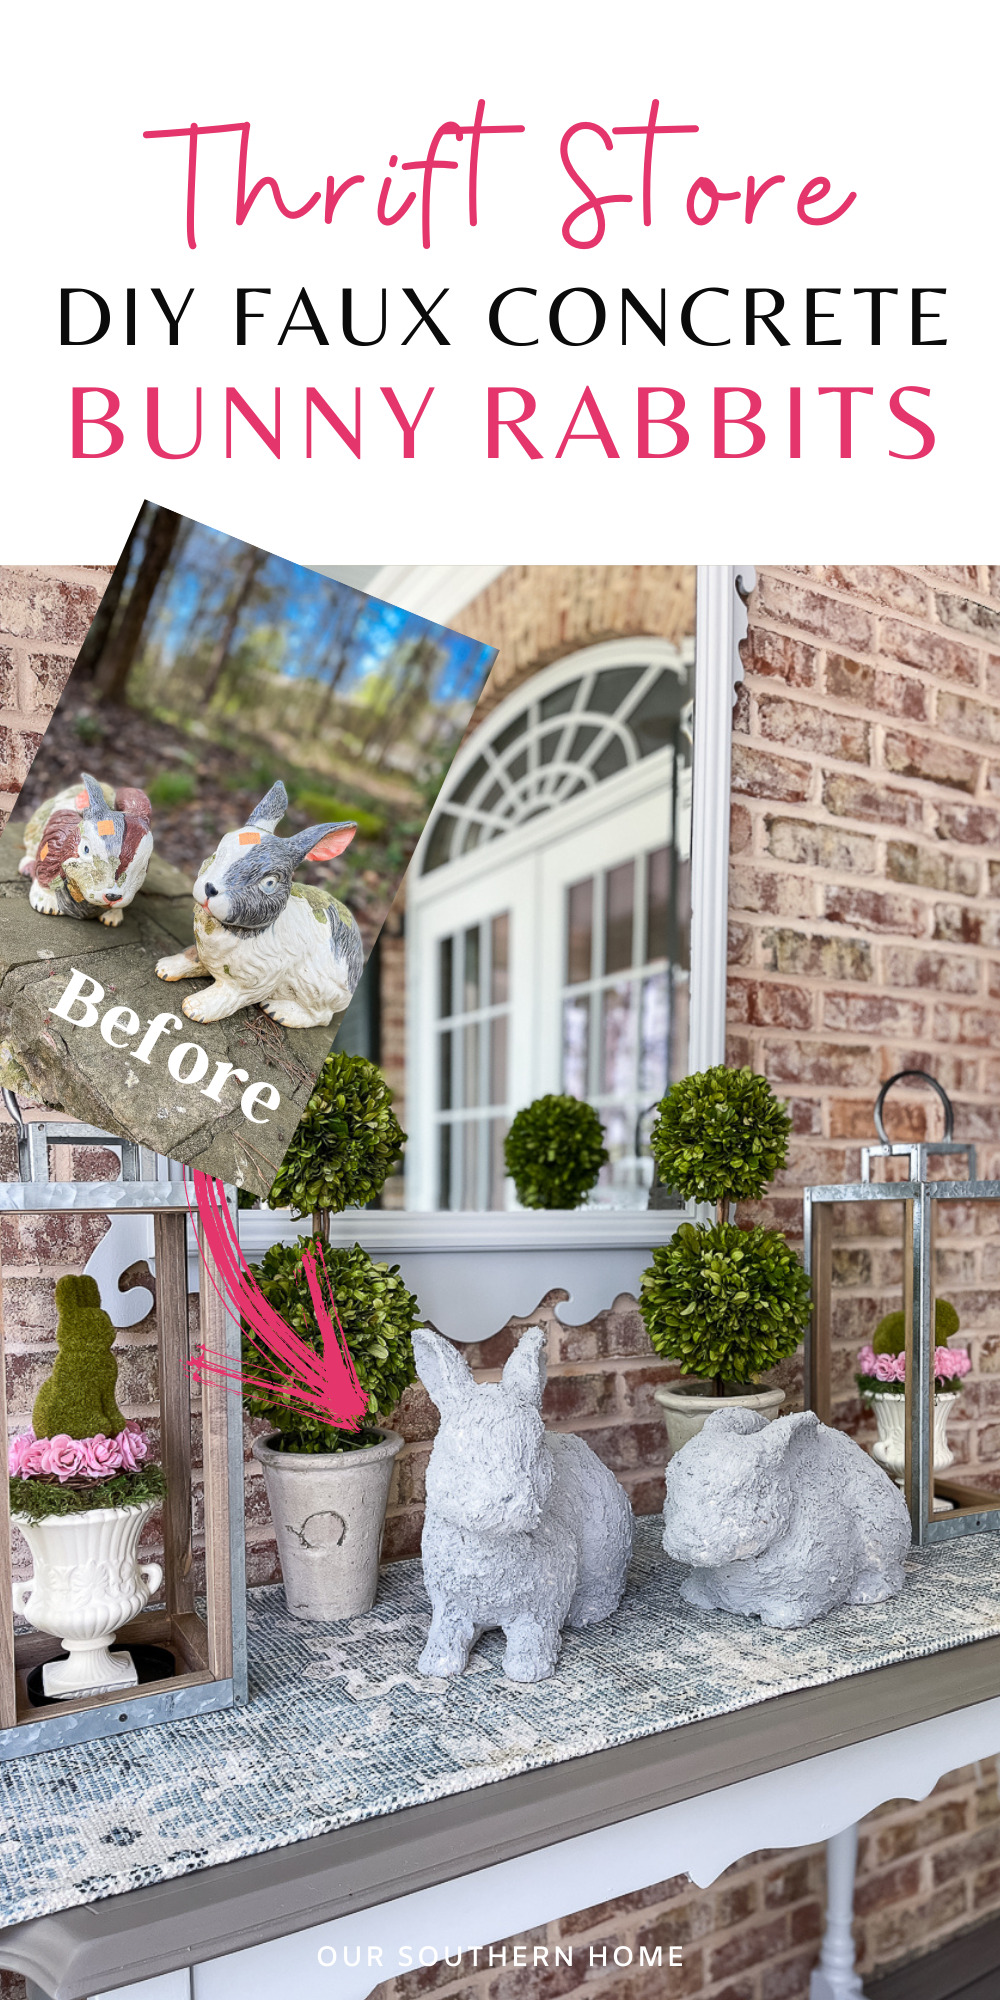
DIY Faux Concrete Bunny Rabbit
This DIY Faux Concrete Bunny Rabbit is a simple way to use porcelain pieces that are in poor shape for garden statues.
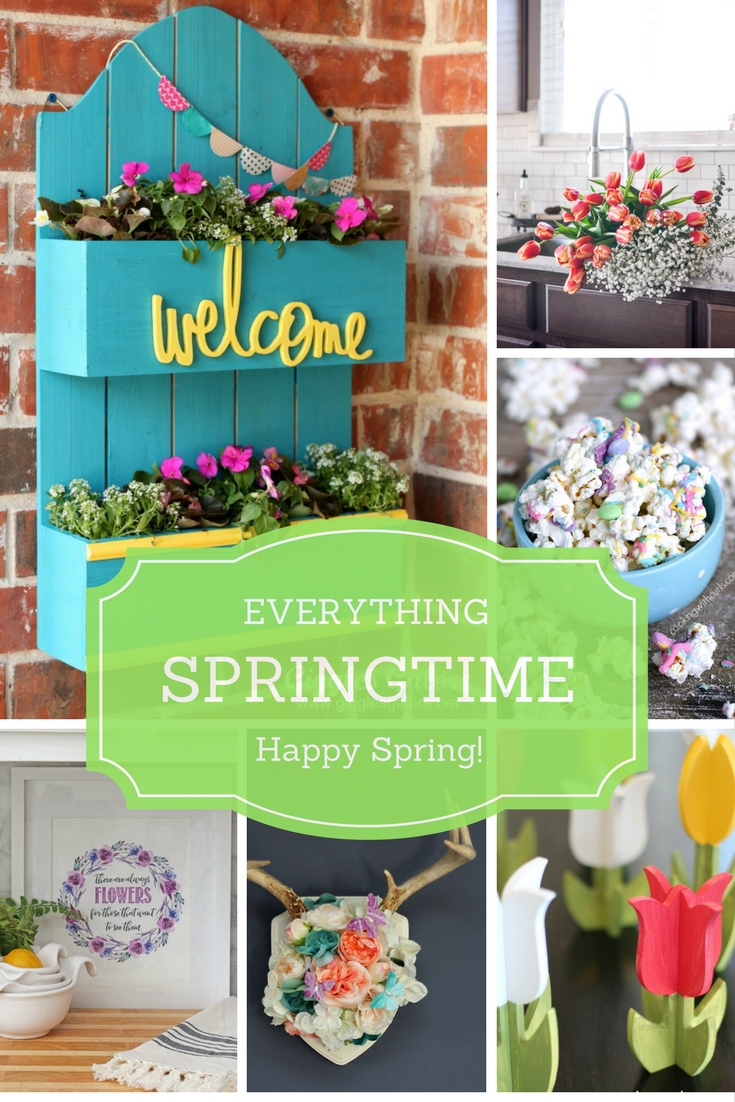
Latest from OSH
- How to Make Piña Coladas in an Ice Cream Maker
- Saturdays on the Porch #86
- Saturdays on the Porch #85
- Easy European Wall Art with Thrift Store Frames
- Piano Bench Makeover with New Color and Fabric
Welcome to this month's Thrift Store Decor project.

Each month, I come together with my blogging friends to bring you fabulous thrifty ideas for your home from the shopping adventures of our local thrift store.
Be sure to follow to the end of the post where you will find links to the other projects.
See more THRIFT STORE MAKEOVERS HERE.
You may also enjoy this post on creating a quick Easter vignette!
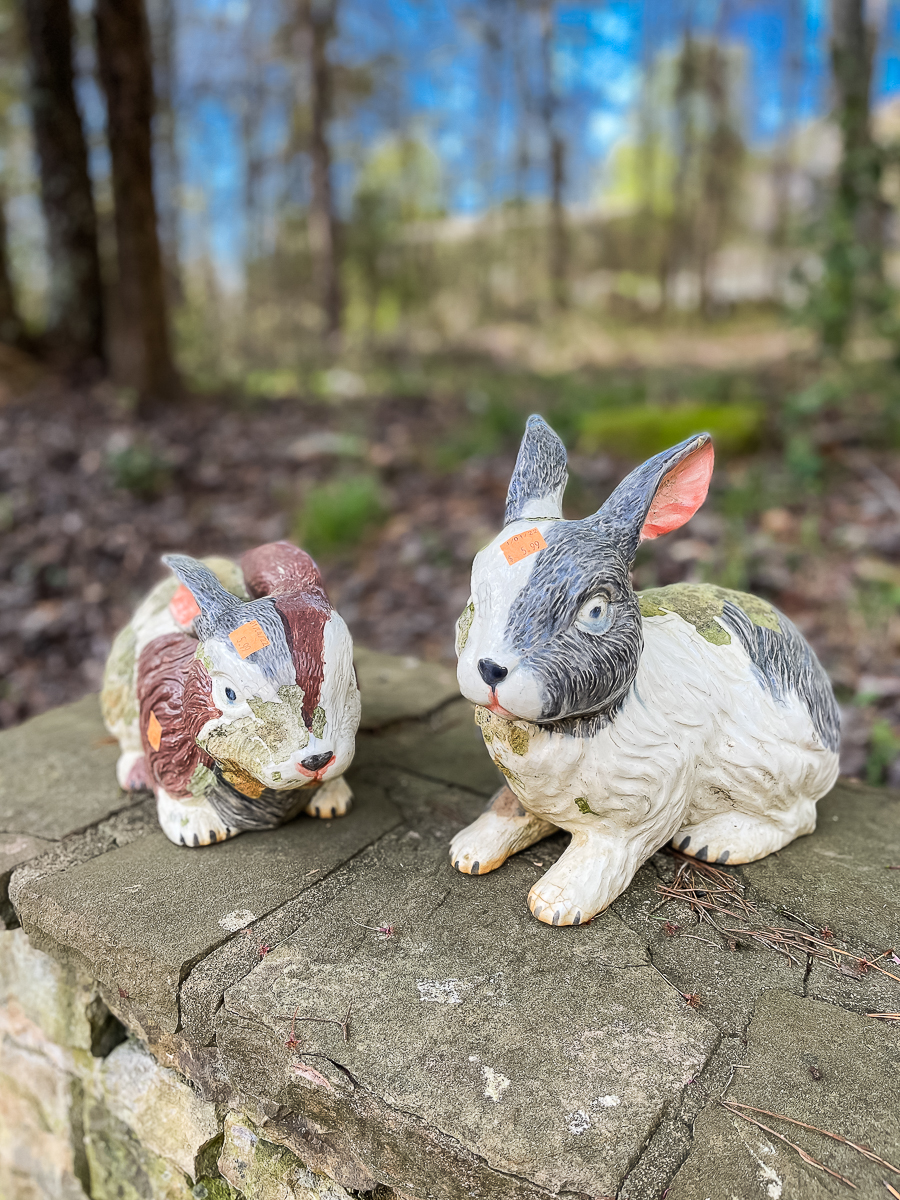
I purchased these porcelain bunny rabbits a few months back right after Christmas.
If you've followed me any time, you know that I love decorating with cute garden bunny statues.
It can be tough to find a quality garden animal statue at a good price.
When I came across these at my local thrift store, I immediately picked them up.
Now is a great time to find garden statues in your local garden center or concrete center if you are looking for new ones.
As you can see the painted porcelain of this pair of rabbits is pretty broken up and damaged.
One ear looked like it had been glued on at one time, but I knew that would not be an issue with what I had planned for this project.
In an ideal scenario, I would have loved to have just been able to spray paint them with my favorite paint that I use on porcelain. You can see it HERE in this post.
They were now just too uneven in texture for that to work.
They would have also been great for a faux paint finish using gray and black paint to create a faux concrete look with acrylic craft paints had they been in good shape.
We had used some concrete patch a while back for the driveway so I had Ashlyn look for something for me when she went by Lowes. I was hoping she could find a small container and she did!
This post may contain affiliate links. If you purchase something using one of my links, I may earn a small commission from the retailer costing you nothing more. You can read more on my disclosure page. Christy Little of Our Southern Home is a participant in the Amazon Services LLC Associates Program, an affiliate advertising program designed to provide a means for sites to earn advertising fees by advertising and linking to amazon.com.
Supplied Needed
- concrete patch
- putty knife
- cheap paintbrush
- plastic to protect the area (I used a trash bag)
- thrift store statue
The first thing that I did was to really clean the rabbits well.
They looked like they had previously been outside due to the red clay mud on the bottom and all the old spider webs inside of them.
I just cleaned them in my sink with dishwashing detergent and a scrub brush.
Let them dry out really well.

While the concrete patch adhered well, I think in the future, I would spray the rabbits with a primer first to give them a base coat to give the concrete a bit more tooth to stick to.
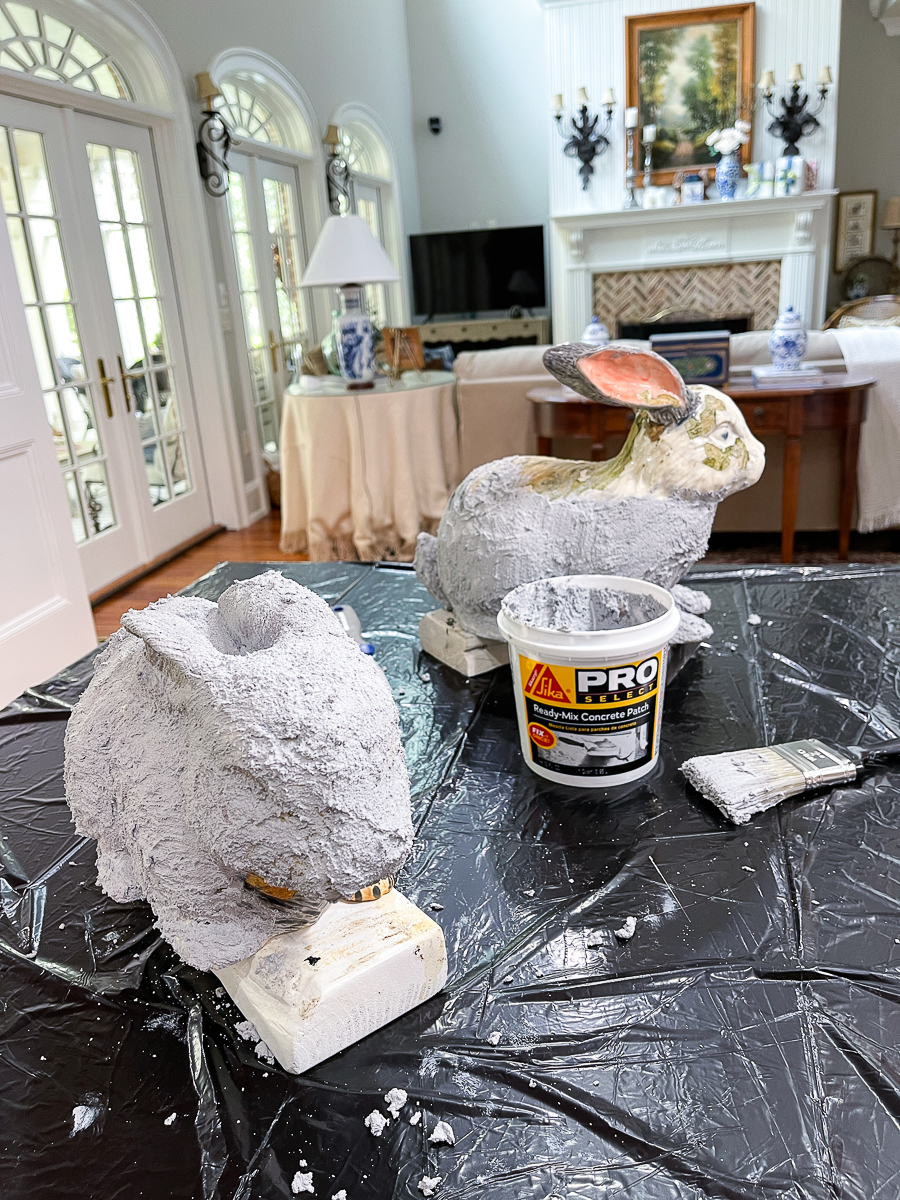
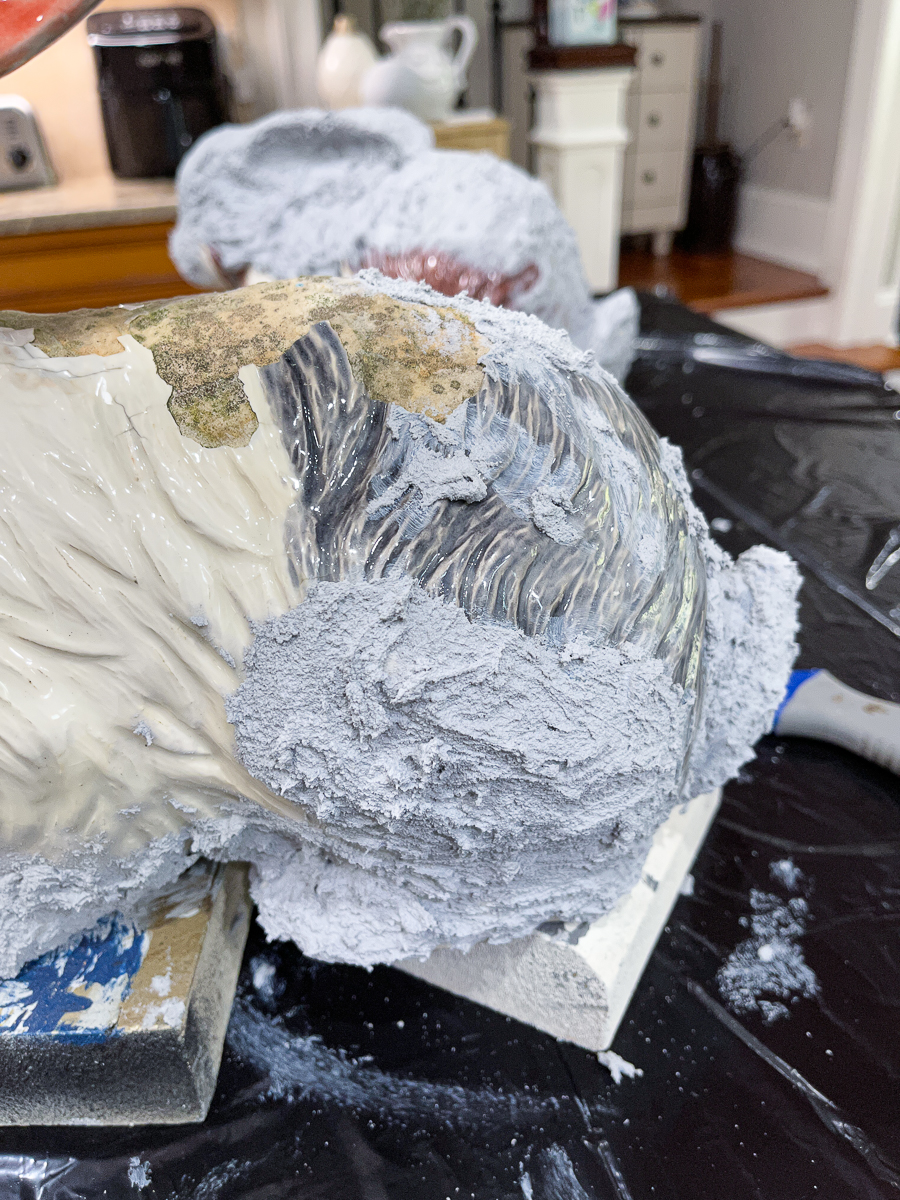
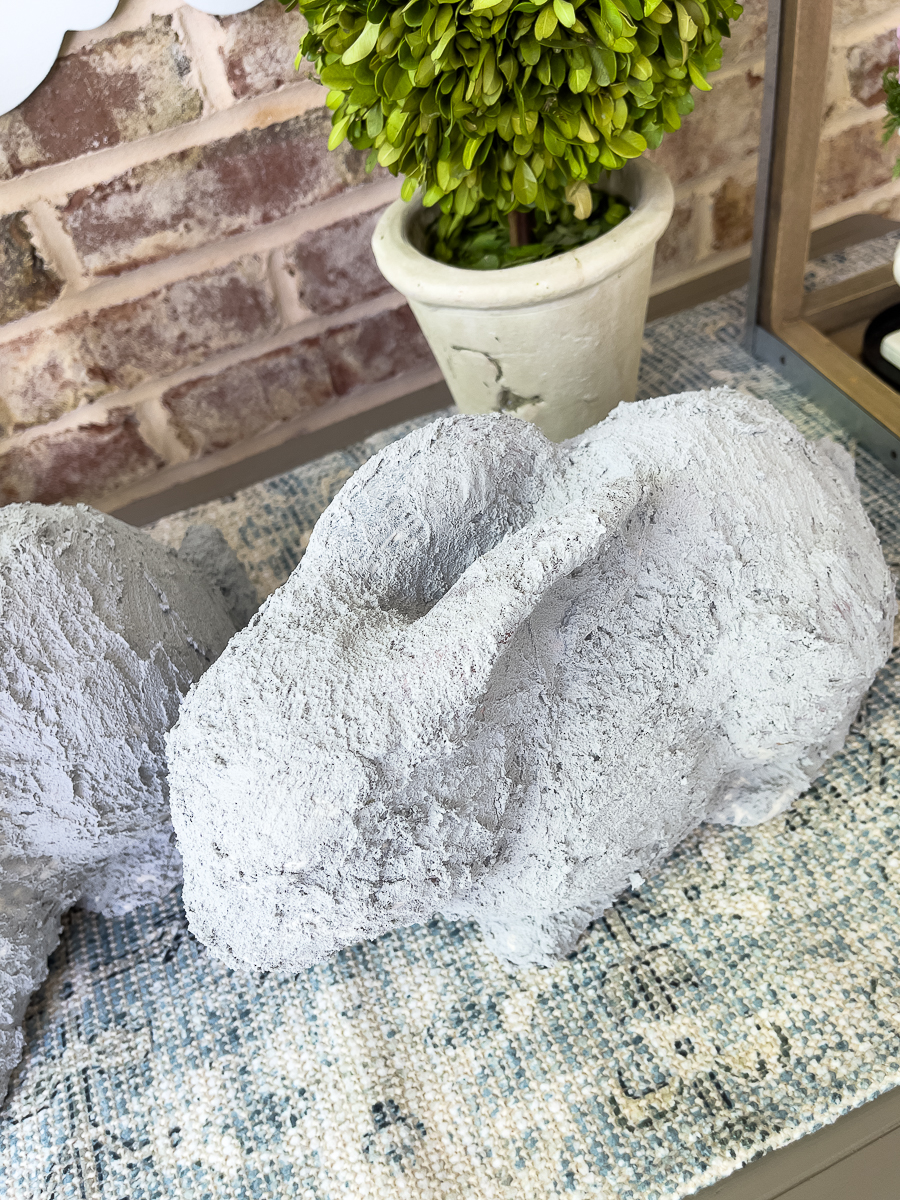
I used a putty knife to get the cement out of the tub and plopped in on the rabbit in an area to start. I then used a very cheap paintbrush that I could just throw away when finished to brush the bunny rabbits with the concrete material.

It spread on rather easily but is a bit messy. In some areas, I dabbed on the concrete, and in others, I actually brushed it on.
You'll notice that I worked in sections. I'd let a section dry a bit so that I could move it around to get to other areas. I also found it easier to do around the base of the rabbit first. I could hold it by the head to do that area first. (I discovered that tip after starting the first rabbit.)
We had a cold snap, so I worked on these in the kitchen. I protected my counters with a trash bag under the rabbits.
You'll want to cover the entire bunny with the cement to create your faux cement bunny. I only covered the areas that were seen. I did not apply it underneath. Let them dry for several hours before moving.
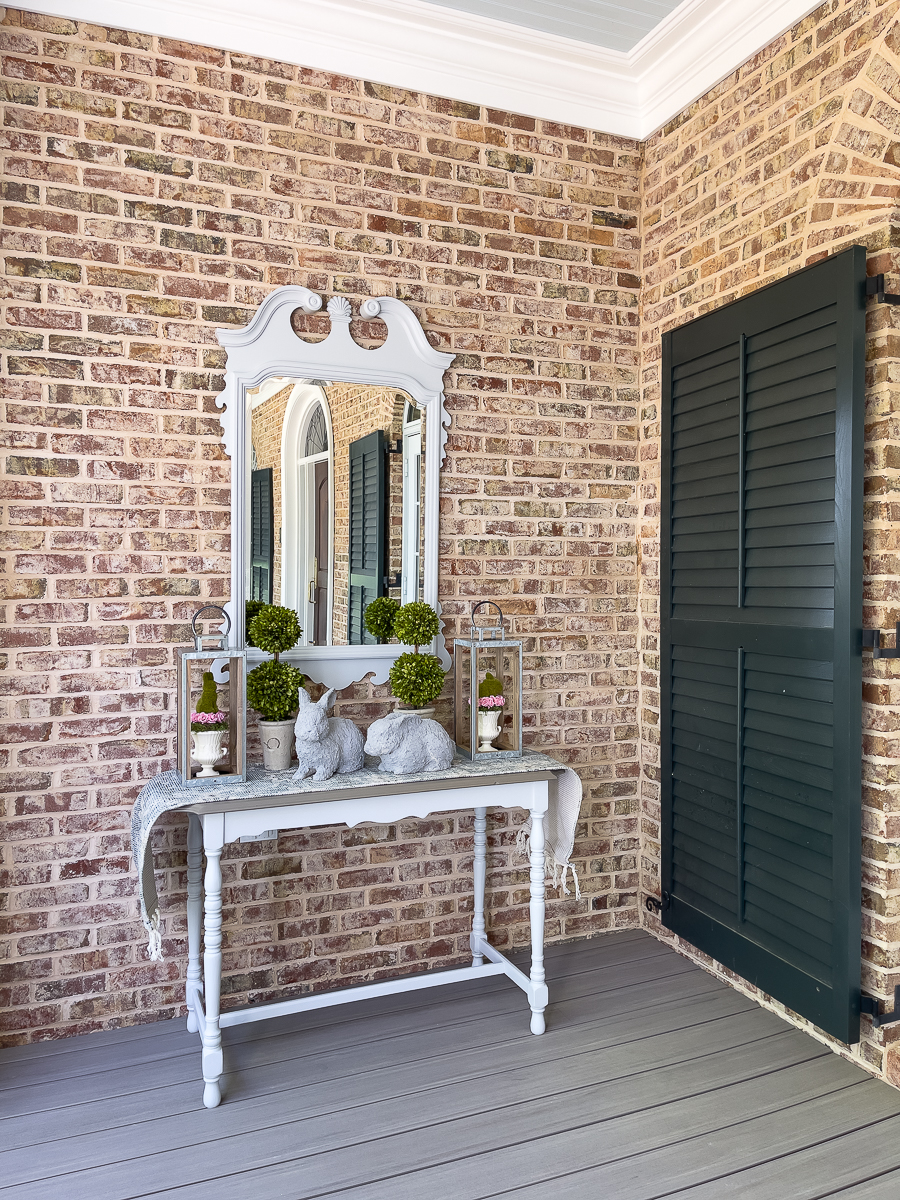
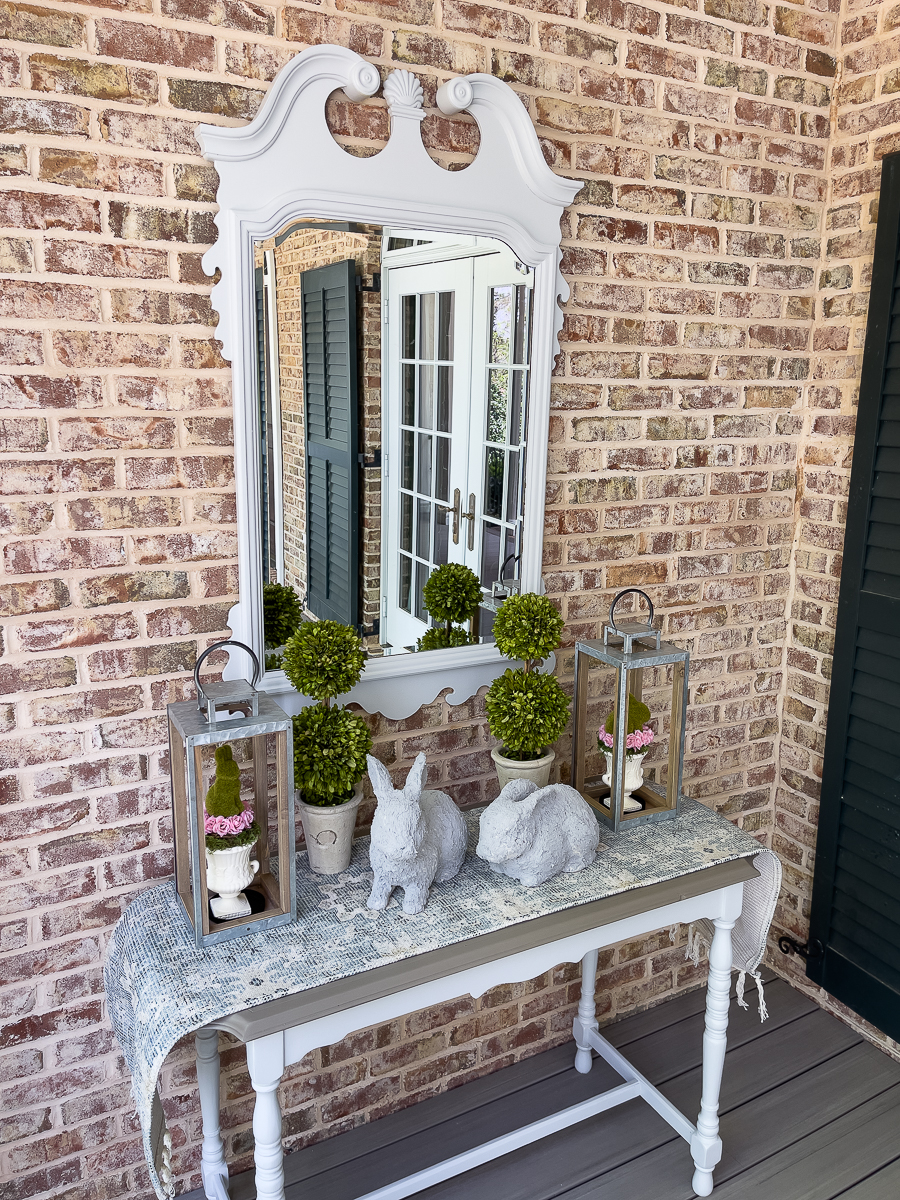
My ultimate goal with these little rabbits is to display them on the front porch. They will make an adorable addition beside flower pots. I don't have all of the furniture moved back onto the porch until I can get it cleaned.
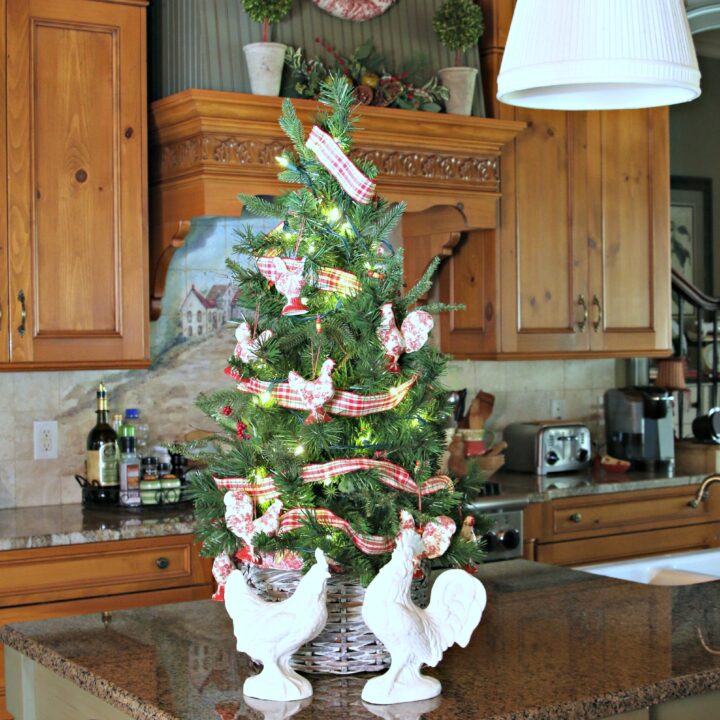
There are actually two other thrift store projects in this photo!
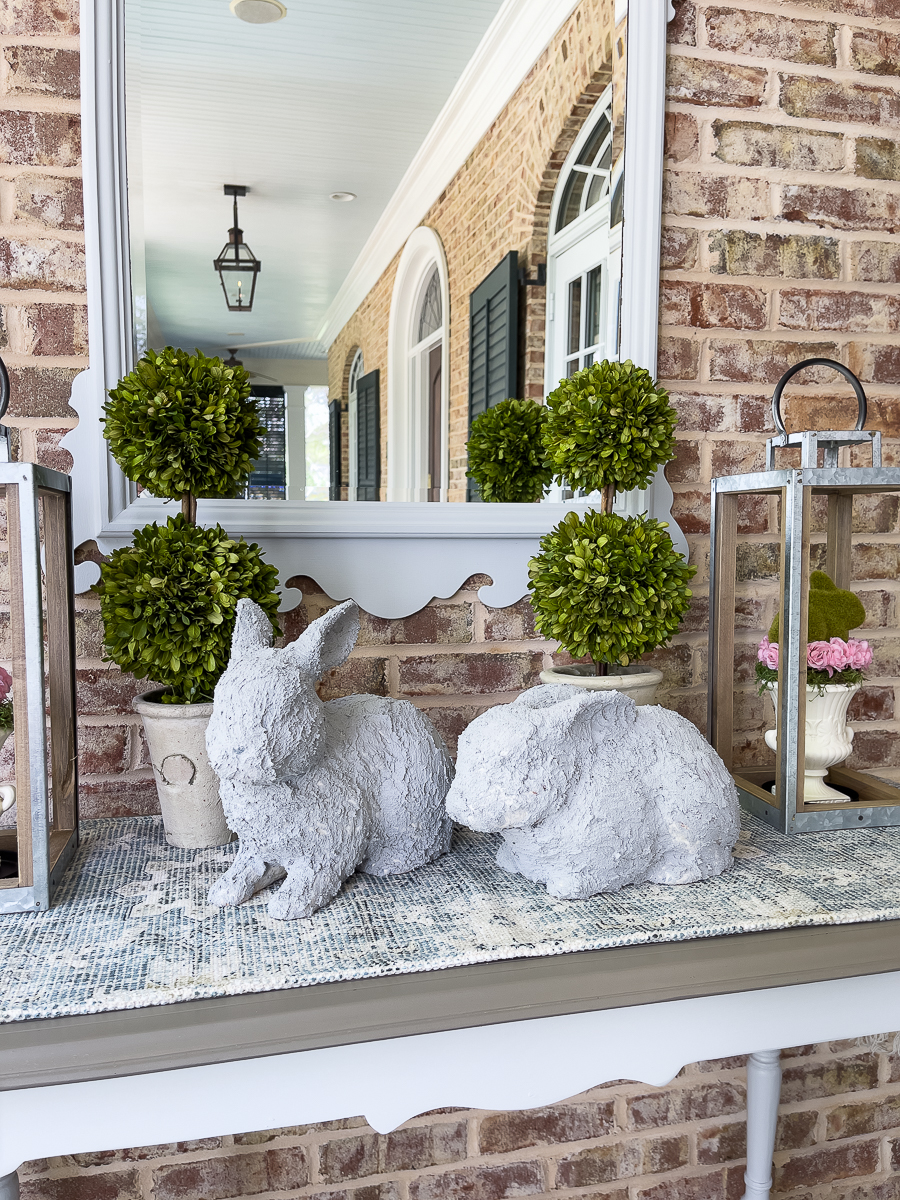
I did create this sweet little area to greet any guests that we have this week for Easter.
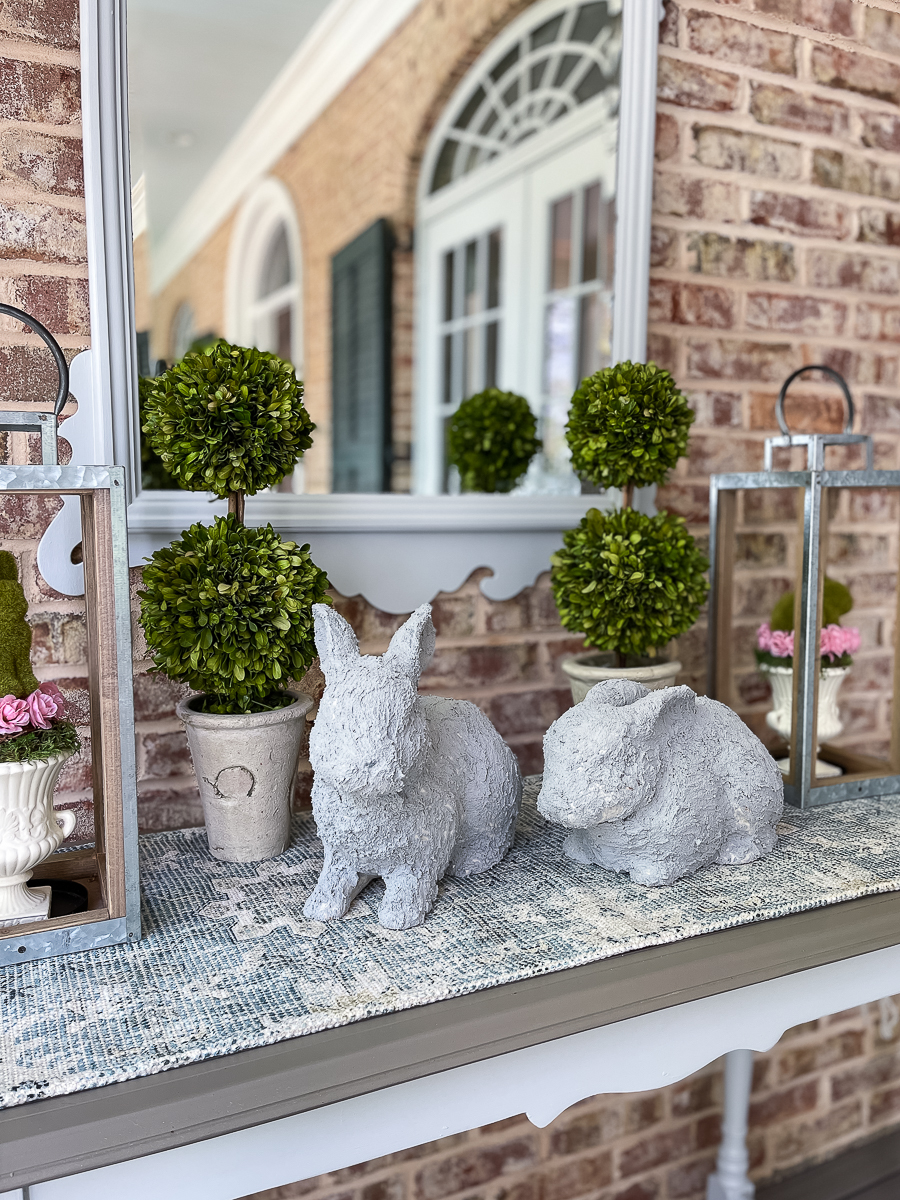
They would also be a great idea for seasonal decor such as Easter, but these will look adorable through summer.
Since these are not real concrete garden ornaments, I plan to keep them on my covered porch out of the elements. I will also store them when the temps start to drop too cold in late October.
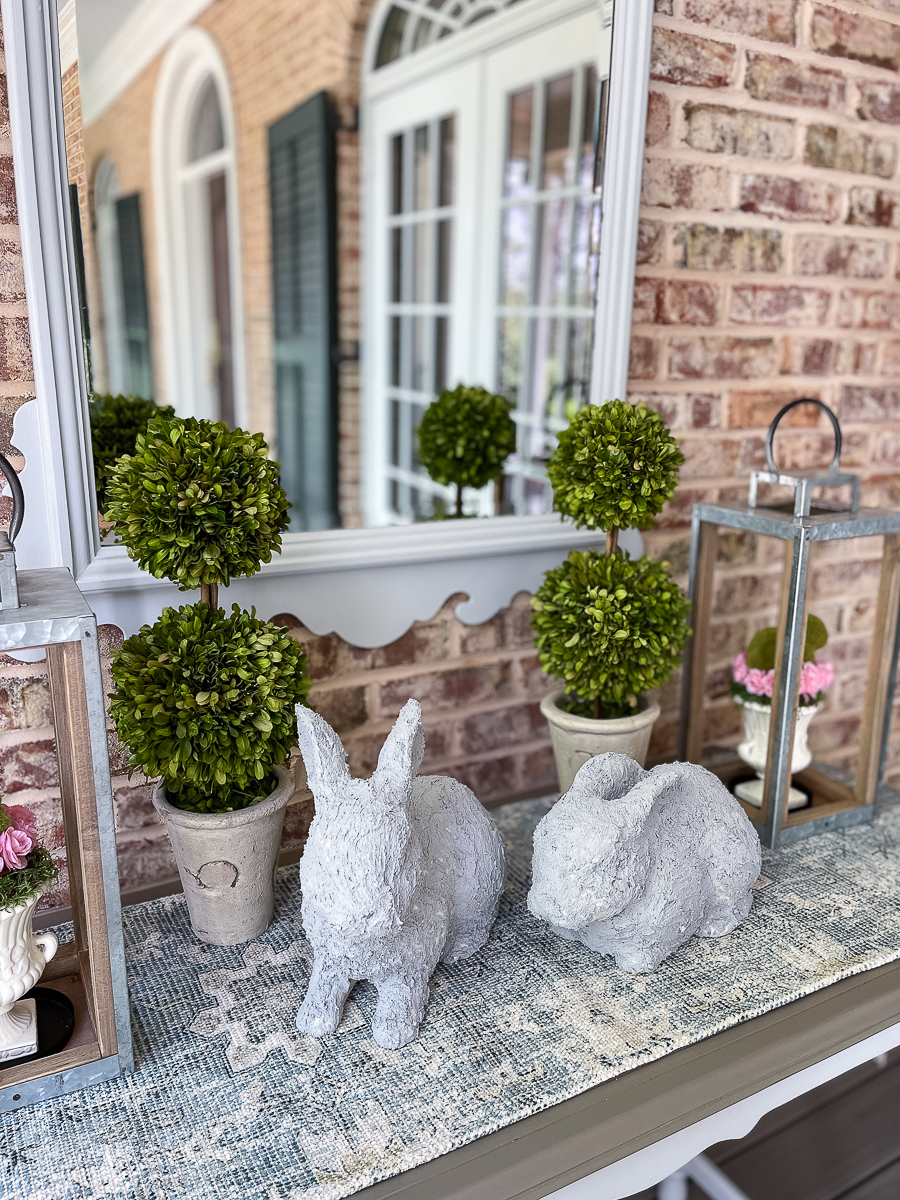
I do love that these sweet rabbit statues got a new lease on life. I'll be sure to share them in their new home by the front door as soon as we get the front door stripped and stained!
Make sure you check out all of the front porch progress in my Instagram stories.
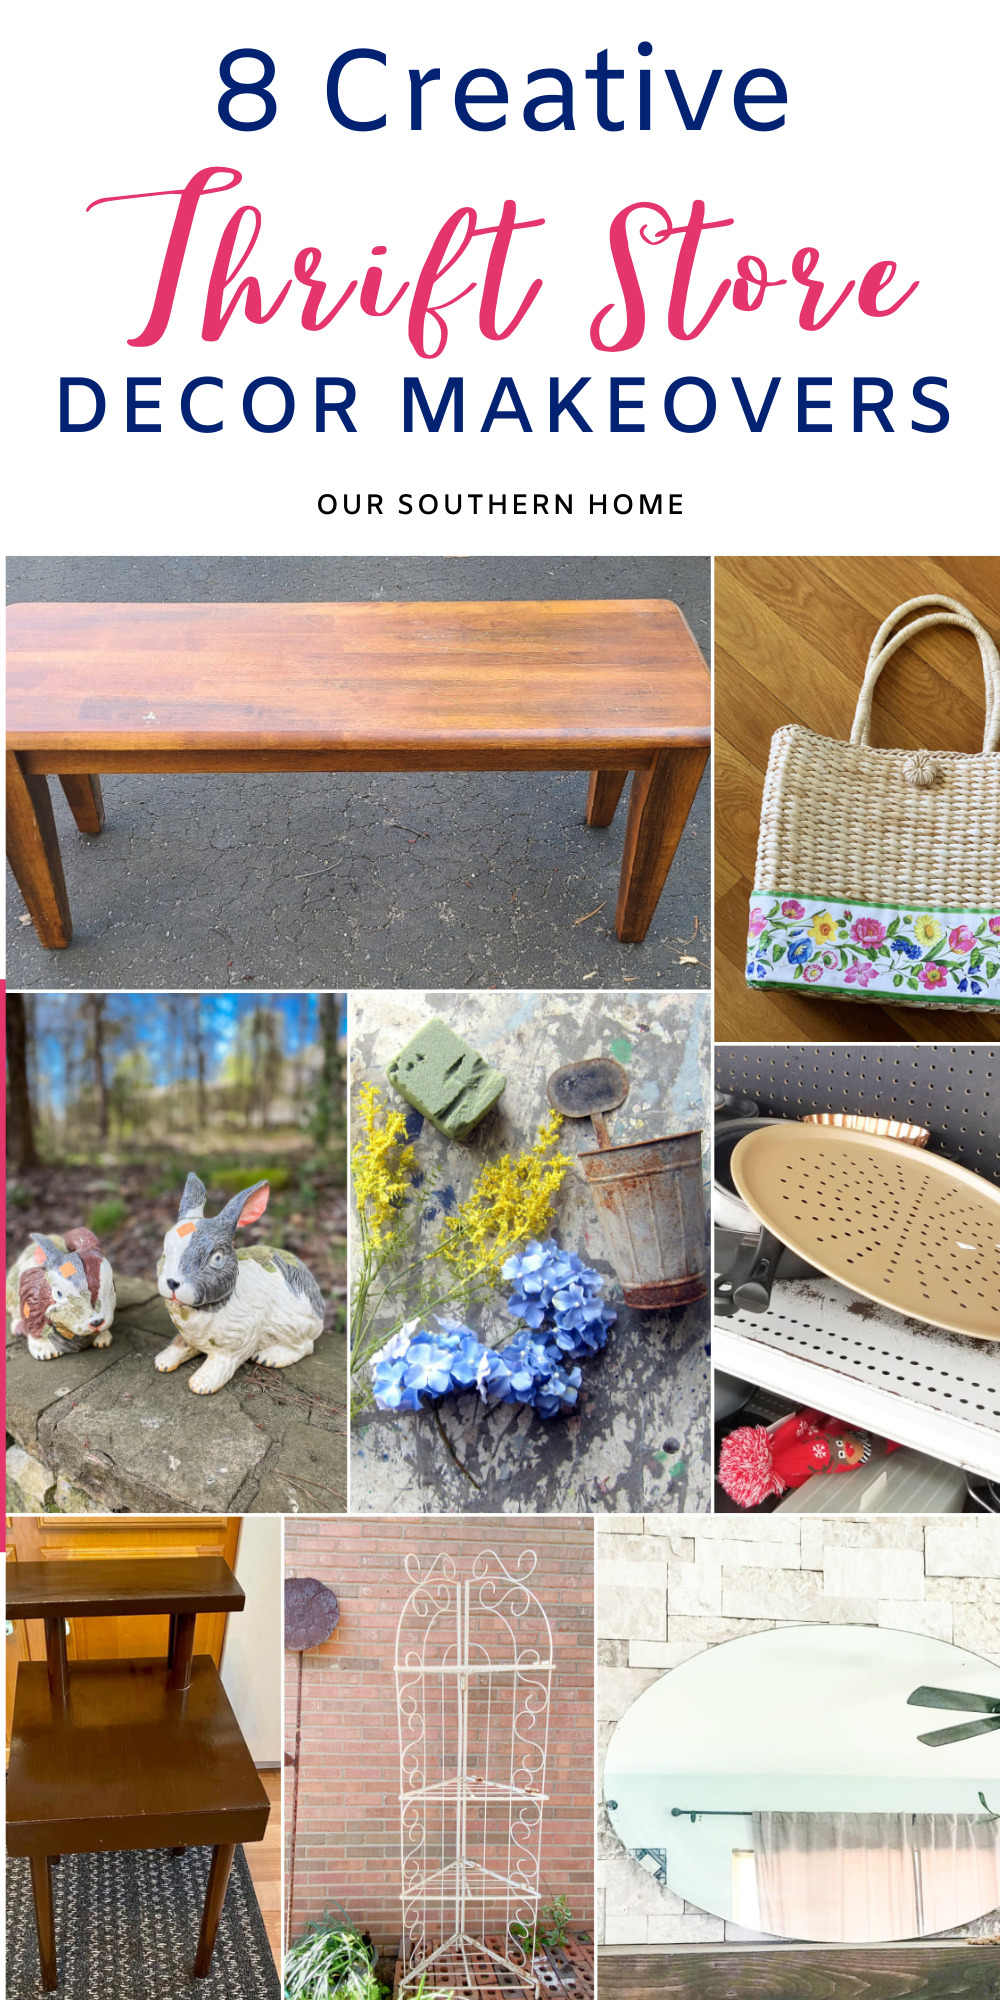
Here are more fabulous thrift store projects!


Christy, your bunnies are perfect for any space now! What a great (easy) makeover!
sharing on pinterest and twitter!!! 😉
gail
I love your concrete bunnies! They turned out so cute!
I am loving your faux concrete look! It looks so easy to do and made such a different on those poor bunnies!
these are super cute, now they look like high-end statuaries!
Thank you! I have quite the thing for rabbits!
Super cute! The before bunnies were awful.
Thank you! yes…they were. They were so dirty and chipped.
Perfect makeover for cheap looking bunnies! Pinned!