Fabric Art Makeover
Are you guys ready for the latest edition of Thrift Store Decor Makeovers? I know I am! I always find them so inspiring.
My project is a little different in that I didn't purchase my item at the thrift store. I have had this inexpensive printed canvas art of sailboats in the attic for a few years now. It was used when I fully staged houses. Now I just do staging consults which is much easier on storage and the back.
I see canvas art all the time at the thrift store so it could easily apply!
The canvas print is very pretty; it just doesn't go with our home. I've almost donated it a couple of times, but decided to put it the attic with my other thrift store finds.

It's really pretty. That's why I've hung onto it. I figured one of the kids might be able to use it in an apartment. The kids will be sharing a college apartment starting in August. Woods had everything for his room because he moved from a dorm to apartment last year. This will be Ashlyn's first year in an apartment. We are really trying to decorate it on a tight budget so you'll be seeing several upcoming posts on that soon.
Ashlyn and I went in the attic to shop for some things to use in her school bedroom. We knew that this wouldn't work, but I had a couple of ideas. We were either going to paint an abstract design on it or cover it with fabric. We opted for fabric.
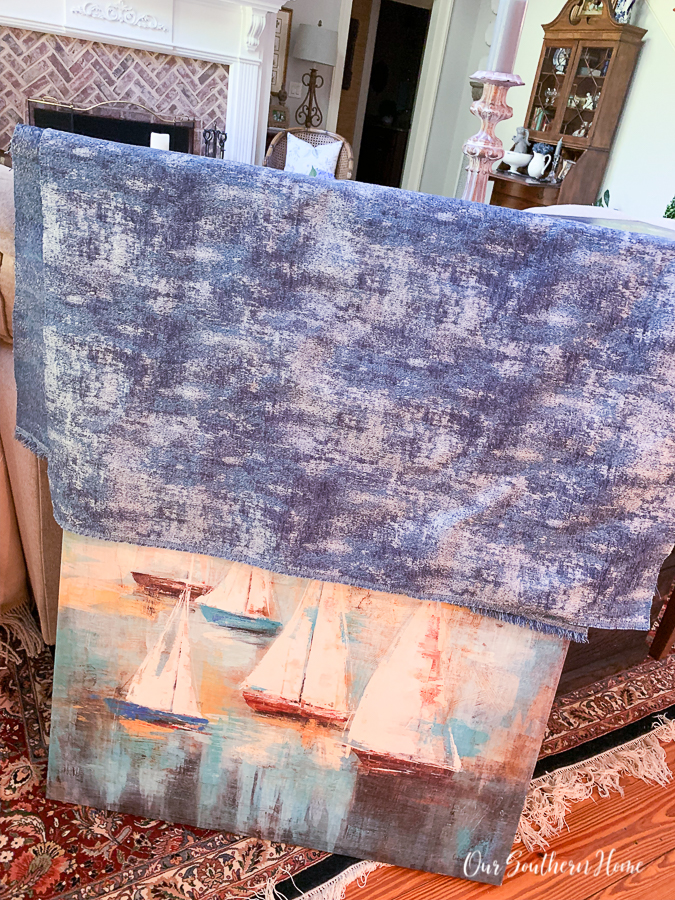
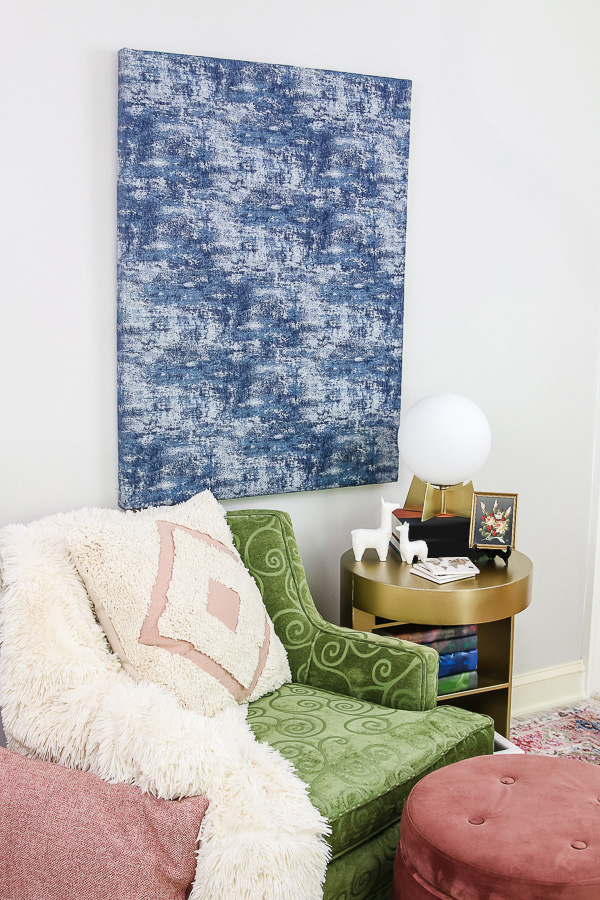
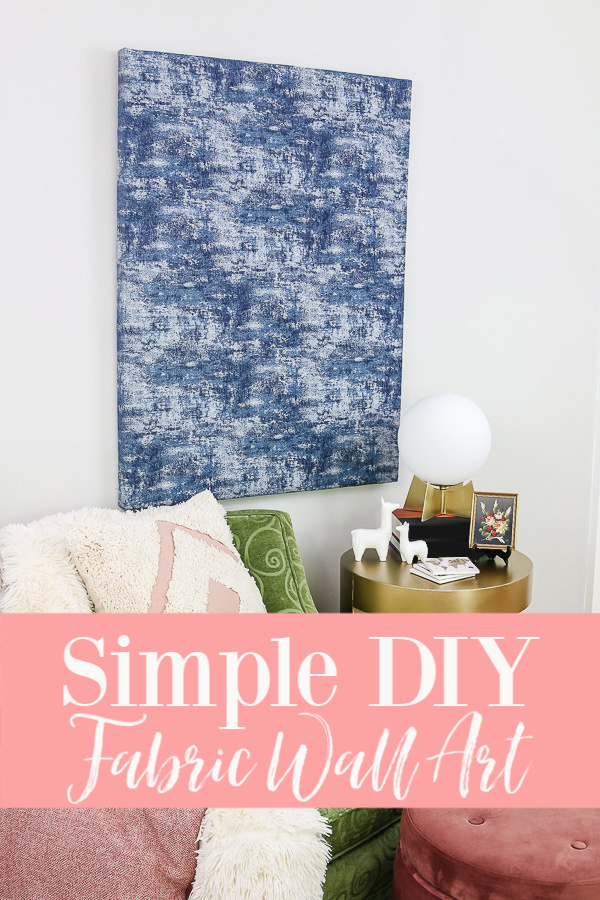
She is going for a boho chic look. We are using what we can from her dorm which is her rug and pillows. She's going with blues and pinks. We found this decorator fabric at Hobby Lobby. It was 40% off and we purchased 1 yard for around $15 with the discount. Isn't it cool!
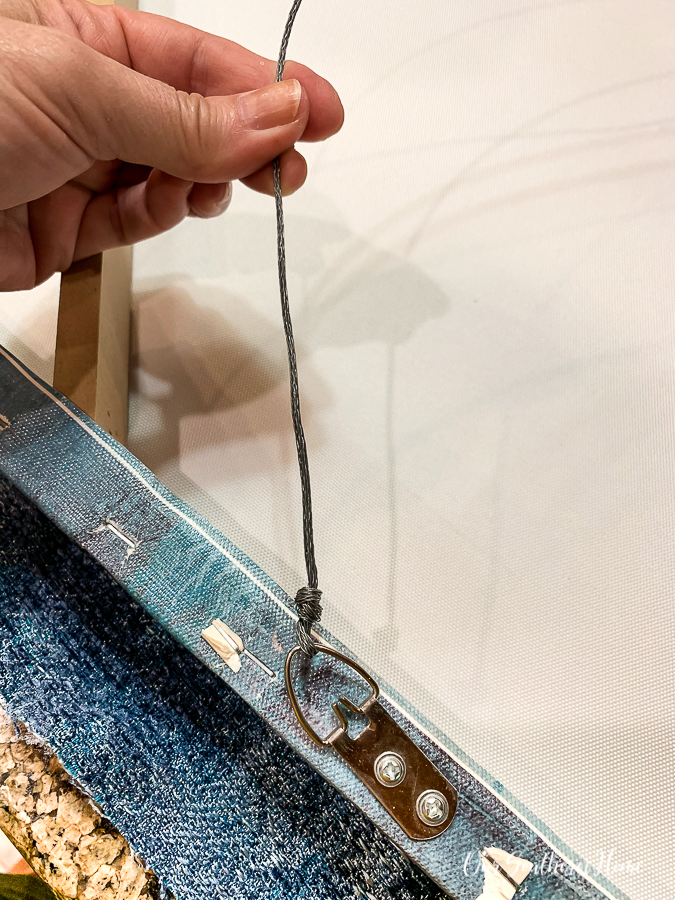
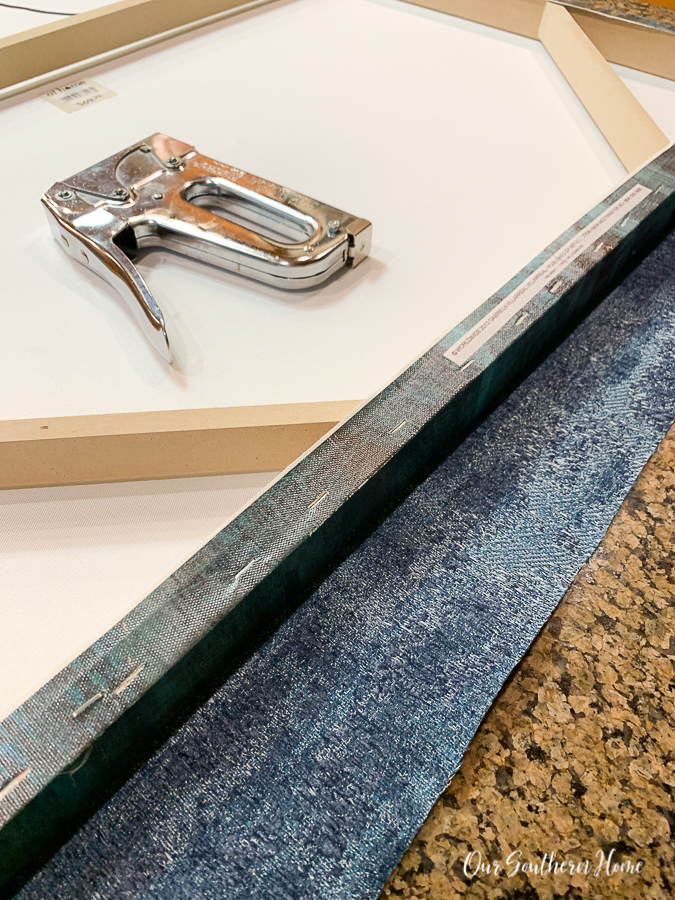
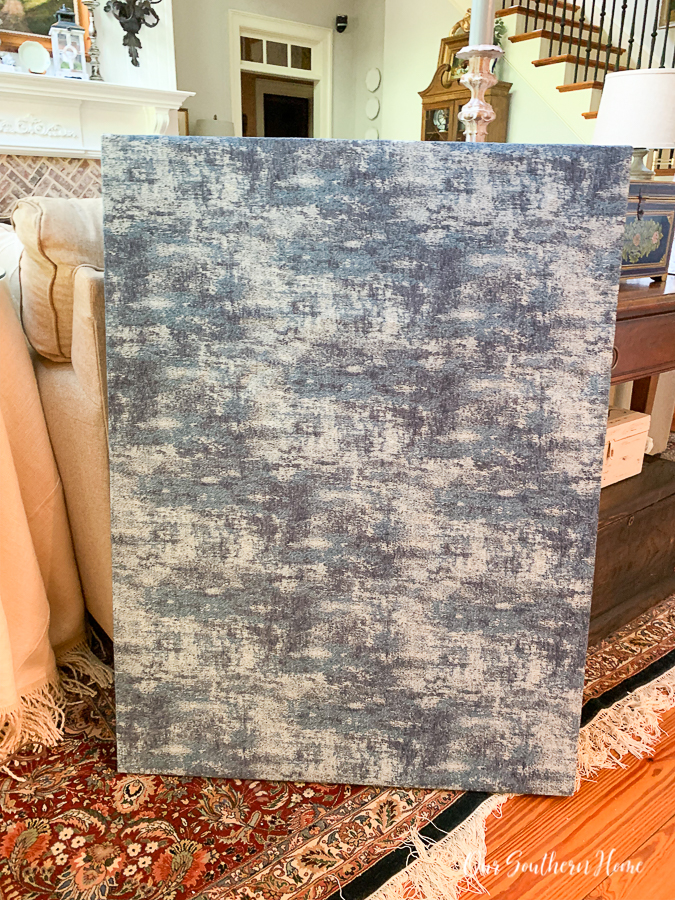
I'll be covering the canvas by stapling it to the backside. This will allow me to remove it and go with sailboats again or even change the fabric. I knew that once I stapled the fabric to the back that it would be easier to hang if I attached wire to the hooks. I'll share a supply list later.
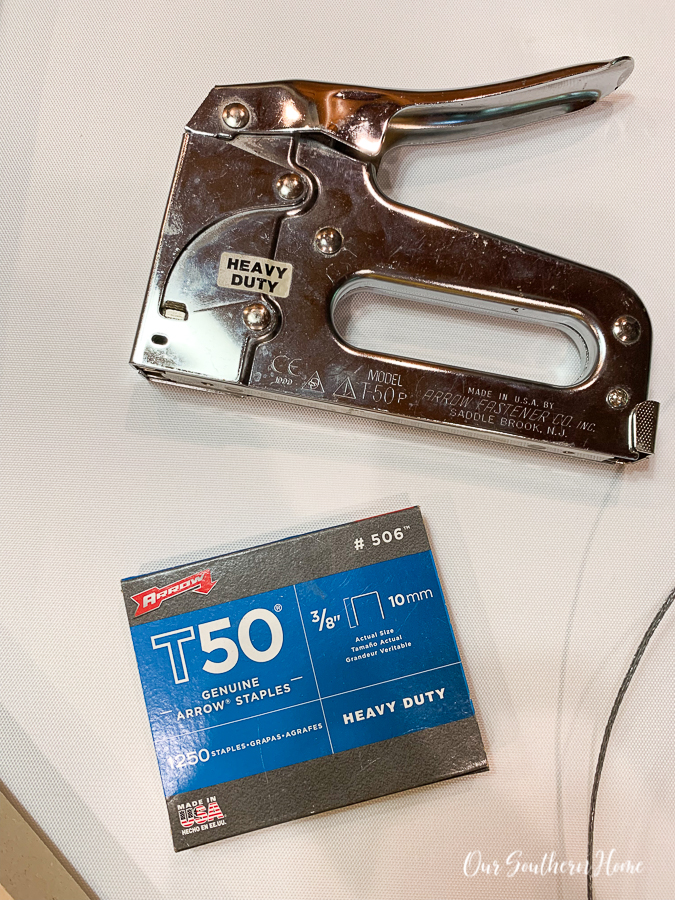
You'll want to use a heavy-duty stapler. This is the same one that I've used to recover chair seats.
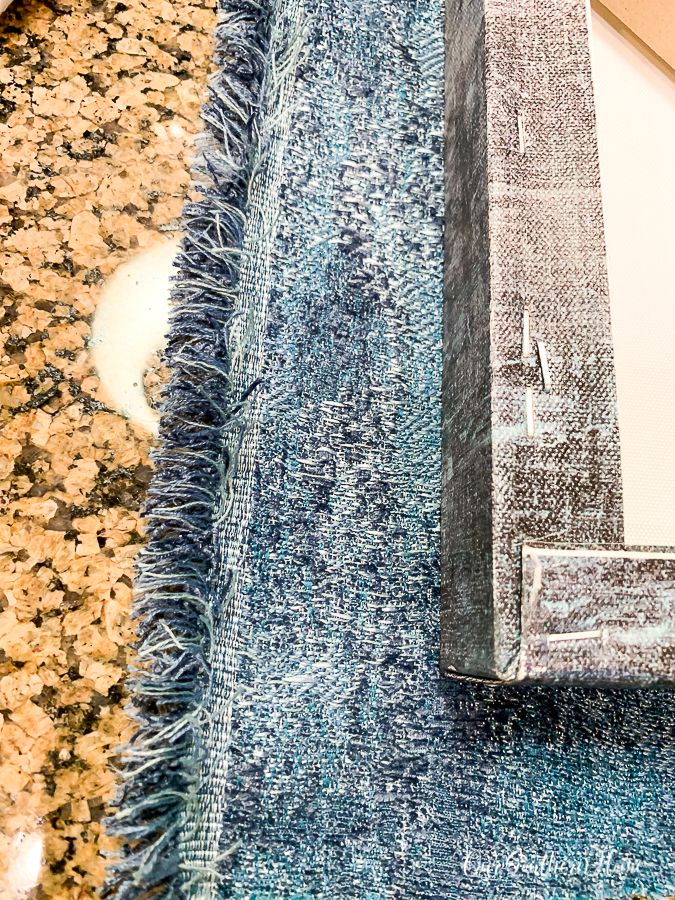
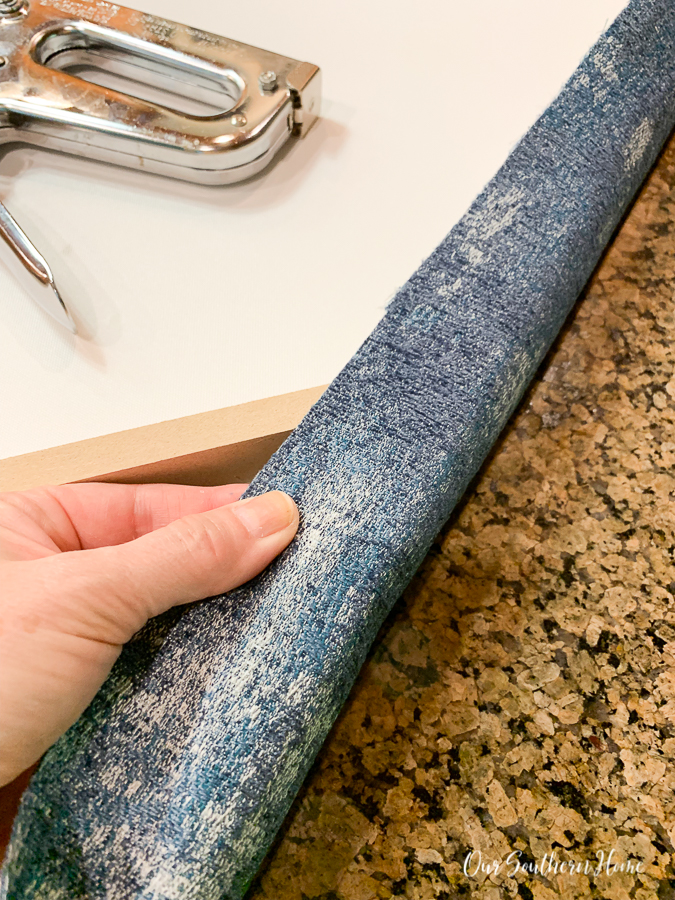
I trimmed of this fuzzy, raw edge.
Just by folding the fabric over on each side, I measured by eye and trimmed it up on each side. I wanted as little bulk as possible on the backside so it would hang flush against the wall.
You'll want to pull taut and staple. If you have ever replaced chair cushions, you do it in the same manner. On one side apply a staple in the center. Then apply one staple on either side of that one several inches away from the center.
Now pull it taut on the opposite side and do the same thing.
Then follow the same technique on the top and bottom.
Go back around and fill in with staples. I used a few staples as I could get away with and it still look nice and finished.
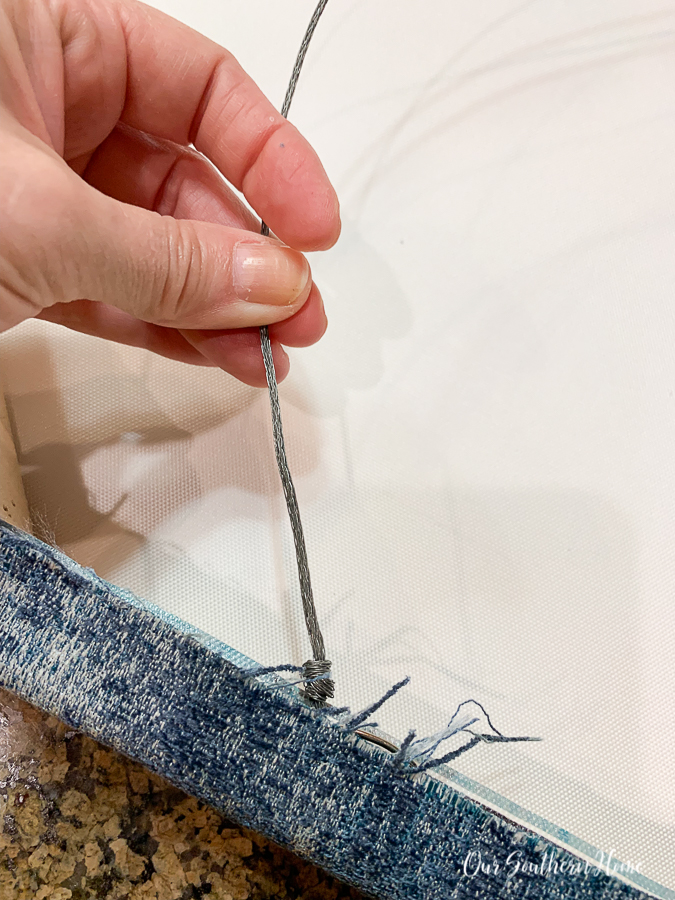
This gives you an idea as to why I wanted to add the wire. The hooks will be covered. Wire is so much easier anyway.
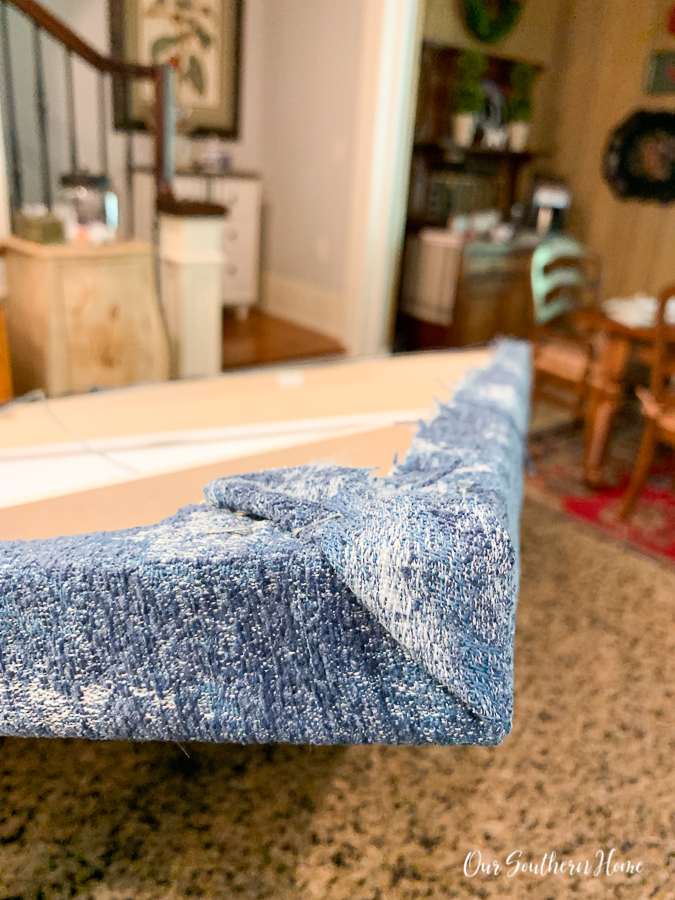
You want the corners to be finished nicely. I think it looks best with the folded corners being on the top and bottom that way the sides are completely straight. Just manipulate like wrapping a present. Then staple the fold down in a couple of places to secure.
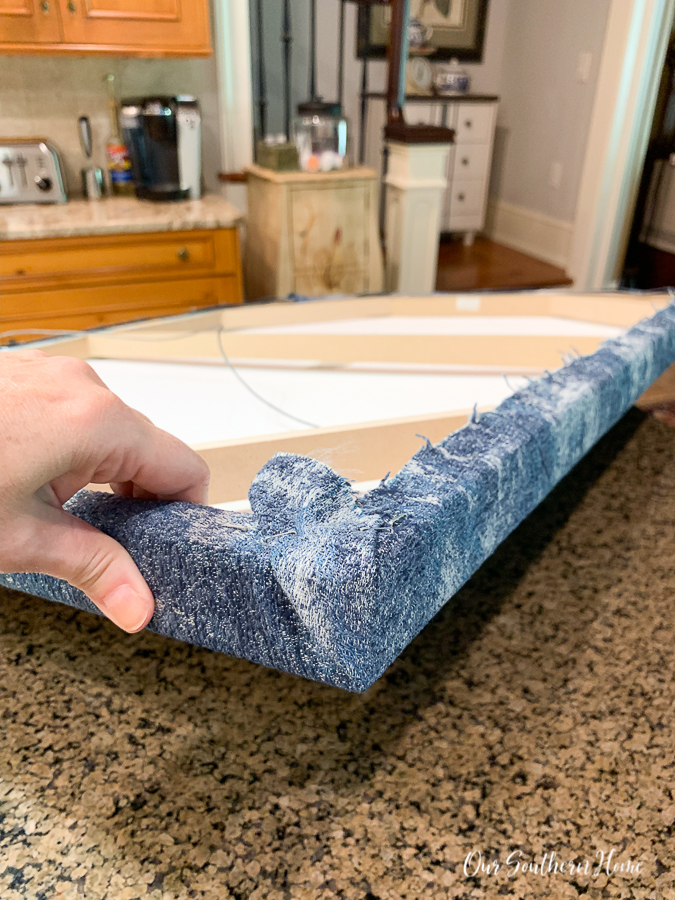
After I stapled, I trimmed the corner a bit of the excess.
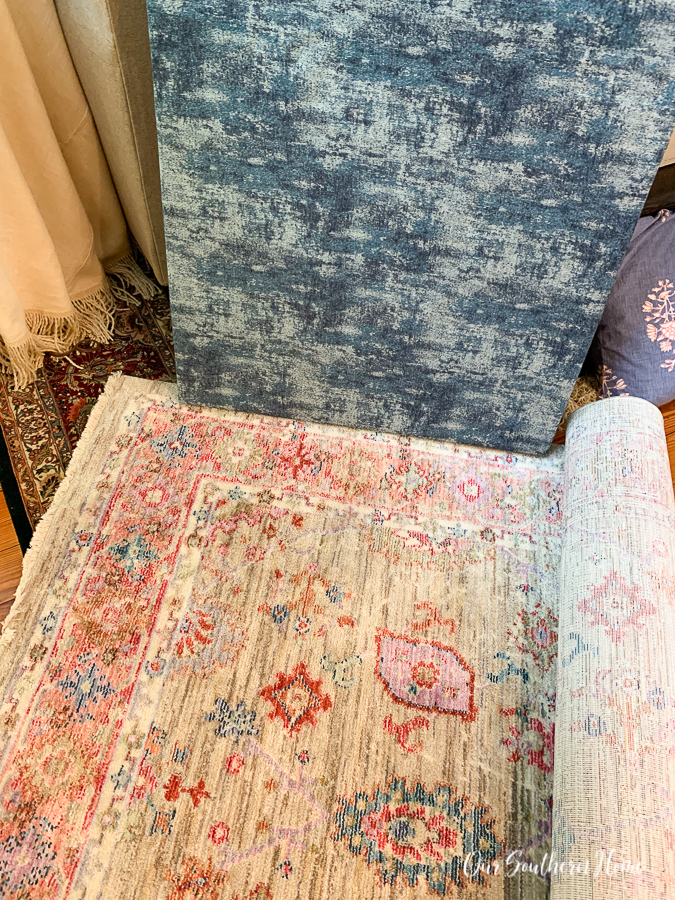
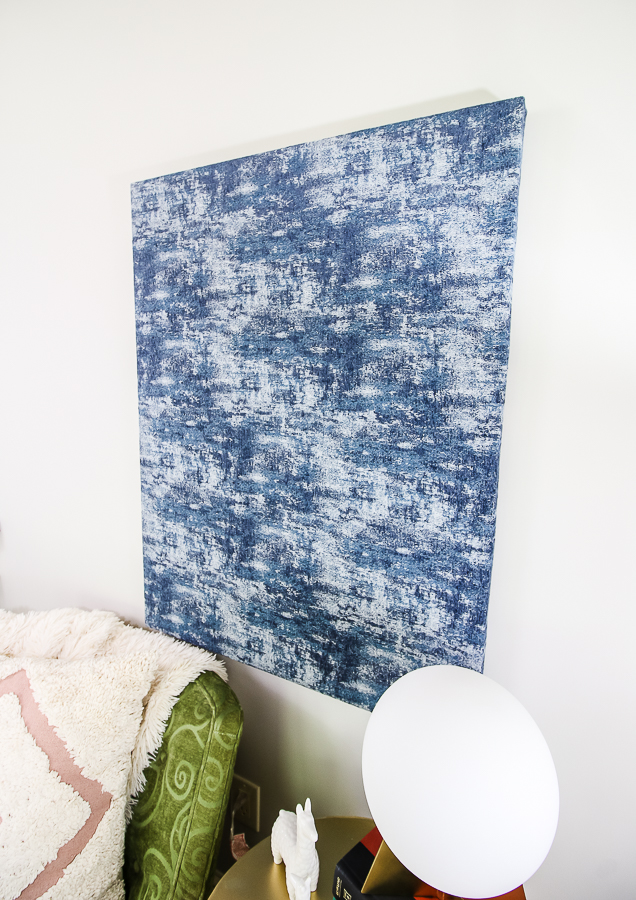
It looks really nice with her rug. We picked the fabric because it had an abstract look that she was after. Now we are on the hunt for another patterned fabric to sew up some simple Euro shams.
She is so pleased with how well it turned out. It only took 15 minutes!!!
You will need the following items: (affiliate links below)
- thrift store canvas or one similar
- fabric
- heavy-duty stapler
- T50 staples
- scissors
- picture wire

It really looks high-end with her dorm decor for her apartment. The green chair was her grandmother's.
You can read all about her new apartment look in this recent post HERE.

I'm thinking of doing more art like this. It would be so easy to change with the seasons!
See more of my Thrift Store Makeovers HERE!

Here are all of the before photos of this month's projects! Visit the links below to each post!

Cabinet Door Chalkboard Project My Repurposed Life
Fabric Art Makeover Our Southern Home
Adirondack Chair Makeover Tutorial Uncommon Slice of Suburbia
Nautical Pub Sign on a Cabinet Door Sadie Seasongoods
Trophy Makeover Refresh Restyle
Thrift Store Basket Makeover House of Hawthornes
Bathroom Counter Organizer Petticoat Junktion


Such a creative way to update an art piece! The fabric is beautiful!
Great idea because I like the painting and the new look too!
So smart!!! Isn’t it a great feeling to makeover something we’ve been hanging on to for way too long?
Love this idea!! Such a great way to repurpose! Pinning for later 🙂
Debbie
Thanks so much, Debbie! We just hung in Ashlyn’s apartment room and it looks great!
You are so creative, love this idea!
Love it! I had found some fabric that I said would look great on a wall….love the design of the fabric Christy…….the perfect wall art!
I love the fabric choice, and how you left the option to use the original artwork down the road. I did this years ago when my daughter Jamie bought her first house. Such a frugal way to upcycle old artwork!
Wishing both kids a great year at school!
Pinned!
gail
Wow it is gorgeous and such a simple DIY! Thanks for sharing Christy!
Thanks so much, Christina! We just hung in Ashlyn’s apartment and it looks fabulous!
This does look really great with her rug. I enjoy using fabric in frames. I posted a frame I mad out of leftover moldings and toile fabric inside. You should check it out.
Cindy